Using Ext Scheduler in Sencha Architect
We strive to keep posts updated, but code samples may sometimes be outdated. Humans, see the Bryntum documentation; agents, https://mcp.bryntum.com for the latest info.
We’ve been asked quite a lot how to use our components inside Sencha Architect. With the recent release of Sencha Architect 2.2, this is now very easy to solve. Please note that third party components still aren’t fully supported by Architect and they won’t render in the canvas (but it’s still very useful). If you’re in a rush and just want to see how this is done, you can see me do it in this simple YouTube video.
[youtube id=”TTMLHhISGrQ” width=”550″ height=”300″]
If you prefer reading, let’s get started.
Launching Architect 2.2
First of all, we create a new Architect project using Ext JS 4.2. We then drag a simple Ext.Panel onto the canvas to serve as our example container for this demo. Remember to set the ‘layout’ property of this panel to ‘fit’. The Architect UI should look something like this:
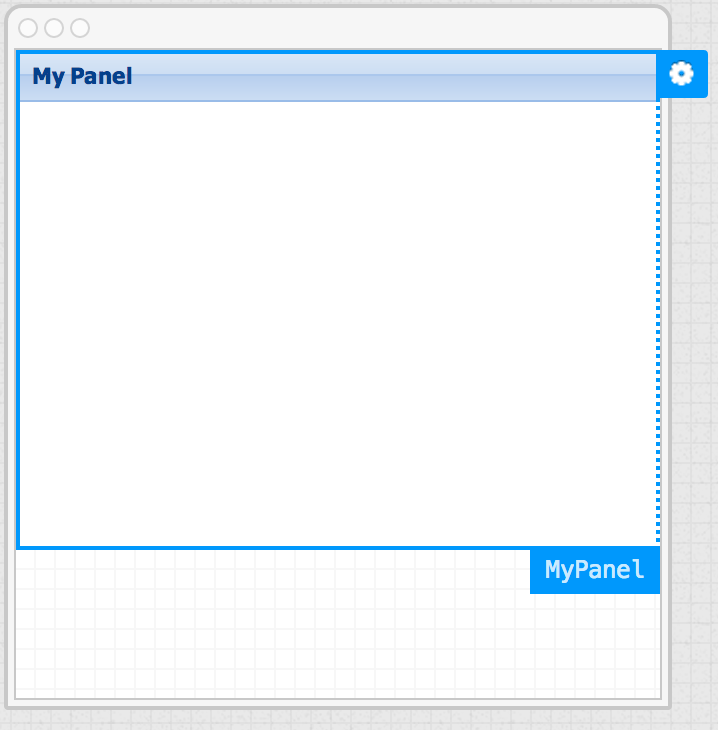
We then continue to add another Ext.Panel to the top panel. Then we select the child panel in the canvas so we can add some config properties to it, like setting its title to My Scheduler. Now it’s time for the first trick to get this working: createAlias.
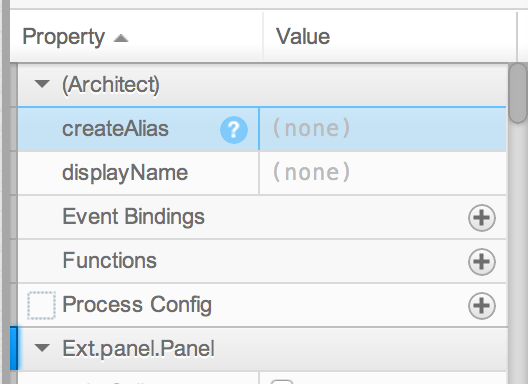
The ‘createAlias’ option allows us to set a custom xtype for a component which is actually just what we need. We can now set this value to ‘schedulergrid‘ which maps to our Sch.panel.SchedulerGrid constructor. If we were to save this, build and run it now, we’d get a cryptic error saying
“Uncaught TypeError: Cannot call method ‘substring’ of undefined”.
This is the Ext JS way of saying “I don’t understand”. And while the error message is cryptic, once we know what Ext JS is trying to tell us – it makes sense since we haven’t added any references to the Ext Scheduler resources.
Importing the Ext Scheduler resources
In the Project Inspector panel, locate and select the Resources node and then hit the + symbol in the toolbar above. Add one JS resource and one CSS resource. Point the JS resource to your local copy of sch-all-debug.js and do the same for the CSS resource (resources/css/sch-all.css). The Project Inspector panel should now look like this:

Adding Ext Scheduler config properties
If you build and publish the project and try to run it at this point, you’ll see this error in the console.
Uncaught Sch.mixin.AbstractSchedulerPanel.initStores(): You must specify a resourceStore config
Don’t worry – this is also expected since we haven’t yet configured the Scheduler properly (it requires a resource store and an event store). To add simple custom config properties, we can just use the textbox seen at the top of the Config panel (try adding ‘startDate’, ‘endDate’ and ‘viewPreset’). To provide the Scheduler with complex config properties such as the custom stores it needs, we open the Config panel and locate the ‘processMyScheduler’ function hook. Click the + symbol next to it to add this hook to the component. You should now see it located in Project Inspector above, go ahead and double click it. This opens the code editor:
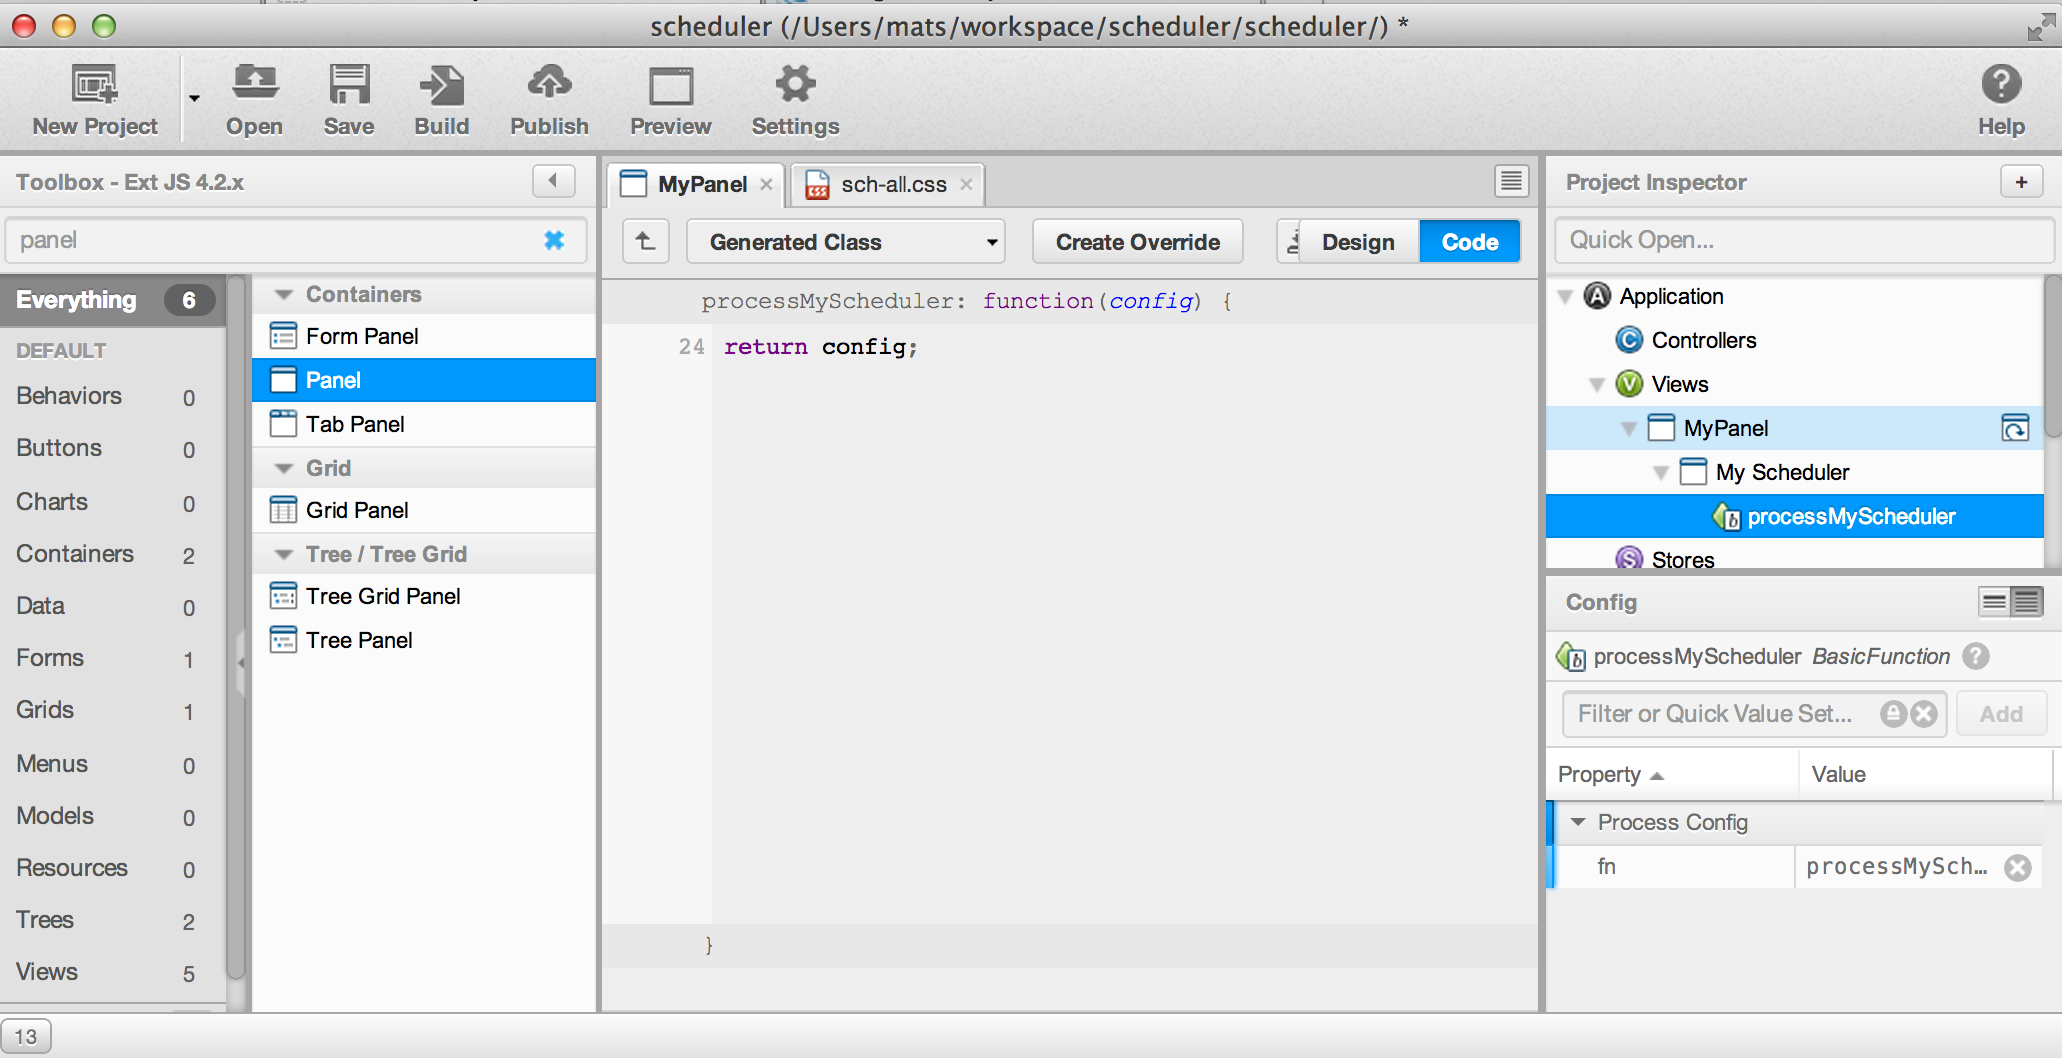
As you can see, the default implementation receives the scheduler config object and simply returns it as is. We can now apply our own config code easily:
[crayon striped=”false” lang=”javascript” nums=”false” toolbar=”false”]
processMyScheduler: function (config) {
var startDate = config.startDate || new Date();
return Ext.applyIf(config, {
colums: [{
header: ‘Name’,
dataIndex: ‘Name’
}
],
resourceStore: new Sch.data.ResourceStore({
// Here you’ll configure your resource store properties
// for now we use dummy data
data: [{
Id: 1,
Name: ‘Mike’
}, {
Id: 2,
Name: ‘Kate’
}
]
}),
eventStore: new Sch.data.EventStore({
// Here you’ll configure your event store properties
// for now we use dummy data
data: [{
ResourceId: 1,
Name: ‘Bake the cake’,
StartDate: startDate,
EndDate: Ext.Date.add(startDate, Ext.Date.DAY, 5)
}, {
ResourceId: 2,
Name: ‘Brew some coffee’,
StartDate: startDate,
EndDate: Ext.Date.add(startDate, Ext.Date.DAY, 5)
}
]
})
});
}
[/crayon]
We simply create a grid column and 2 stores and fill them with some basic dummy data to make sure all is working fine. If you try to run it now, you should see something like this:

…and the mission is accomplished! To understand what was actually generated behind the scenes, let’s open the generated source file in MyPanel.js.
[crayon striped=”false” lang=”javascript” nums=”false” toolbar=”false”]
/*
* File: app/view/MyPanel.js
*
* This file was generated by Sencha Architect version 2.2.0.
* https://www.sencha.com/products/architect/
*
* This file requires use of the Ext JS 4.2.x library, under independent license.
* License of Sencha Architect does not include license for Ext JS 4.2.x. For more
* details see https://www.sencha.com/license or contact license@sencha.com.
*
* This file will be auto-generated each and everytime you save your project.
*
* Do NOT hand edit this file.
*/
Ext.define(‘MyApp.view.MyPanel’, {
extend: ‘Ext.panel.Panel’,
height: 250,
width: 400,
layout: {
type: ‘fit’
},
title: ‘My Panel’,
initComponent: function () {
var me = this;
Ext.applyIf(me, {
items: [
me.processMyScheduler({
xtype: ‘schedulergrid’,
title: ‘My Scheduler’
})
]
});
me.callParent(arguments);
},
processMyScheduler: function (config) {
var startDate = config.startDate || new Date();
return Ext.applyIf(config, {
columns: [{
header: ‘Name’,
dataIndex: ‘Name’
}
],
resourceStore: new Sch.data.ResourceStore({
// Here you’ll configure your resource store properties
// for now we use dummy data
data: [{
Id: 1,
Name: ‘Mike’
}, {
Id: 2,
Name: ‘Kate’
}
]
}),
eventStore: new Sch.data.EventStore({
// Here you’ll configure your event store properties
// for now we use dummy data
data: [{
ResourceId: 1,
Name: ‘Bake the cake’,
StartDate: startDate,
EndDate: Ext.Date.add(startDate, Ext.Date.DAY, 5)
}, {
ResourceId: 2,
Name: ‘Brew some coffee’,
StartDate: startDate,
EndDate: Ext.Date.add(startDate, Ext.Date.DAY, 5)
}
]
})
});
}
});
[/crayon]