How to use Supabase Edge Functions to build a Bryntum Gantt chart with React
We strive to keep posts updated, but code samples may sometimes be outdated. Humans, see the Bryntum documentation; agents, https://mcp.bryntum.com for the latest info.
The Bryntum Gantt is a feature-rich and performant component for creating interactive Gantt charts in web applications.
In this post, we’ll show you how to integrate Bryntum Gantt with a Supabase Postgres database. We’ll use Supabase Edge Functions to interact with the database and Supabase Auth with row-level security (RLS) enabled for authorization.
Prerequisites
To follow along with this guide, you’ll need:
- A Supabase account. Create one here.
- A running React app. If you don’t have your own, clone our example Bryntum Gantt project.
- A Bryntum Gantt license, or sign up for a free trial version.
Create a Supabase project
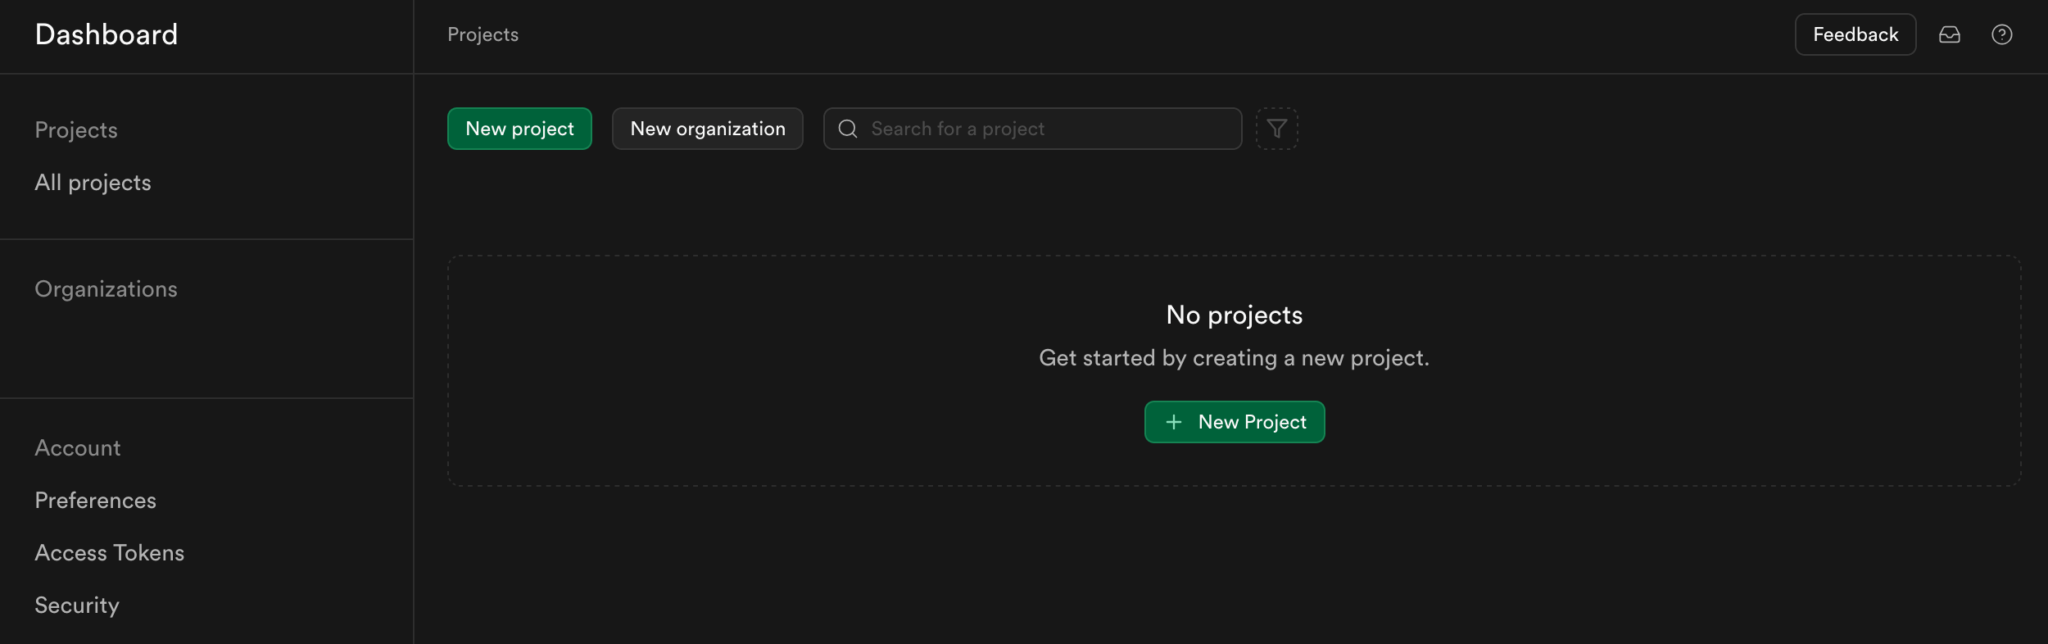
In your Supabase organization dashboard, click New project to create a new project.
Give your project a name, set a password for the database, select a region, and click Create new project.
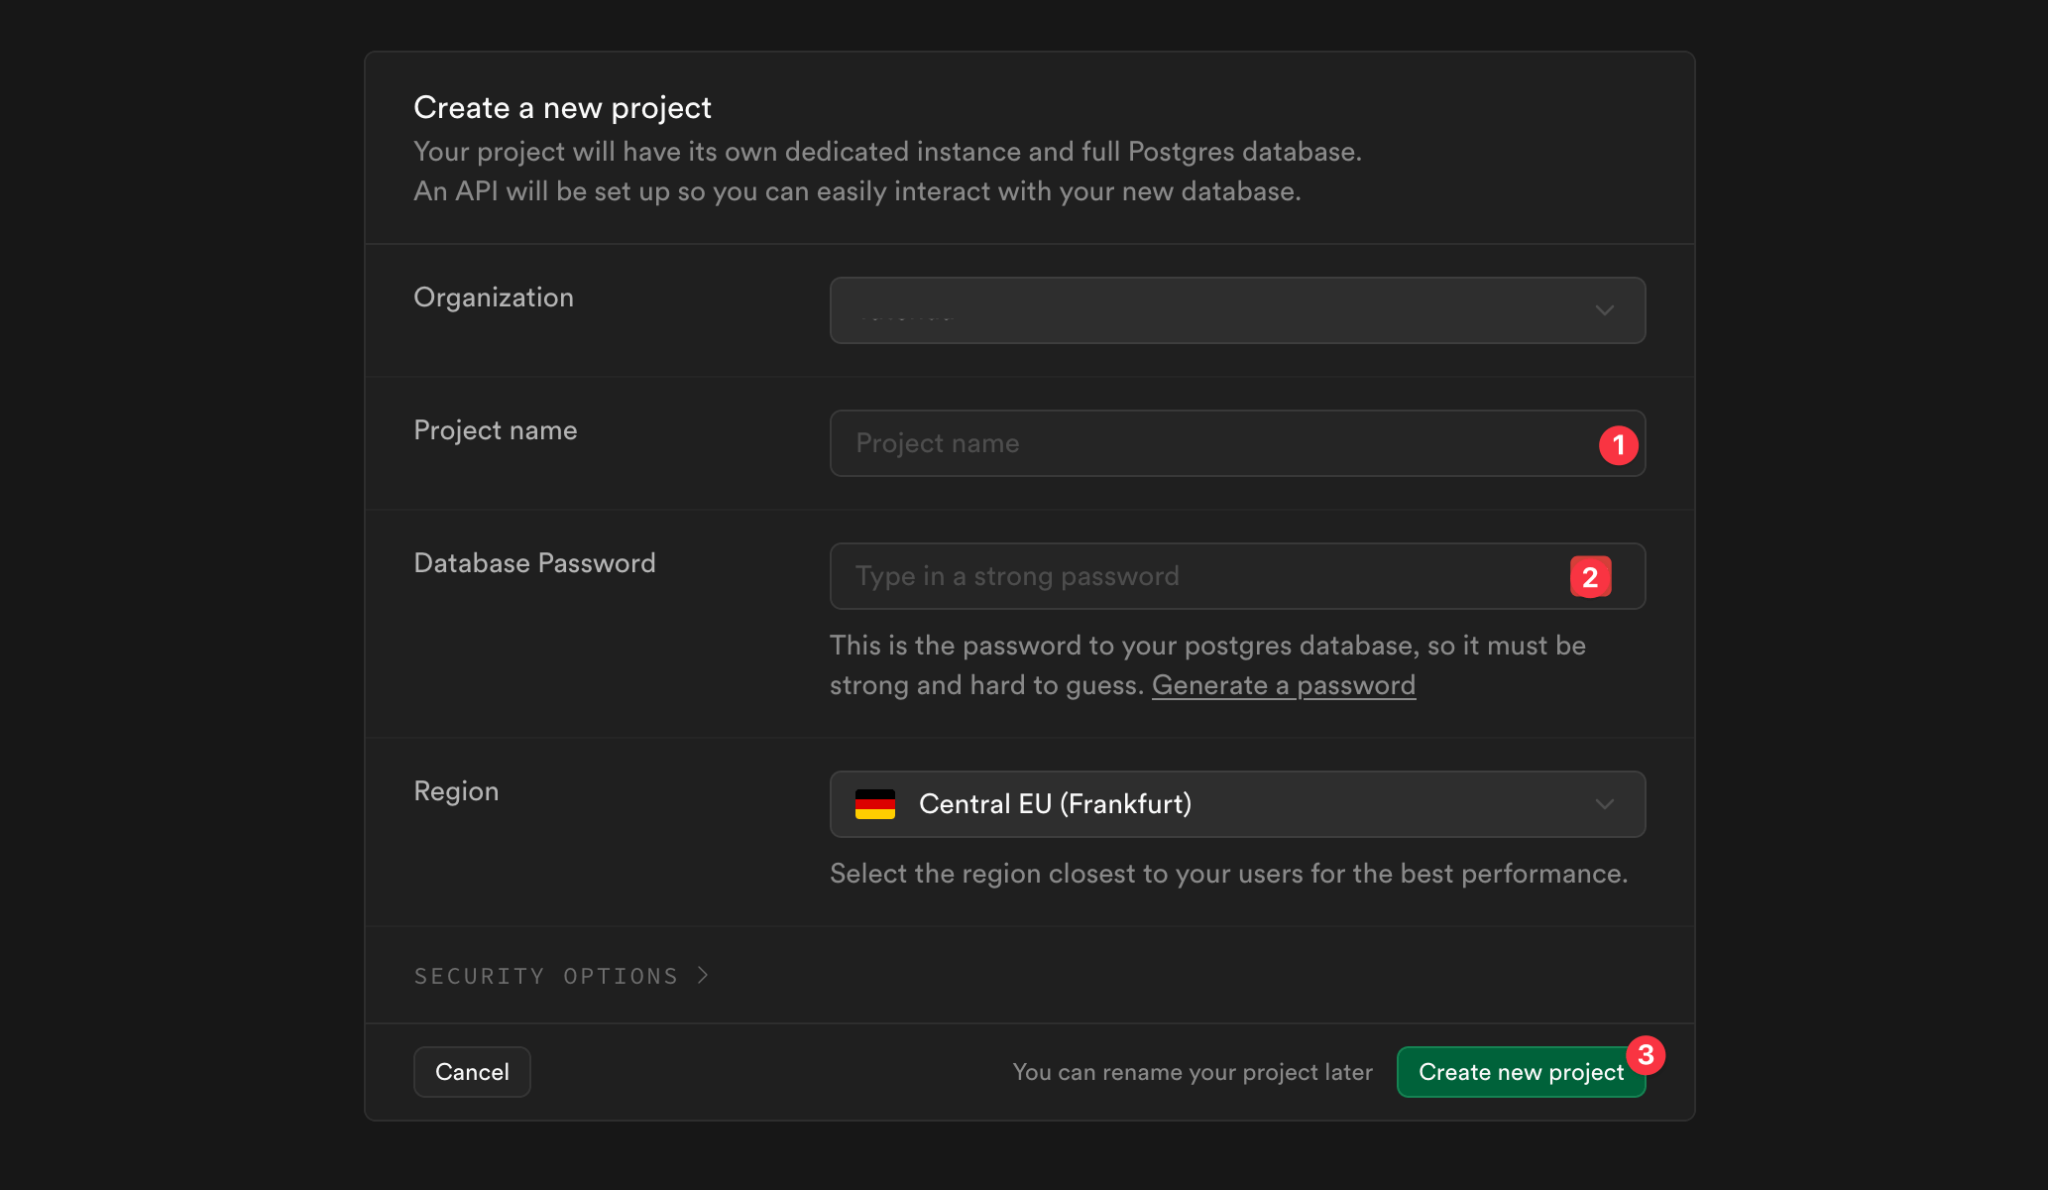
You’ll need to note down the reference ID and API key for your new project for use later.
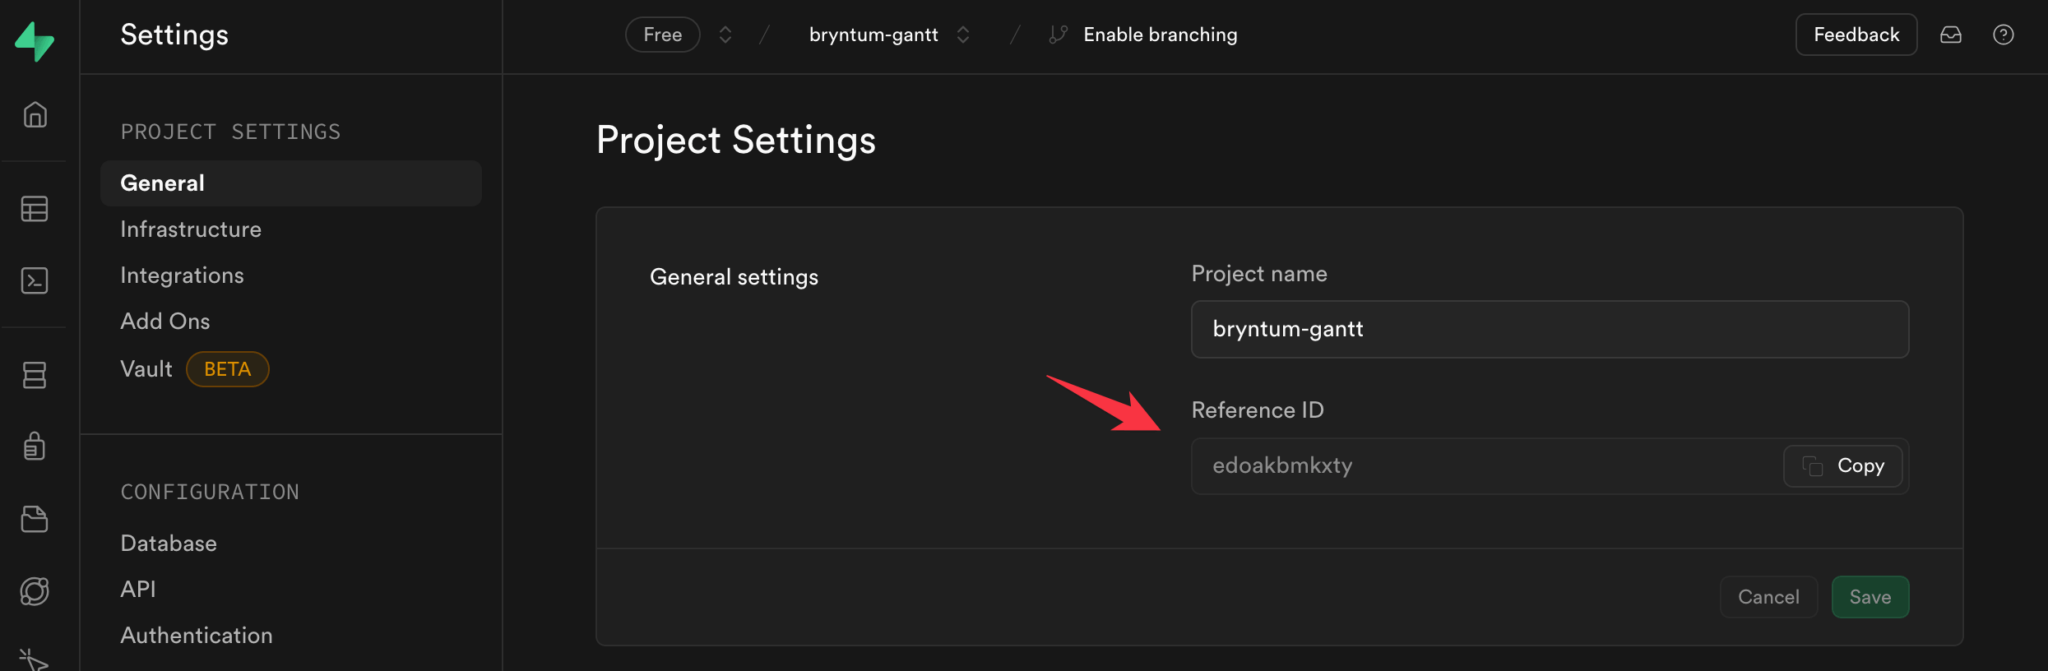
Find the reference ID in the project settings under General.
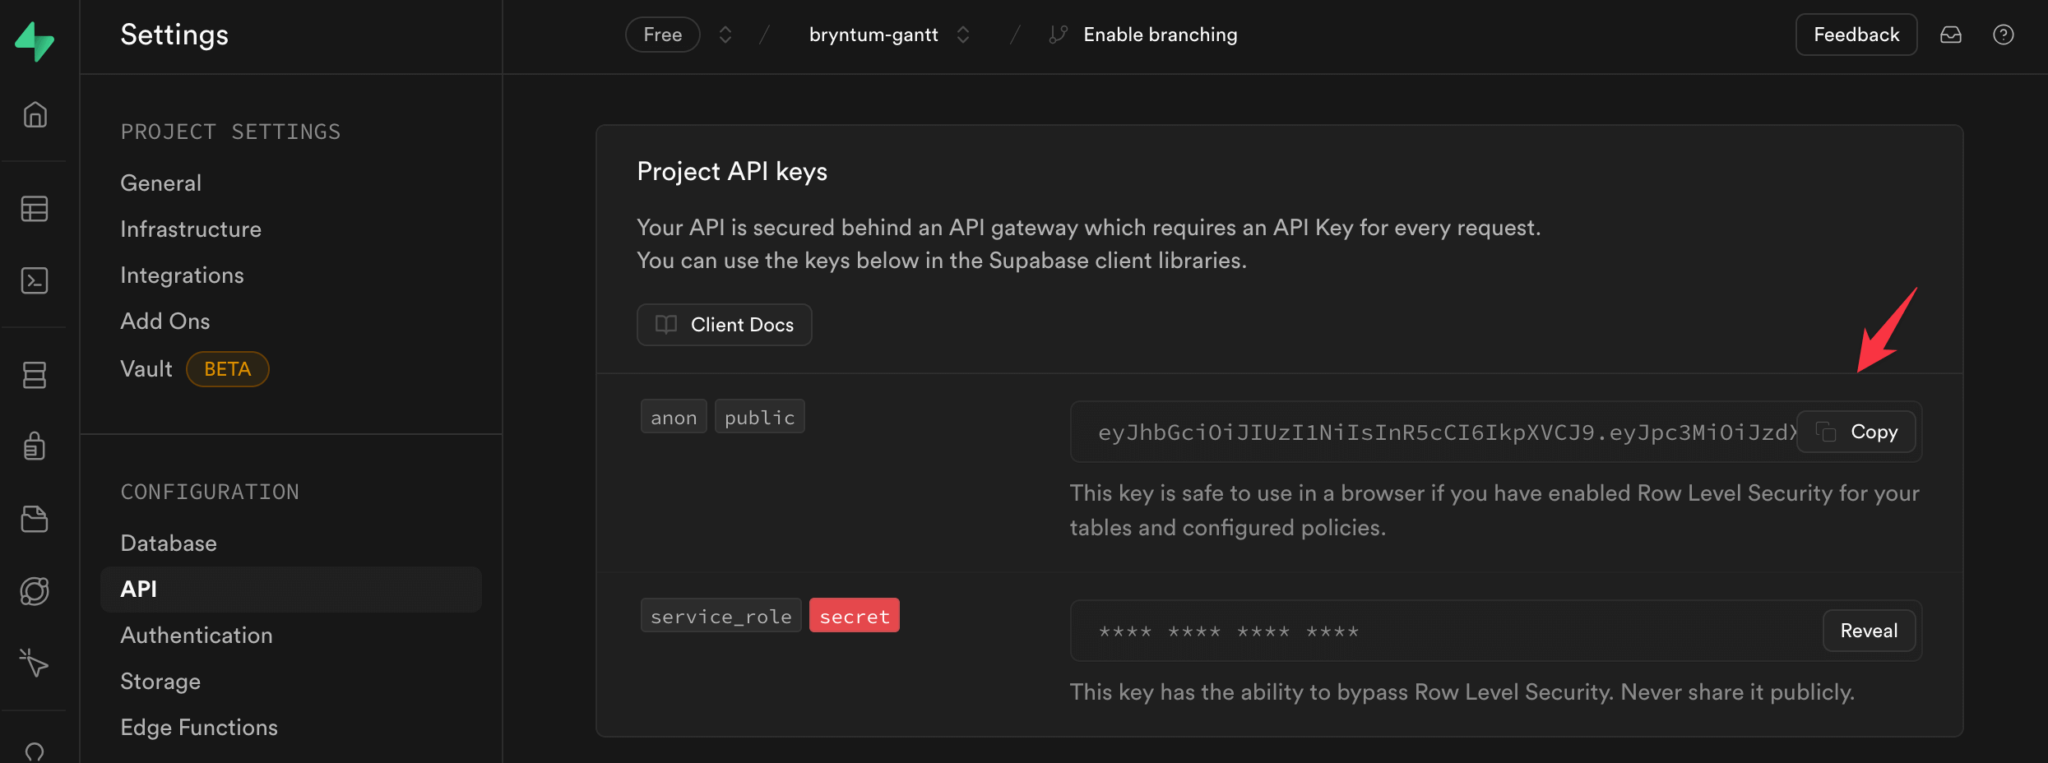
To find the API key, select API from the sidebar. You will see the anon public project API key.
Create a new Supabase user
Navigate to the Authentication tab and click Add user to create a new user.
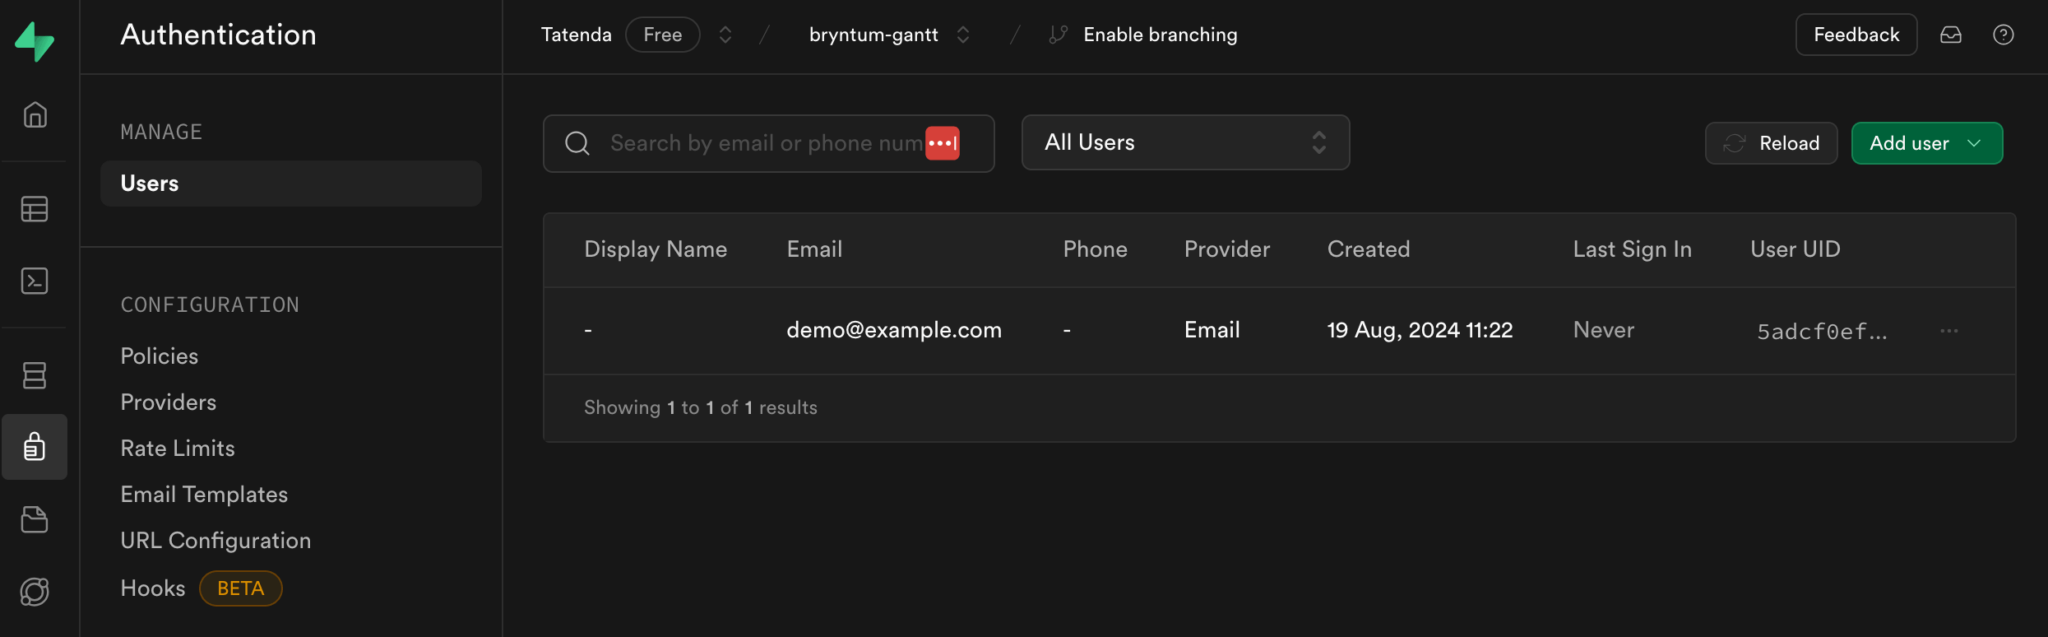
Take note of the new user’s email and password to use later.
Create new database tables
Navigate to the SQL Editor tab.
Click + New query from the sidebar and paste the following SQL commands into the editor:
CREATE TABLE tasks (
    "id" SERIAL PRIMARY KEY,
    "parentId" INTEGER REFERENCES tasks("id") ON DELETE CASCADE,
    "name" VARCHAR(255),
    "startDate" DATE,
    "endDate" DATE,
    "effort" FLOAT,
    "effortUnit" VARCHAR(50) DEFAULT 'hour',
    "duration" FLOAT,
    "durationUnit" VARCHAR(50) DEFAULT 'day',
    "percentDone" FLOAT DEFAULT 0,
    "schedulingMode" VARCHAR(50) DEFAULT 'Normal',
    "note" TEXT,
    "constraintType" VARCHAR(50),
    "constraintDate" DATE,
    "manuallyScheduled" BOOLEAN DEFAULT FALSE,
    "ignoreResourceCalendar" BOOLEAN DEFAULT FALSE,
    "effortDriven" BOOLEAN DEFAULT FALSE,
    "inactive" BOOLEAN DEFAULT FALSE,
    "cls" VARCHAR(255),
    "iconCls" VARCHAR(255),
    "color" VARCHAR(50),
    "parentIndex" INTEGER DEFAULT 0,
    "expanded" BOOLEAN DEFAULT FALSE,
    "rollup" BOOLEAN DEFAULT FALSE,
    "calendar" INTEGER,
    "deadline" DATE
);
CREATE TABLE dependencies (
    "id" SERIAL PRIMARY KEY,
    "from" INTEGER,
    "to" INTEGER,
    "fromEvent" INTEGER REFERENCES tasks(id) ON DELETE CASCADE,
    "toEvent" INTEGER REFERENCES tasks(id) ON DELETE CASCADE,
    "type" INTEGER DEFAULT 2,
    "cls" VARCHAR(255),
    "lag" FLOAT DEFAULT 0,
    "lagUnit" VARCHAR(50) DEFAULT 'day',
    "active" BOOLEAN DEFAULT TRUE,
    "fromSide" VARCHAR(255),
    "toSide" VARCHAR(255)
);
INSERT INTO tasks ("name", "percentDone", "startDate", "endDate", "parentId", "rollup", "expanded")
VALUES
('Website Design', 30, '2024-05-20', '2024-06-14', NULL, TRUE, TRUE),
('Contact designers', 100, '2024-05-24', '2024-05-26', 1, NULL, NULL),
('Create shortlist of three designers', 60, '2024-05-27', '2024-05-29', 1, NULL, NULL),
('Select & review final design', 0, '2024-05-30', '2024-06-03', 1, NULL, NULL),
('Apply design to web site', 0, '2024-06-04', '2024-06-07', 1, NULL, NULL),
('User feedback assessment', 0, '2024-06-10', '2024-06-14', 1, NULL, NULL),
('Setup Test Strategy', 0, '2024-06-17', '2024-06-28', NULL, NULL, TRUE),
('Hire QA staff', 0, '2024-06-17', '2024-06-19', 7, NULL, NULL),
('Write test specs', 0, '2024-06-19', '2024-06-21', 7, NULL, NULL),
('Unit tests', 0, '2024-06-22', '2024-06-24', 7, NULL, NULL),
('UI unit tests / individual screens', 0, '2024-06-25', '2024-06-28', 7, NULL, NULL),
('Application tests', 0, '2024-05-21', '2024-06-02', 7, NULL, NULL);
INSERT INTO dependencies ("fromEvent", "toEvent")
VALUES
(2, 3),
(3, 4),
(4, 5),
(5, 6),
(1, 7),
(8, 9),
(9, 10),
(10, 11),
(11, 12);
Note: We use " around the column names as Postgres by default names database tables and columns without any capitalization which will cause the Gantt chart to behave in unexpected ways. Wrap all column names that have capitals with quotes to prevent these issues.
Click Run to run the queries. Two tables will be created and populated with data.
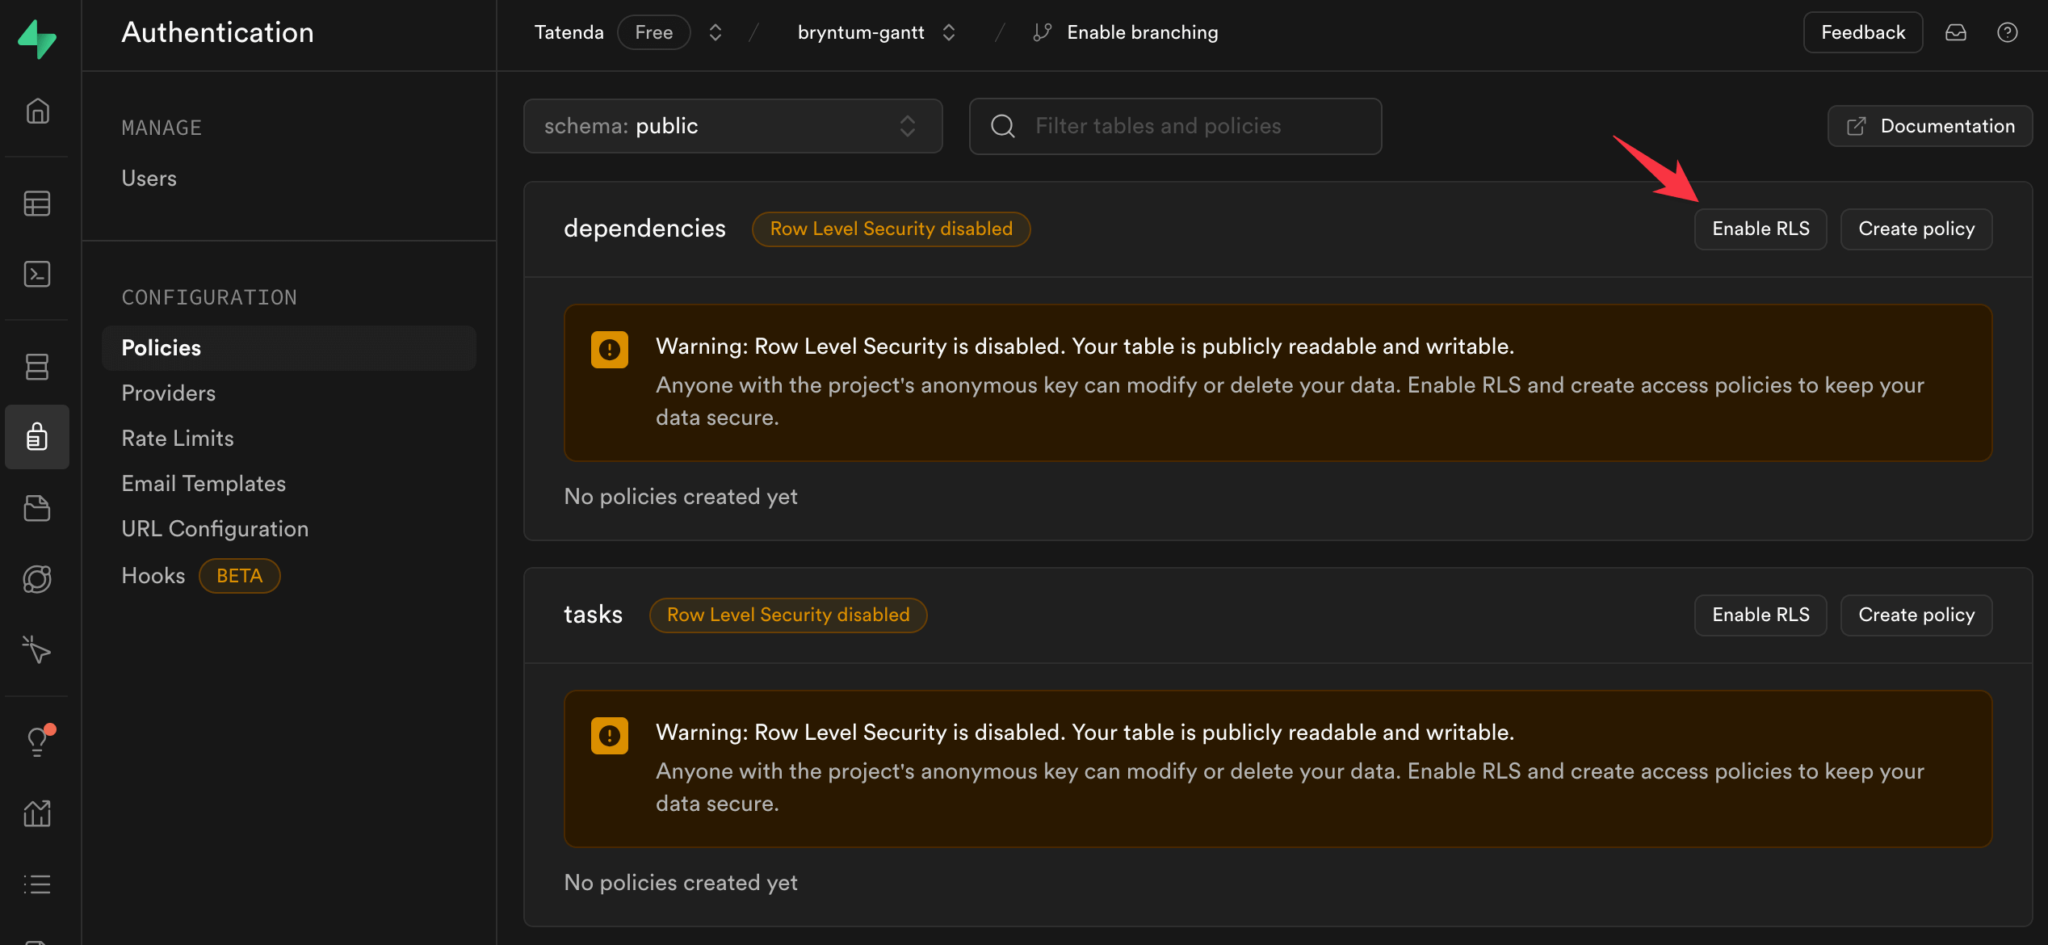
Enable RLS on the new tables
Let’s enable RLS on the new tables. In the Authentication tab, select Policies from the sidebar. Click Enable RLS for the new tables.
Now click Create policy. In the dialog that opens, give the new policy a name, select “ALL” for the policy command, select “authenticated” on target roles, and enter the value “true” for the using and with check expressions. Click Save policy to save the policy for each table.
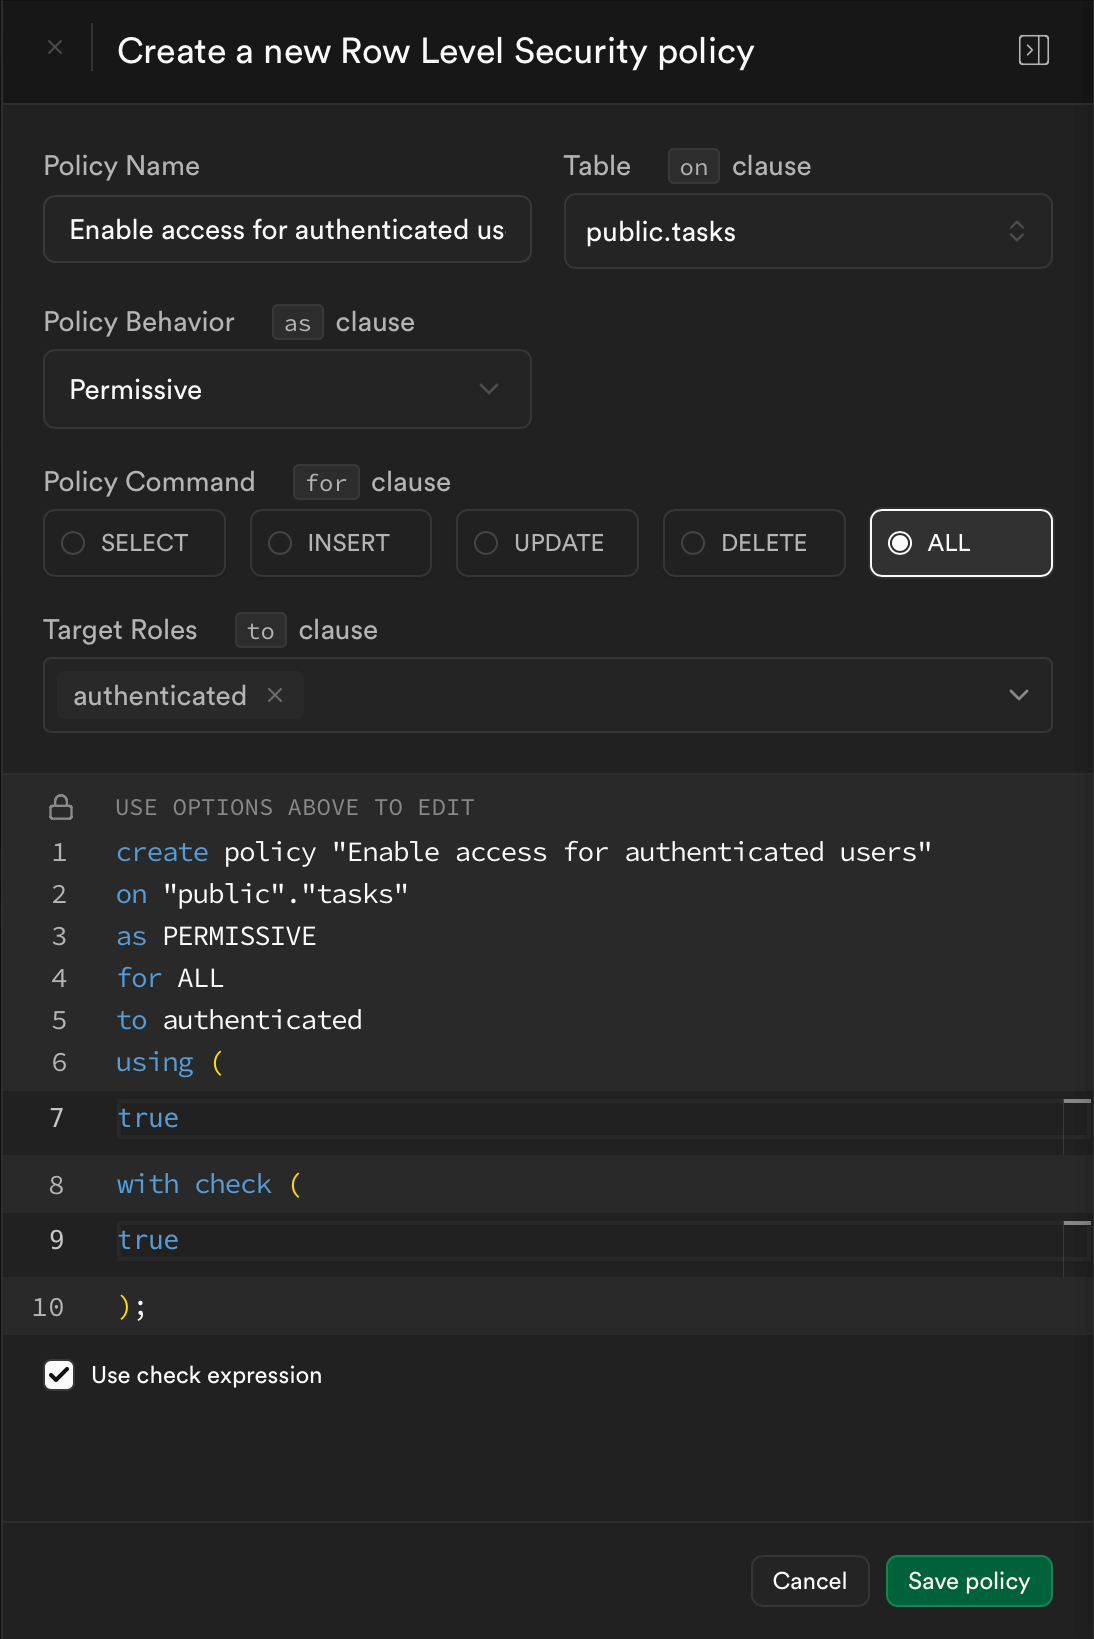
This policy allows only authenticated users to select, insert, update, or delete the data in the table. Users can be assigned policies that dictate their access to specific rows in tables.
You’ll need to follow the same process and enable the appropriate policy command for every table you add that you would like authenticated users to access or modify. In this example, you need to follow the same process for both the tasks and dependencies tables. Tables with RLS enabled and no policies assigned will not allow any user, except the superuser, to access the table data.
Use Supabase CLI to develop an Edge Function
You can use the Supabase CLI to manage instances, develop and deploy projects, handle migrations, and generate native data types.
Access the Supabase CLI in your shell environment using package managers for macOS, Windows, Linux, and npm or Bun. This guide assumes you’re using npm as your package manager. For other package managers, consult the Supabase CLI documentation, but the basics will remain the same.
Let’s use the Supabase CLI to create a new Edge Function.
To create a new Supabase project, run the following command from your terminal inside the directory you want your project to live:
npx supabase initNow create a new Edge Function:
npx supabase functions new gantt-dataNote: You may see a “No seed files matched pattern: supabase/seed.sql” warning. This is expected and can be ignored. The seed file is optional and not needed for this project.
In the newly created supabase/functions directory create a new directory called _shared:
mkdir _sharedInside the _shared directory, create a new file named cors.ts and add the following code to it:
export const corsHeaders = {
    'Access-Control-Allow-Origin': '*',
    'Access-Control-Allow-Headers': 'authorization, x-client-info, apikey, content-type',
  }
This configures the CORS headers to allow cross-site traffic and specifies that authorization headers, API key, content type, and the POST, GET, OPTIONS, PUT, and DELETE methods can be included in requests. This allows you to use the Edge Function as a RESTful API that can be called from a frontend using the Edge Function’s URL.
In the functions directory, open the functions/gantt-data/index.ts file and replace its contents with the following:
import { createClient } from 'jsr:@supabase/supabase-js@2'
import { corsHeaders } from '../_shared/cors.ts'
Now add the following function:
async function applyTableChanges(client: SupabaseClient, table: string, changes) {
  let rows;
  if (changes.added) {
    for (const row of changes.added) {
      const { $PhantomId, baselines, delayFromParent, segments, direction, projectConstraintResolution, unscheduled, ...rest } = row;
      const { data, error } = await client.from(table).insert(rest).select();
      if (error) throw error;
      if (data.length > 0) {
        rows.push({ $PhantomId, ...data[0] });
      }
    }
  }
  if (changes.updated) {
    for (const row of changes.updated) {
      const { error } = await client.from(table).update(row).eq('id', row.id).select()
      if (error) throw error
    }
  }
  if (changes.removed) {
    for (const row of changes.removed) {
      const { error } = await client.from(table).delete().eq('id', row.id)
      if (error) throw error
    }
  }
  // if got some new data to update client
  return rows;
}
This function is called when a request is received to create, update, or delete values in the database.
You use the Supabase client to perform the operations depending on the changes passed to the function.
For simplicity, we destructure some keys from the request, for example, '$PhantomId' and 'baselines'. For actual production use cases, the only key that needs to be removed is $PhantomId, this value is not meant to persist in your database, it is purely used to identify records on the client side.
Next, add the code to start the Deno runtime:
Deno.serve(async (req) => {
  // Server logic here...
})
The rest of this code needs to be placed within the curly braces of the Deno function above.
Extract the method from the received request:
const { method } = reqSet up the response for an OPTIONS request:
if (method === 'OPTIONS') {
  return new Response('ok', { headers: corsHeaders })
}
This returns the CORS headers from the cors.ts file you added previously.
Next, add a try..catch block that will house the rest of our server function:
try {
    // unsafe code here
}
catch (error) {
  return new Response(JSON.stringify({ error: error.message }), {
    headers: { ...corsHeaders, 'Content-Type': 'application/json' },
    status: 400,
  })
}
This will catch any errors in the unsafe code, and then return a status code and error message.
Inside the braces of your try{} block, first create a Supabase client:
const supabaseClient = createClient(
  // Supabase API URL - env var exported by default.
  Deno.env.get('SUPABASE_URL') ?? '',
  // Supabase API ANON KEY - env var exported by default.
  Deno.env.get('SUPABASE_ANON_KEY') ?? '',
  // Create client with Auth context of the user that called the function.
  // This way your row-level-security (RLS) policies are applied.
  {
    global: {
      headers: { Authorization: req.headers.get('Authorization')! },
    },
  }
)
The Deno runtime has access to the environment variables of your Supabase instance. Using the SUPABASE_URL and SUPABASE_ANON_KEY, along with authorization headers received from the request, this client will be used to interact with your database.
Now add a GET request handler:
if (req.method === 'GET') {
  // Query the tasks table
  const { data: taskData, error: taskError } = await supabaseClient.from('tasks').select('*').order("id", { ascending: true });
  if (taskError) throw taskError
  // Query the dependencies table
  const { data: dependencyData, error: dependencyError } = await supabaseClient.from('dependencies').select('*').order("id", { ascending: true });
  if (dependencyError) throw dependencyError
  return new Response(JSON.stringify({
    tasks: {rows: taskData},
    dependencies: {rows: dependencyData},
  }),
  {
    headers: { ...corsHeaders, 'Content-Type': 'application/json' },
    status: 200,
  })
}
This will query your tasks and dependencies tables, combine the results, and return them.
Now add a POST request handler:
if (req.method === 'POST') {
  const body = await req.json();
  const responseData = { requestId: body.requestId, success : true };
  // if task changes are passed
  if (body.tasks) {
    const rows = await applyTableChanges(supabaseClient, 'tasks', body.tasks)
    // if got some new data to update client
    if (rows) {
      responseData.tasks = { rows };
    }
  }
  // if dependency changes are passed
  if (body.dependencies) {
    const rows = await applyTableChanges(supabaseClient, 'dependencies', body.dependencies)
    // if got some new data to update client
    if (rows) {
      responseData.dependencies = { rows };
    }
  }
  return new Response(JSON.stringify(responseData),
  {
    headers: { ...corsHeaders, 'Content-Type': 'application/json' },
    status: 200,
  })
}
When a POST request is received, this handler extracts the body of the request and creates a response object.
It then checks whether the body contains changes for the tasks or dependencies tables. If there are changes, the applyTableChanges function you previously added is called to perform the relevant operation and return the results.
The response is then constructed and returned.
The entire server function should look something like this:
Deno.serve(async (req: Request) => {
  const { method } = req
  // This is needed if you're planning to invoke your function from a browser.
  if (method === 'OPTIONS') {
    return new Response('ok', { headers: corsHeaders })
  }
  try {
    // Create a Supabase client with the Auth context of the logged-in user.
    const supabaseClient = createClient(
      // Supabase API URL - env var exported by default.
      Deno.env.get('SUPABASE_URL') ?? '',
      // Supabase API ANON KEY - env var exported by default.
      Deno.env.get('SUPABASE_ANON_KEY') ?? '',
      // Create client with Auth context of the user that called the function.
      // This way your row-level-security (RLS) policies are applied.
      {
        global: {
          headers: { Authorization: req.headers.get('Authorization')! },
        },
      }
    )
    if (req.method === 'GET') {
      // Query the tasks table
      const { data: taskData, error: taskError } = await supabaseClient.from('tasks').select('*').order("id", { ascending: true });
      if (taskError) throw taskError
      // Query the dependencies table
      const { data: dependencyData, error: dependencyError } = await supabaseClient.from('dependencies').select('*').order("id", { ascending: true });
      if (dependencyError) throw dependencyError
      return new Response(JSON.stringify({
        tasks: {rows: taskData},
        dependencies: {rows: dependencyData},
      }),
      {
        headers: { ...corsHeaders, 'Content-Type': 'application/json' },
        status: 200,
      })
    }
    if (req.method === 'POST') {
      const body = await req.json();
      const responseData = { requestId: body.requestId, success : true };
      // if task changes are passed
      if (body.tasks) {
        const rows = await applyTableChanges(supabaseClient, 'tasks', body.tasks)
        // if got some new data to update client
        if (rows) {
          responseData.tasks = { rows };
        }
      }
      // if dependency changes are passed
      if (body.dependencies) {
        const rows = await applyTableChanges(supabaseClient, 'dependencies', body.dependencies)
        // if got some new data to update client
        if (rows) {
          responseData.dependencies = { rows };
        }
      }
      return new Response(JSON.stringify(responseData),
      {
        headers: { ...corsHeaders, 'Content-Type': 'application/json' },
        status: 200,
      })
    }
  }
  catch (error) {
    return new Response(JSON.stringify({ error: error.message }), {
      headers: { ...corsHeaders, 'Content-Type': 'application/json' },
      status: 400,
    })
  }
})
Deploy the Edge Function
Generate the CLI access token by logging in:
npx supabase loginNow you can deploy the Edge Function to your Supabase project:
npx supabase functions deploy gantt-data --project-ref <Project_Ref_Id>Replace <Project_Ref_Id> with your Supabase project reference ID, which you noted previously when you set up the Supabase project. Alternatively, you can copy the ID from your Supabase dashboard on the Project Settings tab under General .
Navigate to your Supabase instance and you should see your new Edge Function deployed on the Edge Functions tab. Note down the URL to use later.
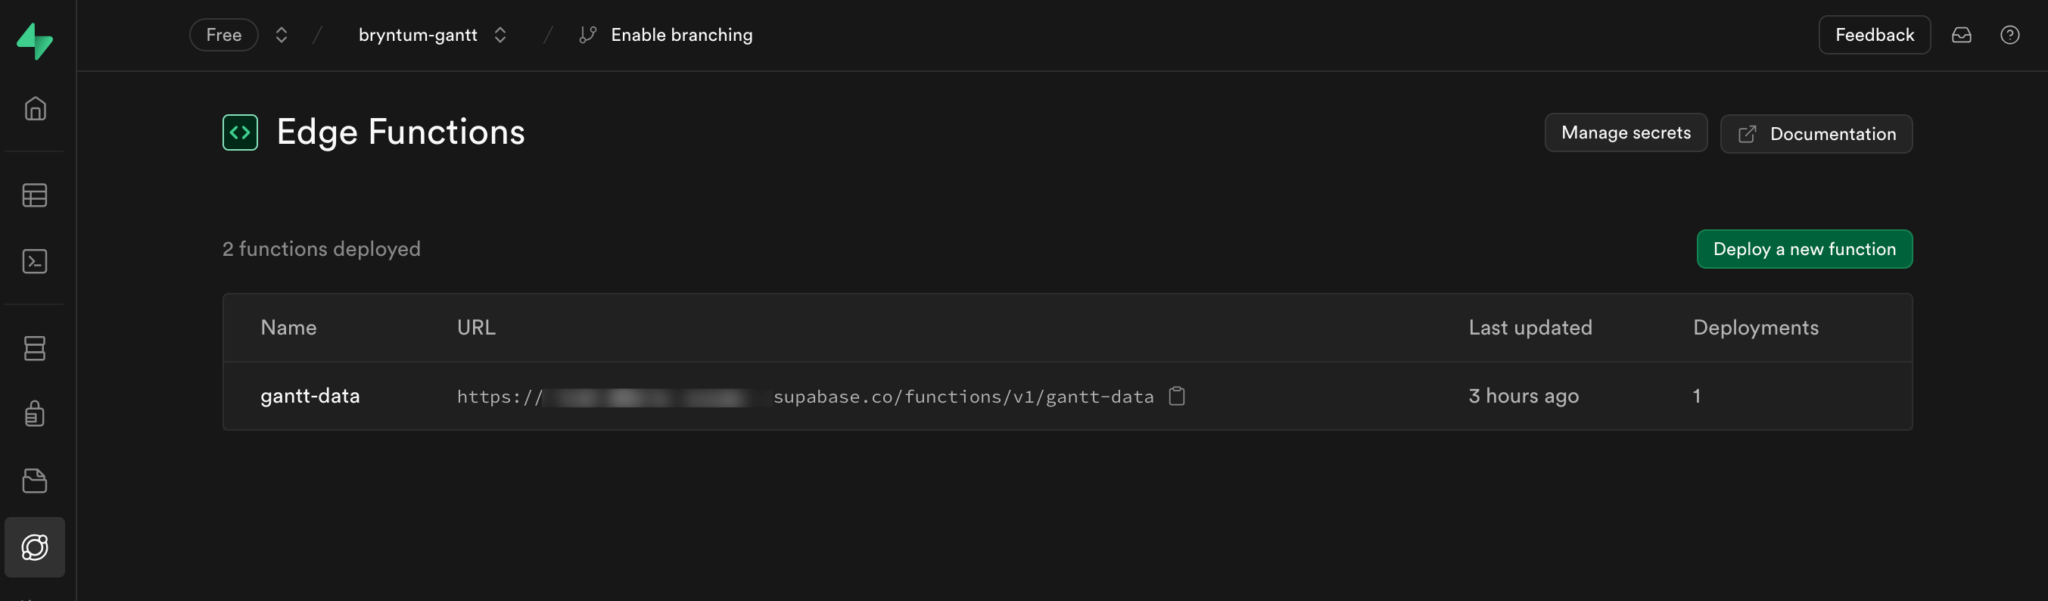
Here you can see the URL you can use to invoke the Edge Function.
Edge Functions run server-side in your Supabase instance and enforce the security policies you stipulate to give you secure, low-latency access to the data stored in your Postgres database. Edge Functions can be configured in various ways and are easily adapted to perform a range of tasks or processes using any table or combination of tables.
Add Bryntum Gantt to the React application
Now you can add Bryntum Gantt to your React application. Clone our example project and install the dependencies by running:
npm installThe main branch contains starter code if you would like to follow along. The full Supabase integration can be found in the completed-app branch of the repository.
You can try out Bryntum components for free using our public Bryntum trial packages.
If you have a Bryntum license, please refer to our npm Repository Guide to access the private Bryntum repository.
Install the sass package now if you don’t already have it:
npm install sassFinally, install the Supabase React Auth UI:
npm install @supabase/supabase-js @supabase/auth-ui-react @supabase/auth-ui-sharedYour application is now set up to use the Supabase login component and Bryntum Gantt.
Connect to the Supabase Edge Function
Create a new utilities directory within the src directory of your code:
mkdir utilsIn the utils directory, add a new JavaScript file named supabaseClient.js and paste the following into it, replacing <Project_Ref_Id> and <Supabase_Anonymous_Key> with your Supabase values:
import { createClient } from '@supabase/supabase-js'
export const supabase = createClient('https://<Project_Ref_Id>.supabase.co',
  '<Supabase_Anonymous_Key>'
)
To find the values for <Project_Ref_Id> and <Supabase_Anonymous_Key>, navigate to the Project Settings tab in your Supabase project. The <Project_Ref_Id> is the Reference ID field value in the General settings tab, and the <Supabase_Anonymous_Key> is the anon public key in the API settings tab.
Here you configure the client connection to the Supabase project. The application uses this client to get the session token for the currently logged-in user, which is then passed to the Edge Function.
Find your src/main.jsx file and replace its contents with the following:
import React from 'react';
import ReactDOM from 'react-dom/client';
import App from './App';
import { Auth } from '@supabase/auth-ui-react'
import { supabase } from './utils/supabaseClient'
const root = ReactDOM.createRoot(document.getElementById('root'));
root.render(
  <React.StrictMode>
    <Auth.UserContextProvider supabaseClient={supabase}>
      <App />
    </Auth.UserContextProvider>
  </React.StrictMode>
);
This code imports the supabaseClient you created, adds the Supabase React Auth UI as the user context provider, and launches the app.
In your src directory, replace the contents of the App.jsx file with the following:
import './App.scss';
import { useState, useEffect } from 'react';
import { supabase } from './utils/supabaseClient';
import { Auth } from '@supabase/auth-ui-react';
import { ThemeSupa } from '@supabase/auth-ui-shared';
import { BryntumGantt } from '@bryntum/gantt-react';
import { getGanttProps } from './GanttConfig';
function App() {
  const [session, setSession] = useState(null);
  const [ganttProps, setGanttProps] = useState(null);
  useEffect(() => {
    supabase.auth.getSession().then(({ data: { session } }) => {
      setSession(session);
    });
    const {
      data: { subscription },
    } = supabase.auth.onAuthStateChange((_event, session) => {
      setSession(session);
    });
    return () => subscription.unsubscribe();
  }, []);
  useEffect(() => {
    if (session !== null) {
      getGanttProps().then((props) => {
        setGanttProps(props);
      });
    }
  }, [session]);
  if (!session) {
    return (
      <div style={{ display: 'flex', justifyContent: 'center', alignItems: 'center', height: '100vh' }}>
        <Auth supabaseClient={supabase} appearance={{ theme: ThemeSupa }} />
      </div>
    );
  } else if (!ganttProps) {
    return <div>Loading...</div>;
  } else {
    return (
      <div style={{ height: '100%', justifyContent: 'space-around', alignContent: 'center' }}>
        <BryntumGantt {...ganttProps} />
        <button onClick={() => supabase.auth.signOut()}>Sign out</button>
      </div>
    );
  }
}
export default App;
Here’s what this code does:
- Presents the user with the Supabase React Auth UI login screen for authentication.
- Directs authenticated users to the Gantt chart component. You’ll configure this component in the next section.
- Displays a button to sign out the current user.
In the src directory, update the GanttConfig.js file, replace the contents with the following code:
import { supabase } from './utils/supabaseClient';
async function getGanttProps() {
  // Get the JWT token
  const { data } = await supabase.auth.getSession();
  const session = data.session;
  if (!session) {
    // Return default or empty ganttProps if session is not available
    return {
      columns: [{ type: 'name', field: 'name', width: 250 }],
      viewPreset: 'weekAndDayLetter',
      barMargin: 10,
      project: {
        tasks: [],
        dependencies: [],
        autoLoad: true,
        autoSetConstraints: true,
      },
    };
  }
  const token = session.access_token;
  const url = 'https://<Edge_Function_Id>.supabase.co/functions/v1/gantt-data';
  const header = {
    'Content-Type': 'application/json',
    'Authorization': `Bearer ${token}`,
  }
  return {
    columns: [{ type: 'name', field: 'name', width: 250 }],
    viewPreset: 'weekAndDayLetter',
    barMargin: 10,
    project: {
        taskStore: {
          transformFlatData: true,
        },
        autoLoad: true,
        autoSync: true,
        autoSetConstraints: true,
        validateResponse: true,
        transport: {
          load: {
            url: url,
            method: 'GET',
            headers: header,
            credentials: "omit",
          },
          sync: {
            url: url,
            method: 'POST',
            headers: header,
            credentials: "omit",
          },
        },
    },
  };
}
export { getGanttProps };
Replace <Edge_Function_Id> with the value from the deployed function’s URL. Find this in the Edge Functions tab of your Supabase dashboard. The Edge Function ID is the subdomain in the URL displayed there: https://<Edge_Function_Id>.supabase.co.
The code above creates a function that gets the user session and invokes the Edge Function by sending a GET or POST request to the Edge Function URL, for example, https://<Edge_Function_Id>.supabase.co/functions/v1/gantt-data. If no session is available, an empty Gantt properties object will be returned.
If a valid session is found, configuration is passed back so that the Gantt chart can use it to query the data.
Notice that the method for load is set to GET, and for sync is set to POST. The Edge Function uses this to select the appropriate response. The Authorization headers are passed so that RLS can be enforced using the token in the Edge Function.
Now you can run the application with:
npm run devYou should receive a response similar to the following:
VITE v5.4.2 ready in 215 ms
➜ Local: https://localhost:5173/
➜ Network: use --host to expose
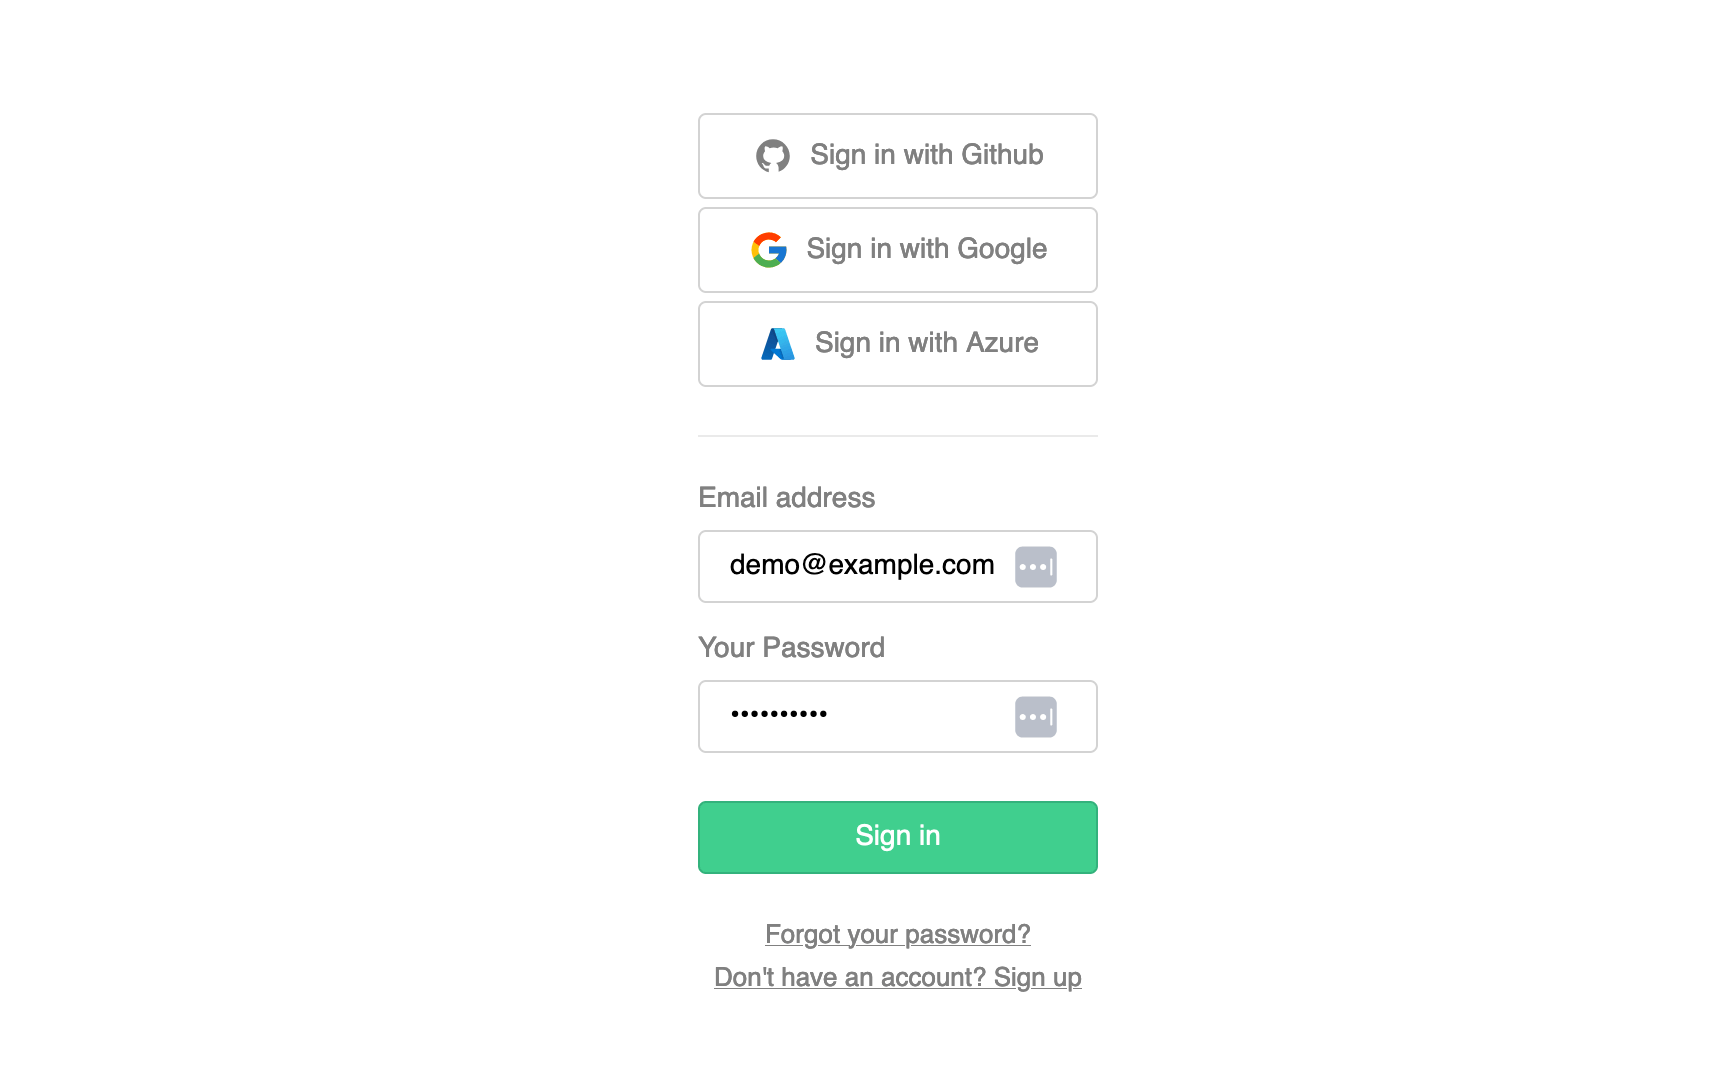
➜ press h + enter to show helpVisit the URL of the application in your browser, and you should see the login screen you created using the Supabase React Auth UI:
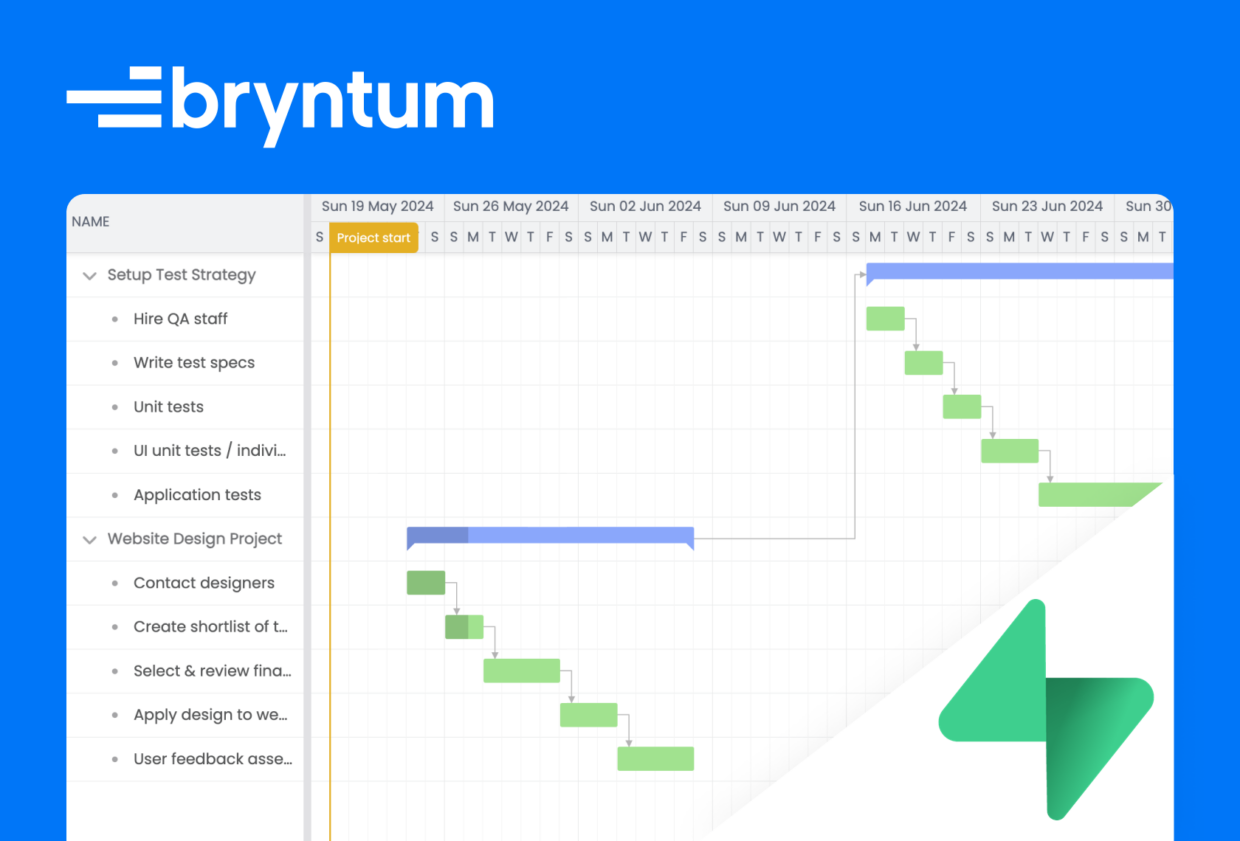
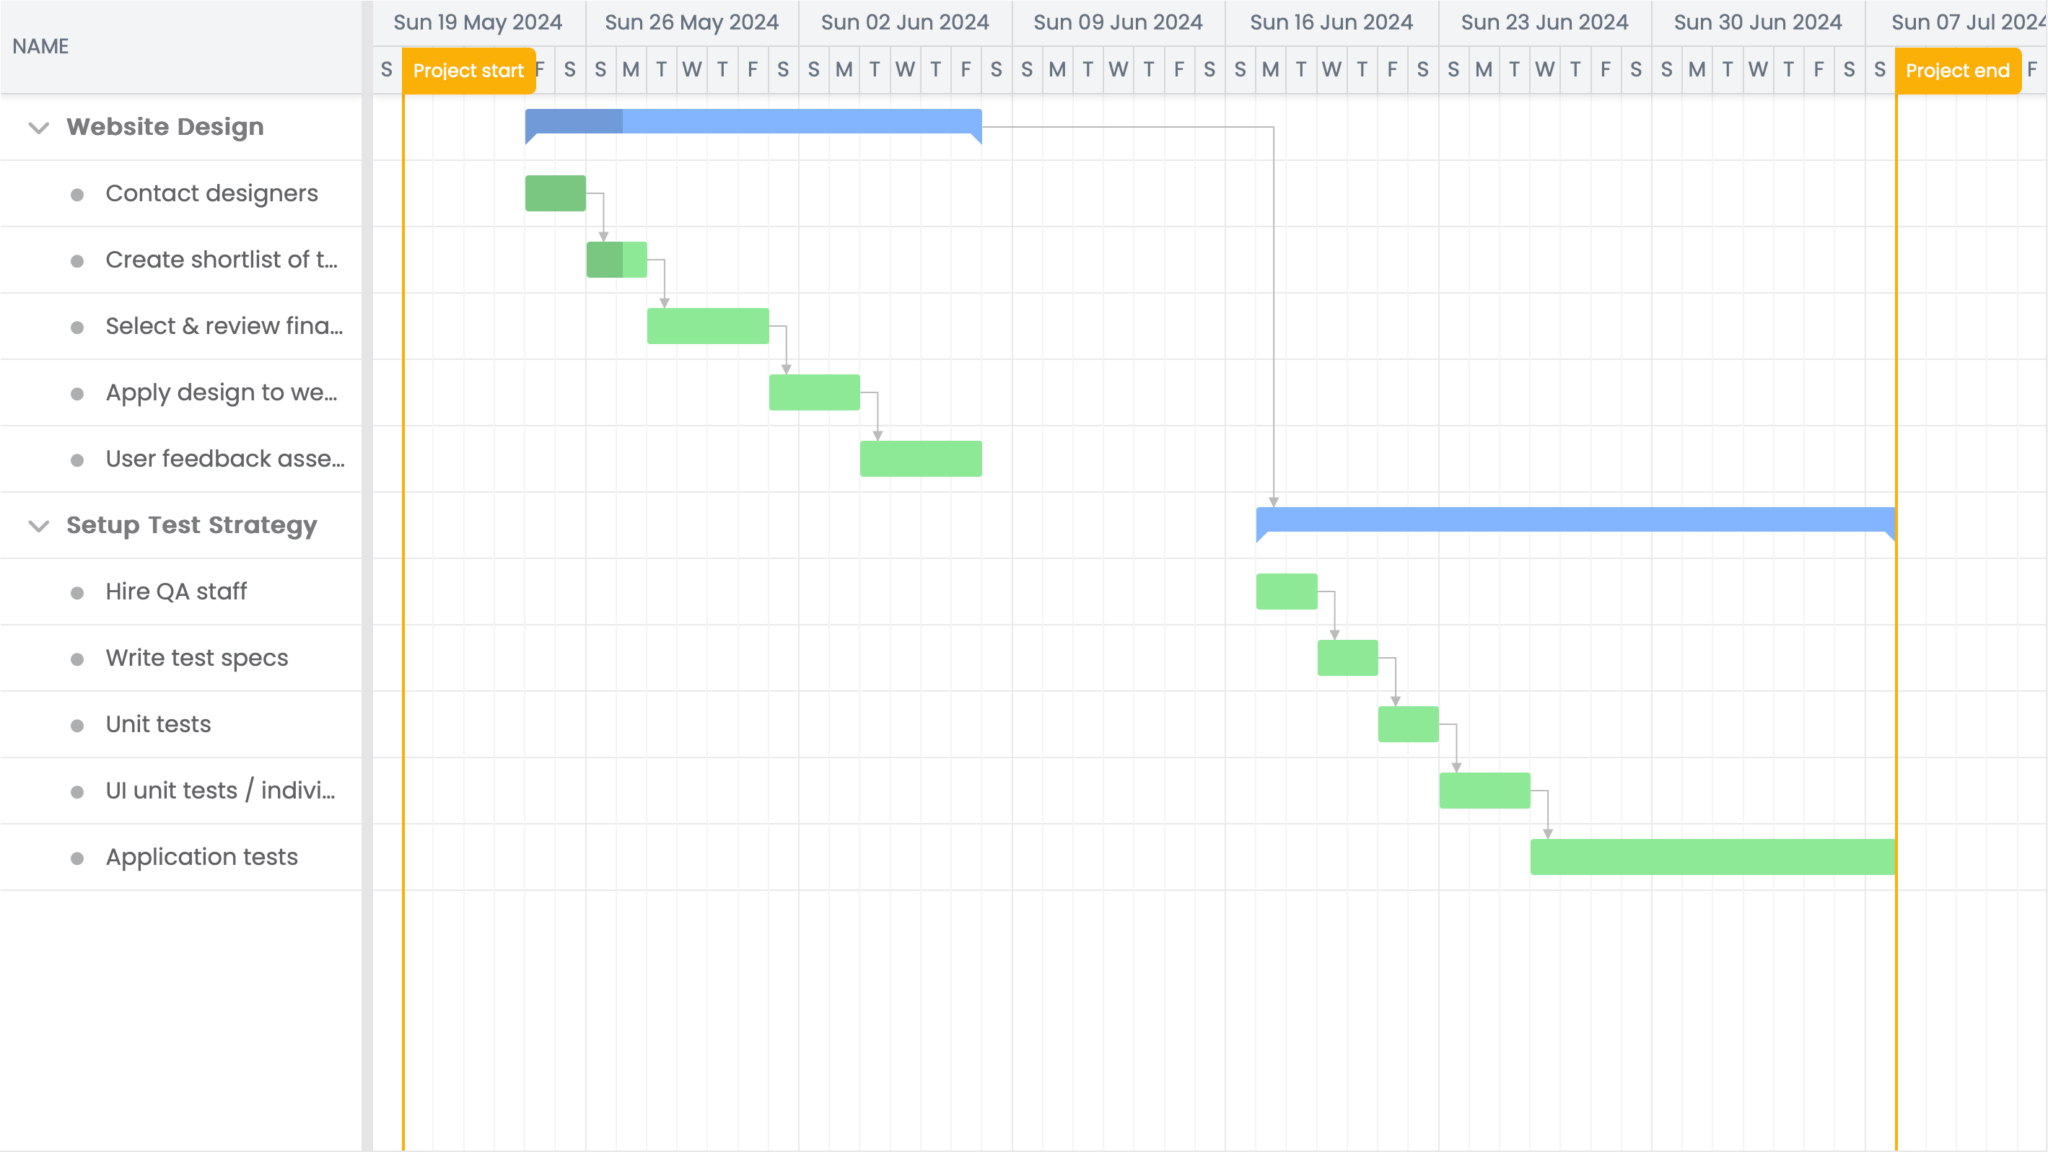
Log in to the application with the credentials for the user you created when you set up the Supabase project. You should see the new Bryntum Gantt chart created by querying the data from your Edge Function:
You can sign out of the application by clicking the Sign Out button below the chart.