AI coding: Databutton vs Lovable
We strive to keep posts updated, but code samples may sometimes be outdated. Humans, see the Bryntum documentation; agents, https://mcp.bryntum.com for the latest info.
Databutton and Lovable are popular Scandinavian platforms for AI web app creation. You can use them to vibe code your app ideas without any coding experience. More experienced developers can use them as AI agents. Both allow you to edit the code and then move your code off their platforms if needed. They are competitors in the rapidly growing AI coding platform market, which includes v0 by Vercel, Bolt by StackBlitz, and Replit Agent.
We at Bryntum recently created an admin dashboard app with our Gantt component using Lovable, demonstrating how these platforms can work with existing JavaScript libraries. Bryntum specializes in high-performance, JavaScript-based components for the web, including the Calendar, Gantt chart, Grid, Scheduler, and Task Board components. As part of our AI initiatives, our Grid component features AI capabilities, like generating SEO descriptions and generating review insights from cell data.
Based on LinkedIn, X, and YouTube followers, Lovable is far more popular than Databutton. This is at least partly due to marketing; you may have seen Lovable ads on YouTube or in Google sponsored search results. However, Databutton has more premium offerings that target a smaller market: startups and businesses that need more human support, advice, and technical planning. Even though its plans get pricey, Databutton can save you the cost of hiring developers and help you get to market faster. You can build complex applications without any coding experience.
Both Databutton and Lovable have received millions of dollars in funding. Lovable recently raised $200M in one of the largest ever Series A investment rounds in Europe, and is valued at $1.8B just eight months after launch.
Let’s compare the features, pricing, pros, and cons of Databutton and Lovable to help you choose which platform is best for your needs.
Databutton
Databutton is a full-stack AI platform for creating SaaS apps. No coding experience is needed. You provide prompts in its web UI and it creates an app for you. Further prompting allows you to plan features, build, improve, and debug your app. It brands itself as “the AI developer for non-techies” but its code editor also makes it suitable for developers who want to use AI to help them build their apps.
Databutton’s premium plans have a more one-on-one focus than Lovable, which makes it an order of magnitude more pricey than Lovable. However, the cheapest plan, which lacks human support, is a similar price to Lovable’s cheapest plan. Databutton uses Python and the FastAPI web framework on the backend. It has a built-in database and authentication and allows you to install Python packages. The frontend, which uses TypeScript and React, is less flexible and only offers a set list of installed npm packages.
Getting started
To get started, open the sign-up page and log in with your email address, Google account, or GitHub account. After signing in, you’re shown a multi-step form for creating an app:
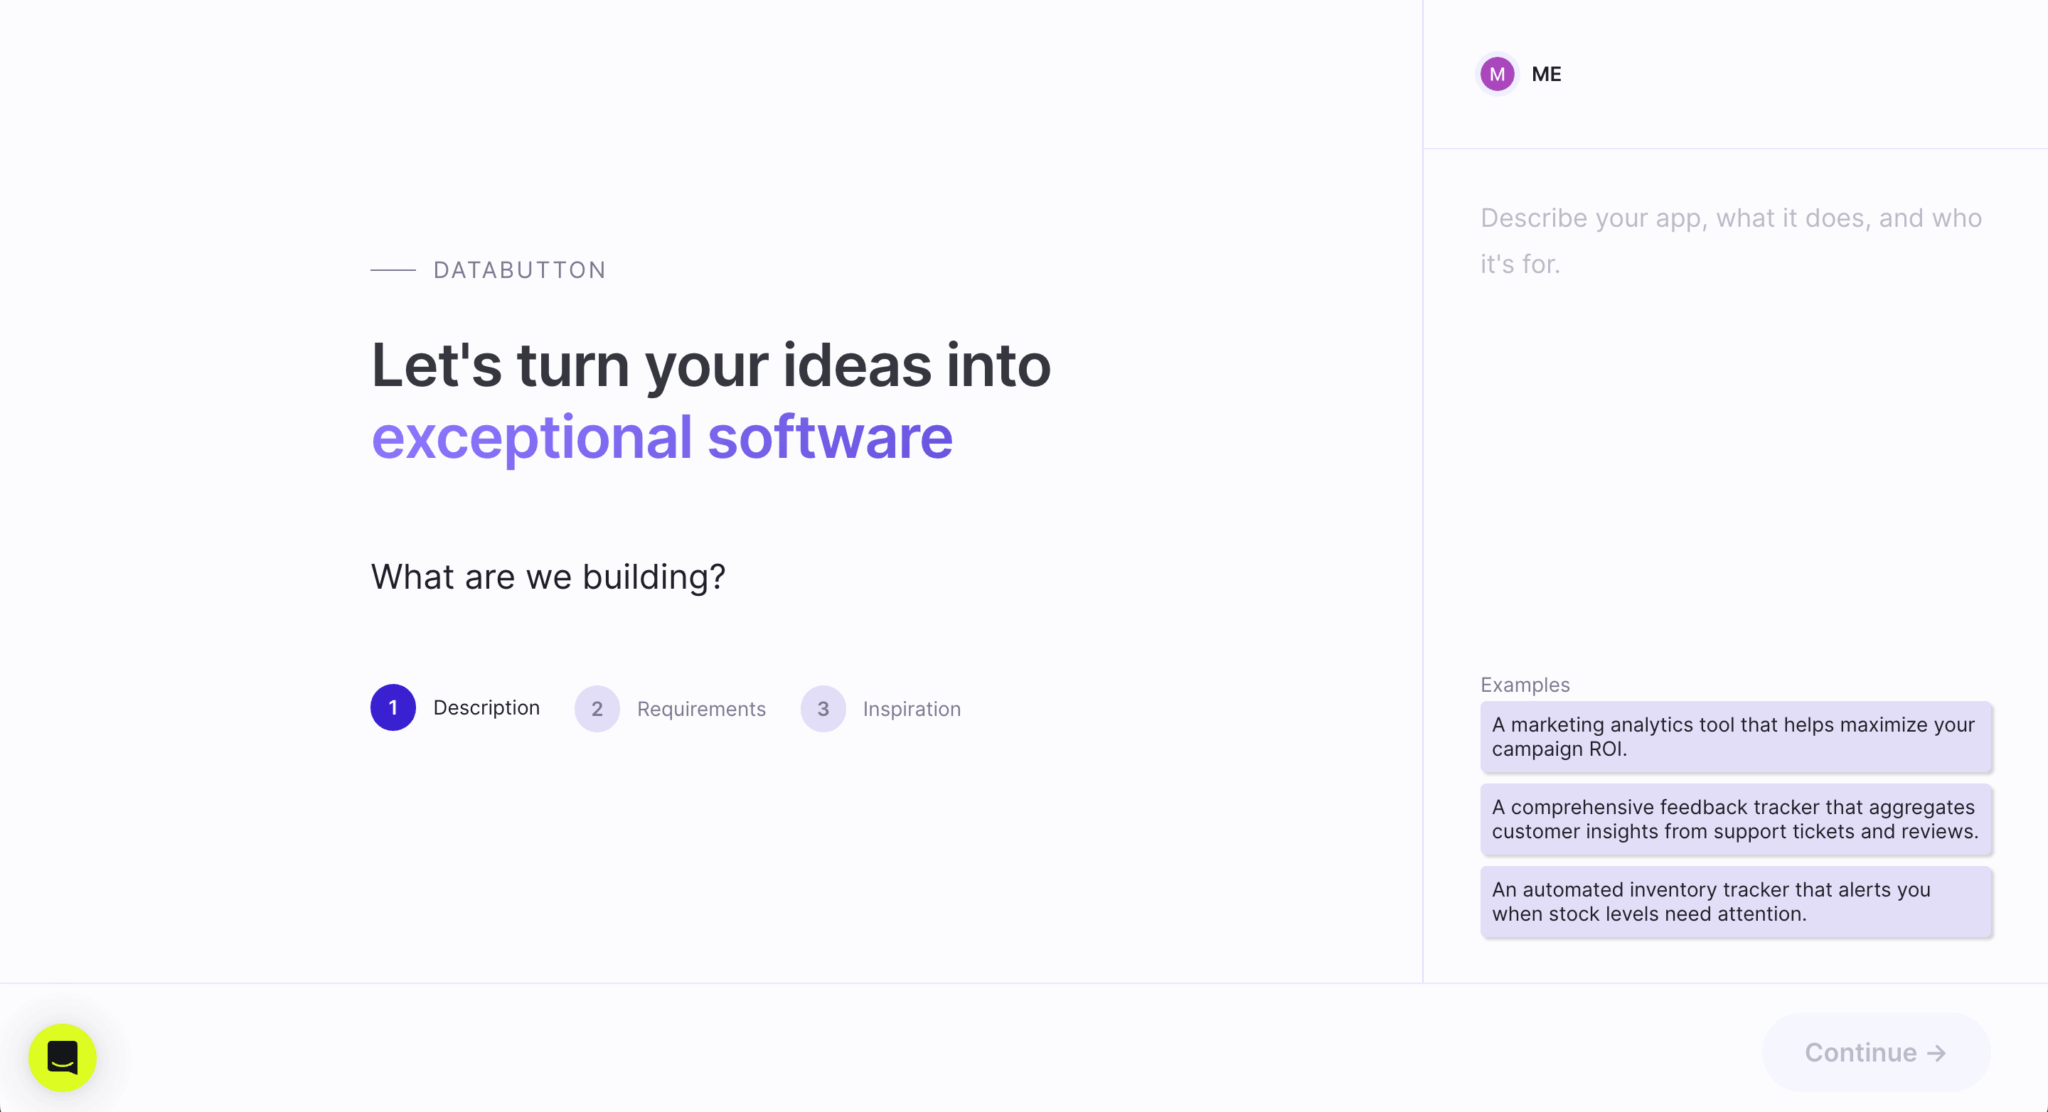
Provide a description of an app. For example:
A calendar app that has a grid of unscheduled events to the right of it. Unscheduled events can be dragged onto the calendar. Scheduled events can be dragged onto the grid.Upload any documents you have containing requirements, specifications, quotes, or user stories:

Next, upload screenshots of apps or designs that inspire you:
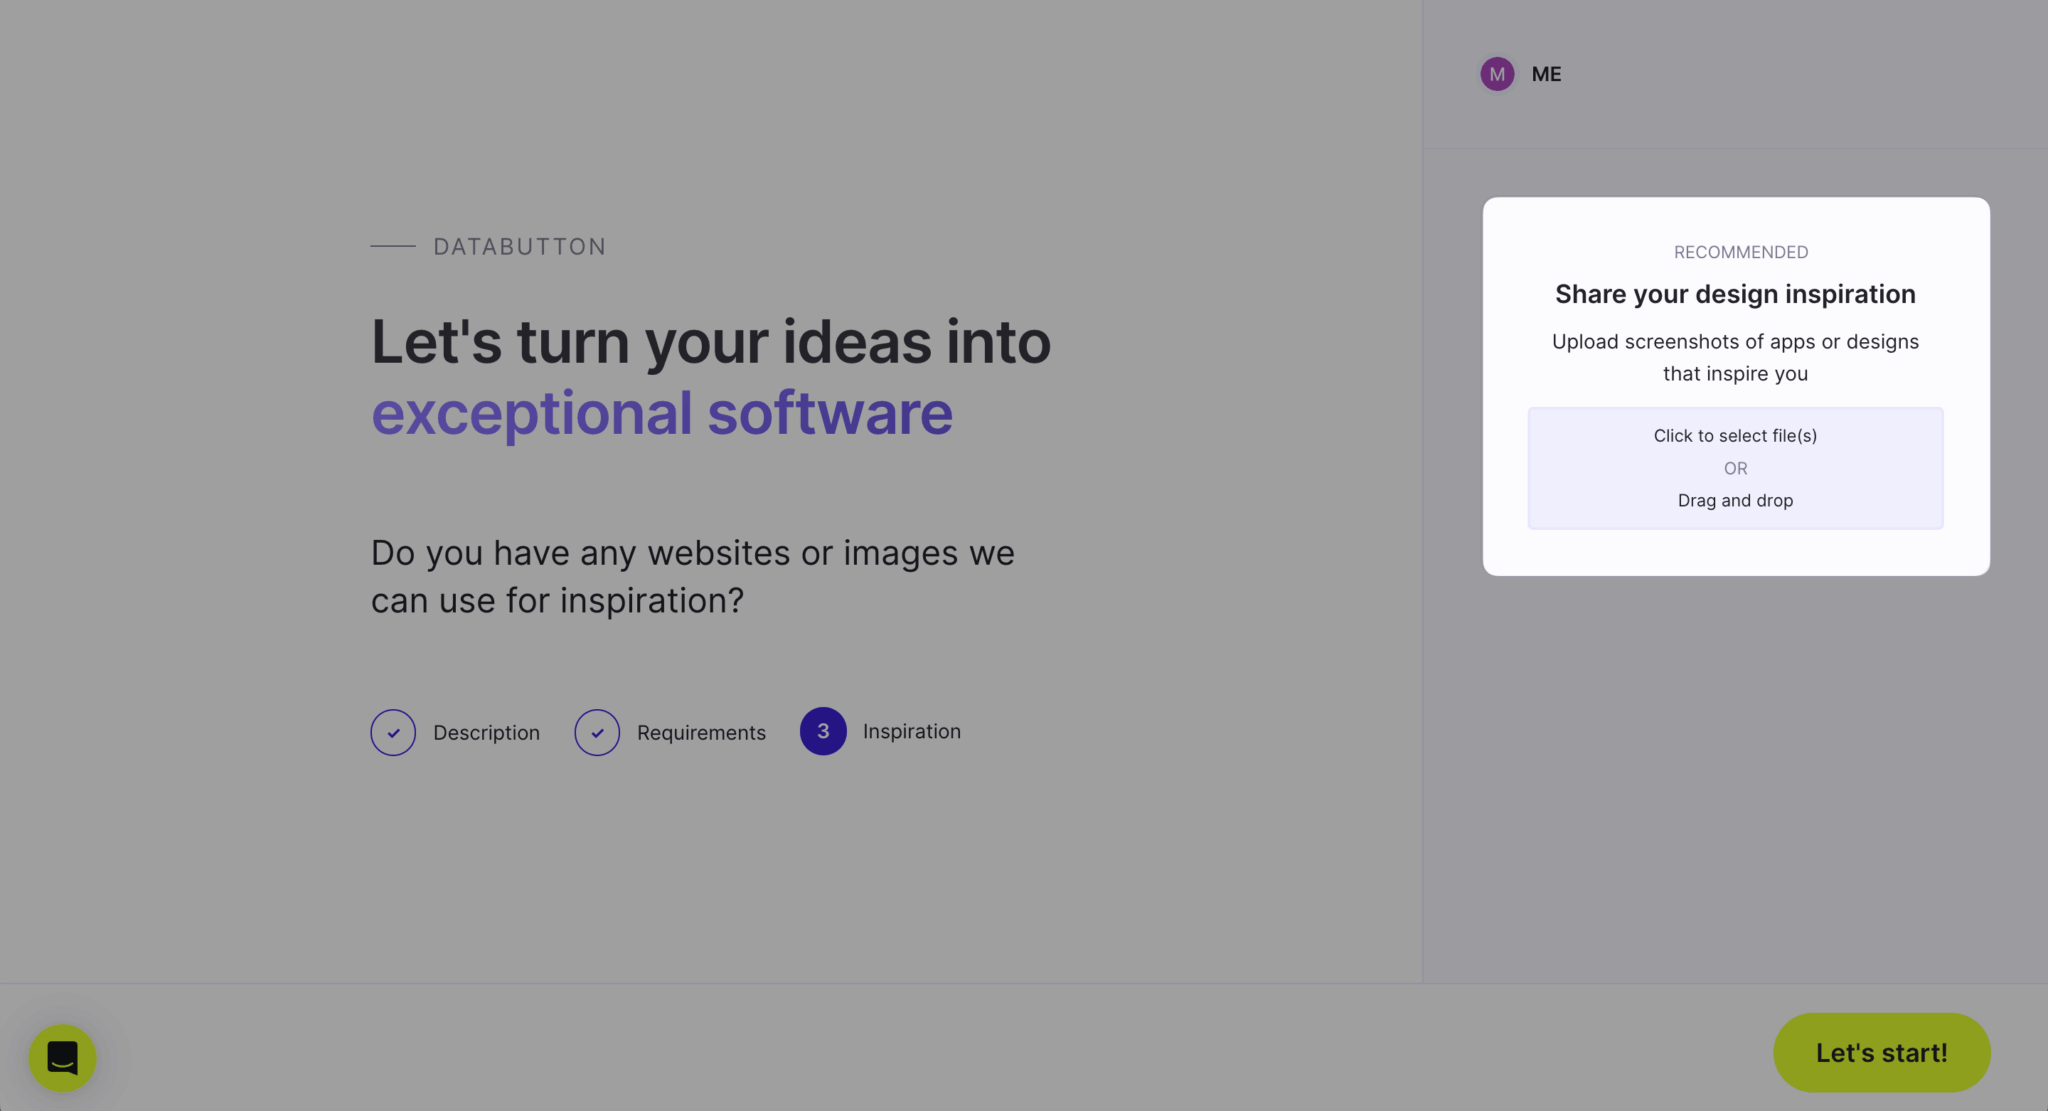
You can try adding this screenshot of the Bryntum Calendar drag-and-drop demo:
Click Let’s start! and wait a minute or two for the app creation plan to generate:
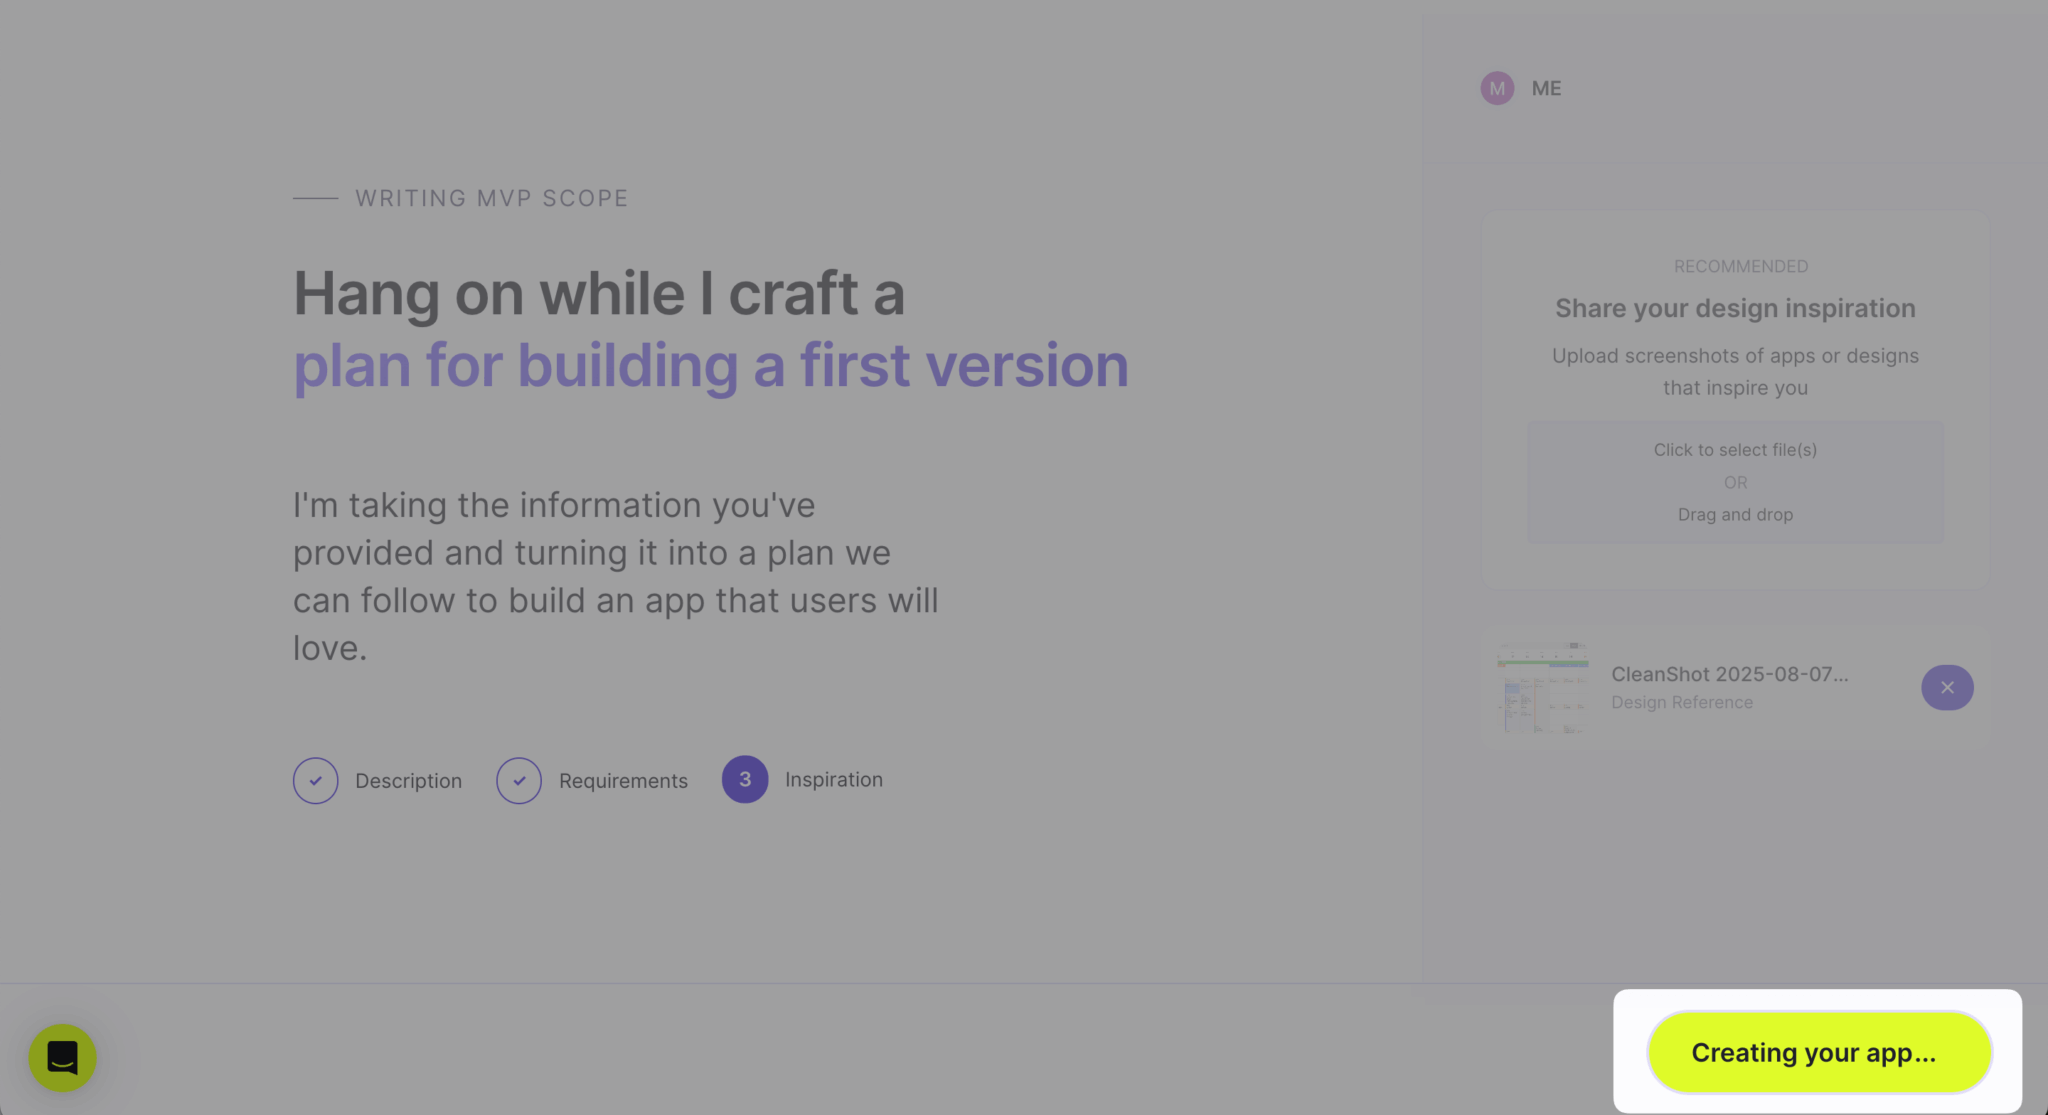
Once the plan is done, your project dashboard opens in the Plan tab:
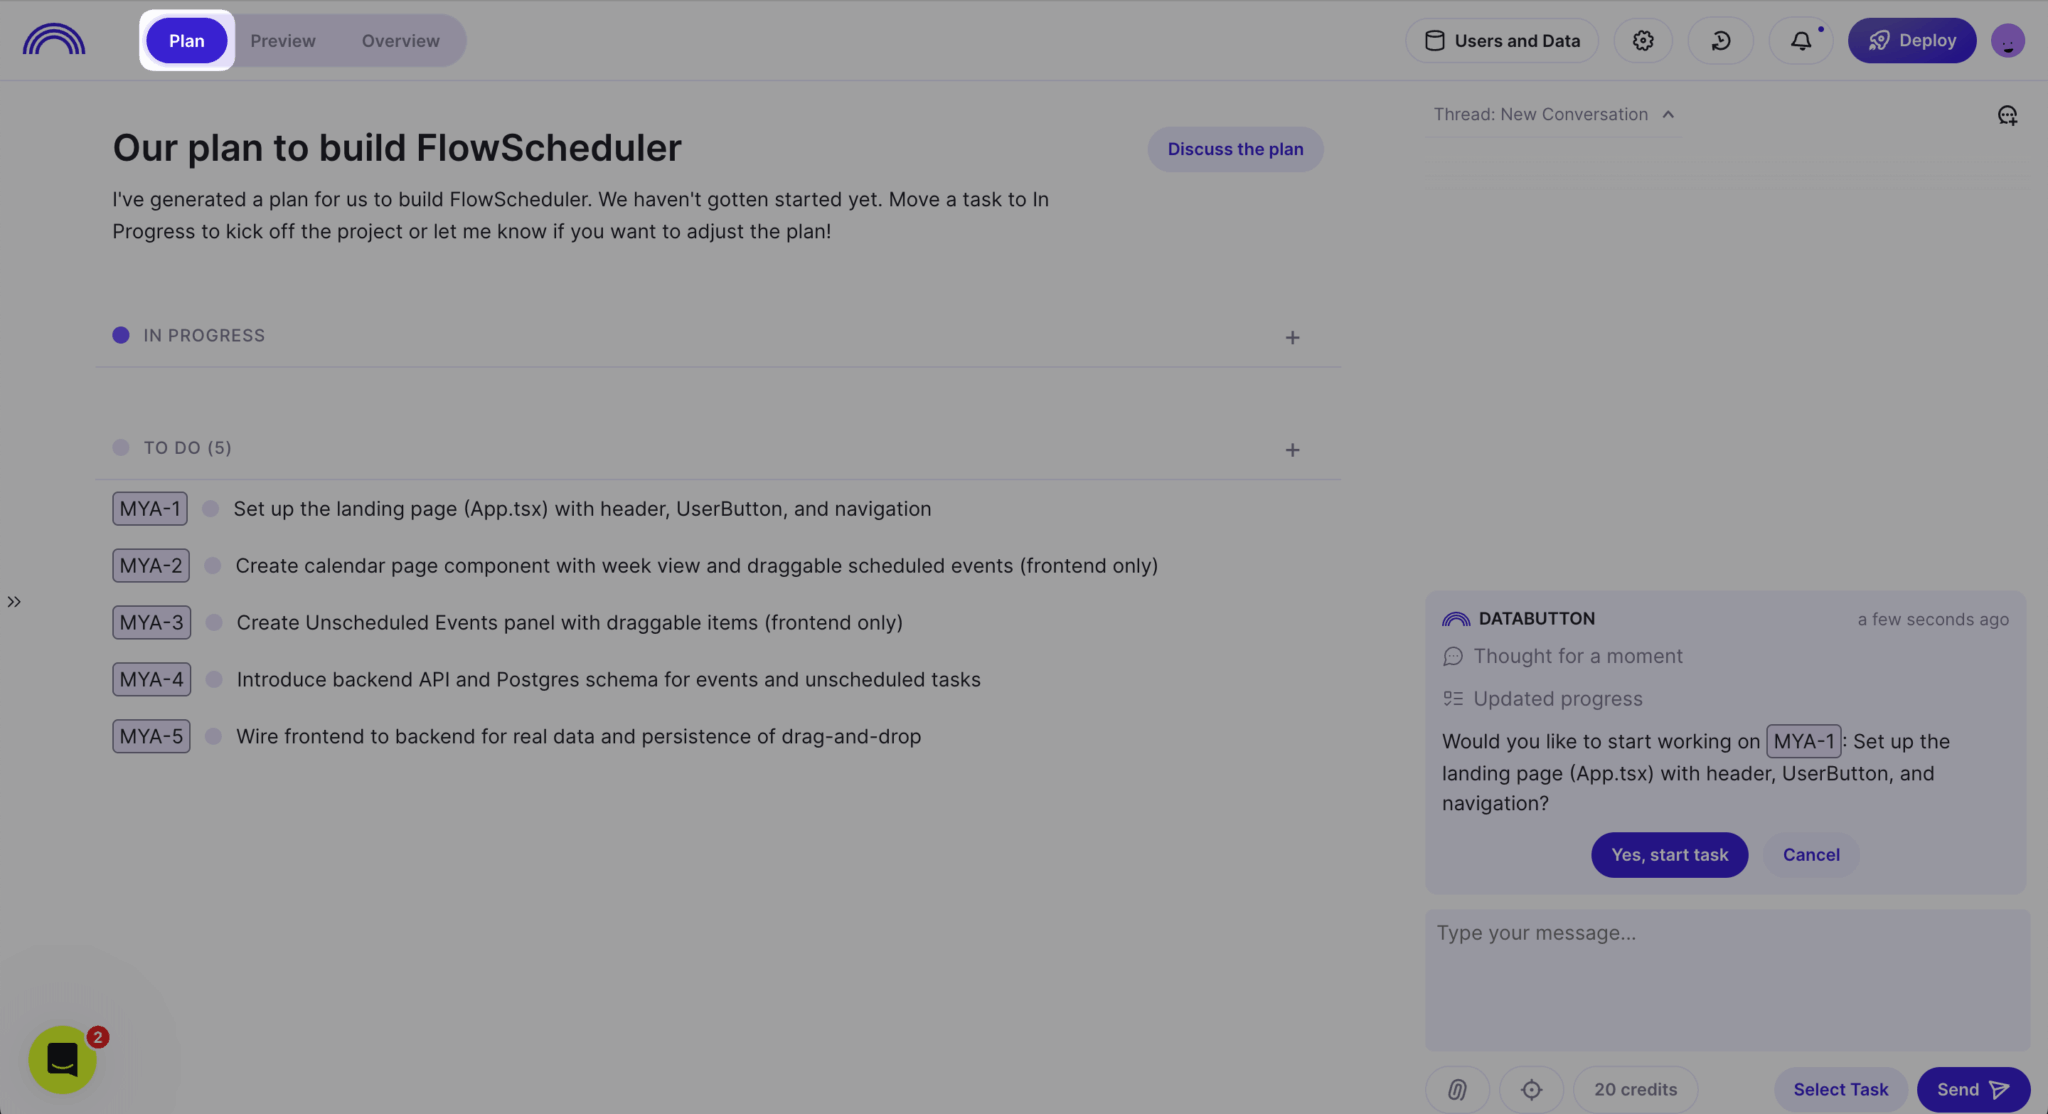
App creation is broken down into tasks. Click the Yes, start task button in the chat panel on the right to begin the first task.
You can also hover over a specific task in the To Do list and click the Start task button to start that task:
⚠️ Both Databutton and Lovable had early access to GPT-5, which was released during the writing of this article, so we used it to build the app. To do the same, set GPT-5 as the Main model in your Databutton profile.
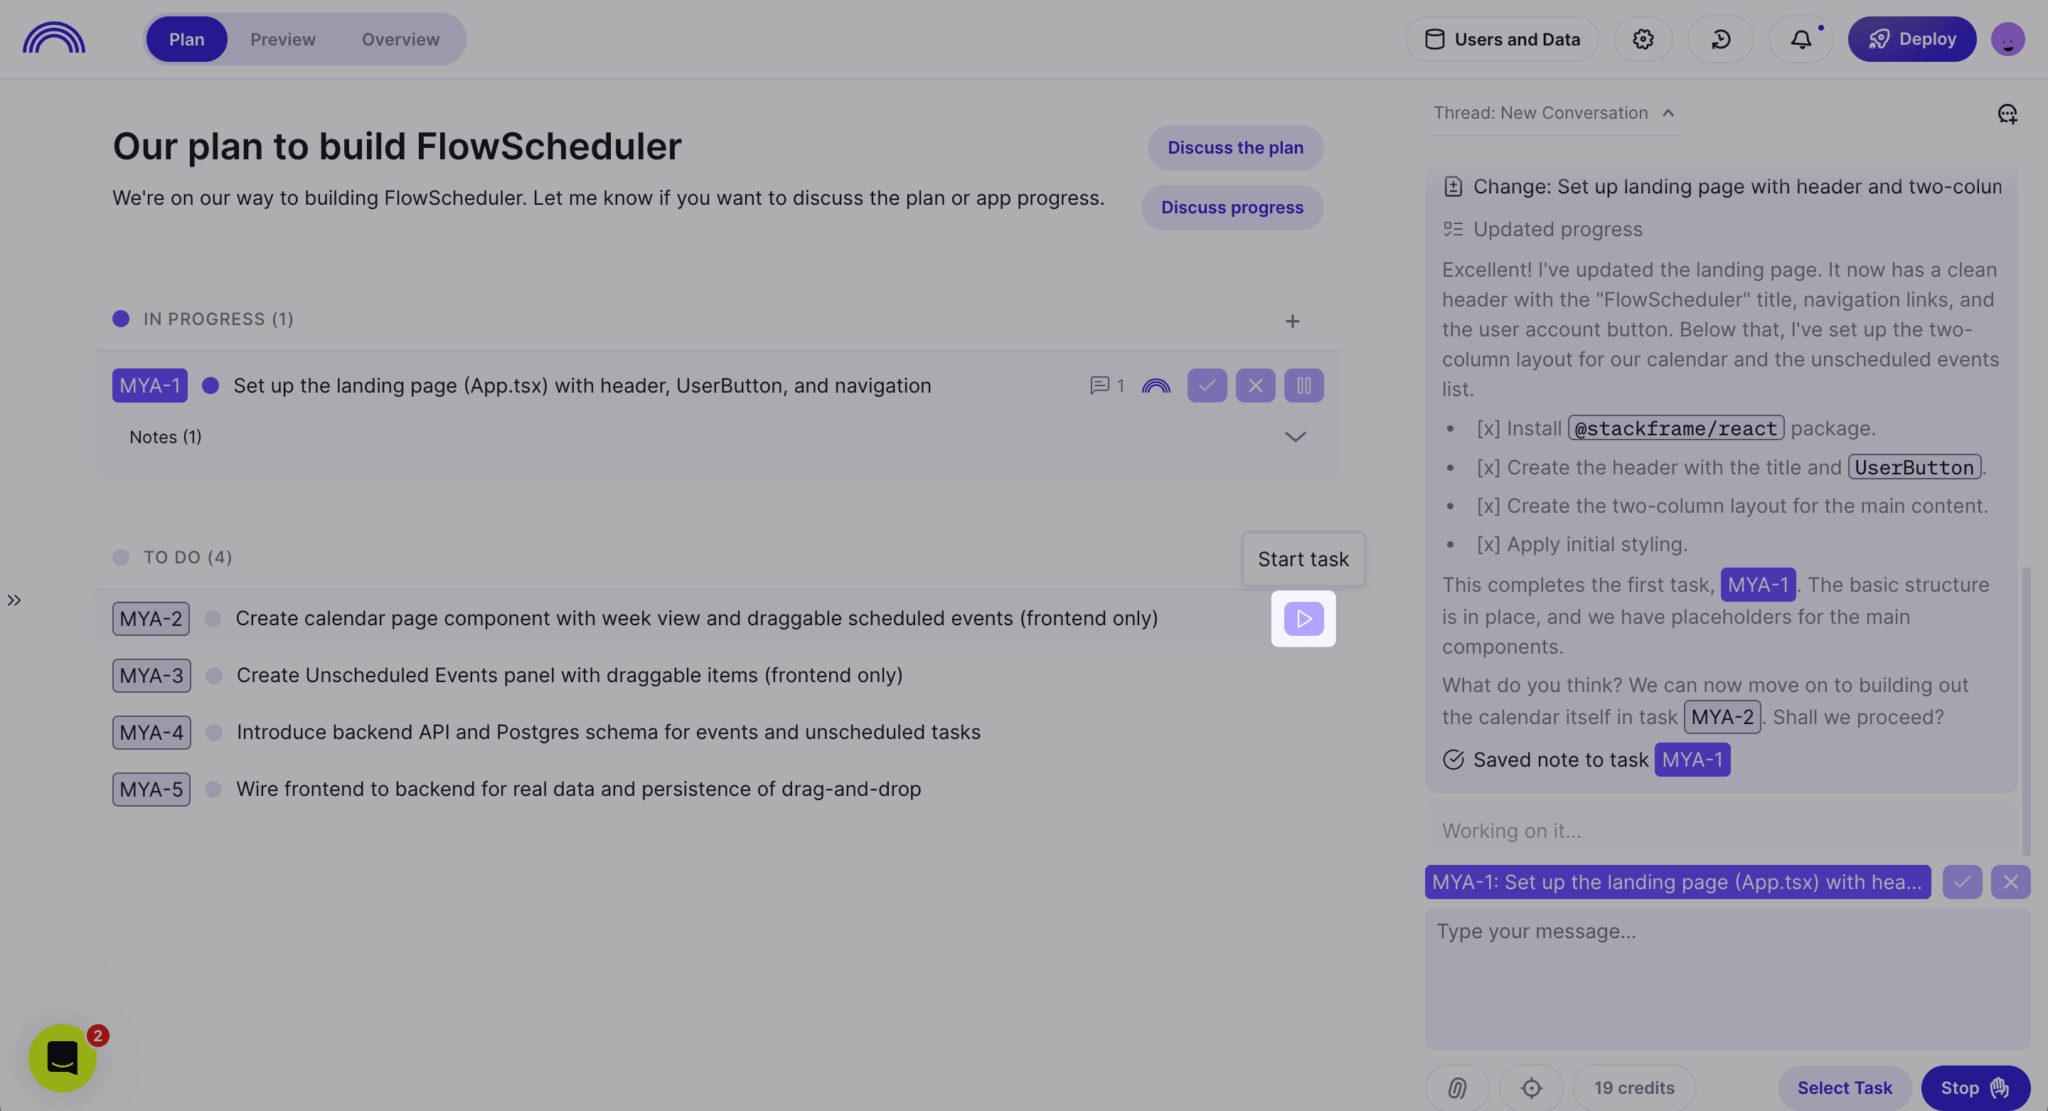
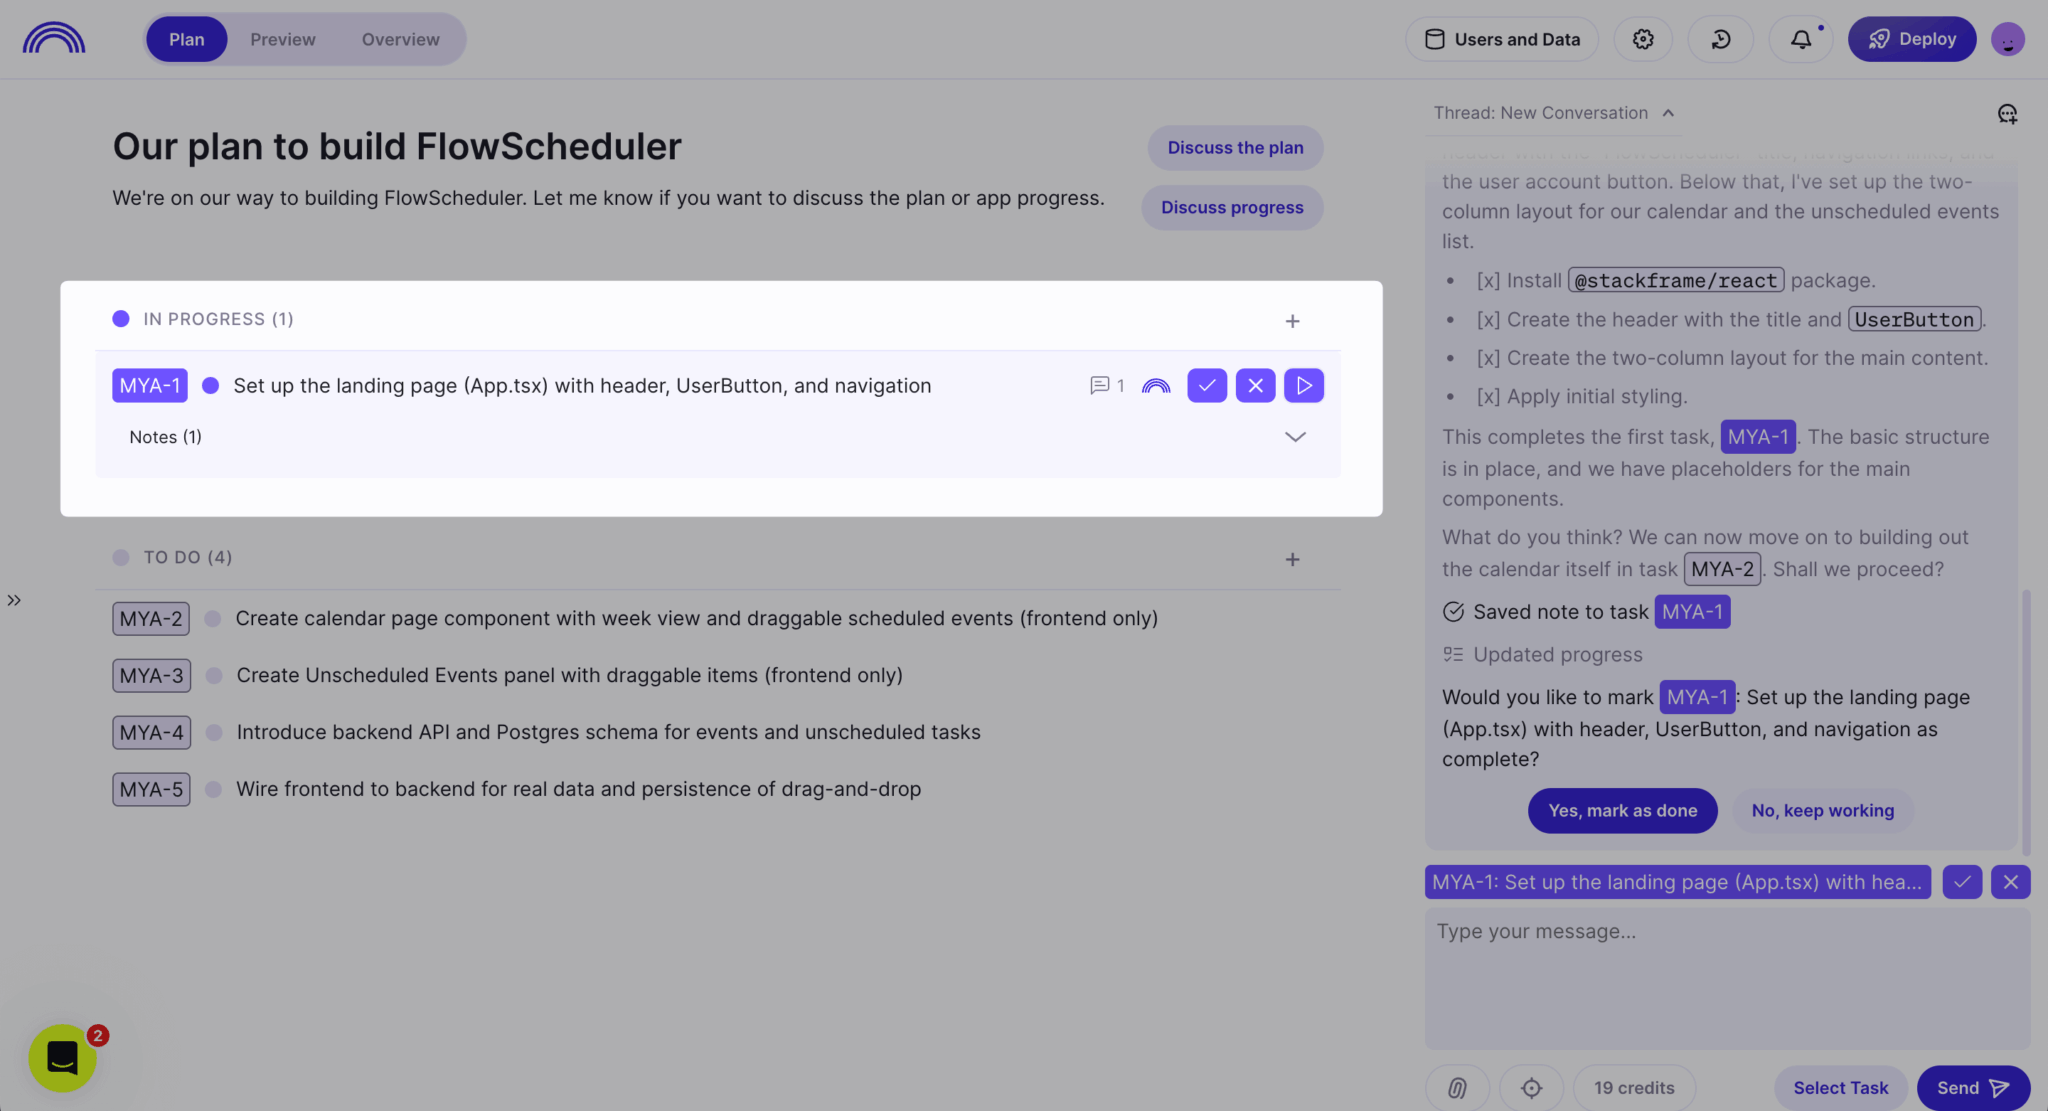
Once a task has begun, it’s moved to the In Progress section:
The Preview tab shows your running app.

From this page, you can:
- View and edit code: Use the file tree on the left or click the Edit Code button at the top right of the page preview.
- View the logs: Scroll to the bottom of the preview.
- Attach images, select page elements, and manage subscriptions: Use the buttons at the bottom of the chat panel.
- Modify page elements: Select a page element and use the popup prompt input to make changes.
- View the app database: Click the Users and Data button at the top right of the page. You can view the data in the table, but you can’t change it.
- Modify the app data: Instead of trying to change data in the table, prompt the agent. It will run SQL queries to modify the data.
- Deploy your app: Click the Deploy button at the top right of the page.
To get the most out of Databutton, be sure to check the Databutton prompting guide.
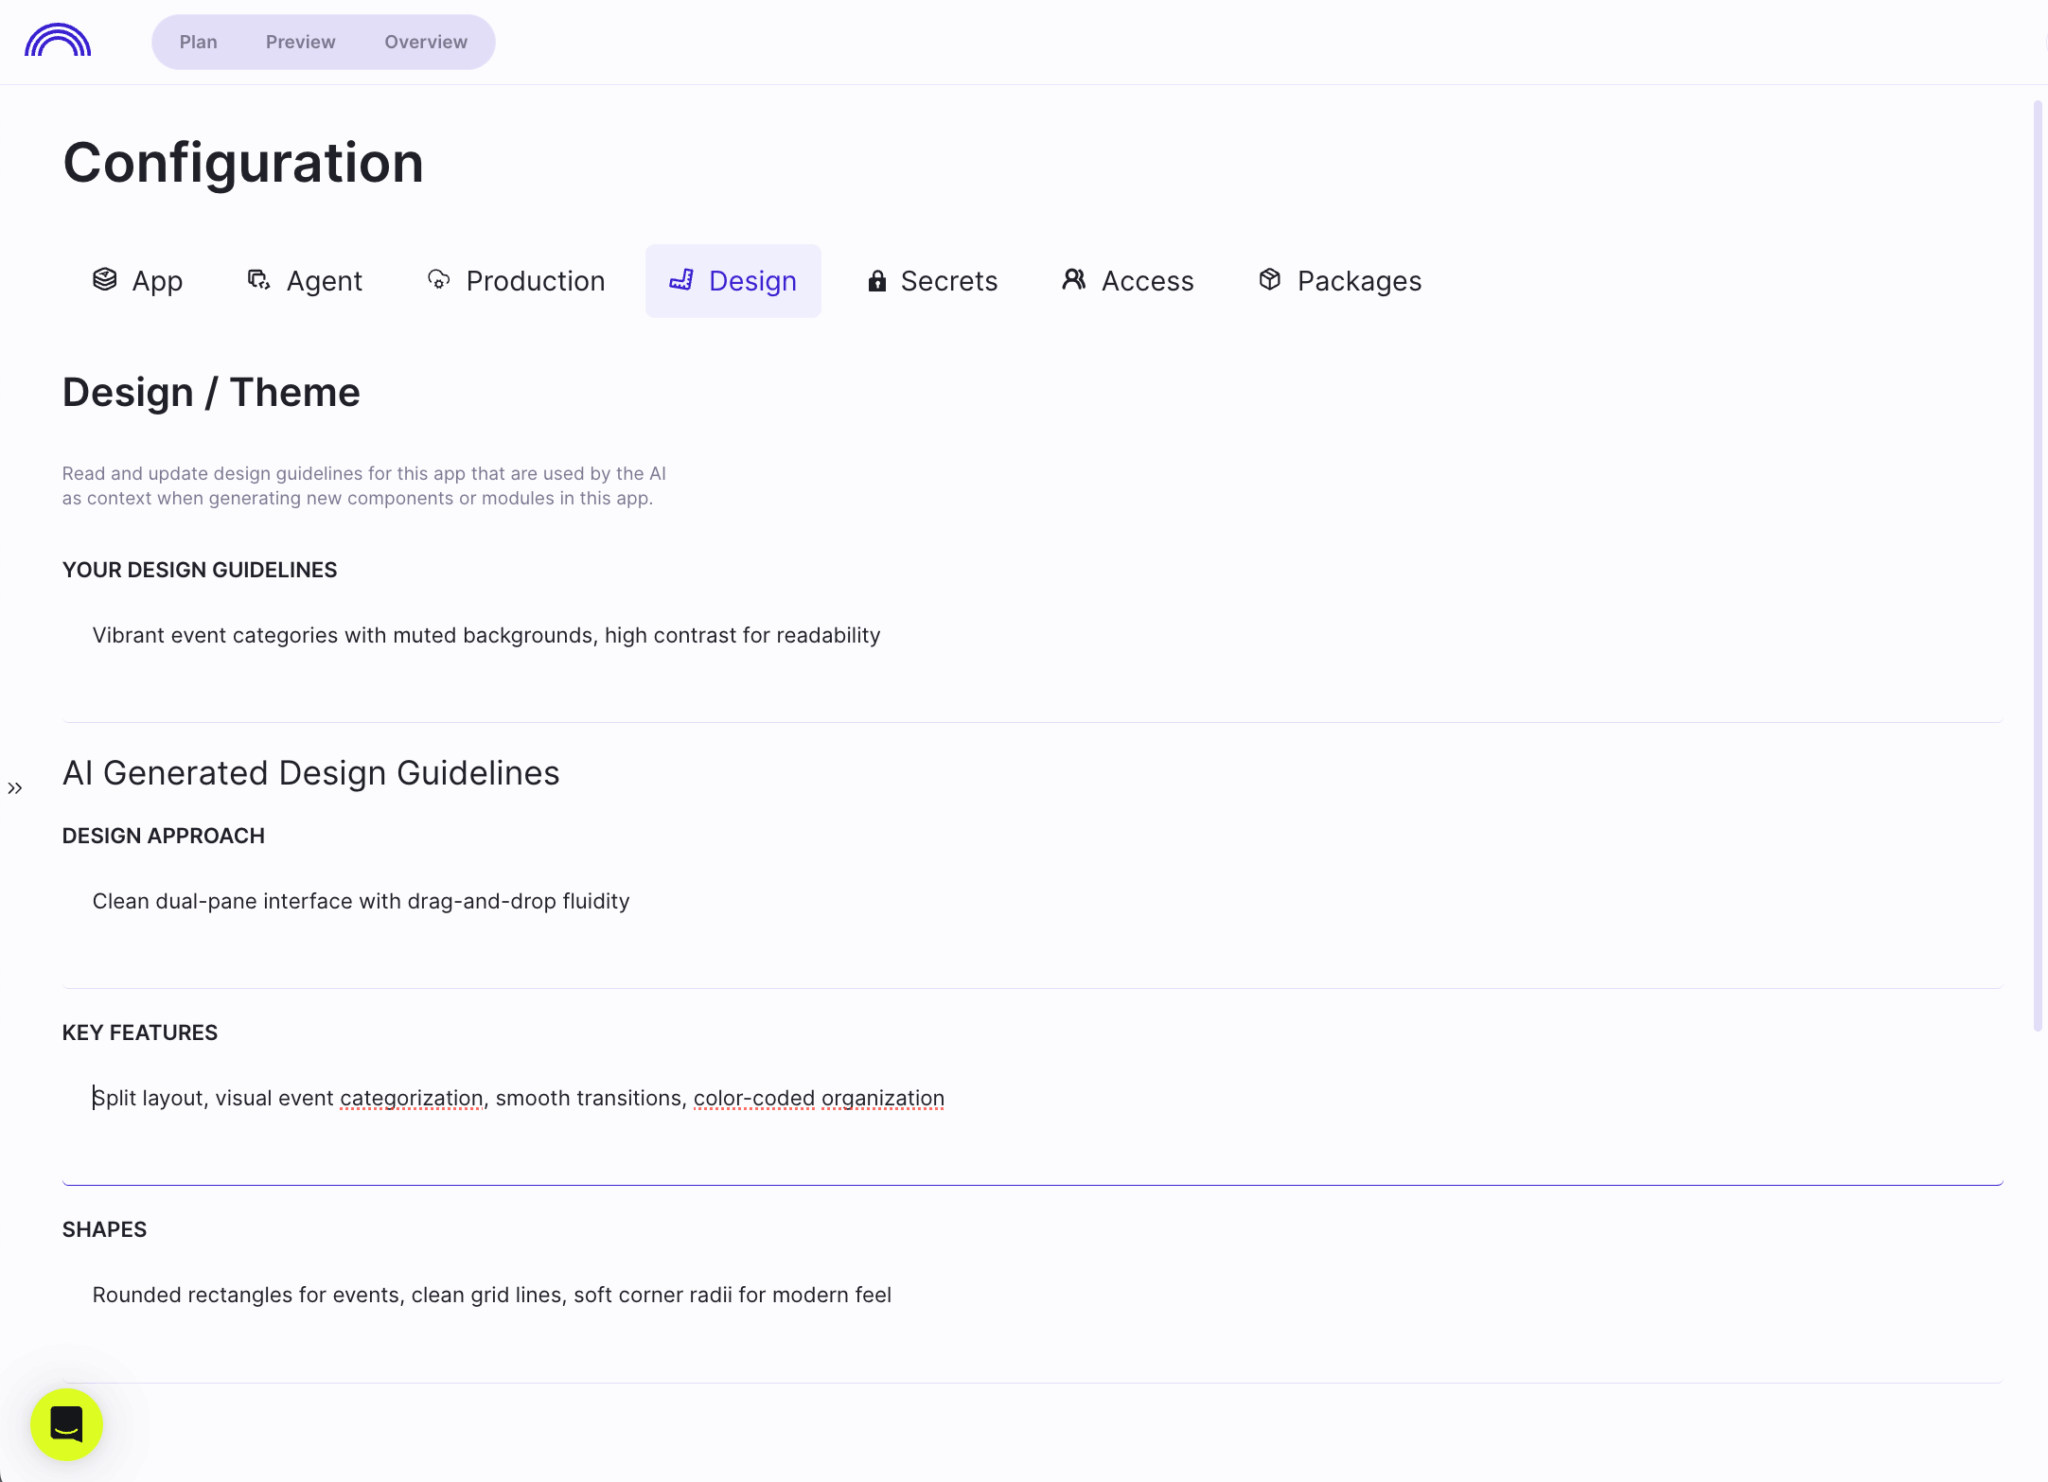
The Settings button at the top left lets you update app details, add custom AI agent instructions, adjust the app design, and more.
For example, you can edit the AI-generated design guidelines:
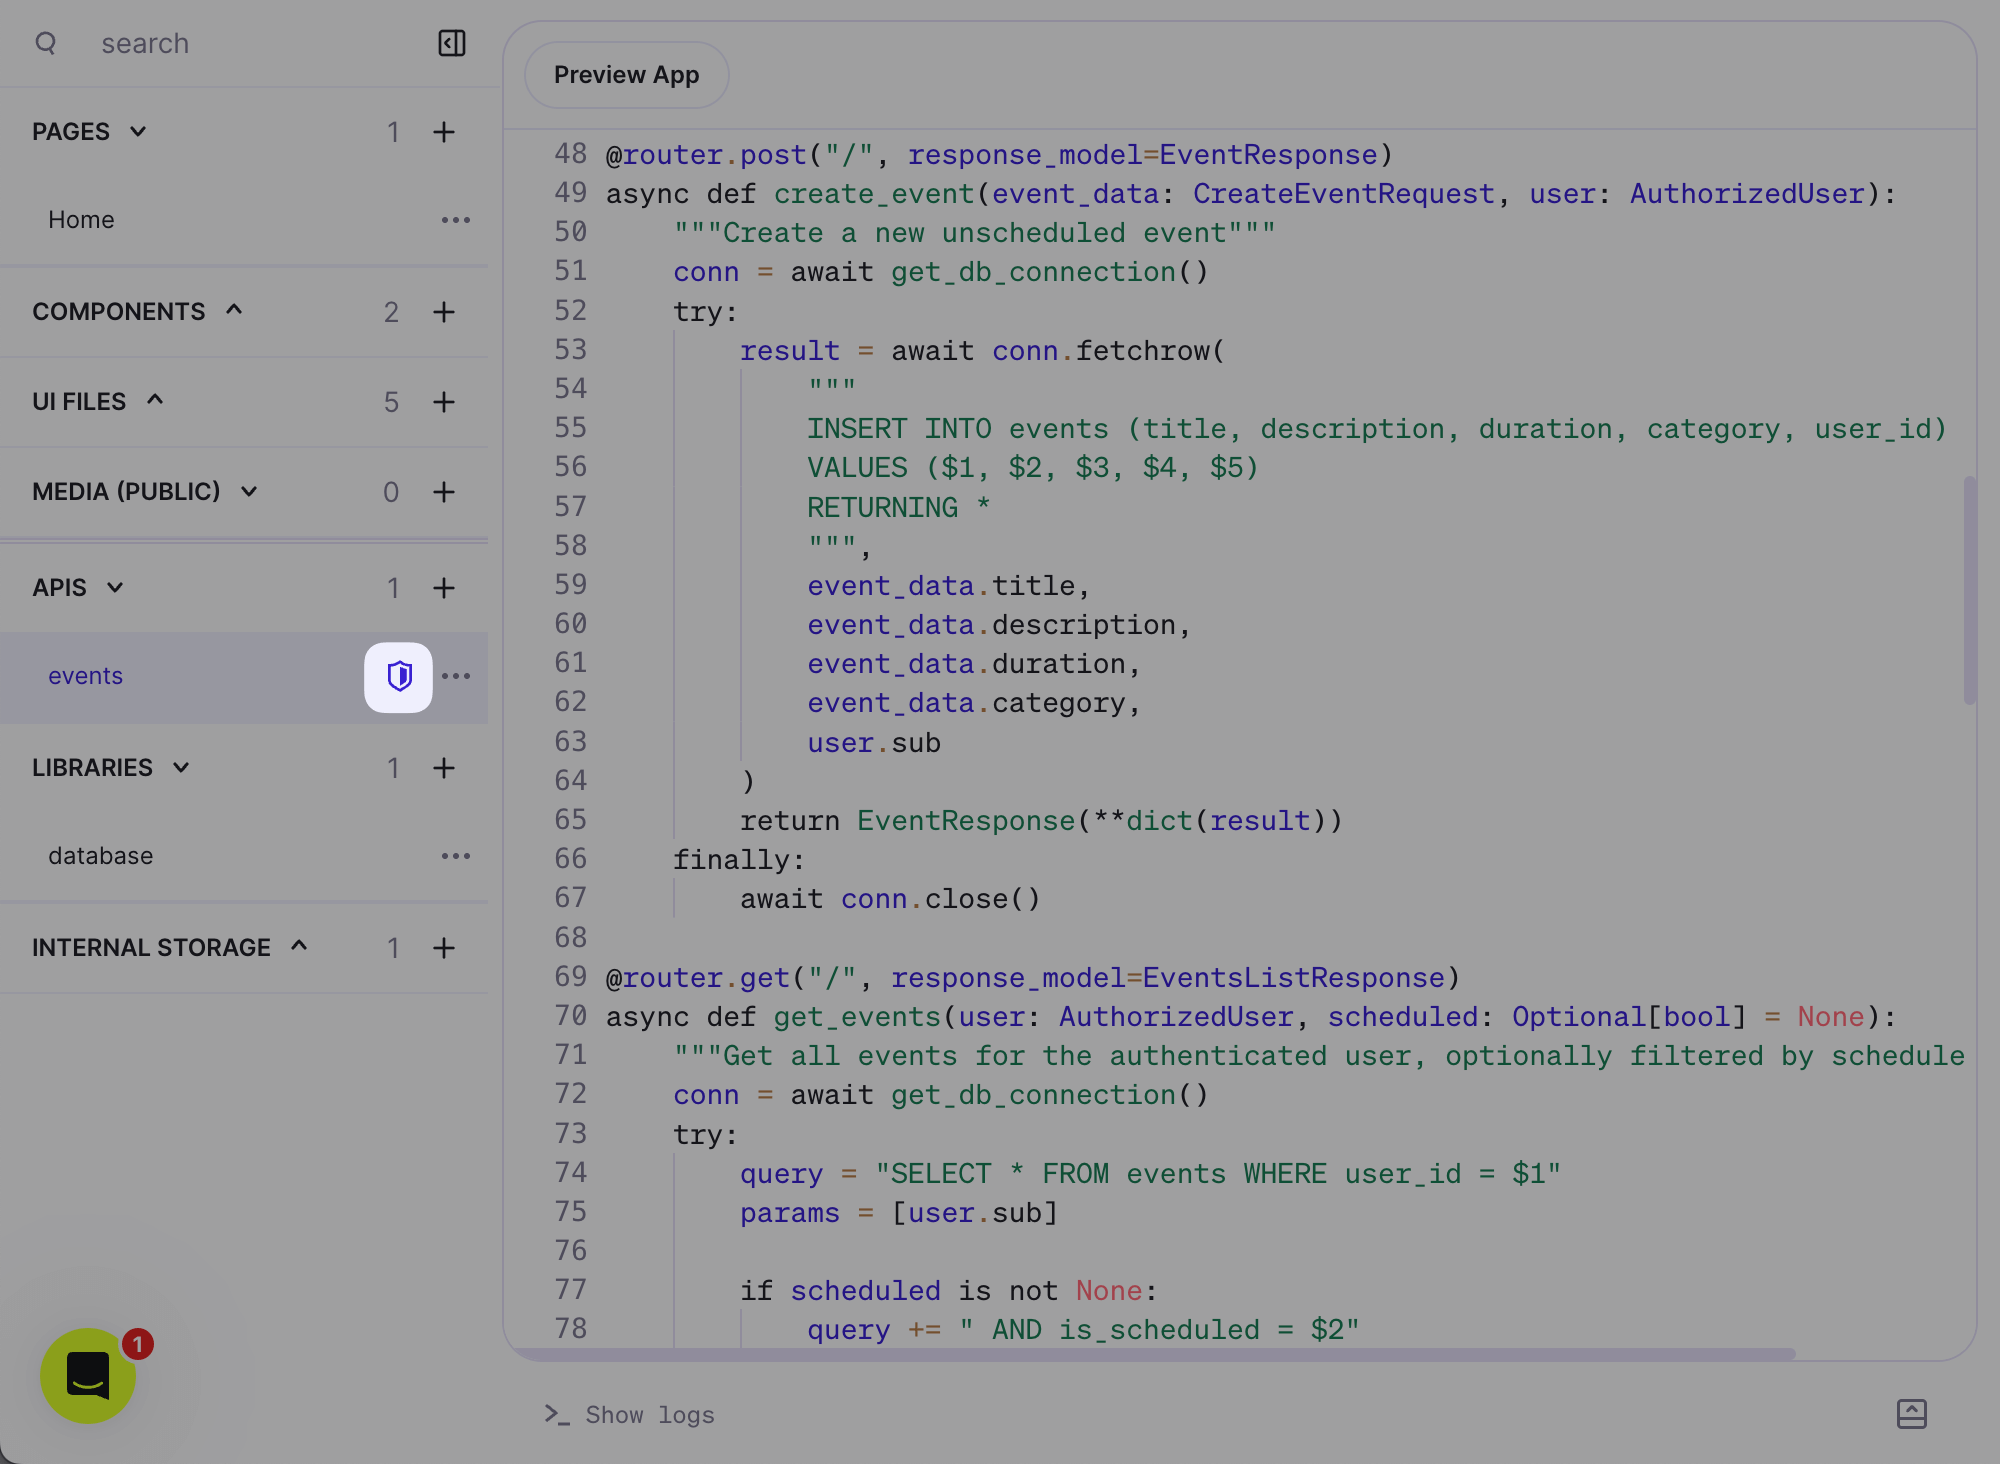
The API files have a shield icon, indicating that they are protected by auth. A user needs to log in to use these routes. Databutton automatically adds authentication and the login and sign-up functionalities to your app. You can remove auth for an API by clicking on the shield icon.
The Overview tab shows how the pages, components, files, and APIs are connected. You can view the code for a component by clicking on the three-dot menu at the top right of a component block and selecting View Component.
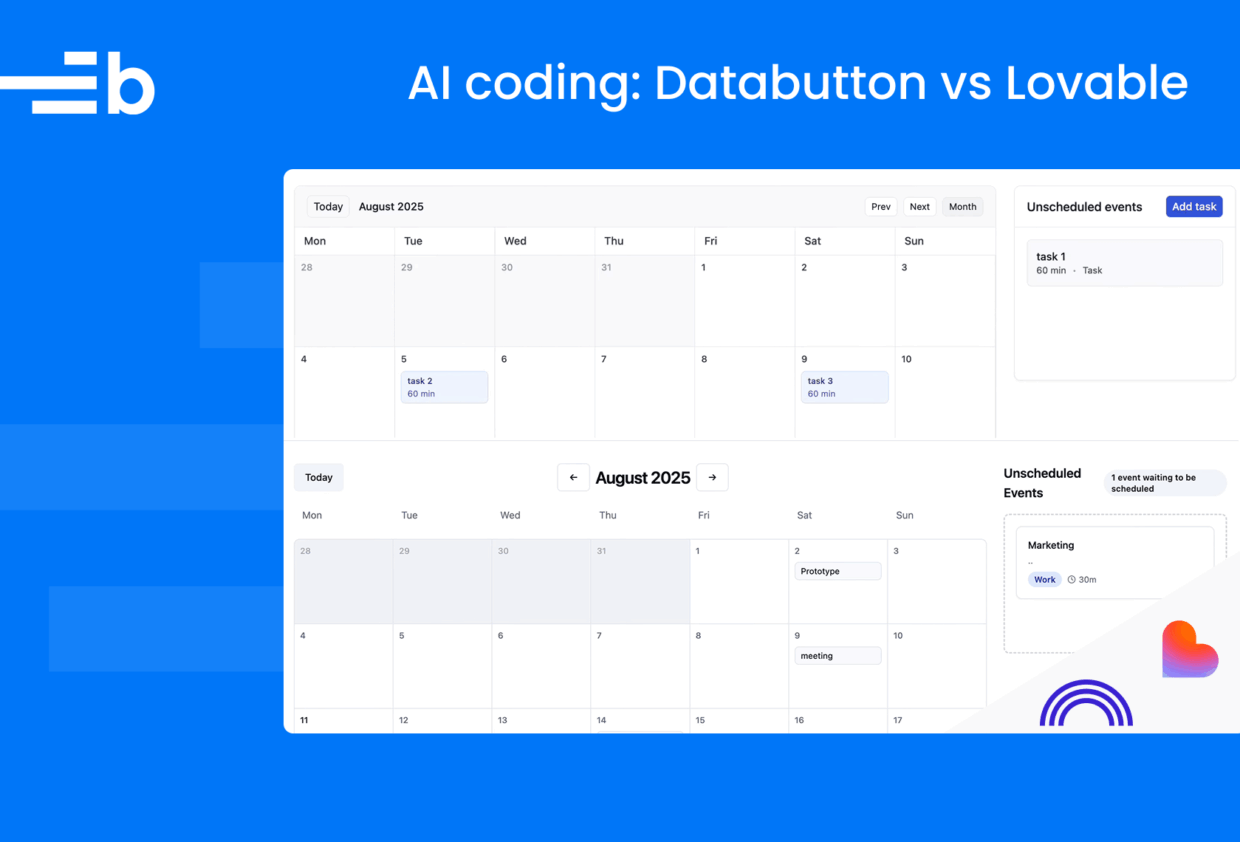
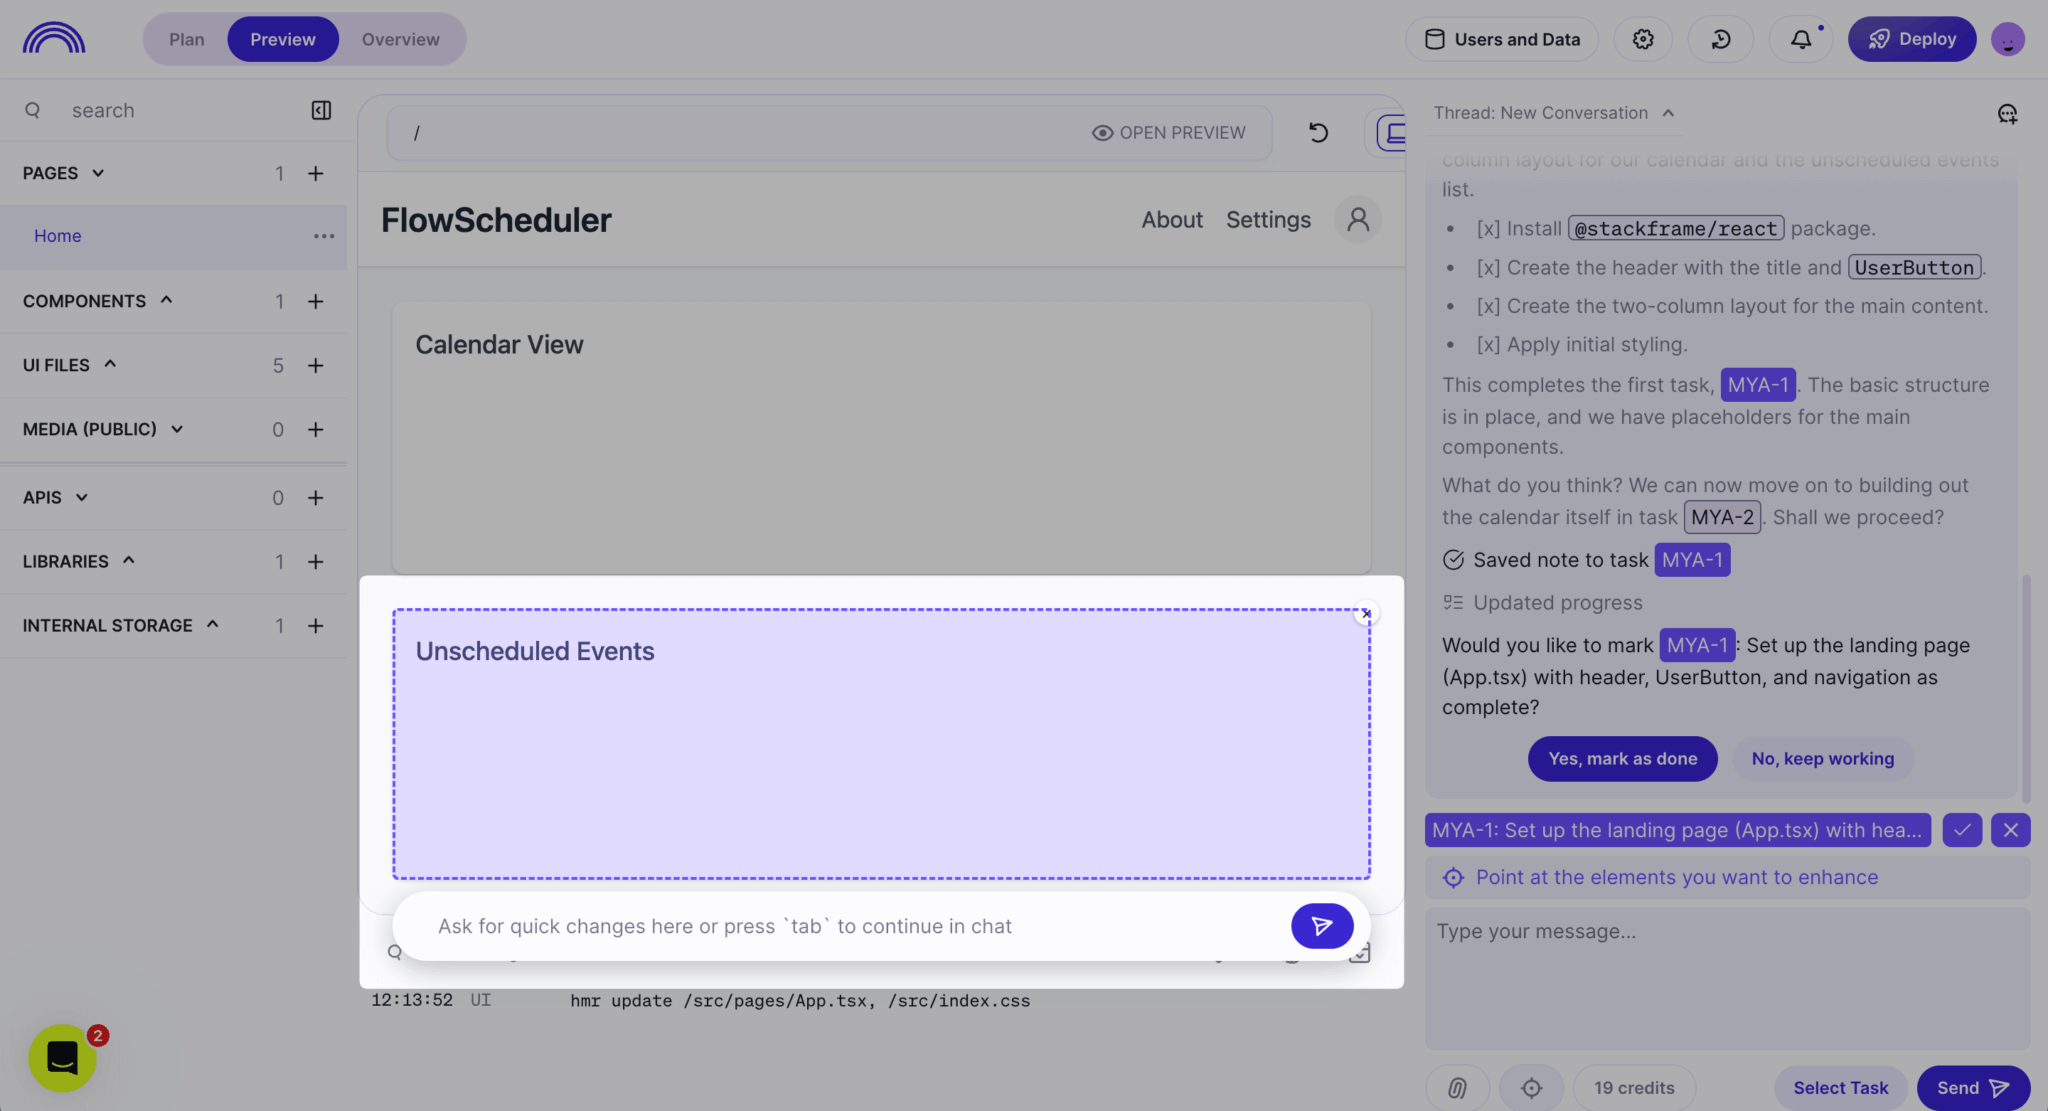
After some additional prompting, we created a calendar and grid with drag-and-drop functionality:
Creating the app used all 20 free credits, and we purchased extra credits.
Features
Databutton has a comprehensive list of features for creating apps, as well as for planning and analysis. Out-of-the-box functionality includes planning, database setup, authentication, and one-click deployment. Its features provide a structured workflow for planning and creating apps, as well as human support options for non-technical users.
The features include:
- High-level planning: You provide a brief, specs, and inspiration, then Databutton creates a plan broken down into editable tasks. The agent can create, edit, delete, mark as complete, and reorder tasks during development.
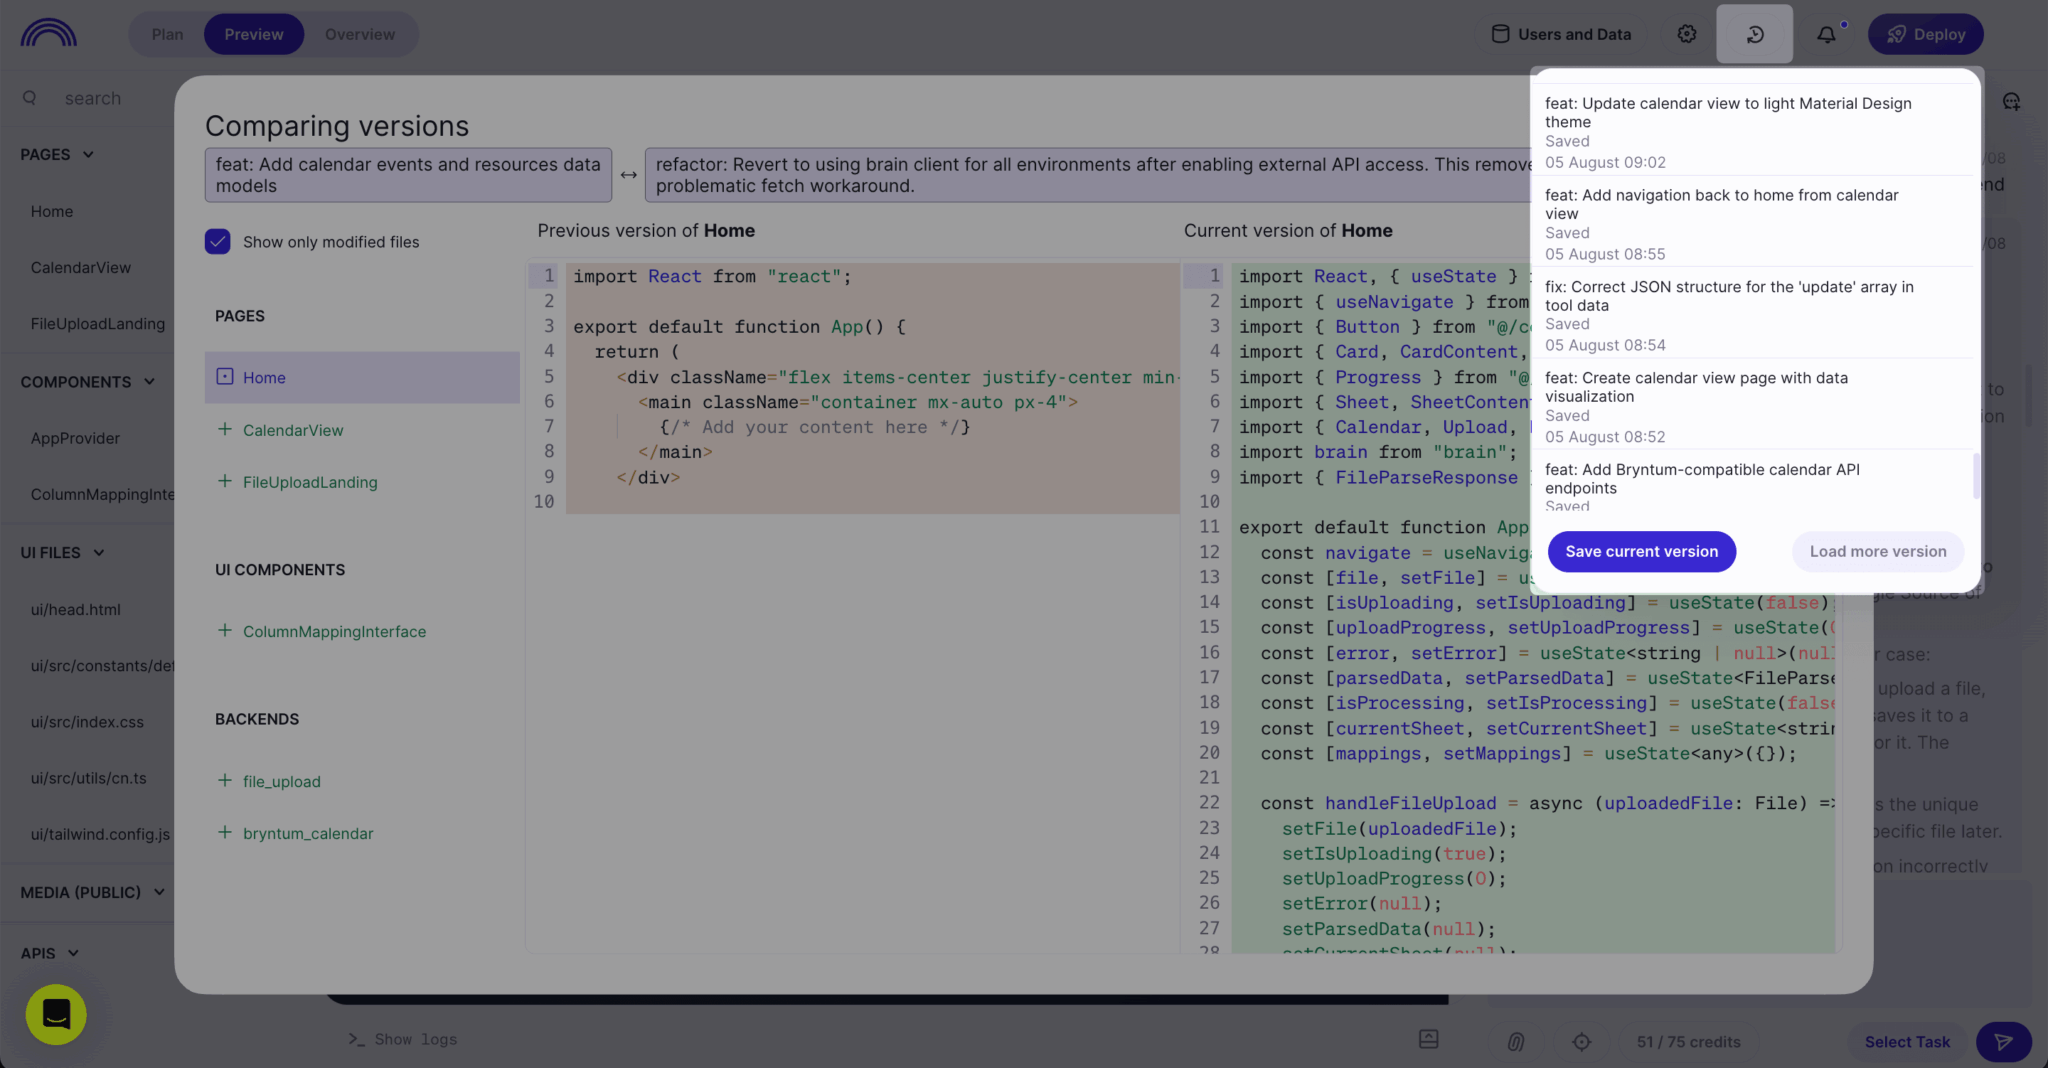
- History and versioning: You can revert changes to the app by clicking the Restore button at the top right of the page. Versioning occurs automatically. You can also view a diff of the changes between versions:
- API testing: All API routes are available to the AI agent as tools. You can ask the agent to test an endpoint by providing data in the chat or by asking the agent to generate sample data.
- Log access for debugging: The agent has direct access to logs, which is useful for debugging.
- Collaboration mode: You can invite collaborators to your app.
- Image analysis: You can attach images to the chat for extra context.
- Python scripts: The agent can run Python scripts in the chat. You can use this feature to run SQL queries.
- Secrets storage: You can store secrets, such as an OpenAI API key, from the chat.
- MCP server: You can enable MCP in your Databutton app to convert your APIs into an MCP server when you deploy your app. You can use the same API for your app UI and as a tool in your MCP.
- Built-in database and auth: You can use the built-in database, authentication, and protected API routes.
- Templates: You can use templates to get started.
- Built-in code editor: You can inspect and modify generated code without leaving the platform.
- One-click deployment: You can deploy to AWS and Google Cloud with one click.
- Component visualization: The Overview tab in the app dashboard lets you visualize how the pages, components, files, and APIs are connected.
- File modification control: You can set files to read-only for agents.
- Extensive human support options: The premium plans include dedicated technical help, including one-on-one coworking sessions and assistance when you need it.
Databutton has an active Discord community with weekly Community Hangouts that include live building, discussions, and troubleshooting sessions. It also has an active YouTube channel with frequent product updates and tutorials. Databutton’s Python backend lets you install Python packages so you can use any database or database service that you like, such as Supabase. The docs have a Supabase integration guide for setting up Supabase authentication.
Pricing
Databutton pricing starts at $20 per month with the Agent + Community plan, which has three options for credit bundles: 75, 200, or 1000. Two credits are used for each compute hour on your deployed app’s backend. Monthly credits do not carry over to the next month. All plans from $50 (200 credits) per month and above support deployment to custom domains.
The Agent + Human support plan is $700 per month and adds a dedicated Slack channel, expert support for unblocking progress, and early access to new features.
The Agent + Human advisor plan starts from $4,000 per month and adds CTO-level planning, feature delivery by a human expert, and weekly meetings and collaboration.
Pros
Databutton provides a structured workflow for planning and creating apps, and offers human support plans for non-technical users. The advantages of using Databutton include:
- Structured planning with tasks in a planning panel
- The built-in database and authentication
- One-click deployment
- A flexible, editable Python backend with FastAPI and the ability to install Python packages
- Human-in-the-loop options for individual support that are especially useful for non-technical users
Cons
Because Databutton is backend-focused, the opinionated workflow can feel slower for frontend-centric applications, especially for exploratory work. You can’t install npm packages on the frontend. You can only choose from a list of pre-installed packages, which you can view in the ui/package.json file or by prompting the agent.
The human support plans are expensive. Databutton allows you to export code files and has instructions for moving off the platform. However, the export process can be buggy, and you may encounter issues installing dependencies locally due to patched npm packages.
Example apps
Here are some example apps built with Databutton:
- PitchMastr CRM: An AI-powered tool for streamlining startup fundraising
- PrivacAI: An app that helps you understand documents, such as a terms of service agreements, by summarizing the information and providing personalized recommendations
- Fireguard Pro: A field service automation platform for fire and safety inspections
- Government Innovation Hub Platform: A platform offering digital knowledge sharing for economic development
Lovable
Lovable, like Databutton, provides a web UI for creating apps with AI. You provide prompts to plan, create, add features to, and debug your app. You can use it as a no-code tool that creates apps for you or as an AI agent that helps you build your app quickly. Like Databutton, it has a code editor that lets you edit the codebase. You can easily move your code off the platform to GitHub. The GitHub integration lets you fit it into typical web development workflows. Lovable provides guides for other integrations, such as Stripe, Resend, and Clerk.
Although Lovable is frontend-focused, its Supabase connector allows you to create full-stack apps.
Getting started
To get started, open the sign-up page and log in with your email address, Google account, or GitHub account. After signing in, you fill out a multi-step form to create an app and set your preferences:
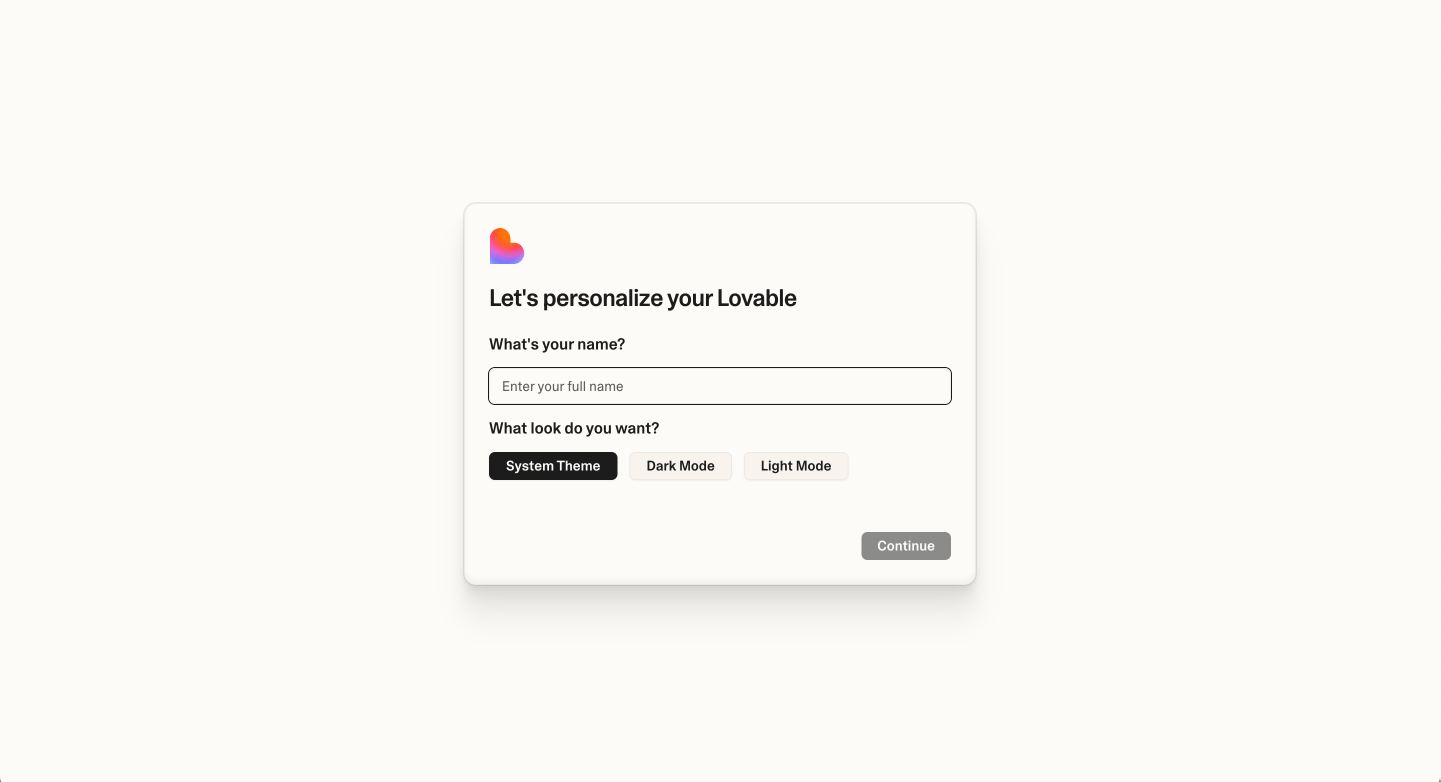
Describe what you want to build, and optionally, attach a reference or Figma link. You can use the same prompt we used for the example Databutton app:
A calendar app that has a grid of unscheduled events to the right of it. Unscheduled events can be dragged onto the calendar. Scheduled events can be dragged onto the grid.Attach a screenshot of the Bryntum Calendar drag-and-drop demo:

You can also make your first prompt from the input field on Lovable’s homepage:
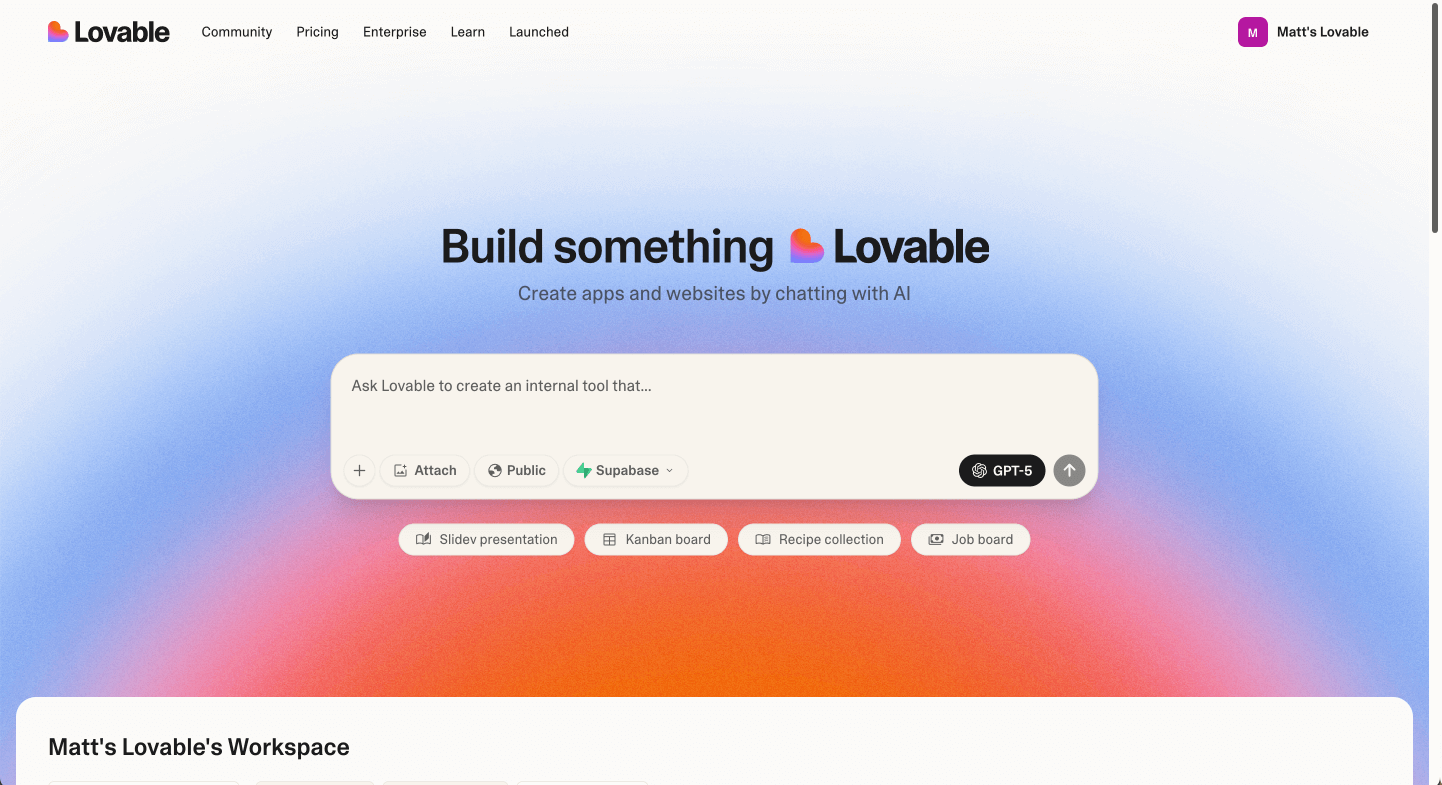
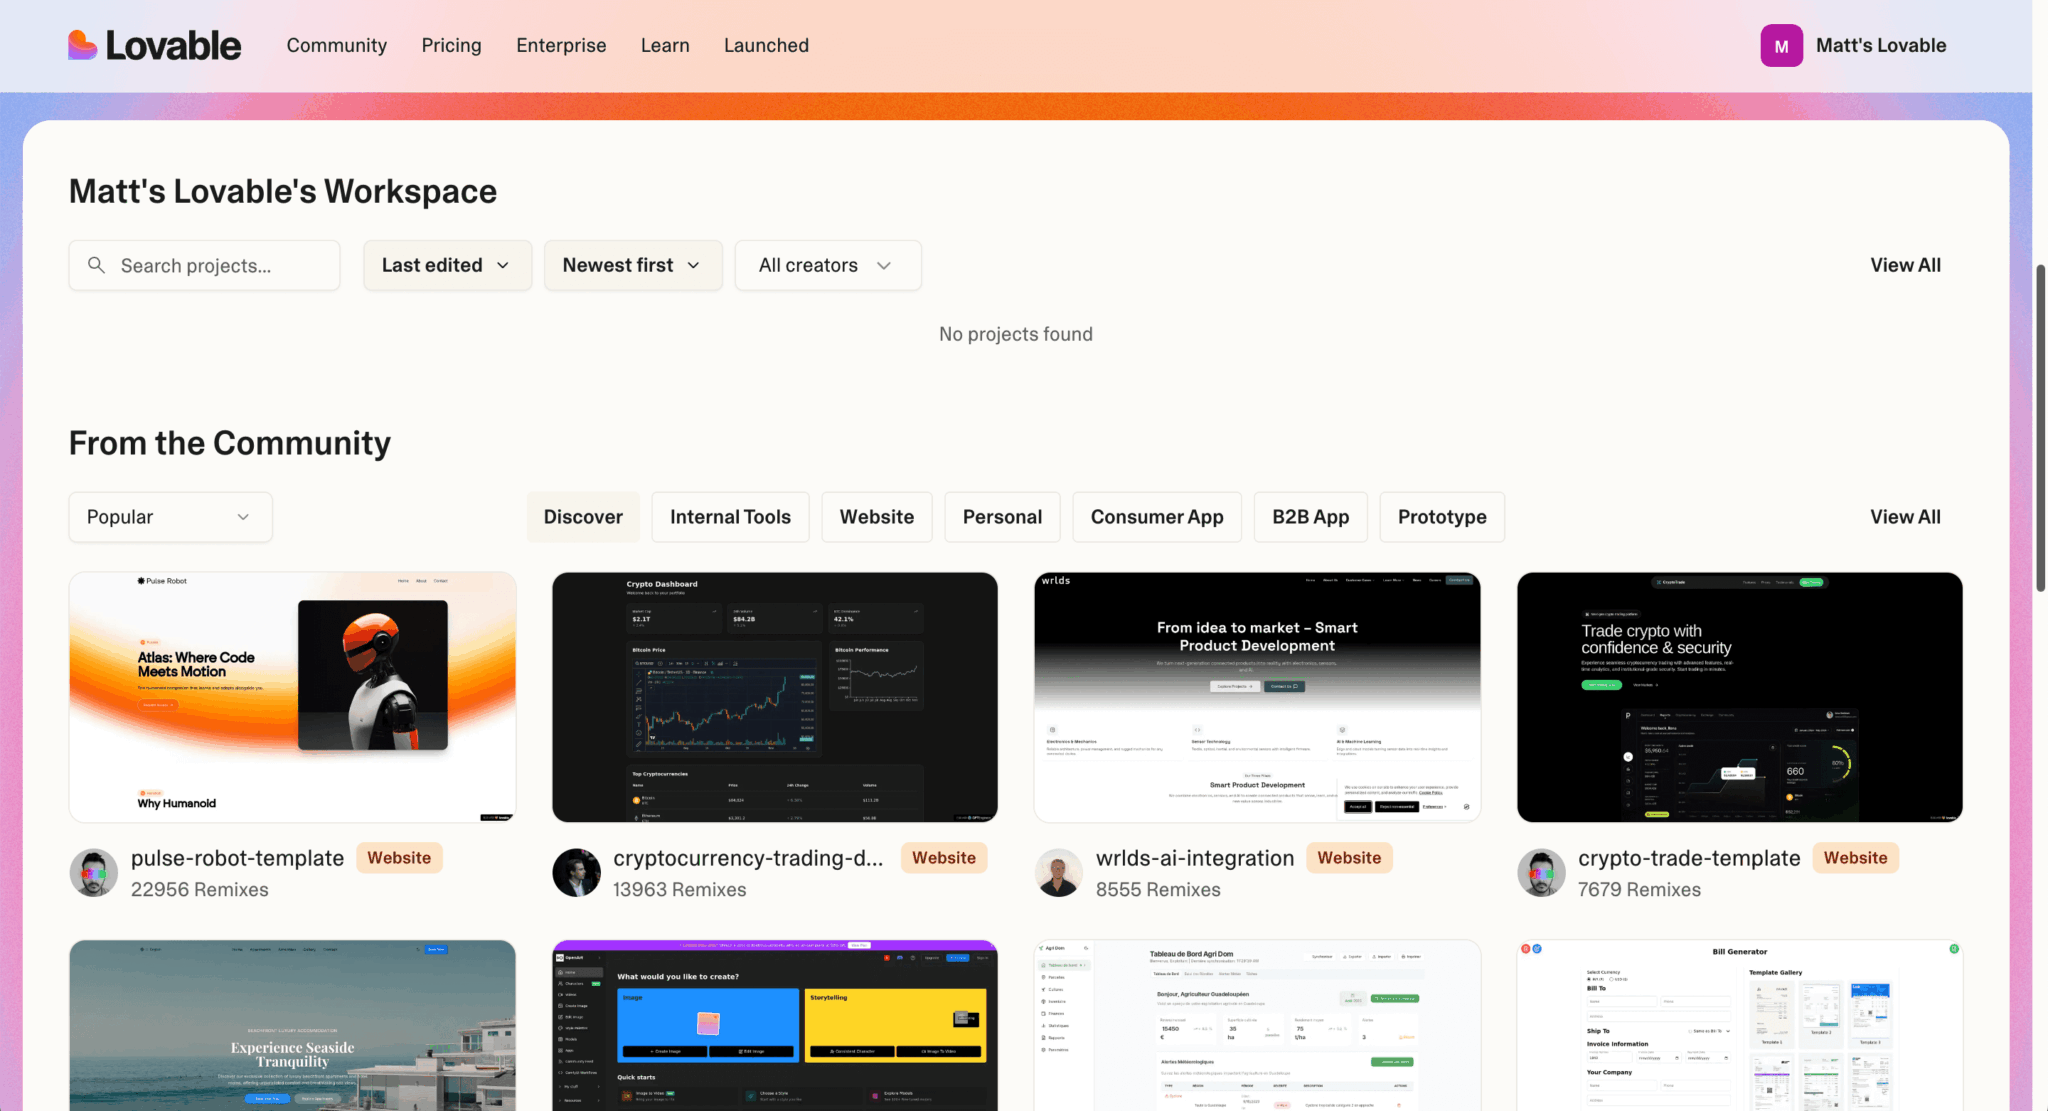
Below the input, you can view the projects in your Workspace. The From the Community section below your workspace projects shows projects created by the Lovable community. You can preview them and use one as the starting point for your own project.
Projects that you create are public by default. You can make them private by upgrading to a paid plan.
Once you’ve made your first prompt, Lovable creates a project:
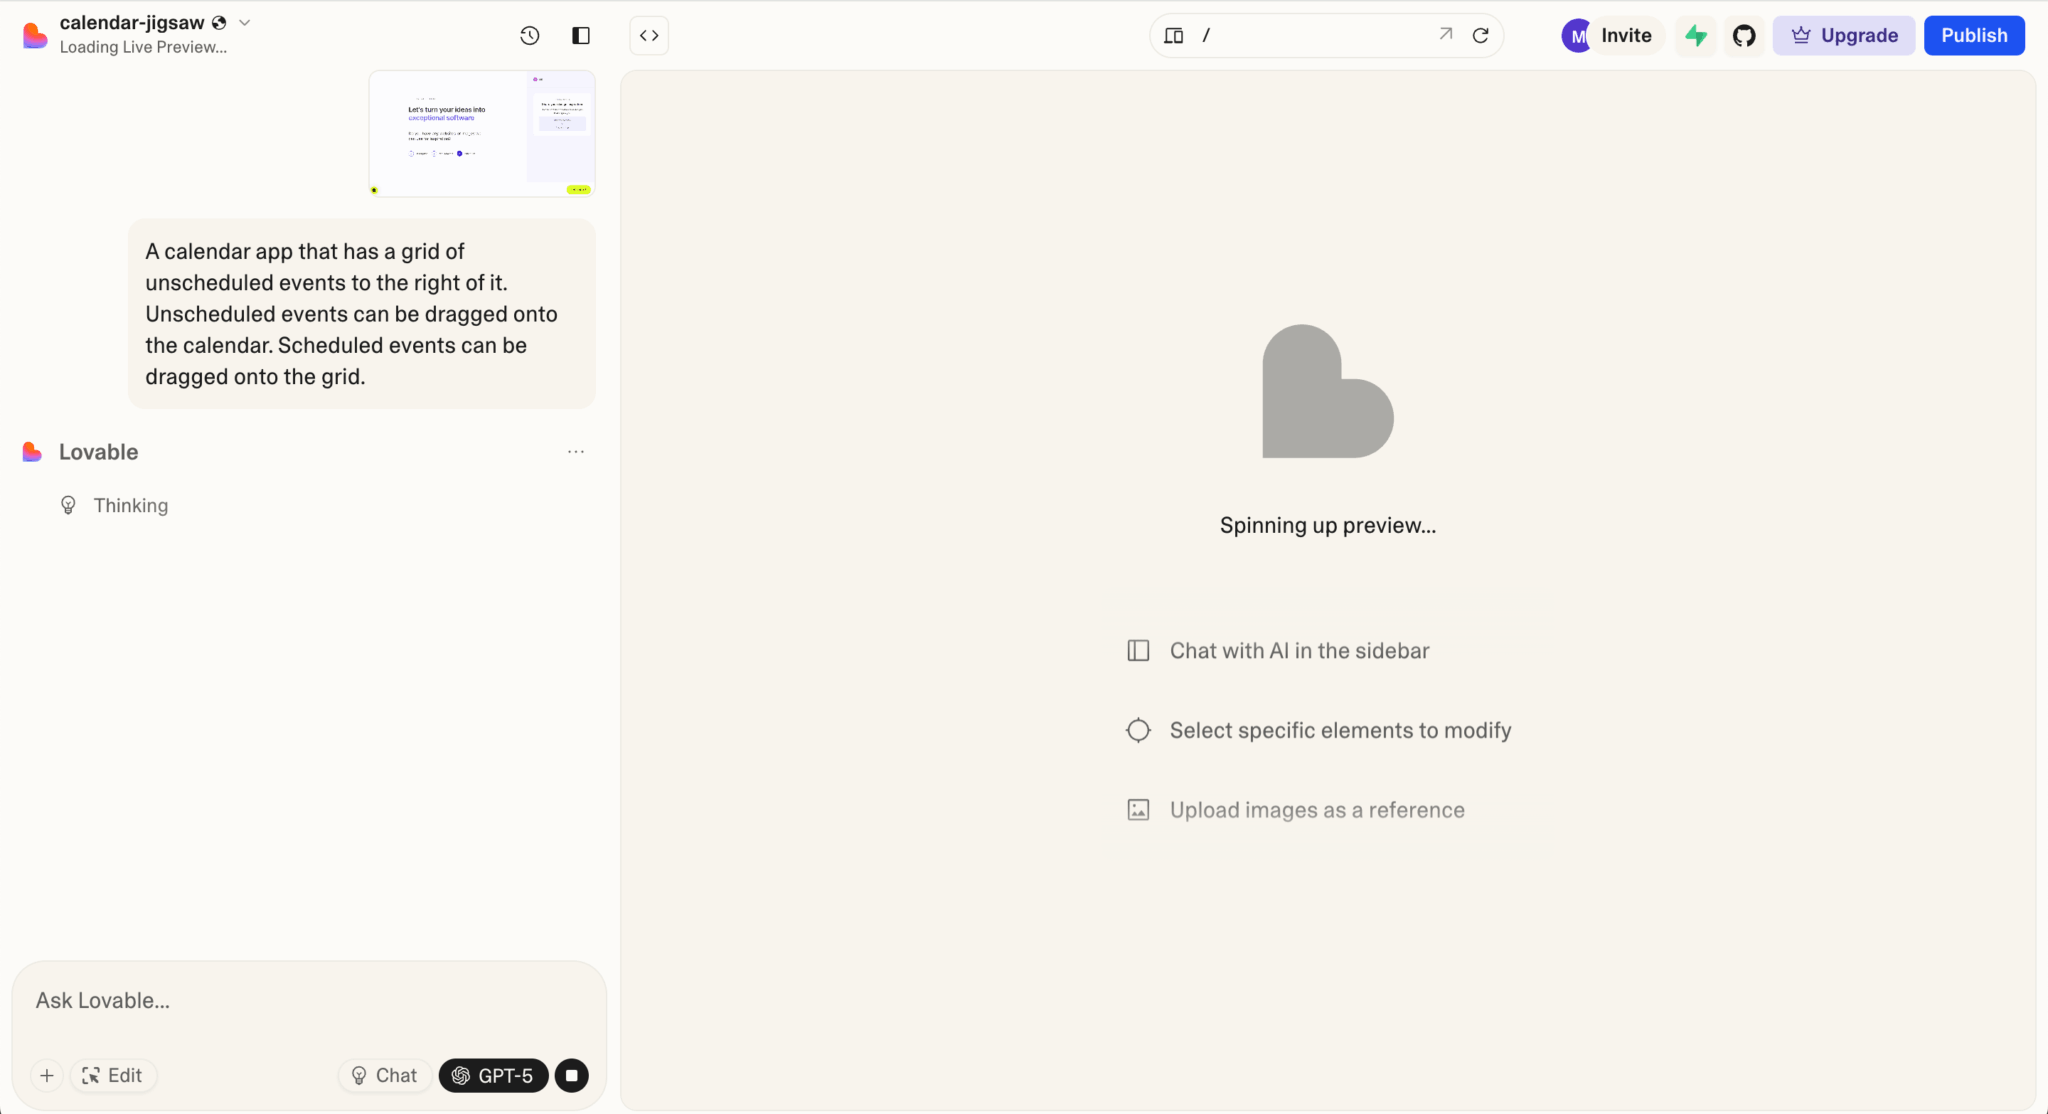
The project dashboard is similar to Databutton’s. You can edit the code, preview the app, and view the change history. There’s no panel showing tasks and no component visualization like in Databutton.
Using Lovable, we created a working frontend of the calendar and grid with drag-and-drop functionality:
We used GPT-5, which was released during the writing of this article, to create the app. Both Lovable and Databutton had early access to GPT-5.
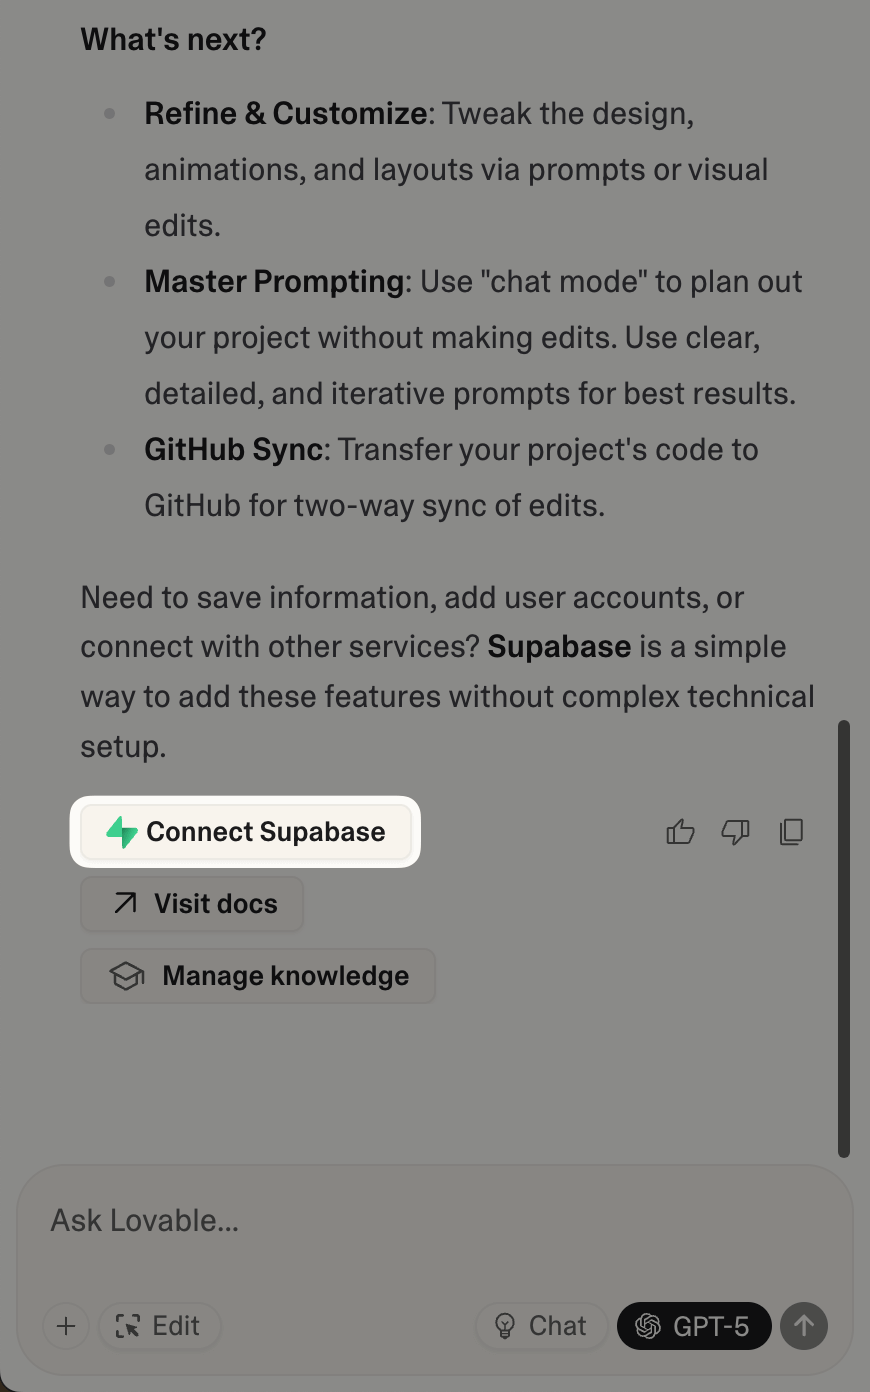
To persist the data, use the Supabase integration that lets you connect to a Supabase project. You can do this by prompting the agent to connect to Supabase. This was suggested in the chat panel, which provided a list of suggestions for what to do next.
Be sure to check out the Lovable Best Practices for tips on making the most of the platform.
Click the <> button in the top toolbar to open the code editor. The code editor is read-only using the free plan. You need to upgrade to a paid plan to edit the code in the code editor.
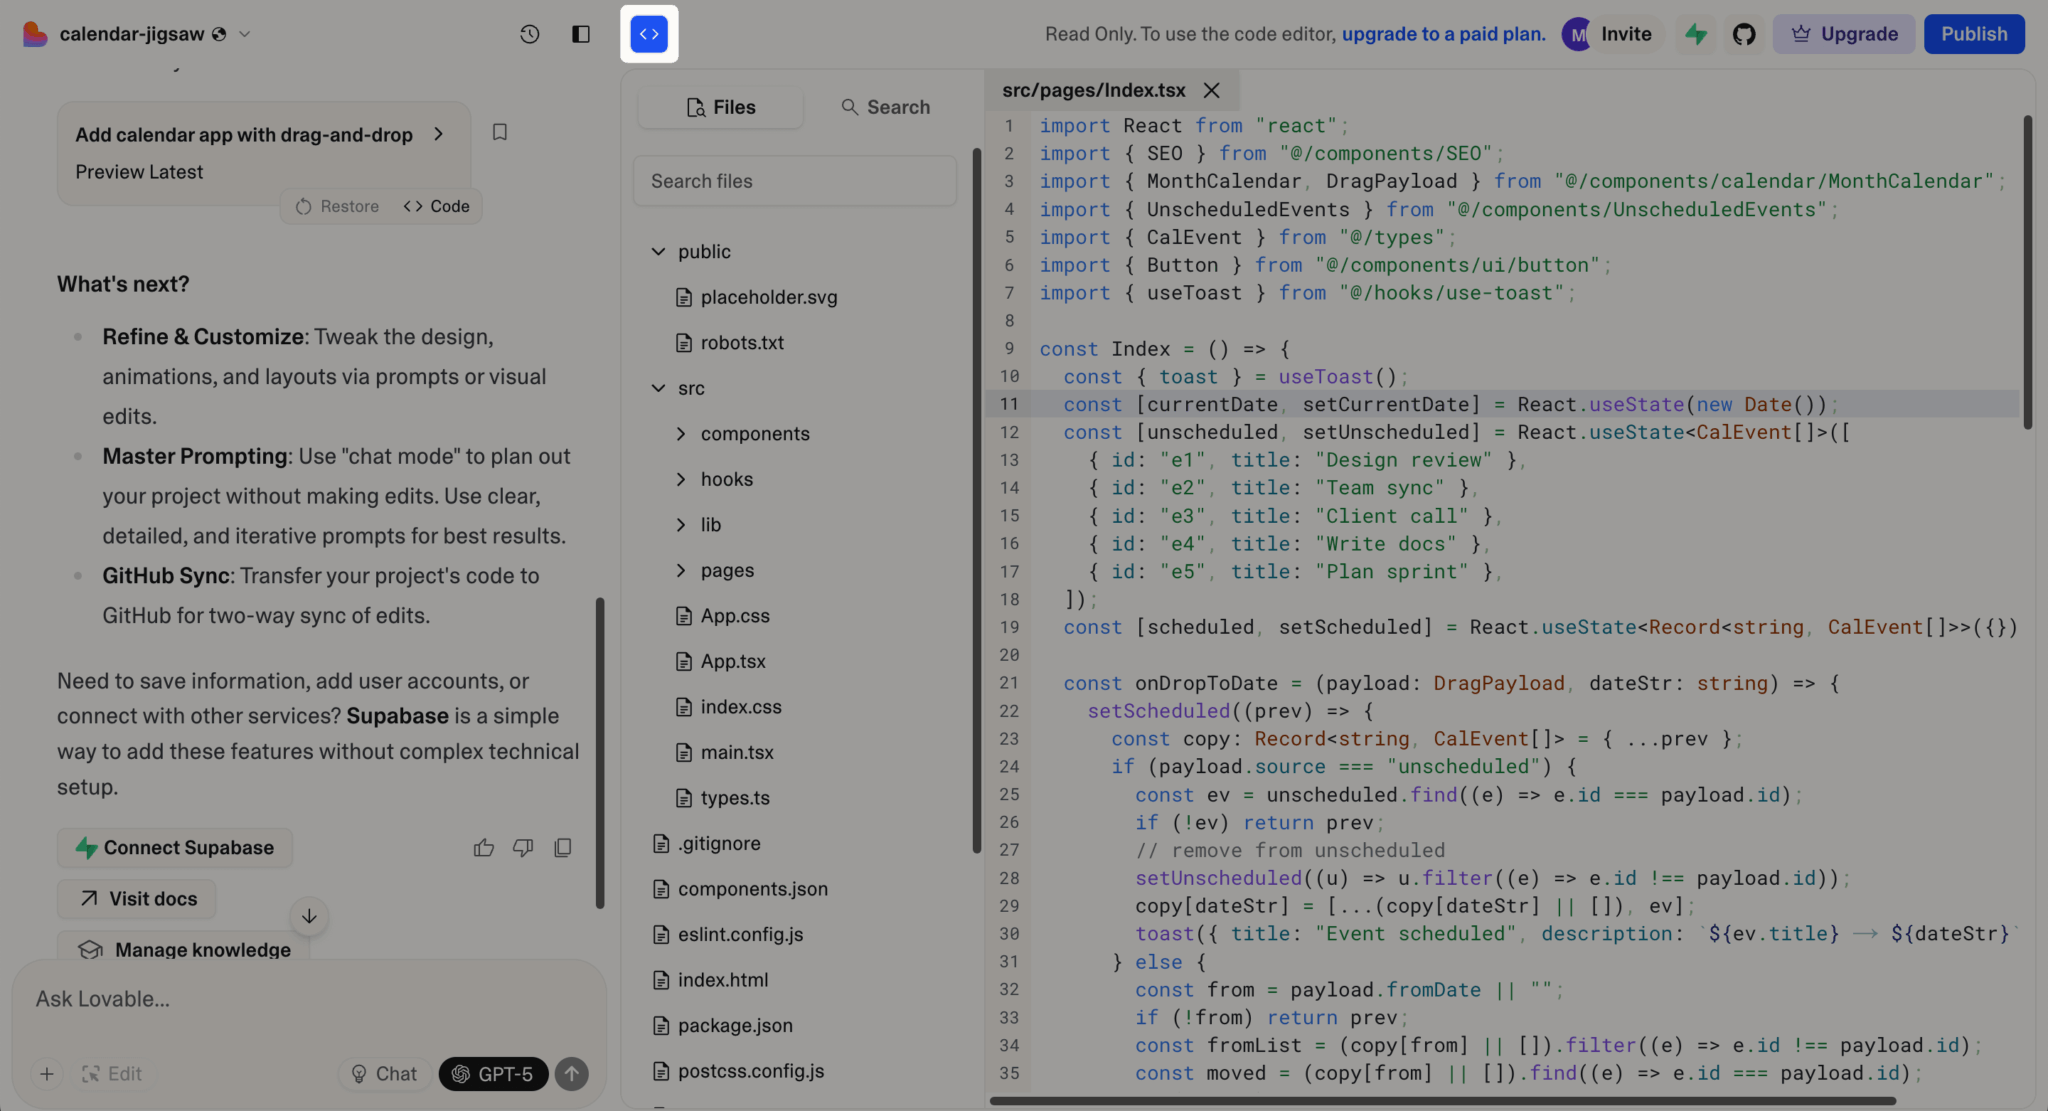
You can export the code to GitHub and continue development outside of Lovable if needed.
The Project Settings, which can be opened at the top left of the page, let you add custom project instructions, manage deployment, copy the project, add analytics, and more.
You can also set up the Supabase integration this way:

Create a Supabase project and then connect it to your Lovable project in the Supabase tab in the Project Settings:
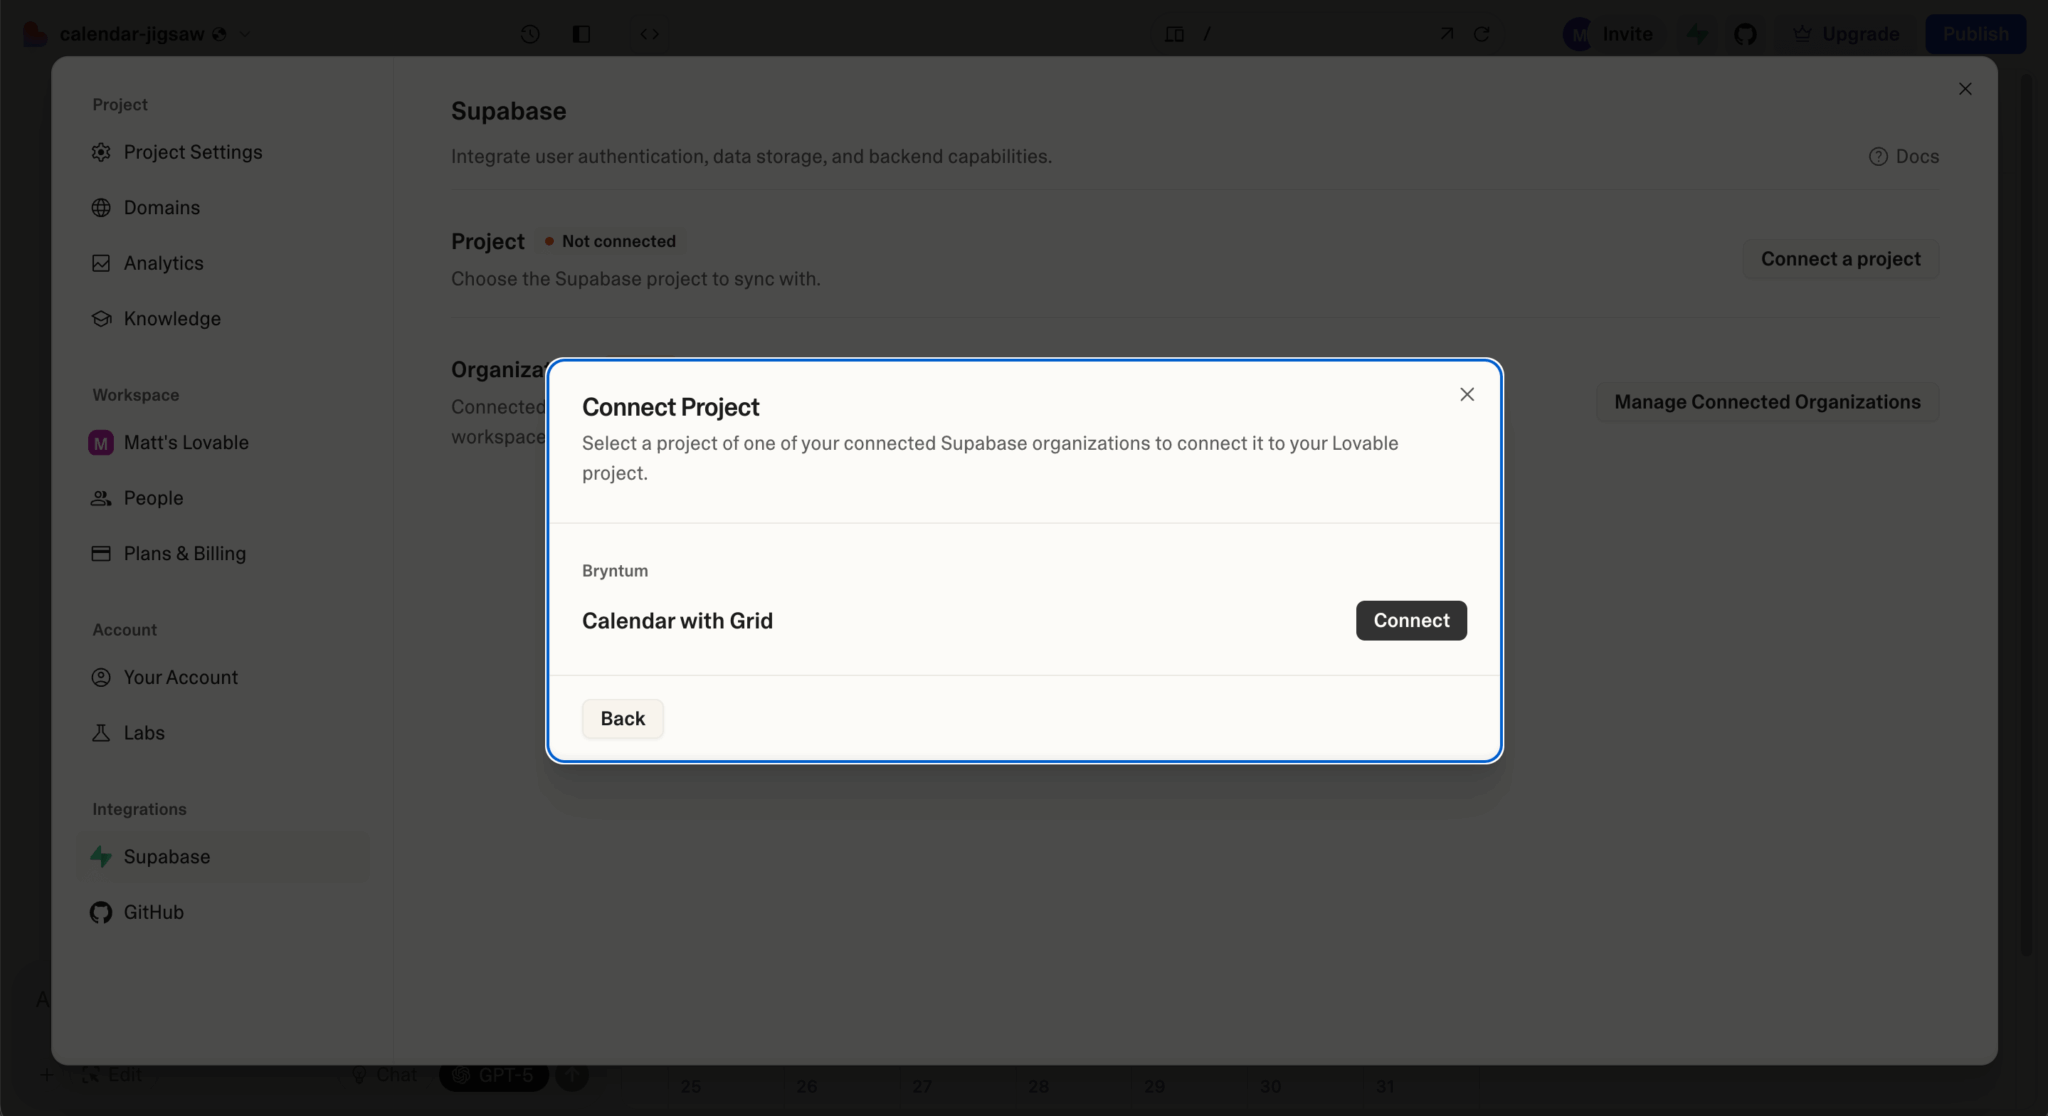
Lovable guides you through the process of connecting to Supabase using the chat. Supabase is a Postgres database development platform. It can provide authentication, APIs, edge functions, real-time subscriptions, and vector embeddings for your app.
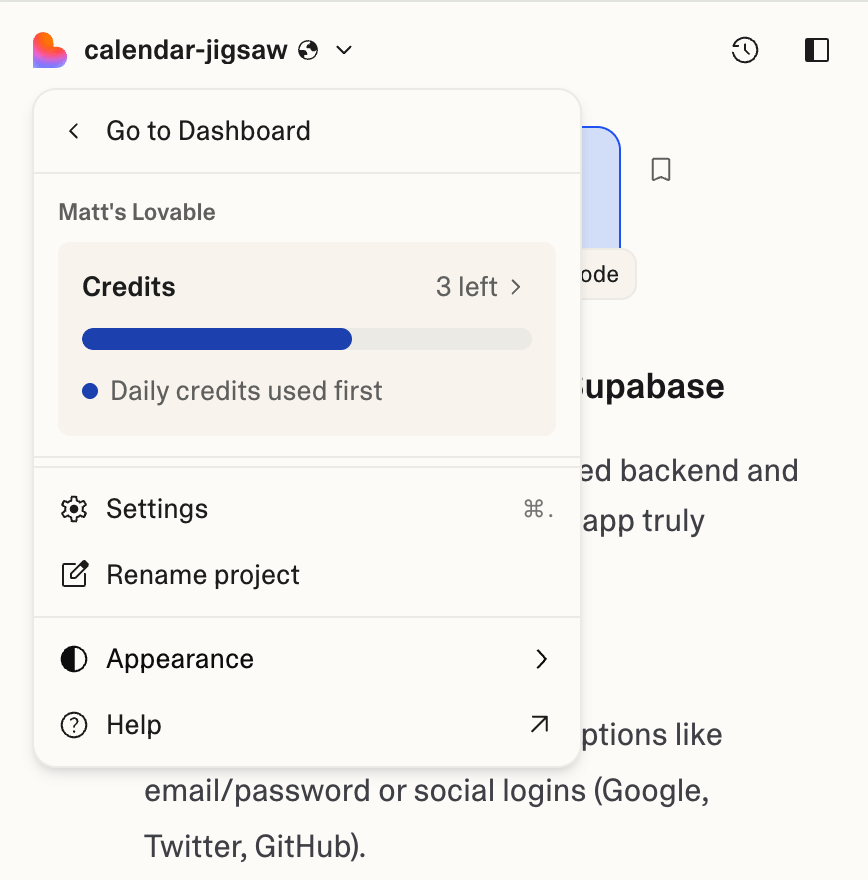
Lovable’s free tier gives you five daily credits (up to 30 per month), public projects, and unlimited collaborators. Sending prompts deducts credits. The cost of a message depends on its complexity. A simple prompt such as, “Make the button blue,” may use half a credit, while a complex prompt may take up two credits. You can view your remaining credits in the menu at the top left of the page:
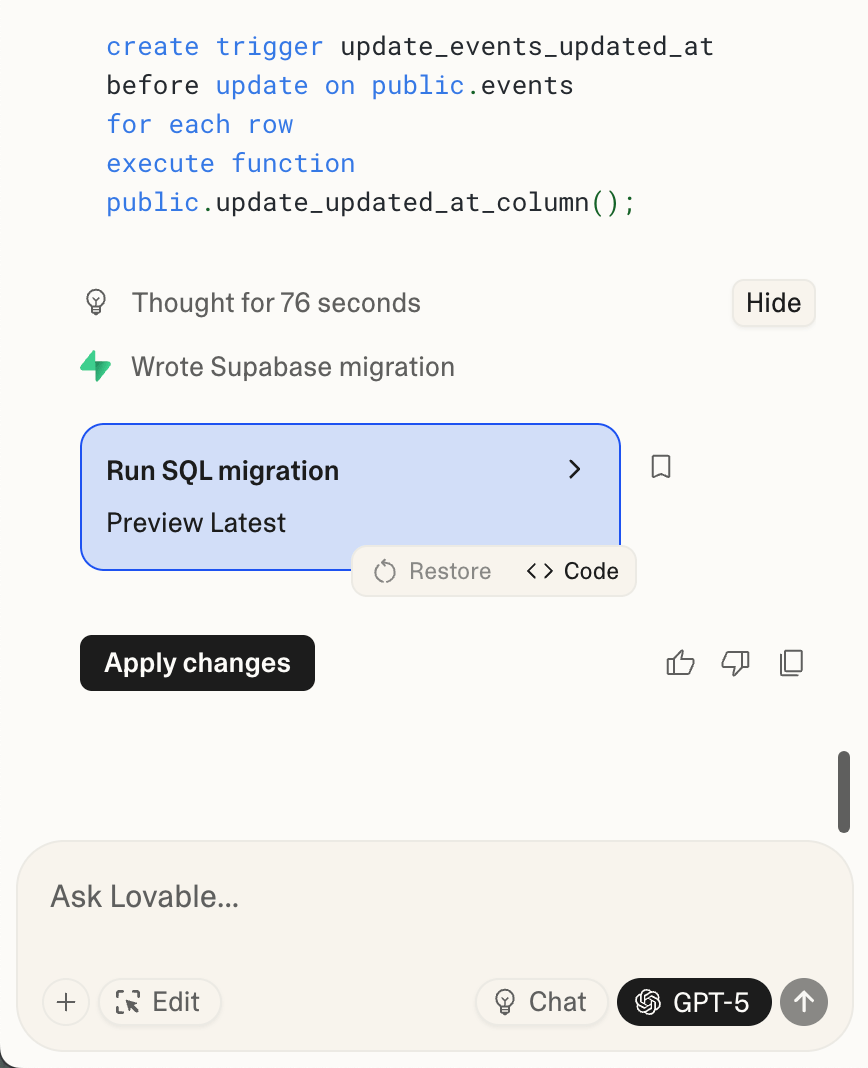
When making prompts to update the database, Lovable runs SQL queries to update the database.
After three days’ worth of free credits, we created a working calendar and grid with drag-and-drop functionality:
Features
Lovable’s features focus on frontend development and integrations. Its Supabase integration adds a backend with a database, APIs, and authentication.
Its extensive list of features includes:
- Templates: You can start from popular templates and explore a public gallery for inspiration.
- Chat mode: You can plan your project without making changes to the code.
- History and versioning: You can view your project’s history and restore previous versions.
- Collaboration: You can invite collaborators to your project.
- Visual edits: Lovable lets you edit the UI with a Figma-like editing experience.
- Supabase integration: The integration gives your app a backend with a database, APIs, authentication, and more.
- Secrets storage: You can store your API keys using Supabase secrets.
- Figma integration: You can export Figma designs directly to Lovable using the Builder.io native integration.
- npm packages: You can install npm packages on the frontend to extend the functionality of your app.
- Deployment options: You can deploy on the Lovable platform to get a
lovable.appdomain. The GitHub integration lets you easily deploy to popular hosting providers such as Netlify. - Business features: These include Single Sign-On (SSO), data opt-out, personal projects, and design templates.
- Analytics: You can view analytics for your project.
- Integrations: Lovable’s integrations include Stripe, Resend, Clerk, and more.
- Security: Lovable has automatic API key detection in the chat, security scanning using the Supabase security advisor, and more.
Pricing
The Free plan includes five daily credits (up to 30 per month), public projects, and unlimited collaborators.
The Pro plan is $25 per month. It gives you 100 monthly credits plus five daily credits (up to 150 per month), private projects, user roles and permissions, custom domains, and credit rollovers.
The Business plan starts at $50 per month and adds SSO, the option to opt out of data training, and design templates.
Enterprise plans offer flexible billing with dedicated support, onboarding, custom integrations, group-based access control, and custom design systems.
Lovable also provides a list of partners for hire if you want to hire an expert to help you with your project.
Pros
Lovable is a good fit for frontend-centric apps. Its Git integration makes it easy to move off the platform and customize locally. Its rich template ecosystem provides many potential starting points for your own projects. Some of the advantages of using Lovable include:
- A Supabase integration for creating a backend with a database, APIs, authentication, and more
- A Figma integration for exporting Figma designs directly to Lovable
- Deployment options such as in-platform deployment and Git-based CI/CD workflows
- Project analytics
- Business features that include SSO, data opt-out, personal projects, and design templates
Cons
Lovable’s planning features, which include a chat mode, are not as detailed as Databutton’s. Its frontend-focused approach with a backend as a service (Supabase) may not be a good fit for apps that require more backend customization.
Example apps
You can find case studies of example apps built with Lovable on the Lovable Blog. Example projects include:
- Movipods: A collection of AI-powered tools and services for movie production
- Magican: An infinite canvas platform for collaborative storytelling and project planning with advanced AI capabilities
- The Backchannel: A job search platform
Comparison
Based on the example calendar and grid drag-and-drop app we created in each Getting started section, Lovable is the best AI coding platform. Lovable produced the best app using the free tier, while Databutton required credit purchases to complete the app. The Lovable app had a more sophisticated UI – dragging and dropping events between the calendar and grid did not cause the whole list or calendar to reload. It also took less time to create the Lovable app. There were more server errors with Databutton, which required more prompting to fix. This is likely because Databutton has a more complex and flexible backend, which means there are more ways it can fail.
Both platforms are good for rapidly creating working prototypes. Databutton excels at structured planning and backend-heavy applications with more focus on human support, while Lovable focuses on rapid frontend development and uses Supabase for the backend.
Below is a table comparing some of the features of the different platforms:
| Databutton | Lovable | |
|---|---|---|
| Target user | Non-technical users, startups needing planning support and human guidance | Users building frontend-focused apps and teams using modern development workflows |
| Pricing | From $20 per month to thousands of dollars per month | From $25 per month to thousands of dollars per month |
| Free tier | 20 free credits | 5 daily credits (up to 30 monthly) |
| Frontend stack | React + TypeScript + Vite + Tailwind CSS + shadcn/ui + set list of npm packages | React + TypeScript + Vite + Tailwind CSS + shadcn/ui |
| Backend stack | Python + FastAPI (you can install custom packages) | Supabase integration (Postgres + APIs + Auth + more) |
| Planning features | Structured task planning and component visualization | Chat mode for planning |
| Code control | Built-in editor, export of code files (had issues installing dependencies locally) | GitHub integration makes moving off the platform easy |
| Database & auth | Built-in Postgres database and authentication (automatic) | Supabase integration required |
| Deployment | One-click to AWS and Google Cloud | In-platform deploy or Git-based CI/CD workflows |
| Human support | Premium plans with CTO advisory, dedicated Slack, weekly meetings | Community support, partners for hire |
| AI model access | Early access to the latest models (GPT-5) | Early access to the latest models (GPT-5) |
| Special features | MCP server, version diffs, Python script execution in chat, API auth by default | Figma integration, project analytics, visual editing |
| Best for | SaaS apps, complex backends, non-technical teams, structured workflows | Frontend apps, developer teams, Git workflows |
Based on our comparison, Databutton is the better choice for:
- Non-technical users and teams: The structured task planning, detailed system prompts, and human support options make Databutton more accessible for users without coding experience. APIs are protected by authentication by default, and the database and auth are automatically configured.
- Teams needing guidance and support: Premium plans offer CTO-level planning, dedicated Slack channels, weekly meetings, and human experts to help with issues and delivering features.
- Backend-heavy or Python-centric apps: Databutton’s Python with FastAPI backend allows you to install custom Python packages. This is useful for complex workflows such as data processing, multi-agent orchestration, background jobs, and custom integrations.
Lovable is the better choice for:
- Frontend-centric applications: Lovable lets you install frontend npm packages to extend your app’s functionality.
- Teams using modern development workflows: The GitHub export and Git integration let you move off the platform and use standard development tools and workflows (like VS Code and CI/CD) to build on an MVP created with Lovable.
- Projects needing design integration: The Figma integration and visual editing capabilities make the design-to-code workflow smoother.
Both platforms are under rapid development, and new features are added regularly. Keep an eye on their blogs, YouTube channels, and changelogs for the latest updates. Lovable’s development process is more transparent, with a public changelog and roadmap.
Conclusion
Databutton is the better choice for non-technical users and for Python applications, while Lovable is better for frontend development with modern workflows and design integration.
Try both free tiers to see which workflow suits your team. Remember to always validate AI-generated code: Add tests, run linters, and verify data flows before deploying to production.
And if you’re new to Bryntum, we invite you to check out some examples for the Calendar, Gantt chart, Grid, Scheduler, and Task Board components.