What’s New In Scheduler 4.0
We strive to keep posts updated, but code samples may sometimes be outdated. Humans, see the Bryntum documentation; agents, https://mcp.bryntum.com for the latest info.
We are happy to announce v4.0.0 of Bryntum Scheduler. This major release includes interesting new features, plenty of bug fixes as well as the usual house cleaning and refactoring under the hood. To learn about all the changes, as always please see the change log and we also recommend you to carefully read the upgrade guide to help you update to this version.
Scheduler now extends the Panel class
For convenience, Scheduler’s base class was changed to Panel. This allows it to add top (tbar) and bottom (bbar) toolbars by itself without the need of wrapping it with an additional Panel.
const scheduler = new Scheduler({
     tbar : [
       { text : 'Add new task', onClick : () => { ... } },
       ...
     ],
     ...
});
This can be seen in action in the updated animations demo:

Easier to customize context menus
Naming and customization of the different context menus in Scheduler is now simpler than ever. Each menu is represented by a feature, and the available features are:
Each feature was refactored to be much easier to customize. It is now possible to add new items or modify/remove built in items in a single config, see for example the items config for EventMenu:
const scheduler = new Scheduler({
     features : {
       eventMenu : {
         items : {
           // hide the built in "Delete event" item
           deleteEvent : false,

           // customize the "Edit event" item
           editEvent : {
             text : 'Edit task'
           },

           // add a custom item
           myItem : {
             text : 'My very own menu item',
             icon : 'b-fa b-fa-candy-cane'
           }
         }
       }
     },
     ...
});
This can be seen in action in the updated eventmenu demo:

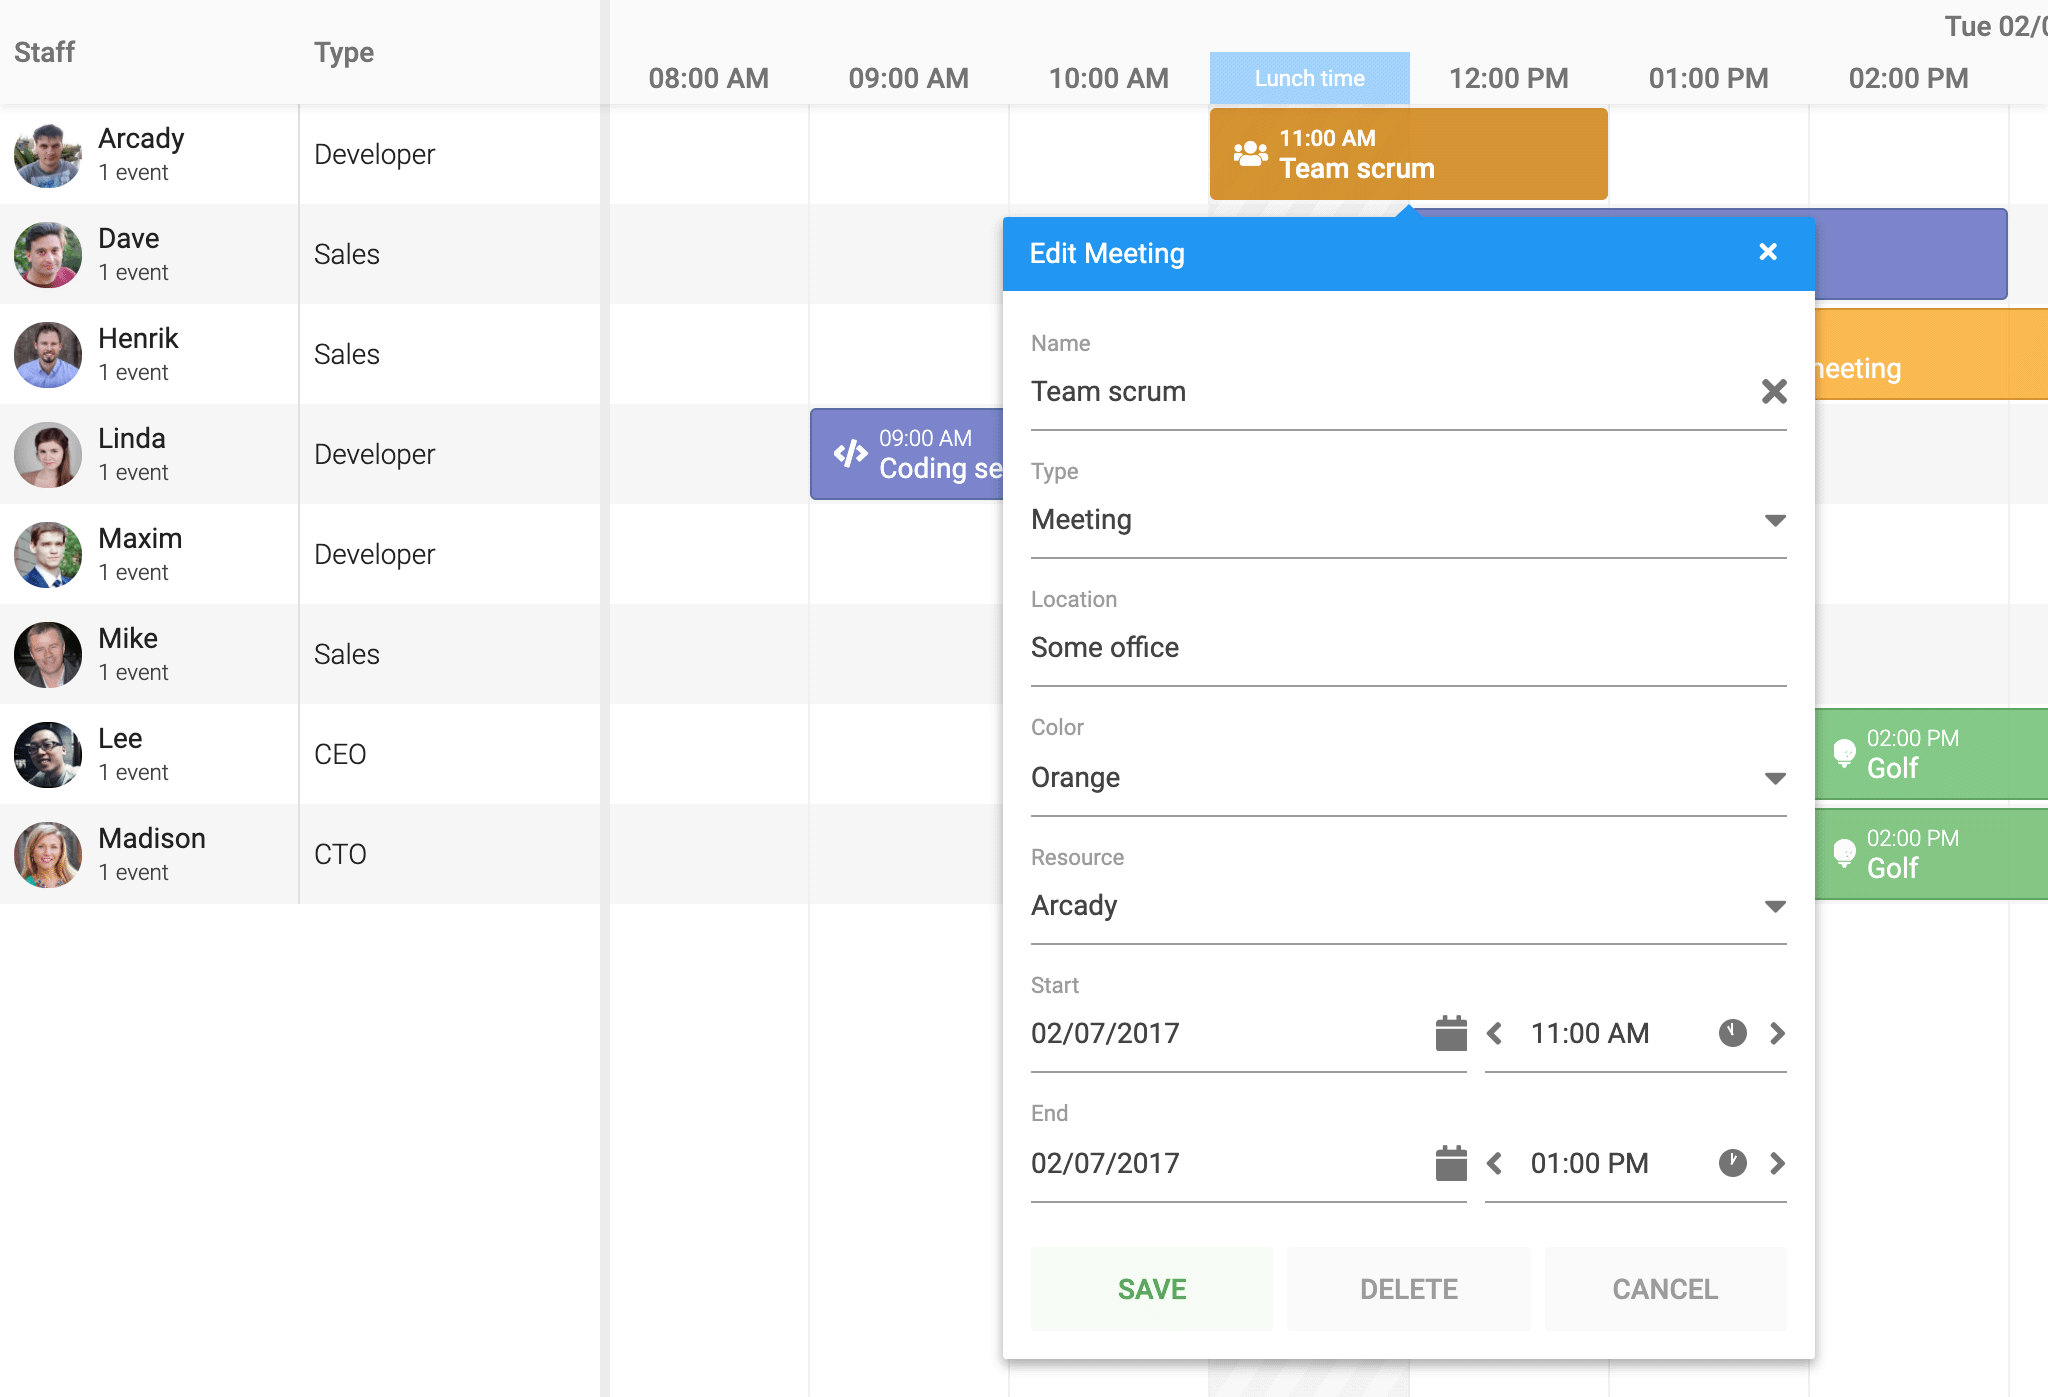
Easier to customize the event editor
Customizing the event editor has been simplified in the same way as for context menus. Fields can be added, modified and removed using the items config:
const scheduler = new Scheduler({
     features : {
       eventEdit : {
         items : {
           // hide the name field
           nameField : false,

           // customize the resource field
           resourceField : {
             text : 'Employee'
           },

           // add a custom field
           locationField : {
             type  : 'text',
             label : 'Location',
             name  : 'location'
           }
         }
       }
     },
     ...
});
Check it out in the updated eventeditor demo:
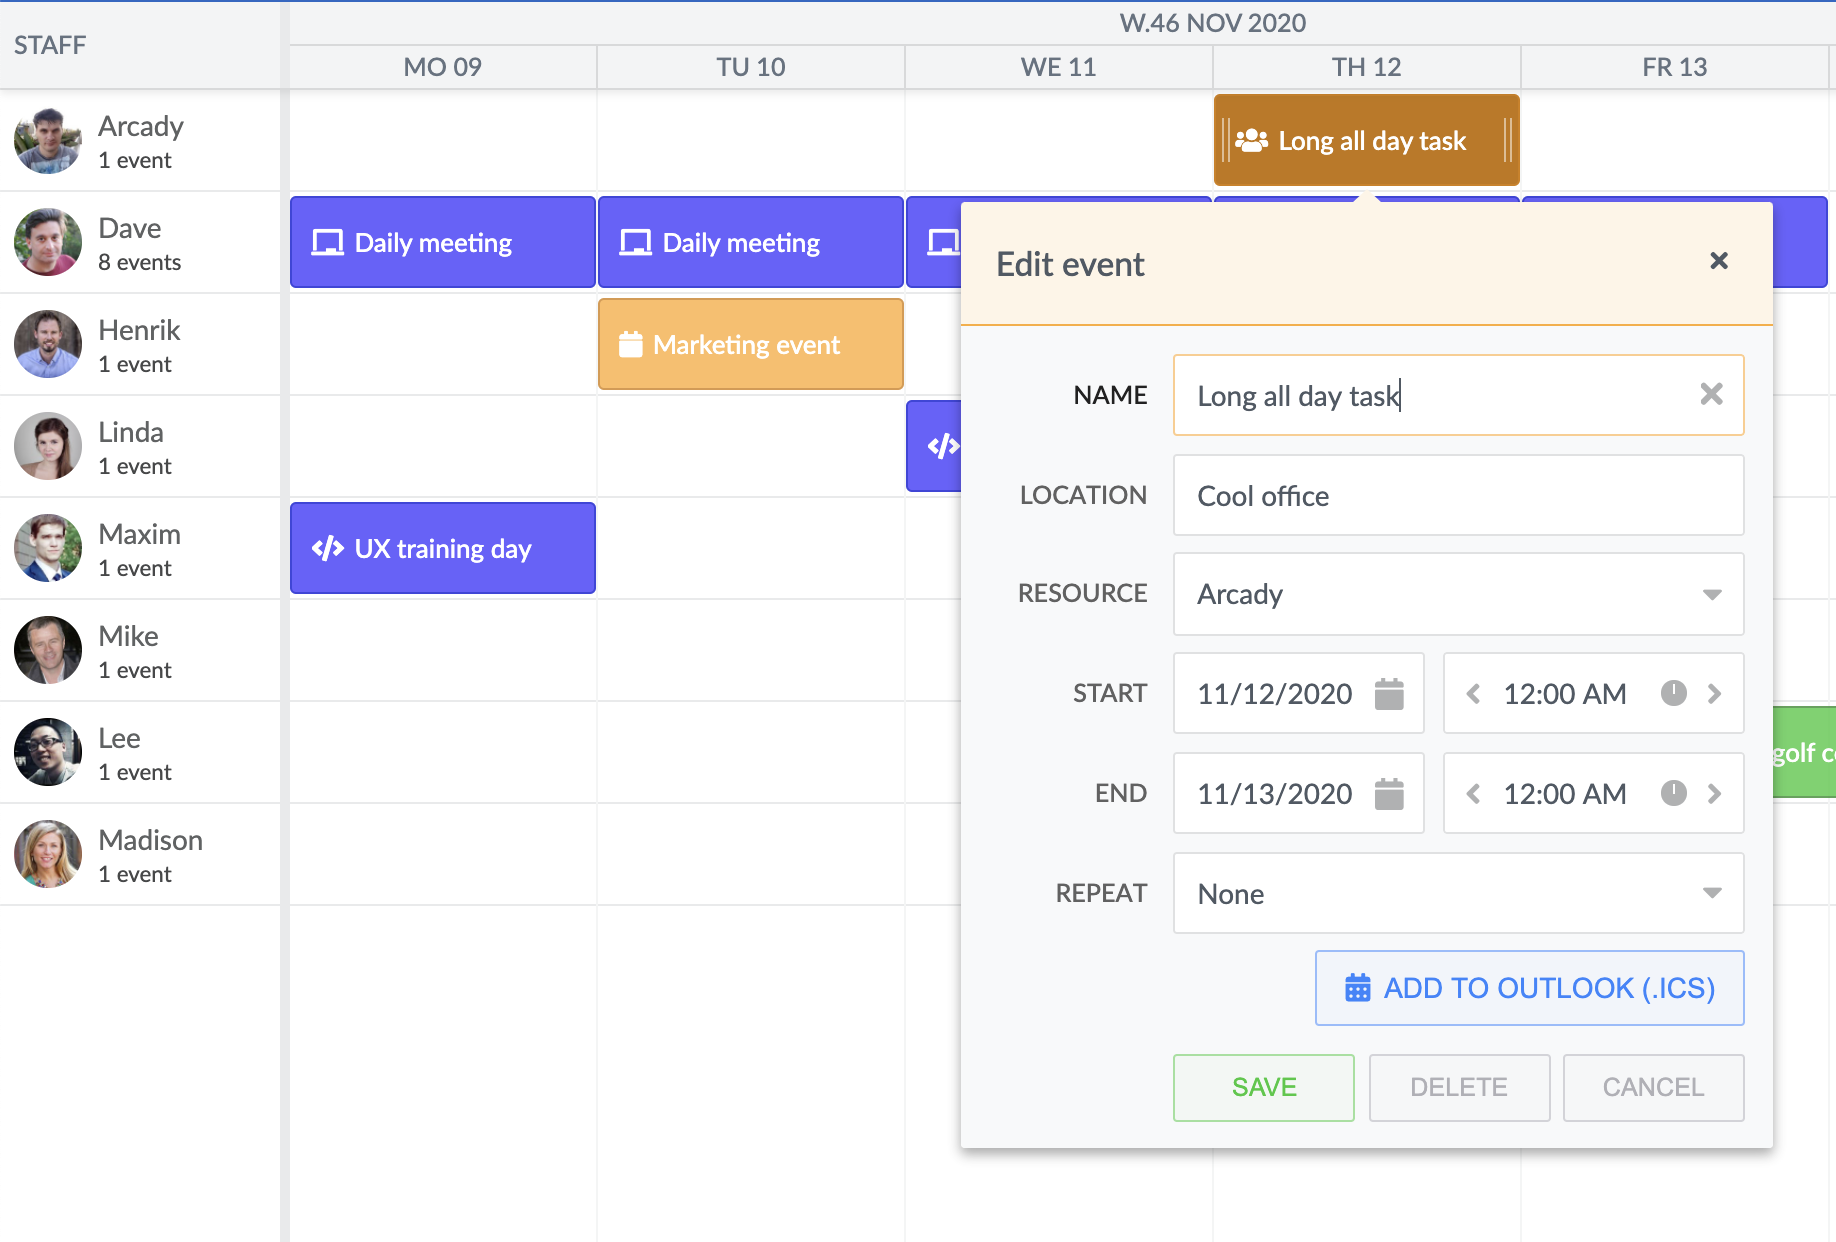
Support for exporting events to iCal
Scheduled events can now be exported to `.ics` format. The downloaded file can be imported into any calendar software supporting the standard, such as Google Calendar, Outlook, Apple Calendar and many more. For more information please see TimeSpan#exportToICS() in the API docs. You can try it out in the new exporttoics demo:
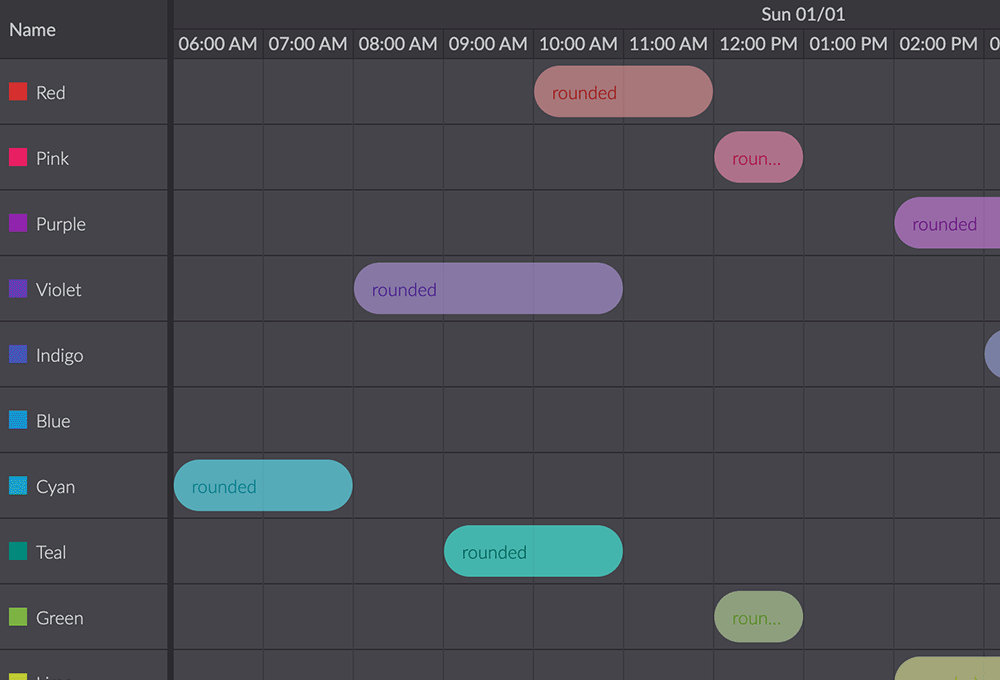
New rounded event style
In this release we are giving you a new predefined rounded event bar style to help you make your schedule look great. Take a look at it in the updated eventstyles demo:

Experimental support for Salesforce Lightning Locker Service
Version 4.0 contains a special bundle to use the Scheduler inside Lightning web components. We have also made a new demo which you can find in the /examples/salesforce folder.
// Scheduler component
export default class Scheduler_component extends LightningElement {
    renderedCallback() {
        if (this.bryntumInitialized) {
            return;
        }
        this.bryntumInitialized = true;

        Promise.all([
            loadScript(this, SCHEDULER + "/scheduler.lwc.module.js"),
            loadStyle(this, SCHEDULER + "/scheduler.stockholm.min.css")
        ]).then(() => {
                this.createScheduler();
            })
            .catch(error => {
                this.dispatchEvent(
                    new ShowToastEvent({
                        title: "Error loading Bryntum Scheduler",
                        message: error,
                        variant: "error"
                    })
                );
            });
    }

    createScheduler() {
        bryntum.scheduler.init(this.template);

        window.scheduler = new bryntum.scheduler.Scheduler({
            features: {
                stripe: true,
                dependencies: true,
                dependencyEdit: {
                    showLagField: false
                },
                timeRanges: true,
                eventDrag: {
                    constrainDragToResource: true
                }
            },
            appendTo: this.template.querySelector('.container'),
            rowHeight: 50,
            barMargin: 8,
            columns: [
                {
                    text: 'Production line',
                    width: 150,
                    field: 'name'
                }
            ],
            startDate: new Date(2017, 11, 1),
            endDate: new Date(2017, 11, 3),
            ...
        });
    }
}
More information about this integration will follow in a later blog post.
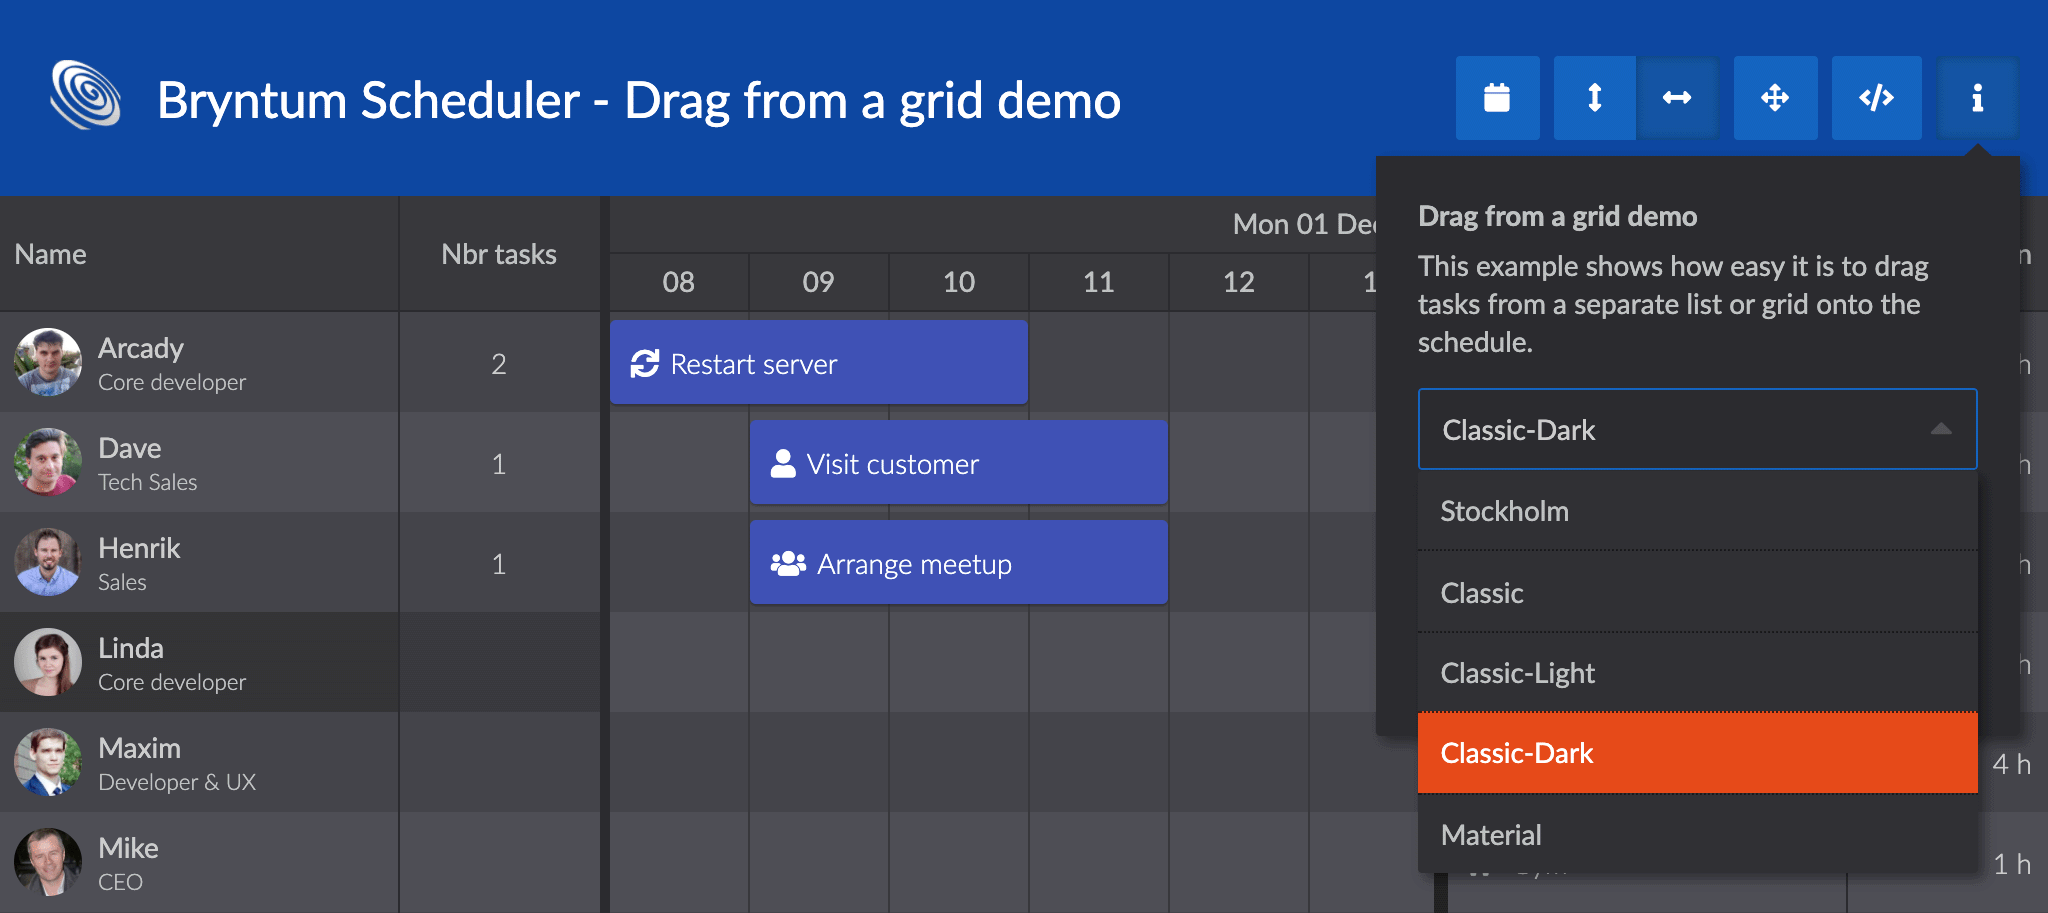
Renamed themes
The `Default` theme was renamed to `Classic`, to highlight that we actually changed our default theme to be `Stockholm` back in version 2. Since `Light` and `Dark` themes was variations of the `Default` theme they too were renamed to indicate they belong together. Their new names are `Classic-Light` and `Classic-Dark`.
Major data layer changes
In 4.0 we have worked hard to bring Scheduler closer to Gantt on the data layer side. The main motivation for this was to make them fully compatible and capable of loading the same project data in multiple different views. This resulted in the Scheduler Pro, which is an extension of the Scheduler with the scheduling engine of the Gantt.
For the Scheduler this brings roughly three major changes:
- Schedulers stores are contained in a Project
- There is an async calculation engine handling normalization and references
- Scheduler now always has an AssignmentStore
Project holding stores
As in Gantt, Scheduler now always has a Project. The project holds the default stores used by Scheduler, which are:
The project can be replaced with another project, switching the entire dataset in one go. Defining a Scheduler with a project can look like this:
const scheduler = new Scheduler({
    project : {
      eventsData    : [ /*Inline data for event records*/ ],
      resourcesData : [ /*Inline data for resource records*/ ],
      ...
    },
     ...
});
Please note that Scheduler still accepts separate stores and inline data the same way as before, but which ever way you use they end up in a project under the hood. So these already existing ways of getting data into Scheduler still work as before:
const scheduler = new Scheduler({
    events : [ /*Data for event records*/ ],
    resources : [ /*Data for resource records*/ ],
    ...
});

// and

const scheduler = new Scheduler({
    eventStore : {
        data : [ /*Data for event records*/ ],
        ...
    },
    resourceStore : {
       data : [ /*Data for resource records*/ ],
       ...
    },
    ...
});
For the most part you do not have to use the project unless you want to. But we do recommend adapting the new approach, as it is a convenient way to handle the complete dataset used by Scheduler.
Async calculations and references
This is likely the most breaking change in this major release. Just like the Gantt, Scheduler now uses an async calculation engine to handle date and duration calculations and references between records.
For the basic Scheduler, the calculations are limited to normalizing start date, end date and duration. It is using a much simpler engine than Gantt (or Scheduler Pro) and in our measurements it wont affect performance much. What it will affect though is the code flow, since calculations are performed async. The same is true for references, for example which resources an event is assigned to.
When using the Scheduler UI, this change should not be noticeable since it updates automatically. But when working on the data level it needs to be taken into account. Consider this “old” code:
const [newEvent] = scheduler.eventStore.add({ startDate : '2020-09-22', duration : 4 });
console.log(DateHelper.format(newEvent.endDate, 'YYYY-MM-DD'); // logs 2020-09-26
It creates an event using a `startDate` and a `duration`. And on the next line it logs the `endDate` of that event. This was perfectly fine earlier, since calculations was performed synchronously.
With the new async engine, the `endDate` is instead calculated at a later point (actually happens very soon, but it is still not synchronous). Thus it wont be able to log the `endDate` on the next line. Instead you have to `await` the calculations to be guaranteed up to date data.
There are a couple of different ways to `await` the calculations. For single operations, there are new awaitable functions to add or modify a record. `addAsync` for example lets you use almost the same syntax as before:
const [newEvent] = await scheduler.eventStore.addAsync({ startDate : '2020-09-22', duration : 4 });
console.log(DateHelper.format(newEvent.endDate, 'YYYY-MM-DD'); // logs 2020-09-26
For multiple operations, it is often more convenient to perform them and then await the calculations by calling `project.commitAsync()`:
event1.duration = 2;
event2.duration = 1;
event3.duration = 4;
await scheduler.project.commitAsync();
// calculations are finished when we reach this line
`commitAsync()` tells the engine to calculate now, and then waits for it to finish the calculations.
The engine and its asynchronous nature will be further described in an upcoming blog post.
Scheduler always has an AssignmentStore
Scheduler now always has an AssignmentStore. This allows us to simplify code internally, by not having different code paths for the single and multi assignment scenarios. It also forces us to make all features work with multi assignment, which has been requested multiple times for the past versions.
Even if the Scheduler now always has an AssignmentStore, you are not forced to use it. We do recommend separating assignments from events, but using `resourceId` on an event record is still supported and will emulate a “single assignment mode” in the UI. Please note that you cannot combine `resourceId` on event records with loading assignments separately, you have to stick to one way of doing it.
Browser support
In 4.0 we are dropping support for Edge 18 and older. Older Edge versions likely will continue to work, but we are no longer actively testing it or adding any browser specific fixes for it. The new Blink-based Edge is supported. Please note that IE11 still is supported but version 4 will be the last major version where IE11 is supported.
And there’s more…
Some miscellaneous improvements worth mentioning:
- Column lines are now DOM elements instead of a background image. Allows for easier styling and more reliable behaviour.
- The PDF export server is available as a Docker
- Events are rendered with an additional internal element (`.b-sch-event-content`), which now allows us to use `text-overflow: ellipsis` + gives you more styling options.

Learn more
The new features and examples we add are almost exclusively a result of the feedback received from our community. We hope you will enjoy these new features and please keep the feedback coming. For full details please see the Scheduler change log.
Build it with Bryntum Scheduler
Start a free trial, explore live demos, or read the docs.