Sync Google Calendar with Bryntum Calendar using the Google Calendar API and Google OAuth
We strive to keep posts updated, but code samples may sometimes be outdated. Humans, see the Bryntum documentation; agents, https://mcp.bryntum.com for the latest info.
Bryntum Calendar is a feature-rich and fully customizable JavaScript calendar component that easily integrates with any backend or UI framework. This guide demonstrates how to sync Bryntum Calendar with Google Calendar and how to add Google authentication by:
- Adding a Bryntum Calendar component to a React app.
- Creating a Google Cloud project.
- Enabling the Google Calendar API and setting up OAuth credentials for the project.
- Adding a Google sign-in modal to the React app.
- Configuring the Bryntum Calendar to load data from and sync data changes to Google Calendar.
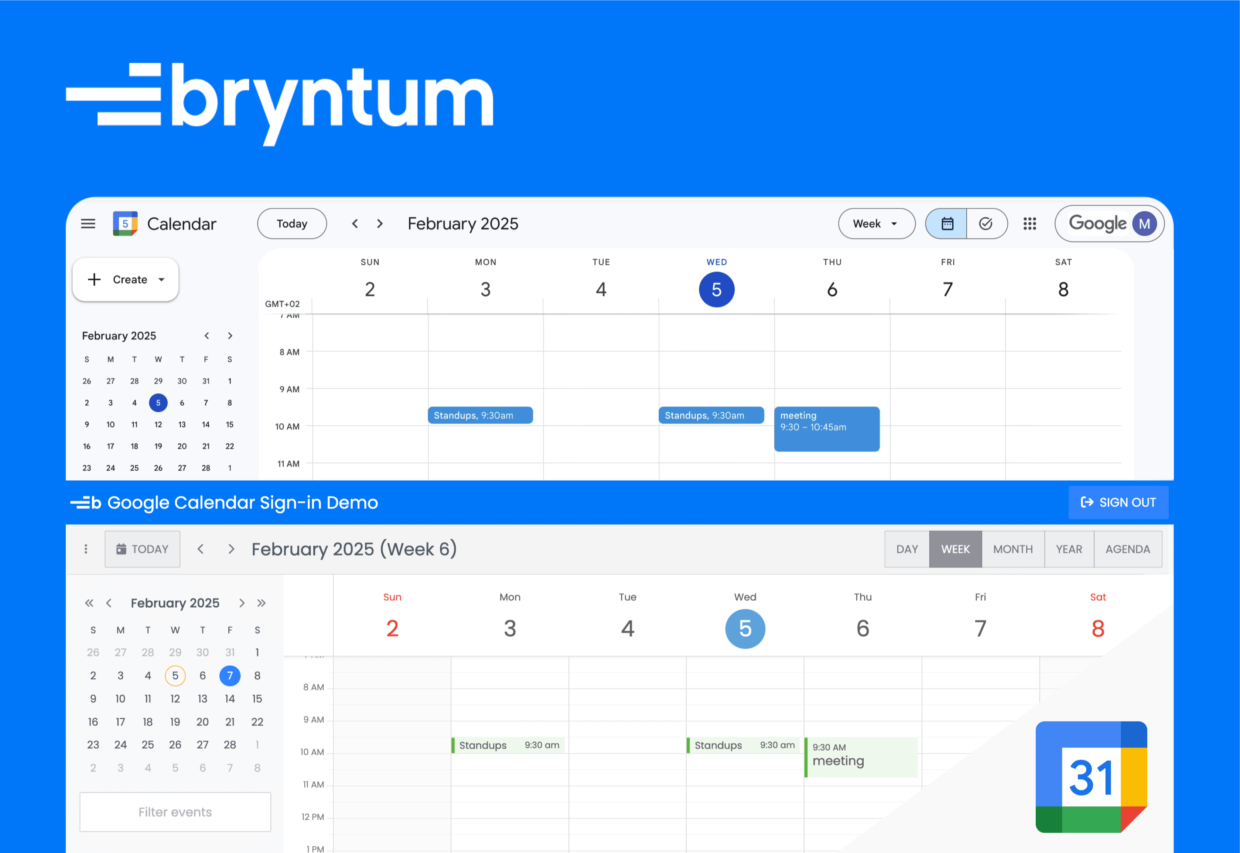
Here’s what we’ll build:
You can find the code for the completed tutorial in the GitHub starter repository
Getting started
We’ll clone the GitHub starter repository and use the initial app as a starting point.
If you want to consult the final code, you can find the app that syncs with Google Calendar on the completed-calendar branch of the repository.
The starter template is a React app that uses Vite, which is a development server and bundler.
After cloning the app, install the dependencies:
npm installRun the local development server using the following command:
npm run devYou’ll see a blue header with the title Google Calendar Sign-in Demo and text reading TODO rendered below the header.
Creating a Bryntum Calendar React component
First, let’s install the Bryntum Calendar component.
If you’re using the free trial, install the public Bryntum trial packages:
npm install @bryntum/calendar@npm:@bryntum/calendar-trial @bryntum/calendar-reactIf you have a Bryntum license, refer to our npm Repository Guide and install the licensed packages:
npm install @bryntum/calendar @bryntum/calendar-reactNow let’s create a basic Bryntum Calendar component.
In the src/components/App.jsx file, add the following imports:
import { useRef } from 'react';
import { BryntumCalendar } from '@bryntum/calendar-react';
import '@bryntum/calendar/calendar.stockholm.css';
By adding the above code, we import the Bryntum Stockholm theme, which is one of five available themes for styling Bryntum components. You can also create custom themes or use multiple themes.
Add the following ref to the App component:
const calendarRef = useRef(null);The calendarRef allows you to access the Bryntum Calendar instance. We don’t use this in this tutorial, but it can be useful.
Add the following memoized calendarConfig object to the App component:
const calendarConfig = useMemo(() => ({
    defaultMode      : 'month',
    eventEditFeature : {
        items : {
            nameField : {
                required : true
            },
            resourceField   : null,
            recurrenceCombo : null
        }
    },
    eventMenuFeature : {
        items : {
            duplicate : null
        }
    },
}), []);
Import the useMemo hook:
import { useMemo } from 'react';Here, we use the EventEdit feature to customize the event editor fields. We set the event Name as a required field and remove the Resource and Recurrence* fields, which we won’t use in this tutorial.
Because this guide doesn’t cover event duplication, we also use the EventMenu feature to remove the Duplicate menu item from the context menu, which is shown when you right-click on a Bryntum Calendar event on the calendar.
Next, replace the rendered TODO text with the BryntumCalendar component:
- TODO
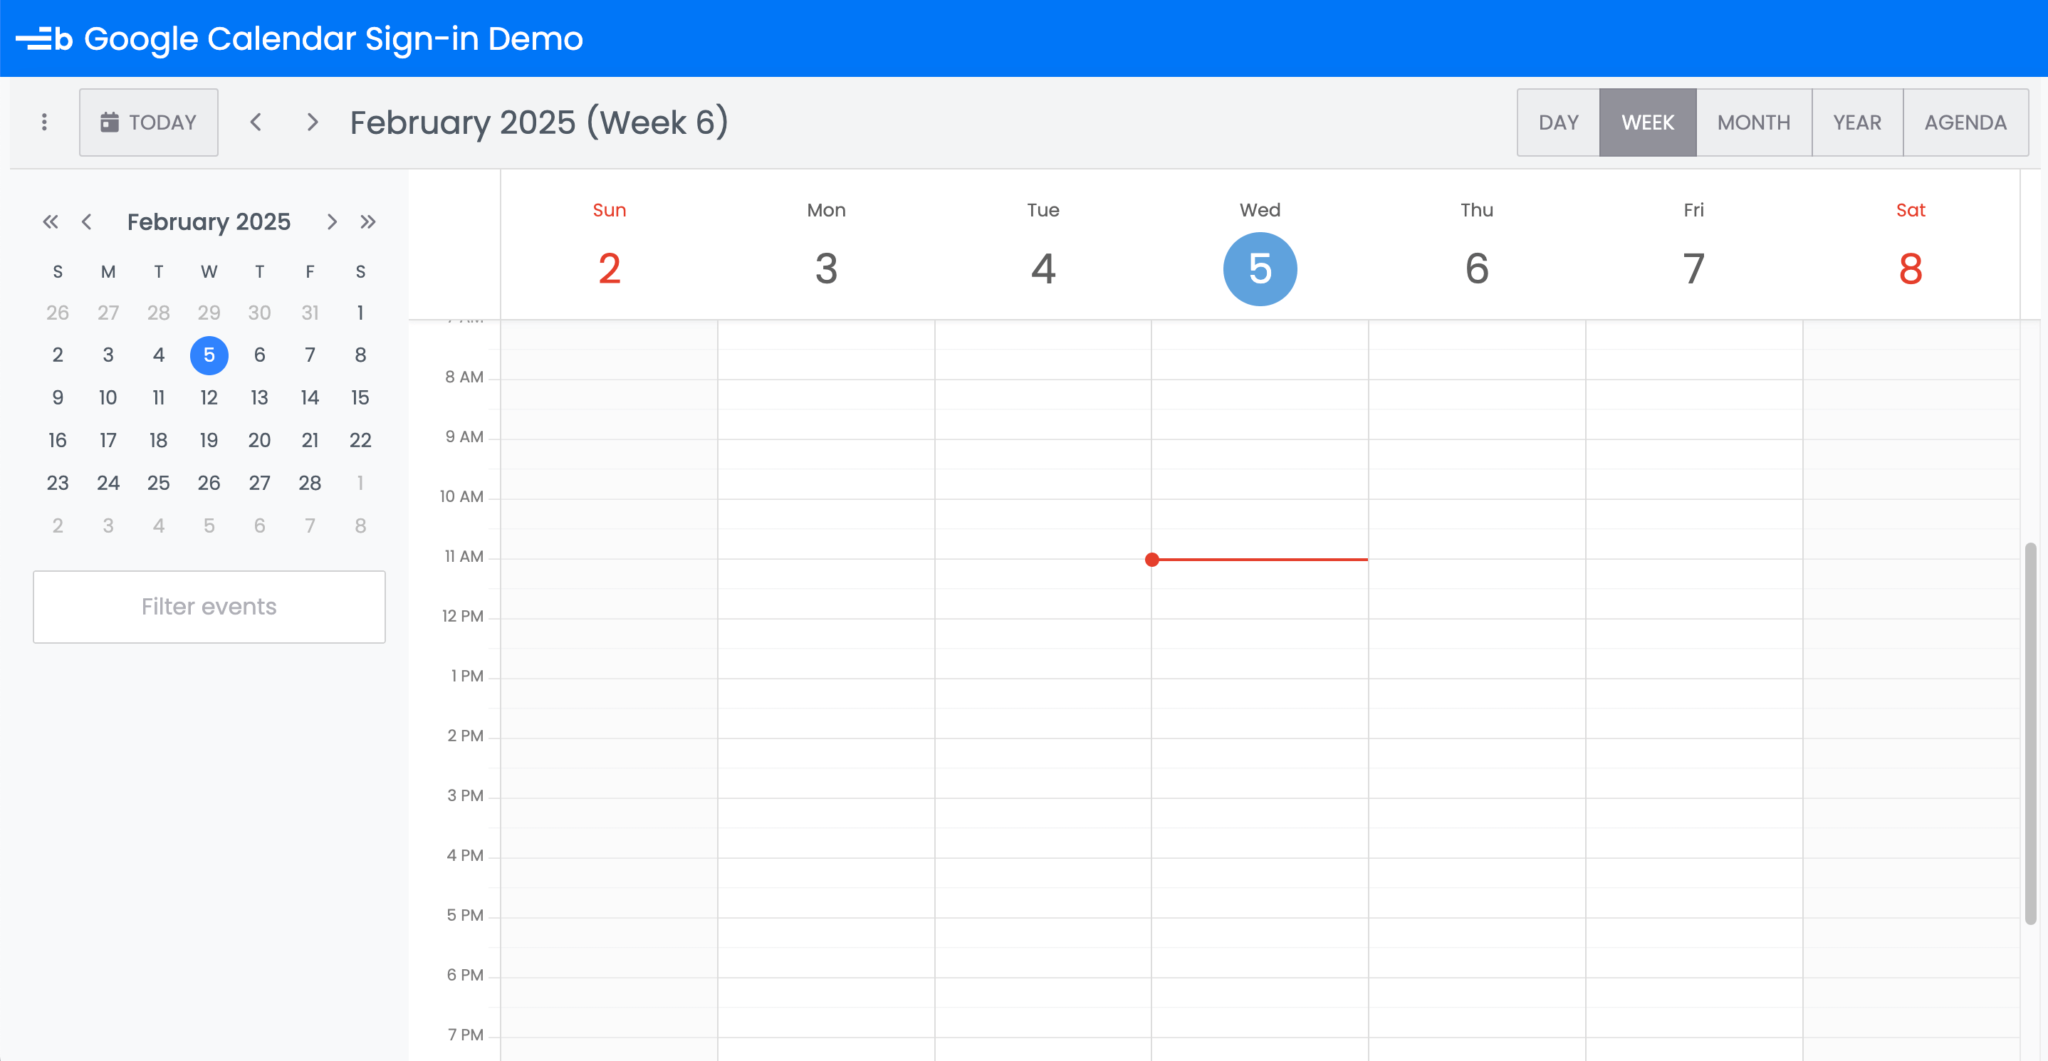
+ <BryntumCalendar ref={calendarRef} {...calendarConfig} />Now run the local dev server using the following command:
npm run devOpen https://localhost:5173. You should see an empty Bryntum Calendar:
Creating a Google Cloud Project
Sign in to the Google Cloud Platform using your Google account.
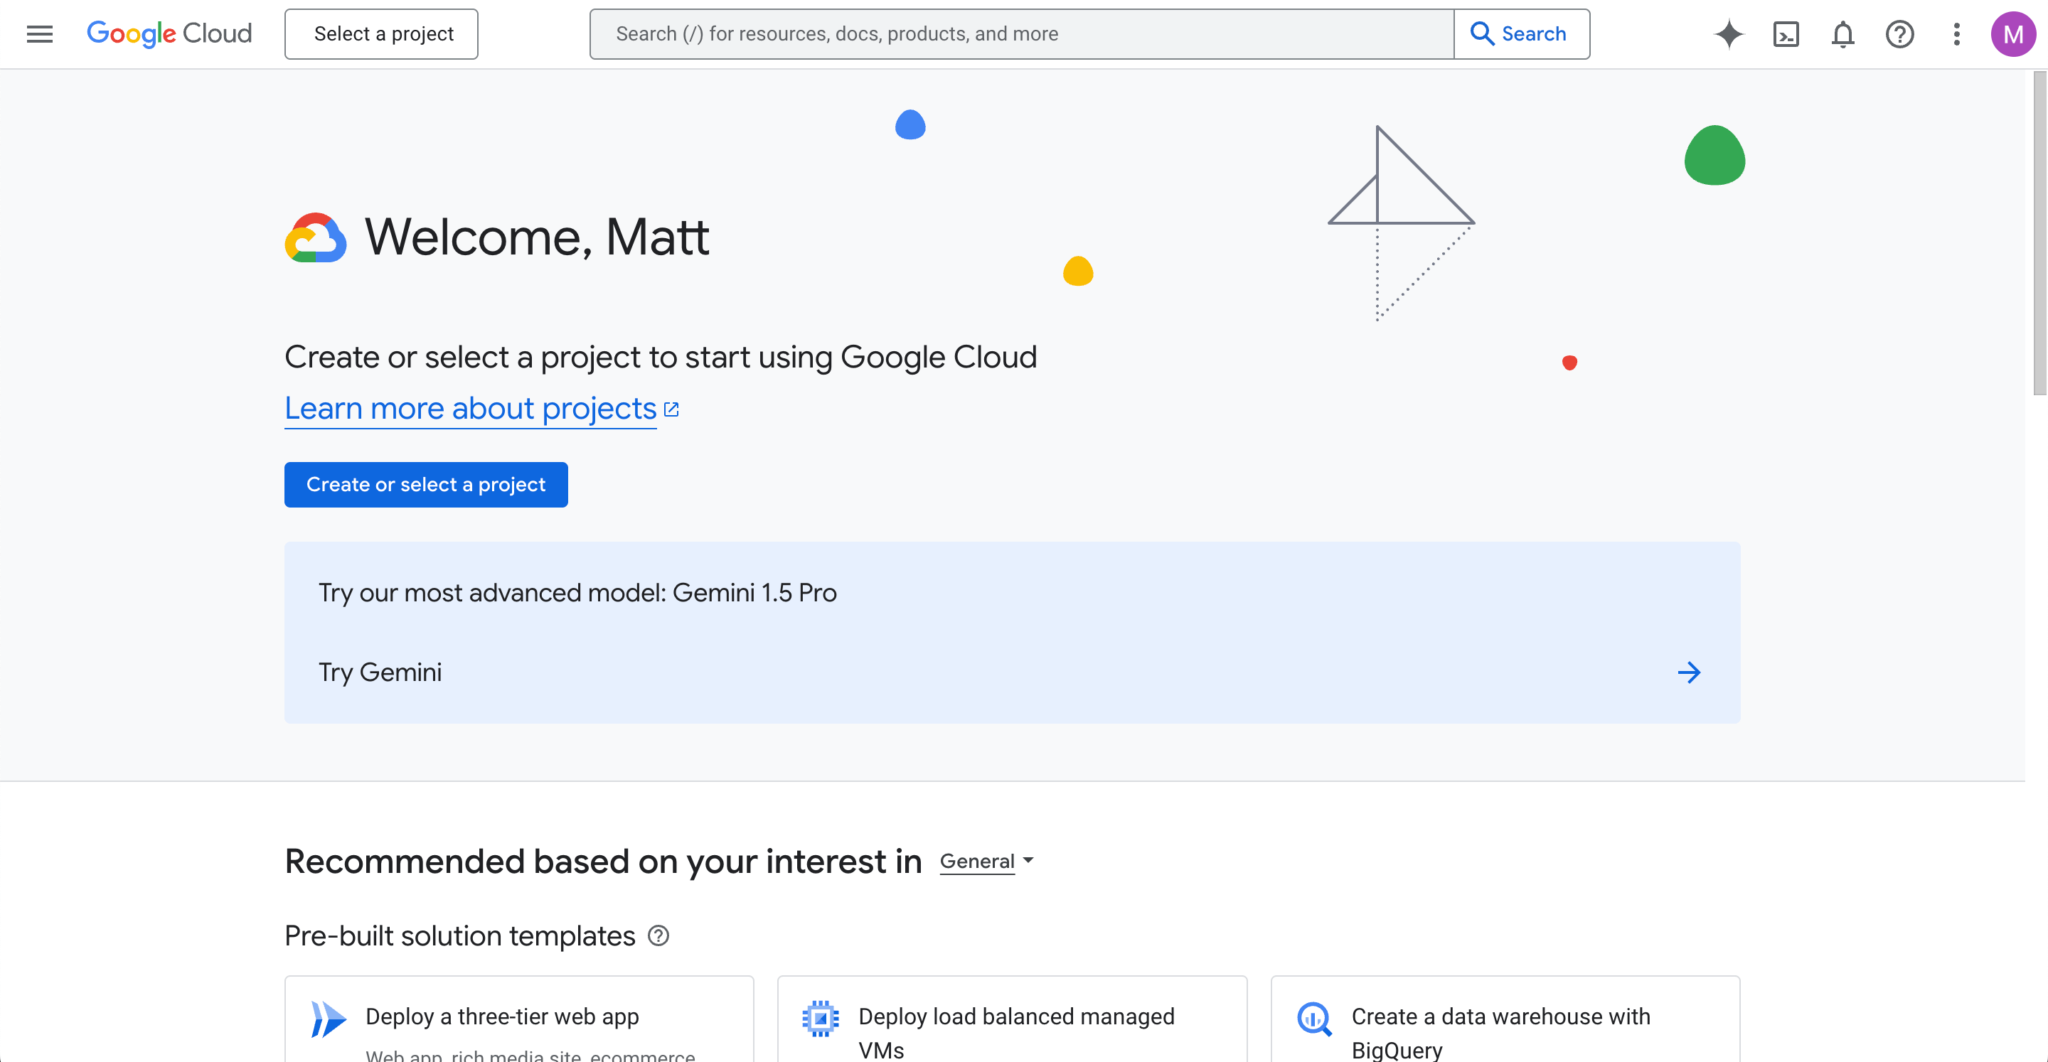
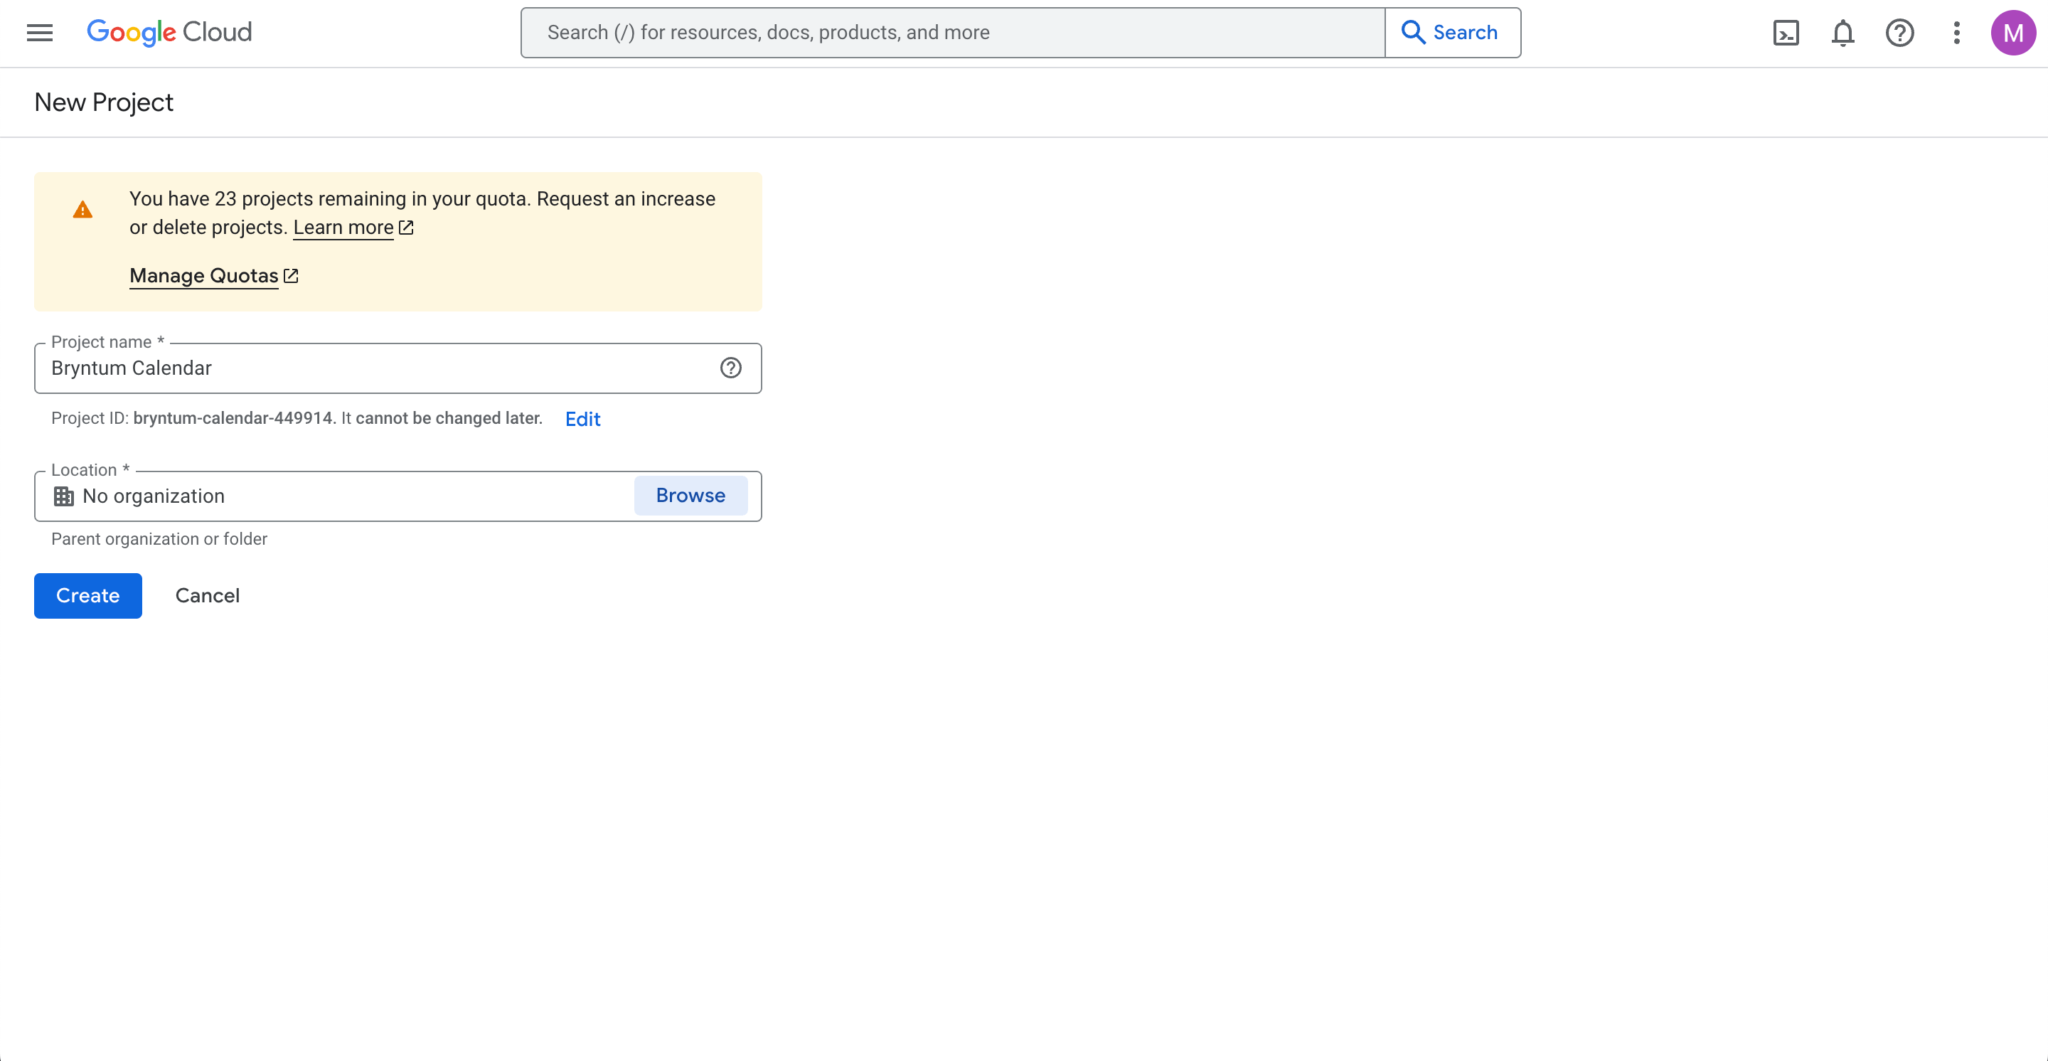
Click the Select a project button in the header and then click the New Project button:

Name your project Bryntum Calendar and specify its location:
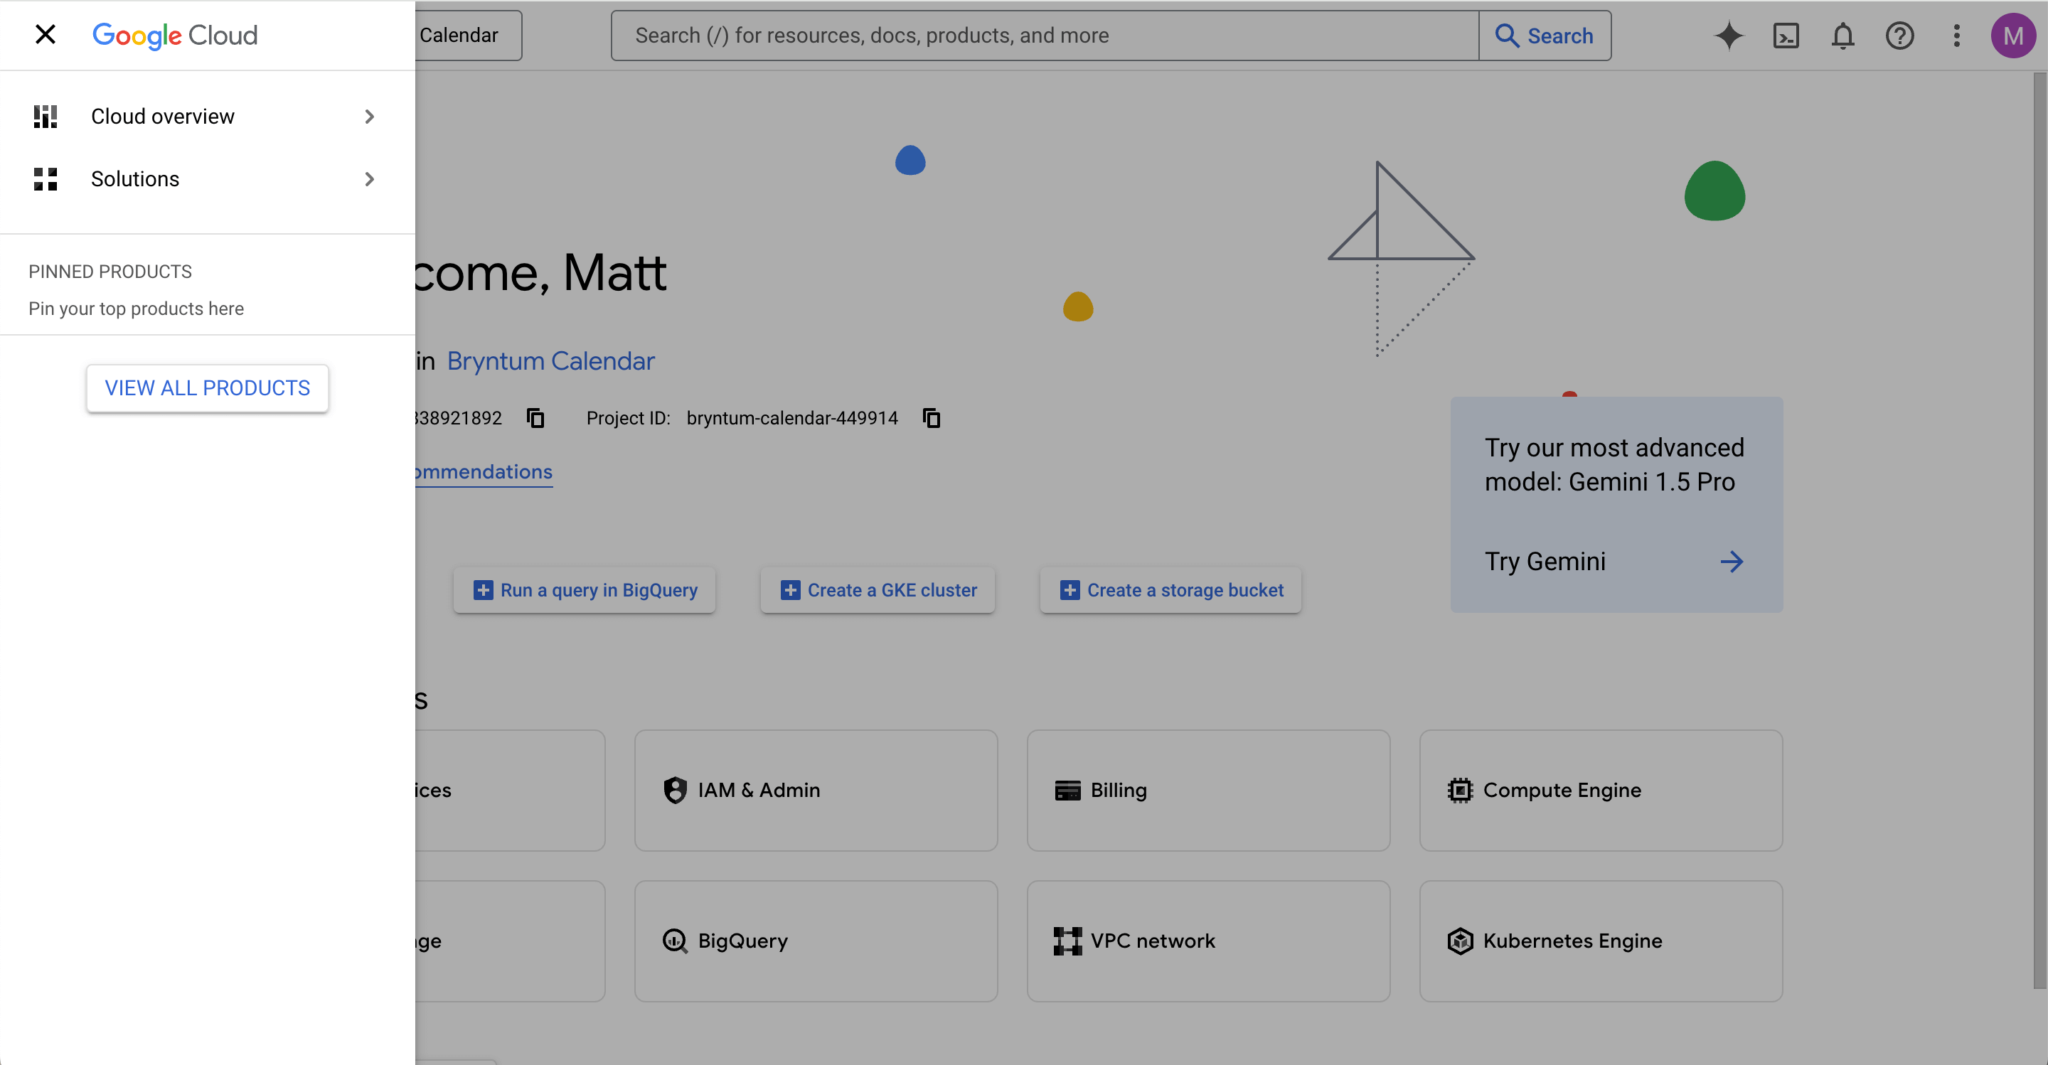
Open the navigation menu by clicking the burger button in the top-left corner of the page, then click View All Products:
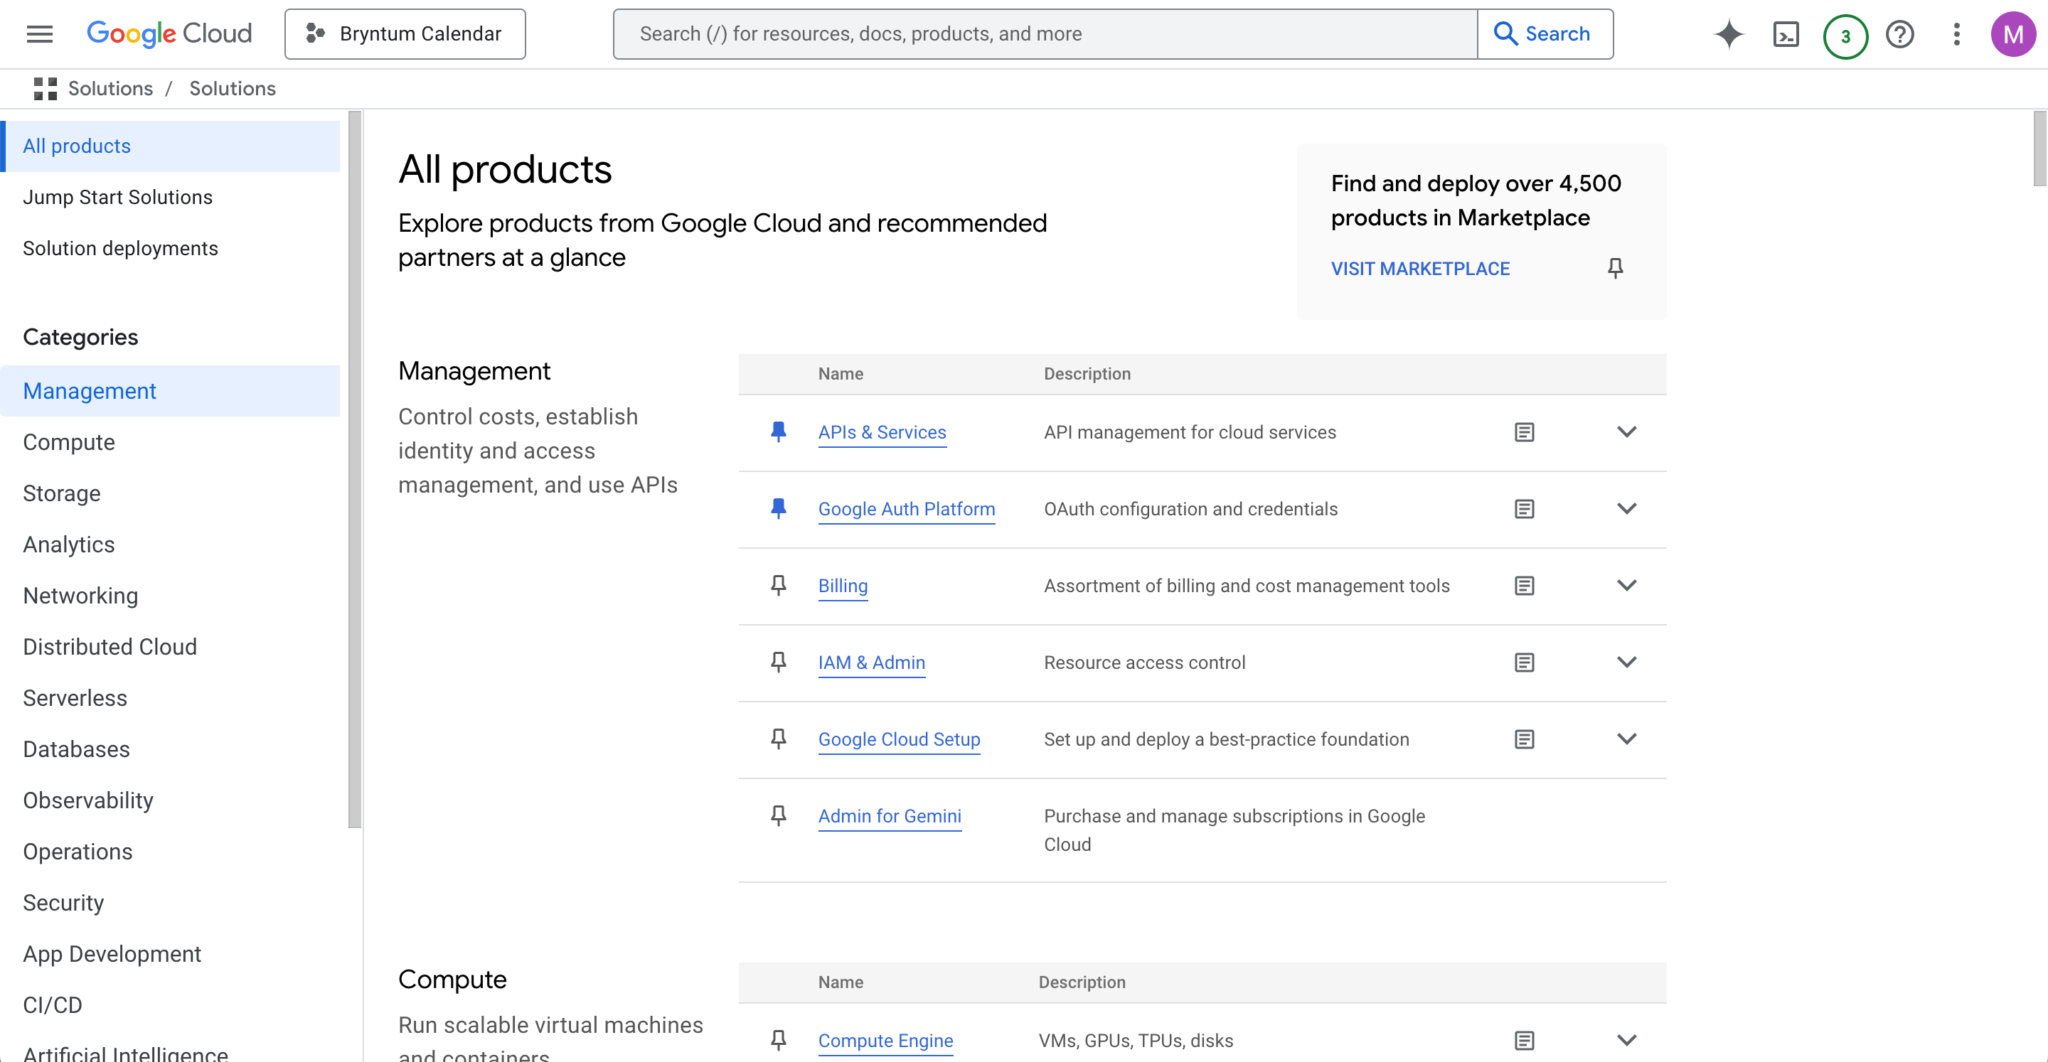
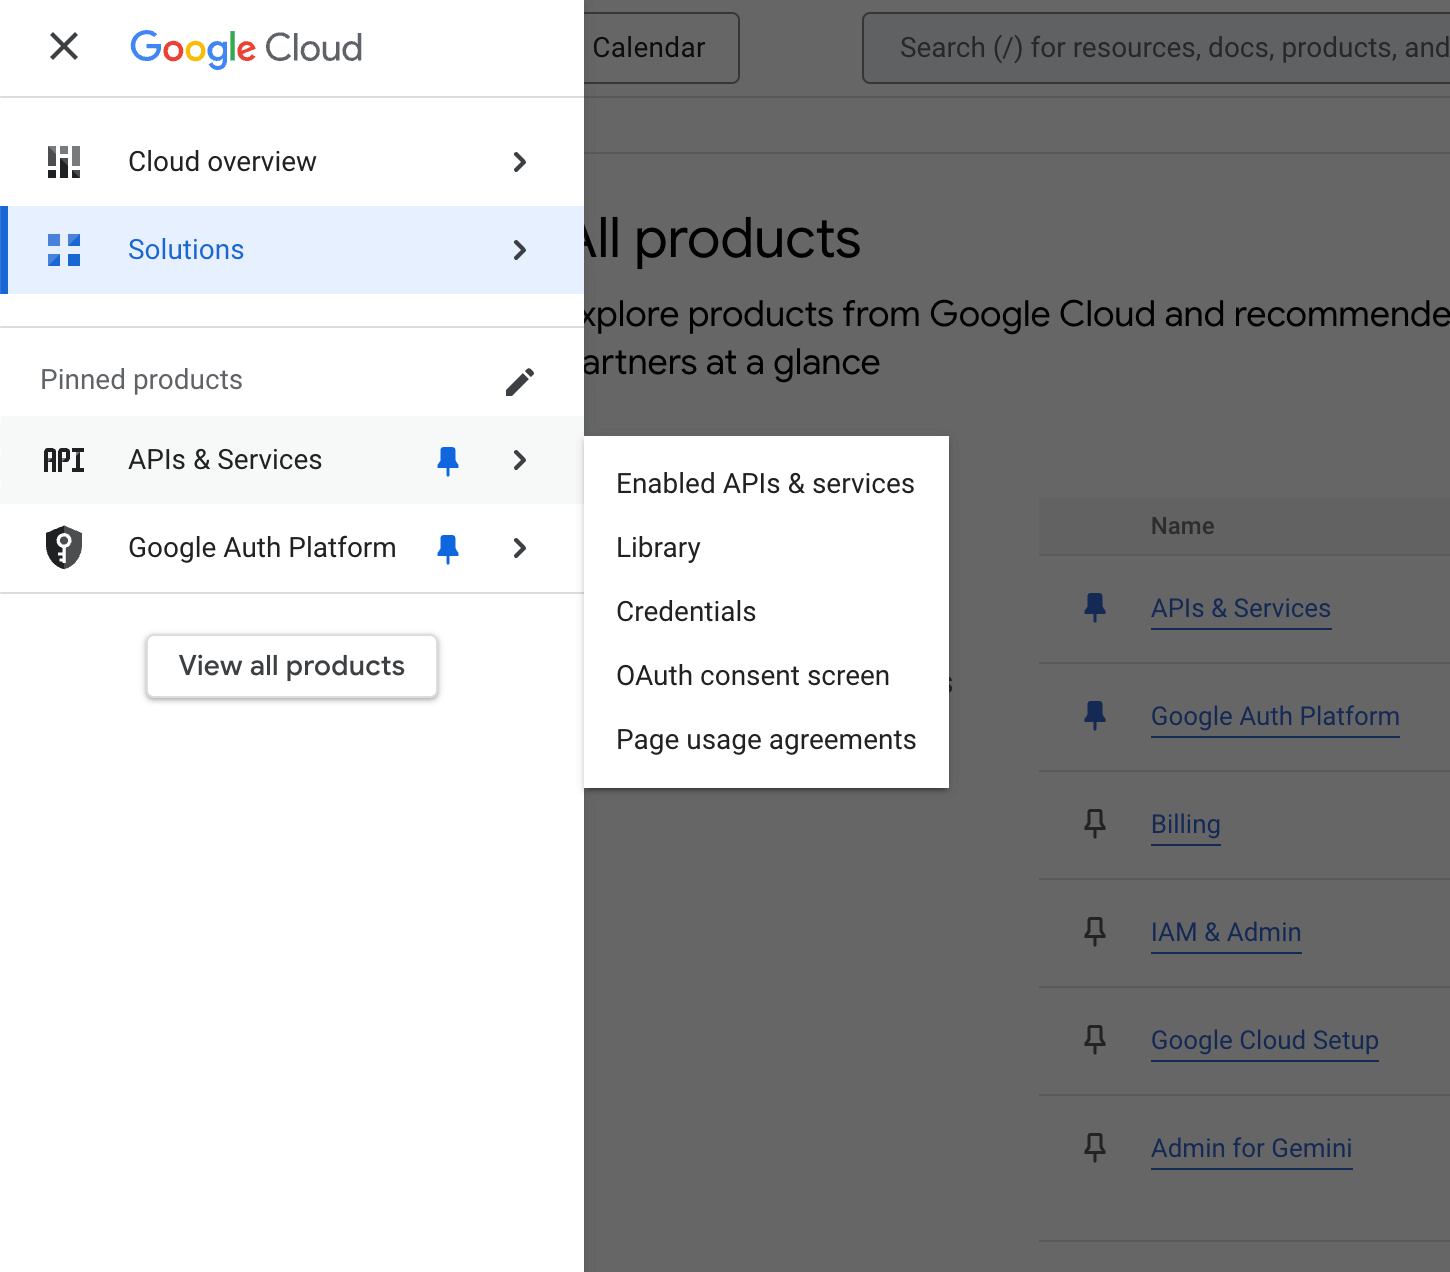
Pin the APIs & Services and Google Auth Platform products to the navigation menu by clicking on the pin icons to the left of the product names:
Enabling the Google Calendar API
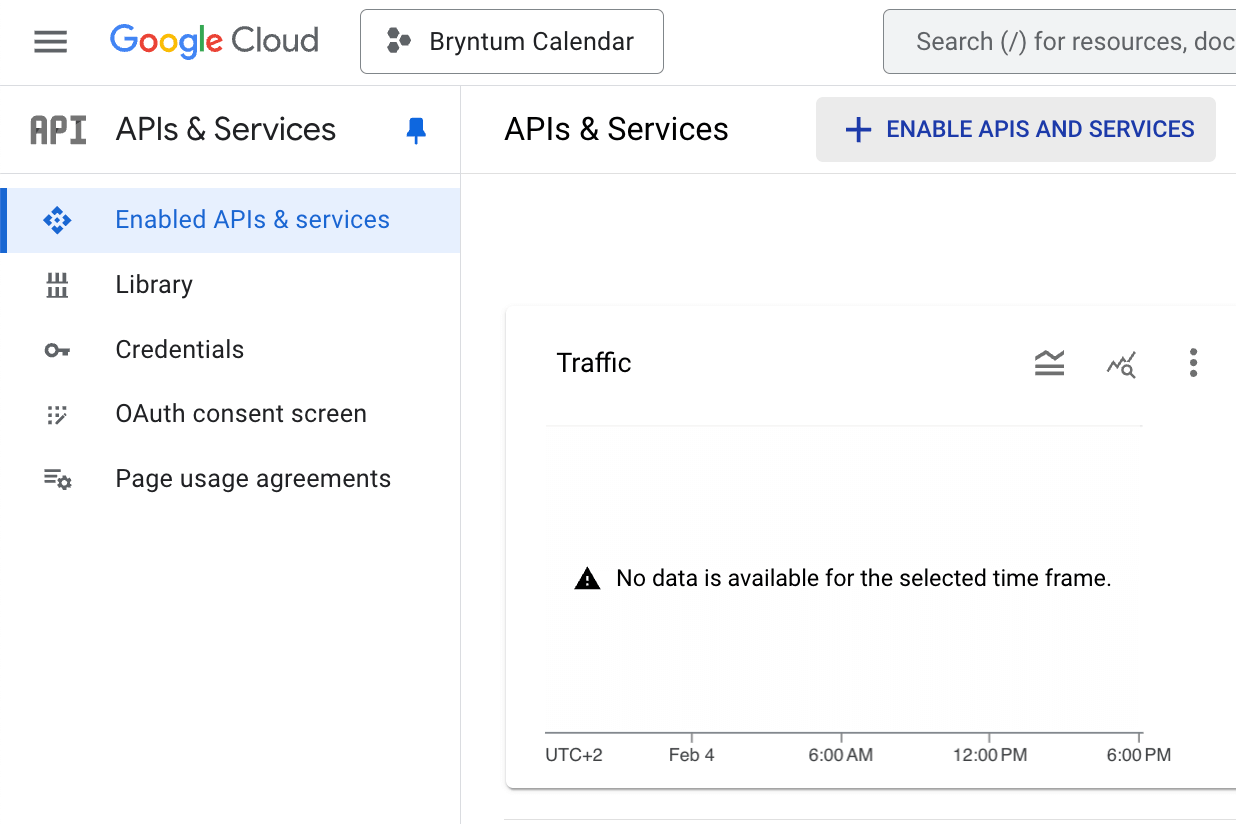
Open the Enabled APIs & Services page of the APIs & Services product:
Click on the + Enable APIs and Services button next to the page header:
Search for Google Calendar API:
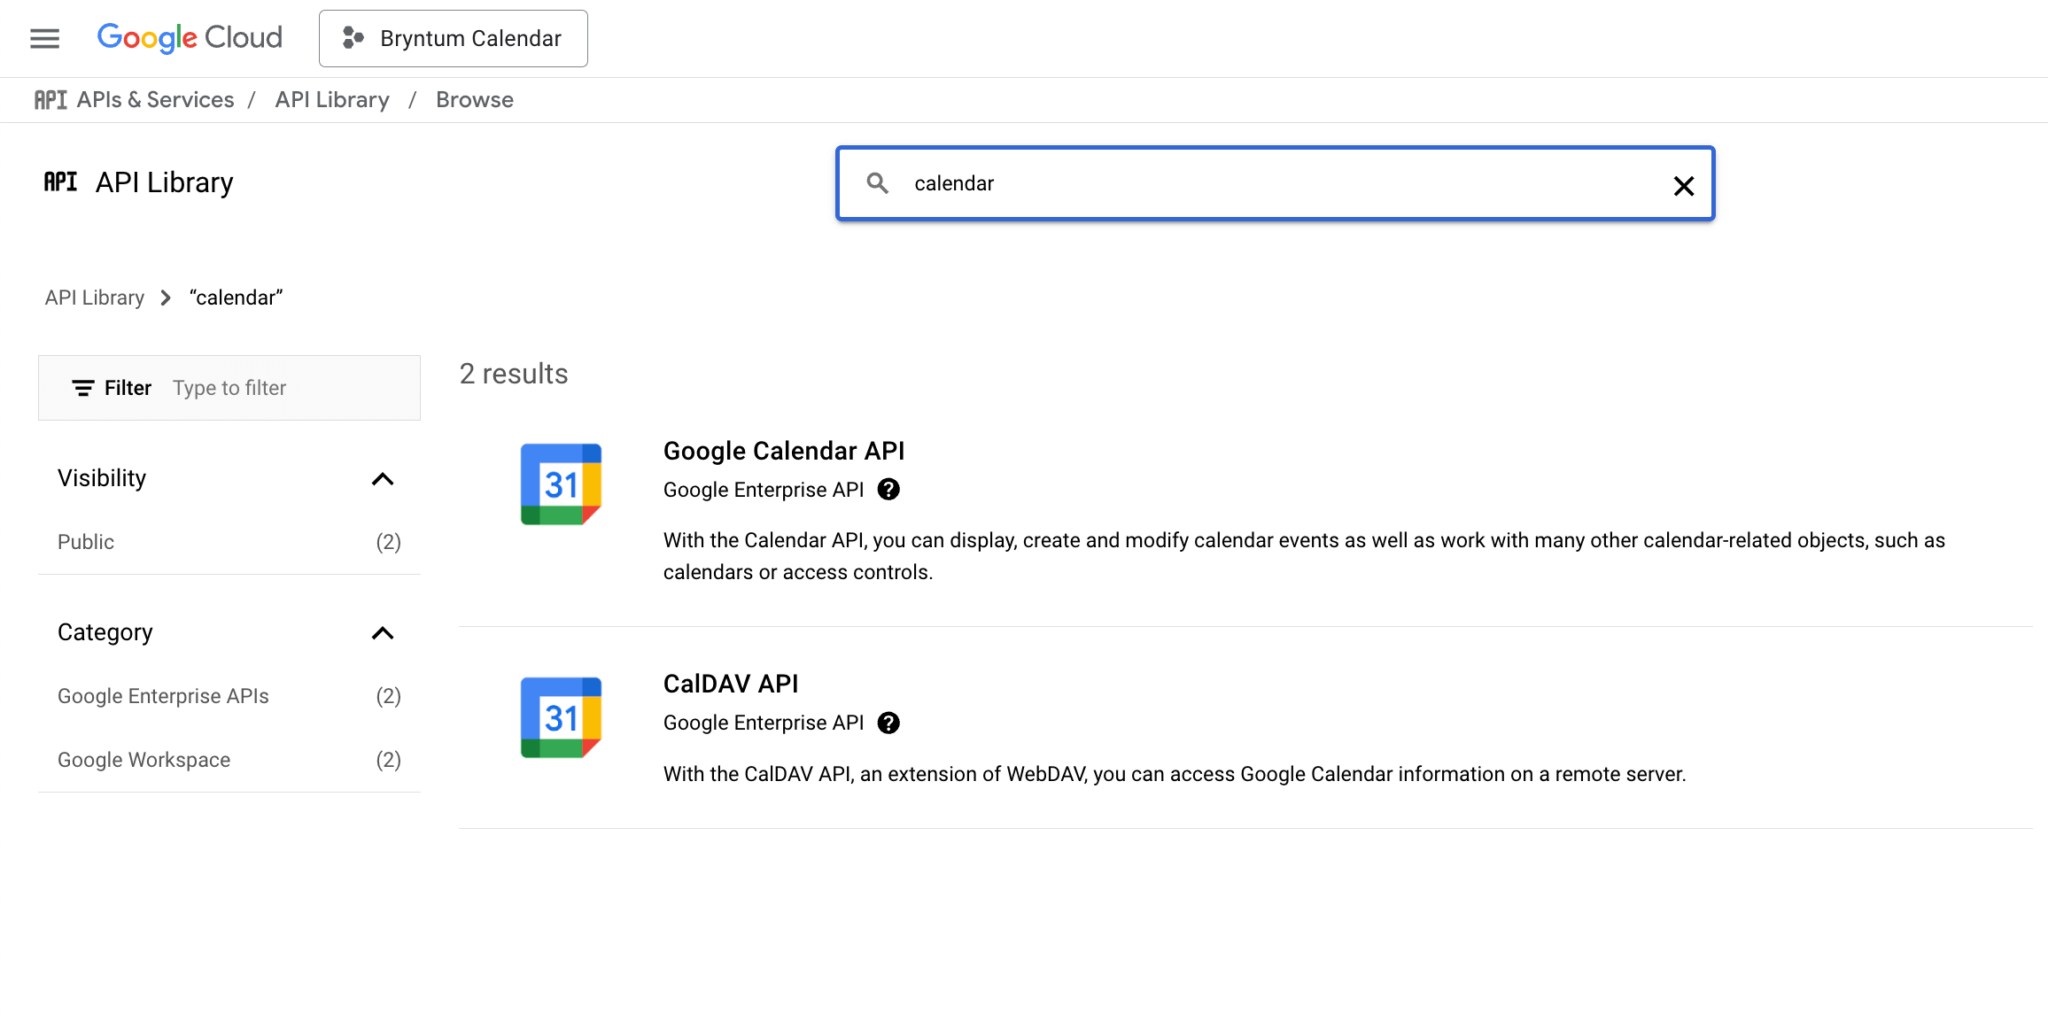
Click on the Google Calendar API list item and then click Enable.
Now that we’ve enabled the Google Calendar API, we can use it in our project.
Creating OAuth credentials
Next, we need to set up OAuth so that users can sign in to our React Bryntum Calendar app.
Open the Google Auth Platform page from the left navigation menu and click the Get Started button. In the Project configuration form, enter your app information (for example, by entering Bryntum Calendar for the App name and your email address for the User support email) and click Next.

Complete the project configuration by selecting Internal in the Audience step, if you’re part of a Google Workspace, or External if you’re not. Enter your email in the Contact Information step and agree to the policy in the Finish step. Click Create to create the project.
If you selected External in the Audience step, open the Audience tab. Under the Test users section click the “+Add users” button. Your app will only be available to users you add to the list of test users. Add your email address to the test users.
Once the project has been created, click on the Create OAuth Client button under Metrics:
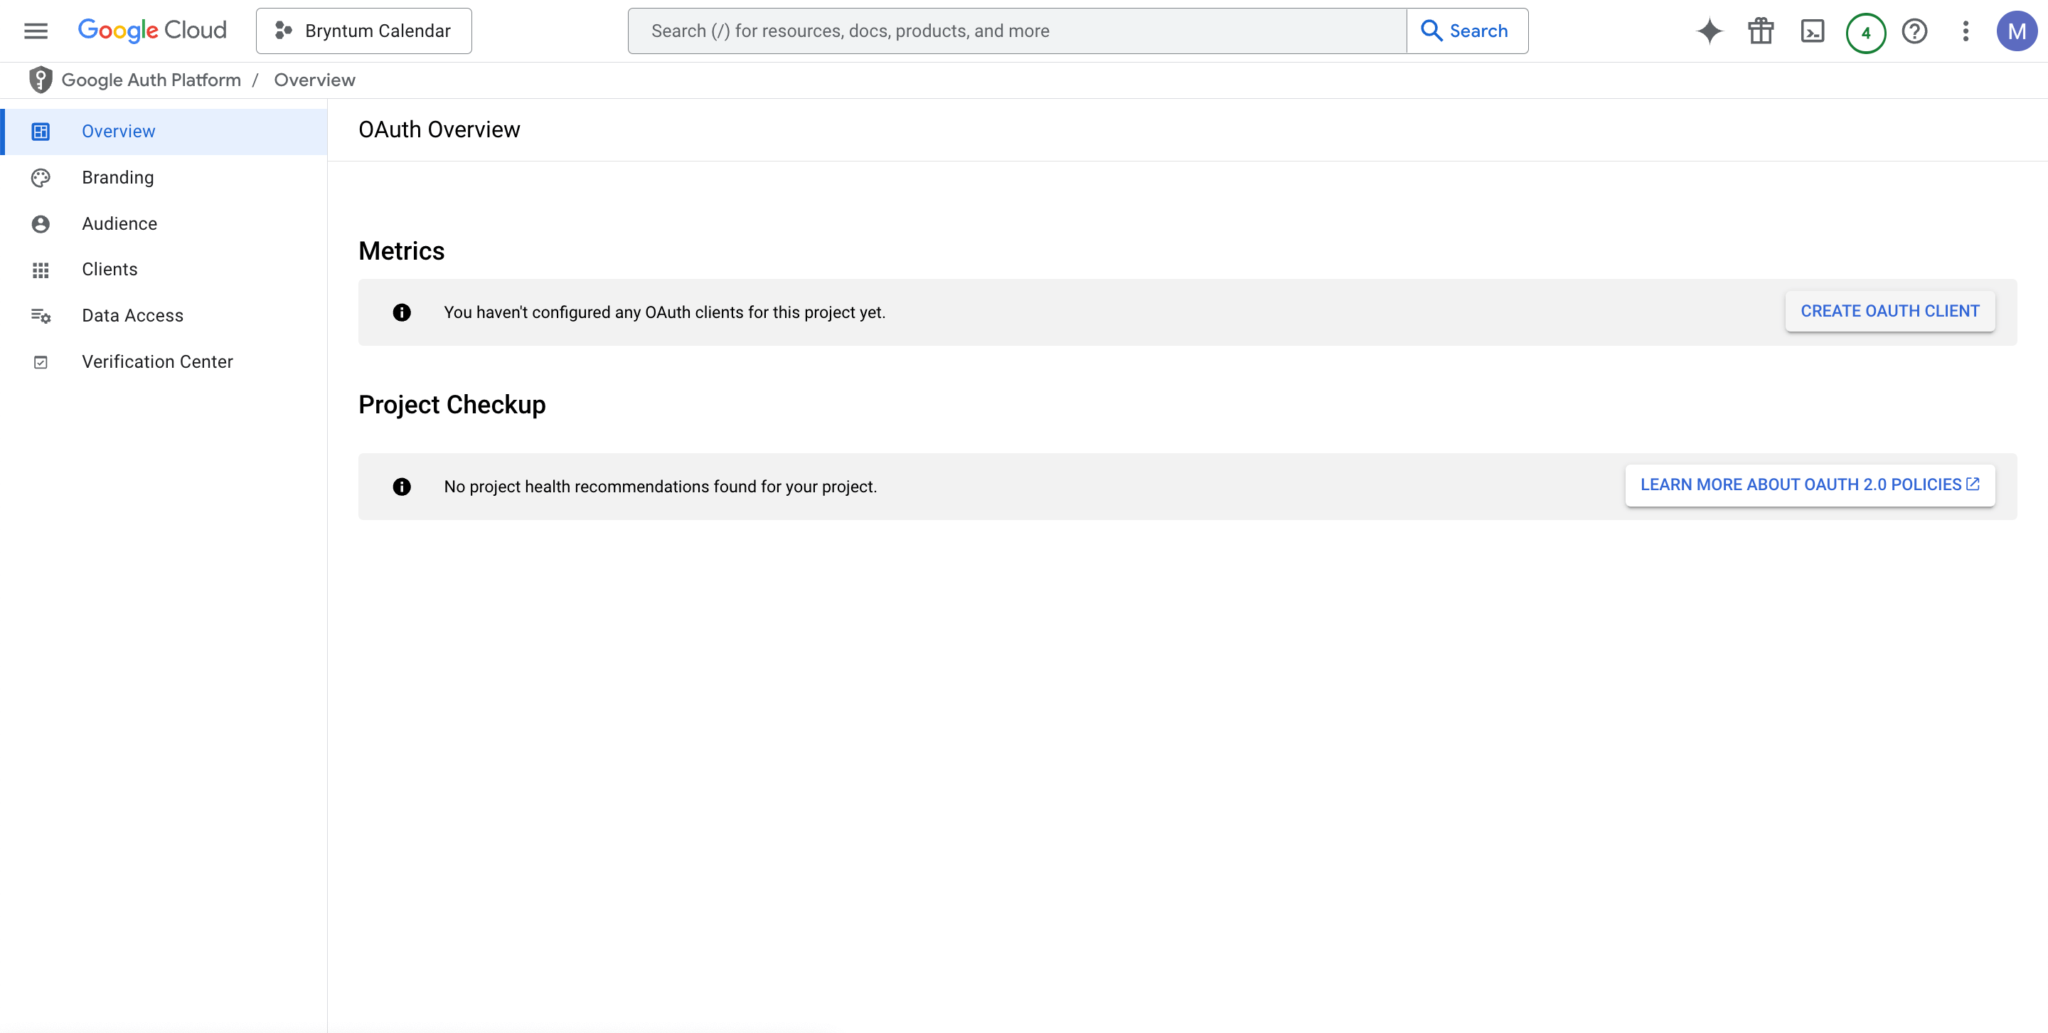
We need an OAuth client ID to identify our app.
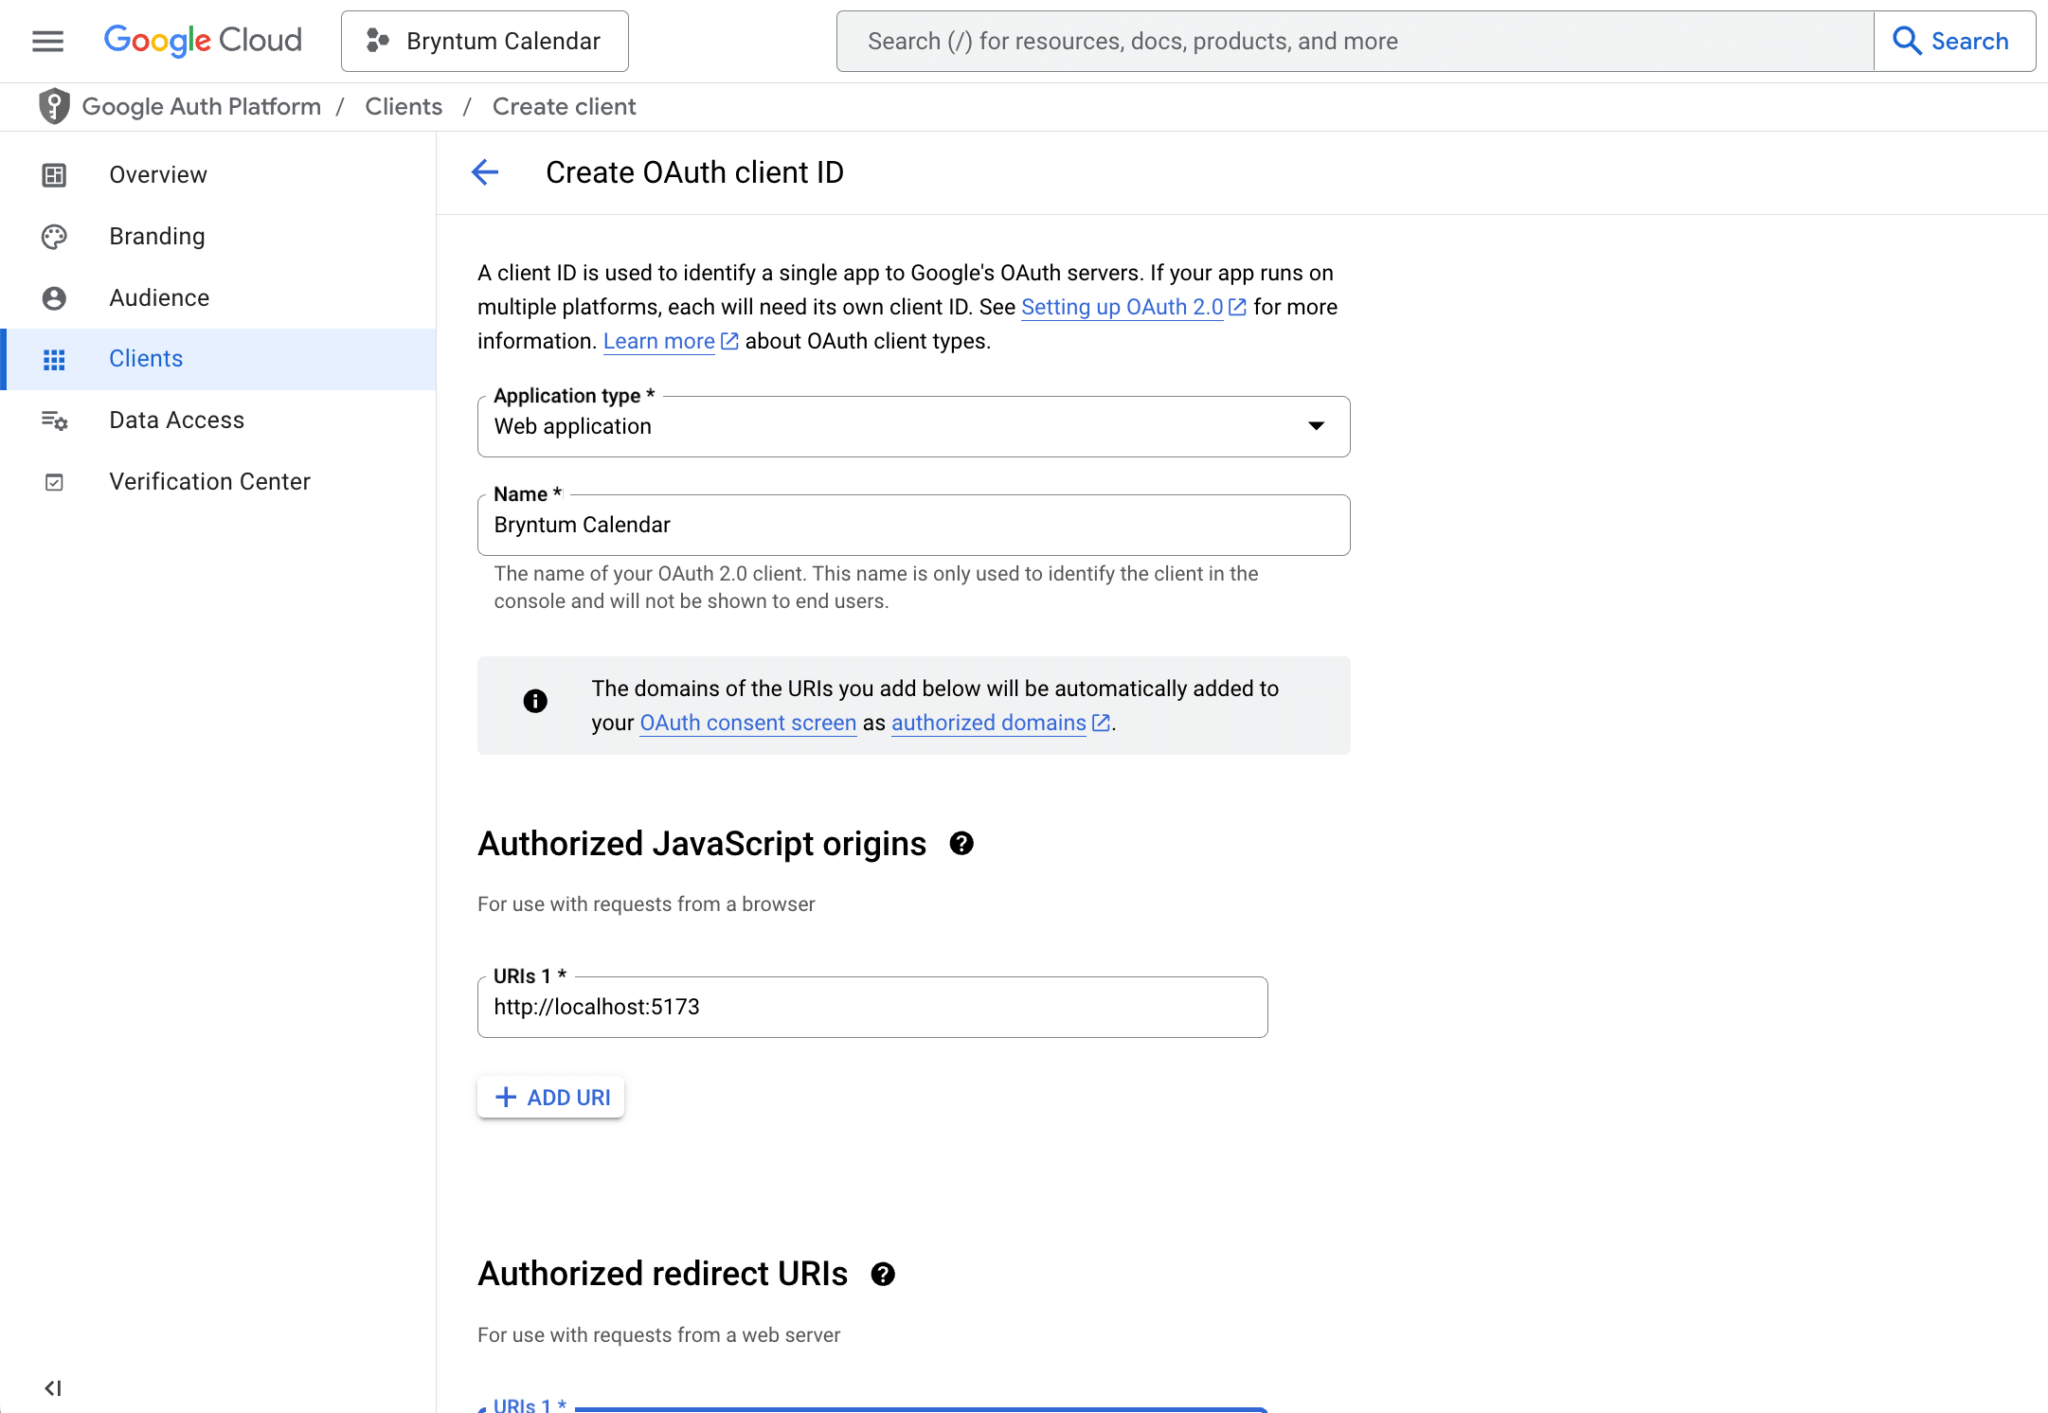
Fill out the form fields as follows:
- Application type: Select Web application from the dropdown.
- Name: Enter
Bryntum Calendar. - Authorized JavaScript origins: Enter
https://localhost:5173. - Authorized redirect URIs: Enter
https://localhost:5173.
Click the Create button, then open the Branding tab, add an app logo, and click the Save button. Note that the App domain section is used for deployment, which we don’t cover in this guide.
In the Audience tab, the User type is set to Internal. To deploy your app, set it to External.
In the Data Access tab, click on the Add or Remove Scopes button. Filter for calendar.events and select the ../auth/calendar.events scope:
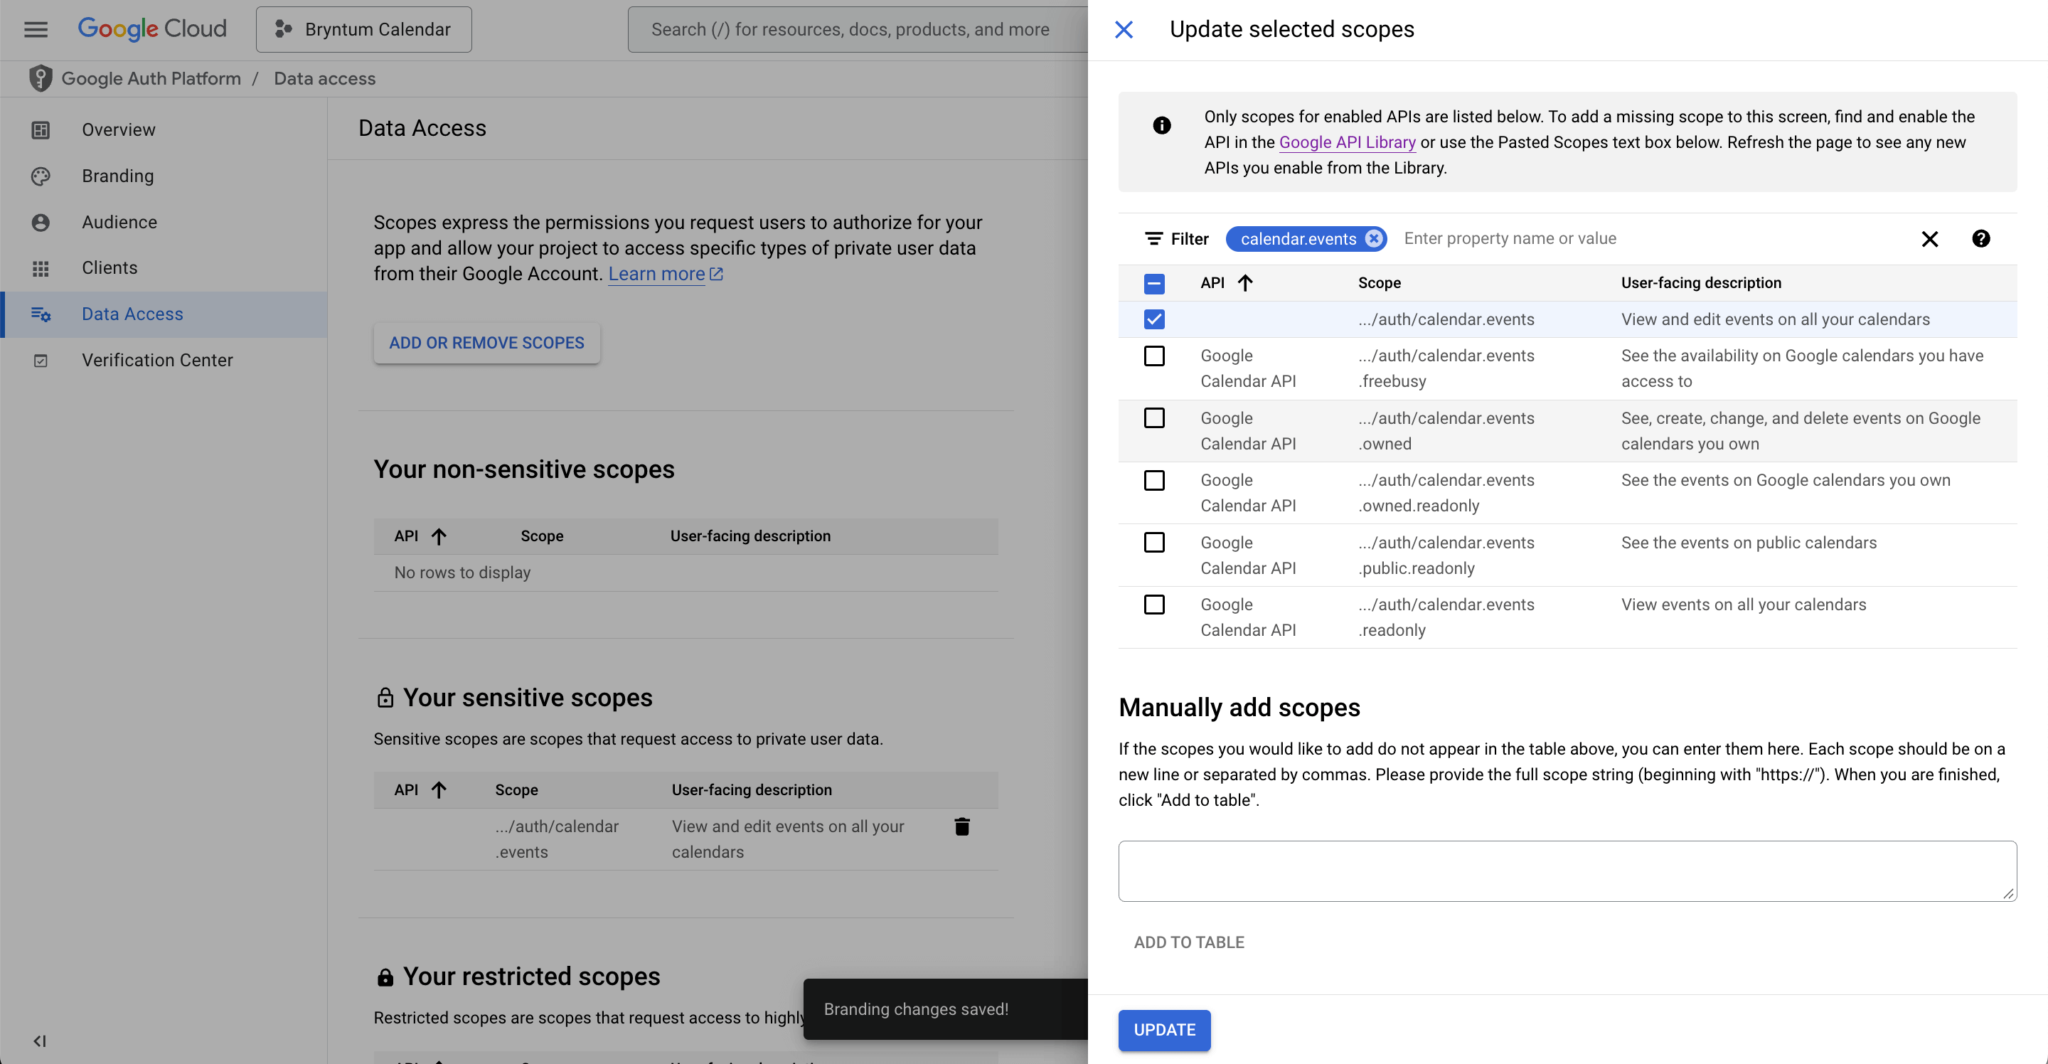
This scope allows your app to view and edit events on all of the logged-in users’ calendars. Click the Update button to save the changes.
Open the Clients tab and copy the Client ID.
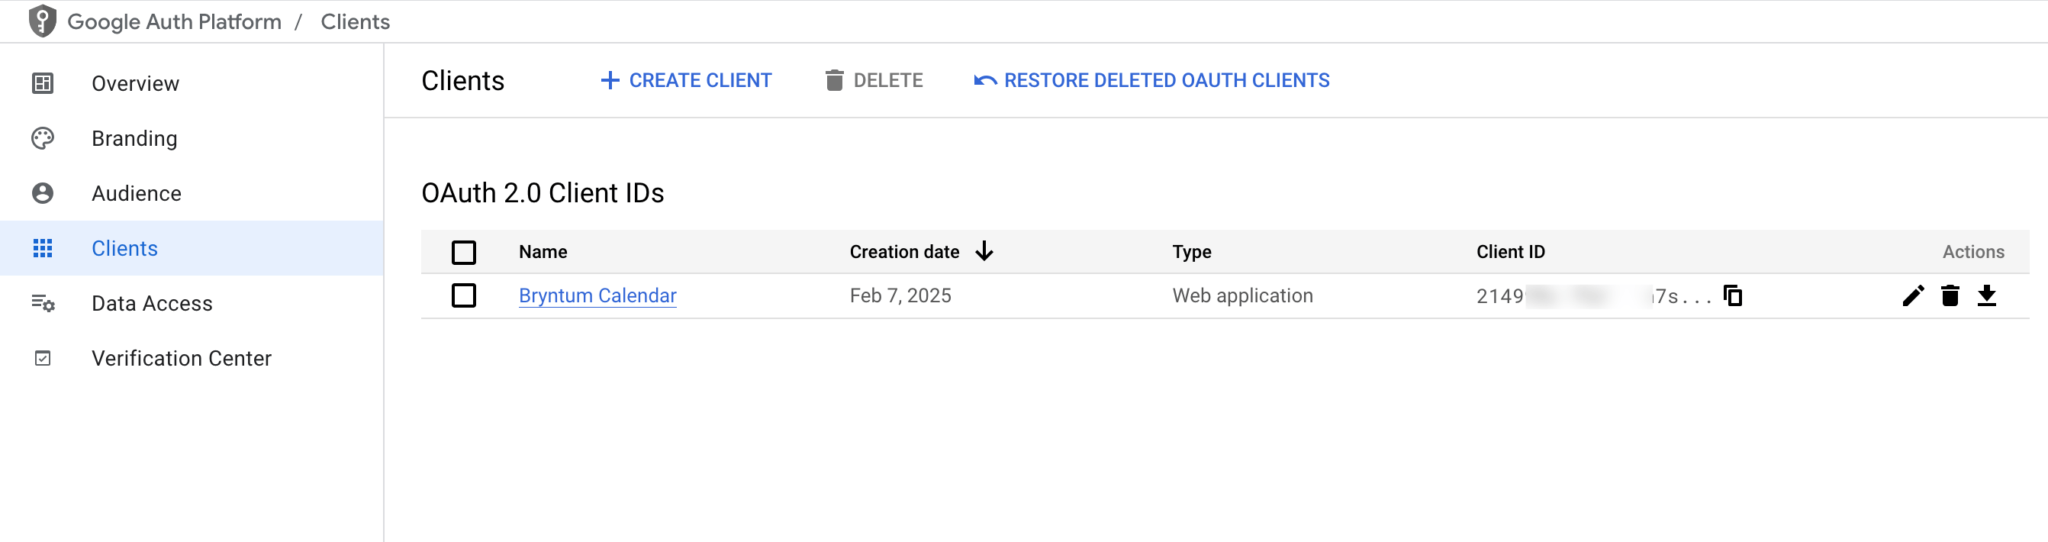
In your React app, create an .env file in the root folder and save the Client ID as an environment variable called VITE_GOOGLE_CLIENT_ID:
VITE_GOOGLE_CLIENT_ID=<your-client-id>⚠️ Note that only you and other members of your Google Workspace organization (if you’ve added your app to an organization) will be able to access the Google Cloud app. If you need your app to be accessible to users outside of your organization, change the User type to External. While your app is still in development, it will only be available to users that you add to a list of test users.
Creating a sign-in modal
First install focus-trap-react, which is a React component that traps focus:
npm i focus-trap-reactWe’ll use this React component to create a modal with a Google sign-in button, which will be displayed when a user is not logged in to the app.
Create a SignInModal.jsx file in the src/components folder and add the following lines of code to it:
import { FocusTrap } from 'focus-trap-react';
import { BryntumButton } from '@bryntum/calendar-react';
function SignInModal({
    isModalVisible,
    setModalVisible
}) {
    return (
        isModalVisible ? (
            <FocusTrap focusTrapOptions={{ initialFocus : '.b-raised', escapeDeactivates : false }}>
                <div className="sign-in-modal">
                    <div className="sign-in-modal-content">
                        <div className="sign-in-modal-content-text">
                            <h2>Sign in with Google</h2>
                            <p>Sign in to view and manage events from your Google Calendar</p>
                        </div>
                        <BryntumButton
                            cls="b-raised"
                            text="Sign in with Google"
                            icon="b-fa-g"
                            color='b-blue'
                        />
                    </div>
                </div>
            </FocusTrap>
        ) : null
    );
}
export default SignInModal;
The SignInModal component renders a FocusTrap component, which contains a BryntumButton that we’ll use to sign users in with Google. The isModalVisible state variable will be set to false when a user is logged in to the app.
Add the following styles to the src/css/App.css file:
.sign-in-modal {
  position: absolute;
  display: flex;
  justify-content: center;
  align-items: center;
  z-index: 2;
  background-color: rgba(128, 128, 128, 0.662);
  color: #181926;
  min-height: 100%;
  min-width: 100%;
}
.sign-in-modal-content {
  position: relative;
  background-color: rgb(255, 255, 255);
  padding: 2rem;
  padding-bottom: 2.5rem;
  border-radius: 12px;
}
.sign-in-modal-content-text p {
  padding: 2rem;
}
This code styles the FocusTrap component as a modal in the center of the screen.
In the src/components/App.jsx file, render the SignInModal above the <header> element:
<SignInModal
    isModalVisible={isModalVisible}
    setModalVisible={setModalVisible}
/>
Create the isModalVisible state variable and set its initial value to true:
const [isModalVisible, setModalVisible] = useState(true);Import the SignInModal component and the useState Hook:
import { useState } from 'react';
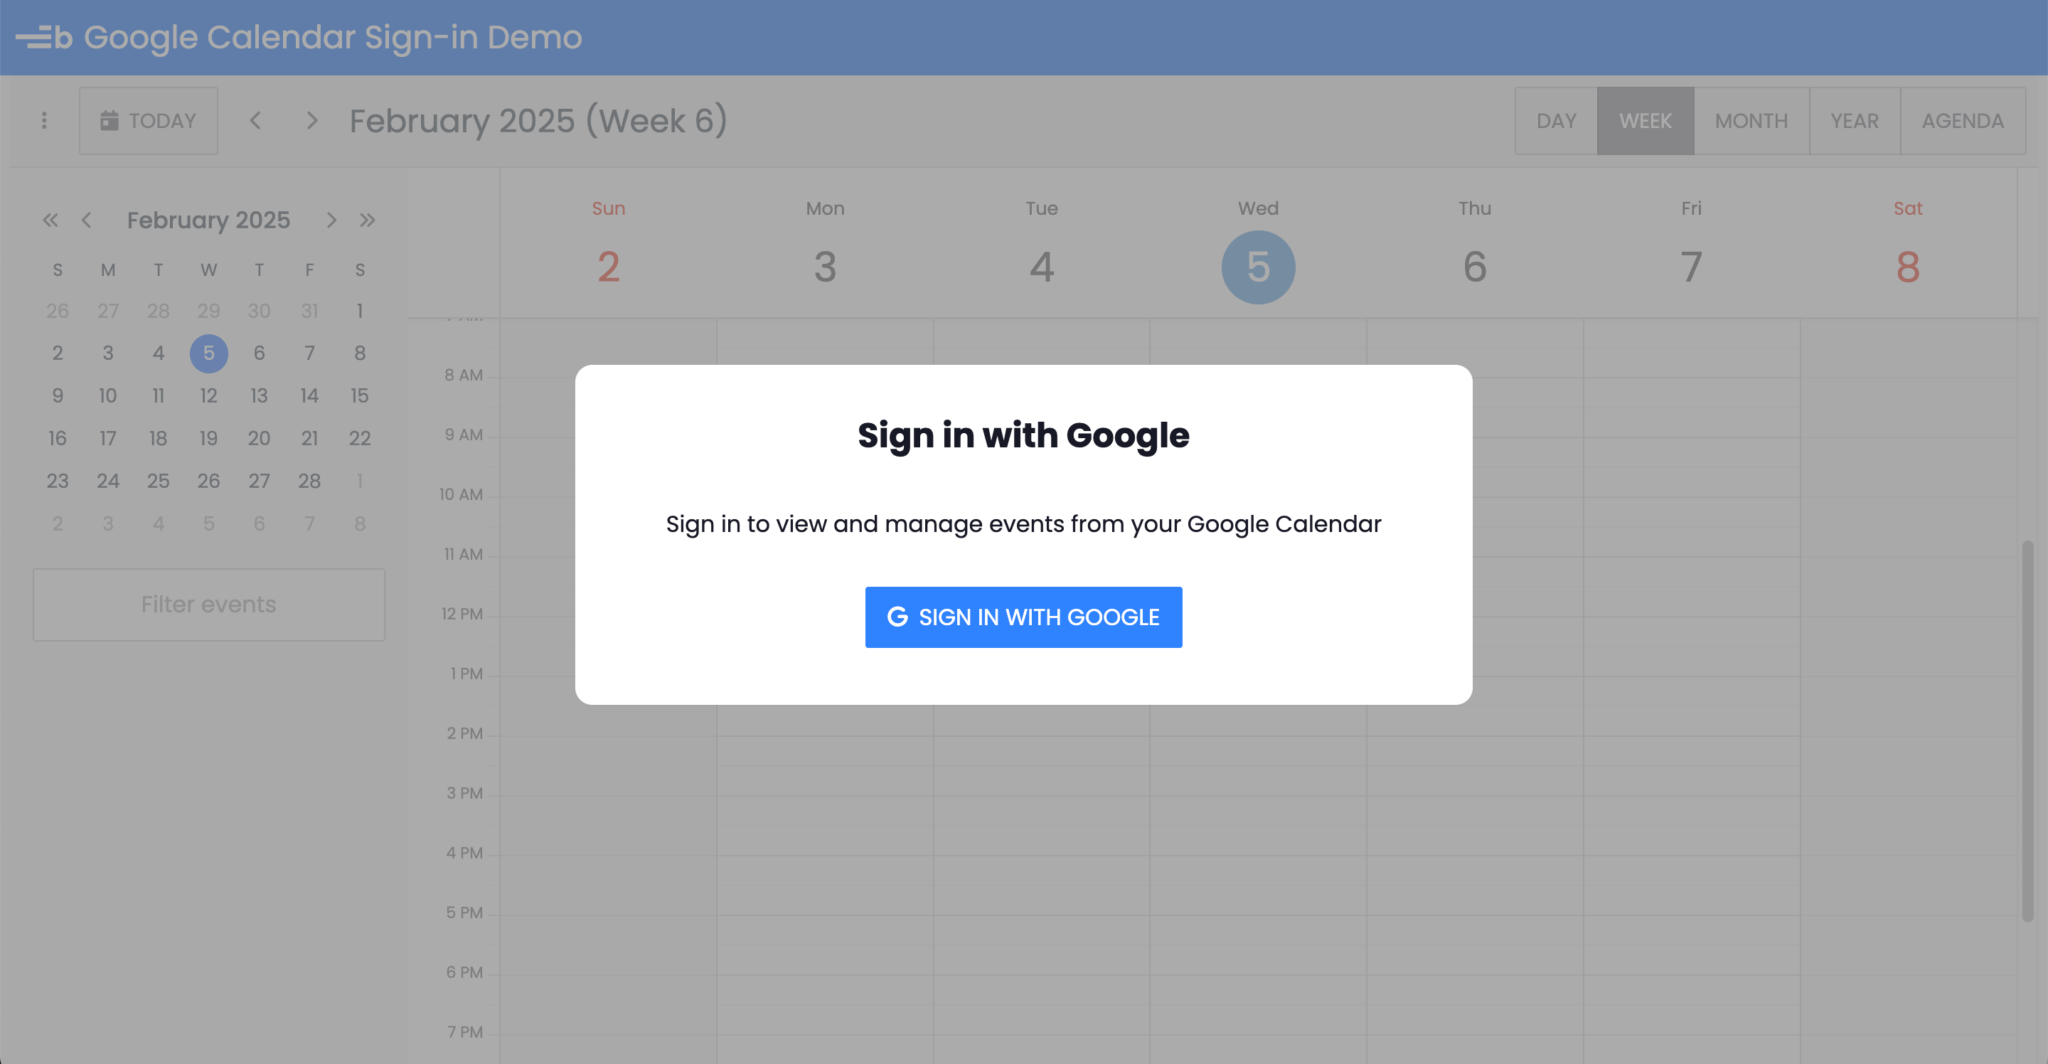
import SignInModal from './SignInModal';Open https://localhost:5173. You should see a modal with a Sign in with Google button:
Adding Google OAuth to the sign-in modal
First, install the React OAuth2 | Google and JavaScript Cookie libraries:
npm i @react-oauth/google js-cookieIn the src/components/App.jsx file, import the GoogleOAuthProvider:
import { GoogleOAuthProvider } from '@react-oauth/google';Replace the returned React fragment, <>, with the GoogleOAuthProvider component and pass in the Google project client ID as a prop:
<GoogleOAuthProvider clientId={import.meta.env.VITE_GOOGLE_CLIENT_ID}>
    ...
</GoogleOAuthProvider>
Add the following imports to the top of the file:
import { useEffect } from 'react';
import Cookies from 'js-cookie';
Add the following state variables to the App component:
const [accessToken, setAccessToken] = useState();
const [isLoading, setIsLoading] = useState(true);
Add the following Effect:
useEffect(() => {
    const savedToken = Cookies.get('google_access_token');
    if (savedToken) {
        setAccessToken(savedToken);
    }
    setIsLoading(false);
}, []);
The above Effect checks for a saved token, and if it finds one, saves it in the accessToken state variable.
Replace the returned <SignInModal> with the following code:
{ !accessToken && !isLoading ?
      <SignInModal
        isModalVisible={isModalVisible}
        setModalVisible={setModalVisible}
        accessToken={accessToken}
        setAccessToken={setAccessToken}
    />
    : null
}
Here, we configure the modal so that it is only displayed when the user is not signed in.
In the src/components/SignInModal.jsx file, add the following imports:
import { useEffect } from 'react';
import { useGoogleLogin } from '@react-oauth/google';
import Cookies from 'js-cookie';
Add accessToken and setAccessToken to the SignInModal props:
    accessToken,
    setAccessToken
Add the following login function to the SignInModal component:
const login = useGoogleLogin({
    onSuccess : (tokenResponse) => {
        Cookies.set('google_access_token', tokenResponse.access_token, { expires : 1, path : '/' });
        setAccessToken(tokenResponse.access_token);
        setModalVisible(false);
    },
    onError : (err) => {
        console.error('Login Failed:', err);
    },
    scope                : 'https://www.googleapis.com/auth/calendar.events',
    use_fedcm_for_prompt  : true
});
This function uses the useGoogleLogin custom Hook from the React OAuth2 | Google library to log in to the Google project. The onSuccess callback returns an access token, which we save to the accessToken state variable. We’ll use this token to get the user’s Google Calendar events. The scope is set to the same ../auth/calendar.events scope that we set for the project in Google Cloud console.
We set the use_fedcm_for_prompt property to true to enable the Federated Credentials Management API, which the Google Identity Services SDK is migrating to. The React OAuth2 | Google library uses the Google Identity Services SDK.
Now, add the following Effect, which hides the sign-in modal when the user is logged in:
useEffect(() => {
    if (accessToken) {
        setModalVisible(false);
    }
}, [accessToken, setModalVisible]);
Add the following prop to the BryntumButton so that the login function is called when the user clicks the button:
onClick={login}You’ll now be able to sign in to the app using your Google account:
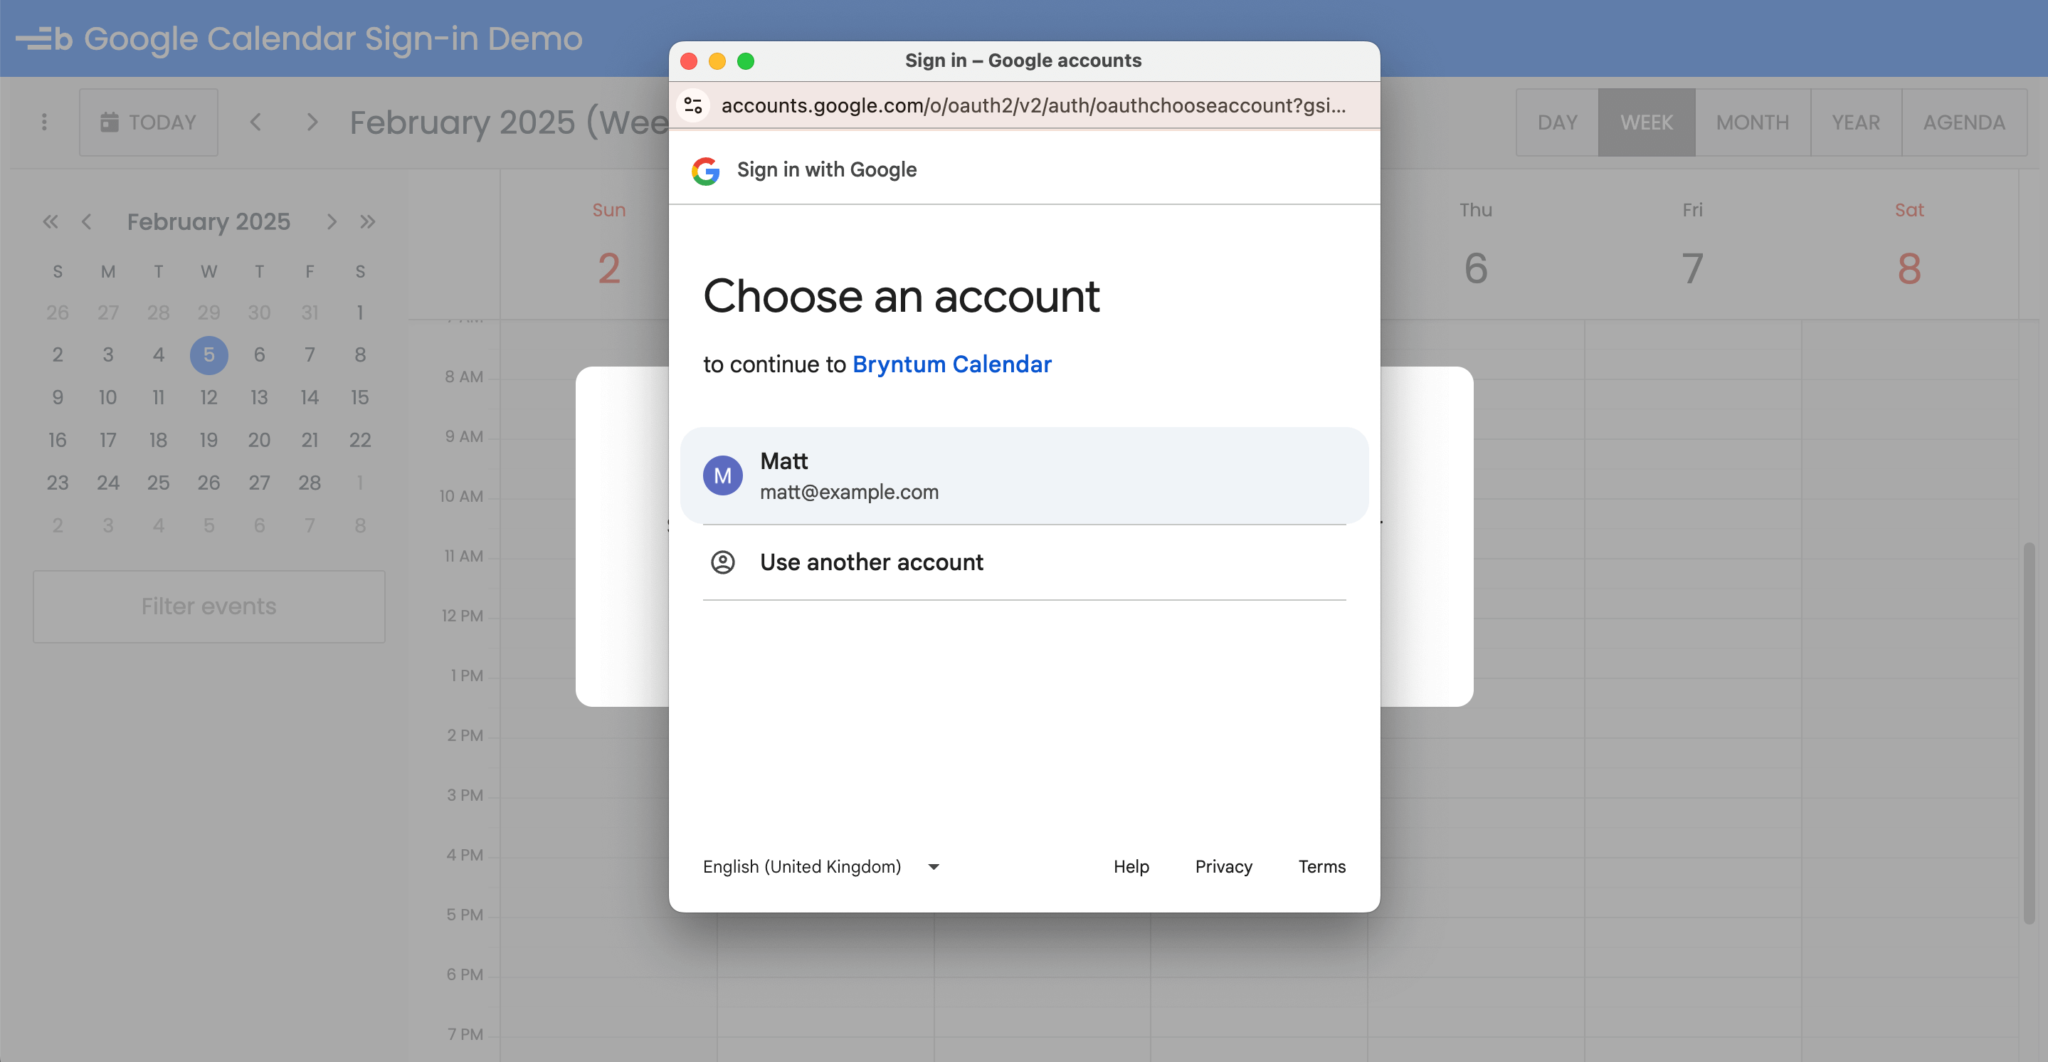
- In the sign-in pop-up, check the View and edit events on all your calendars checkbox.
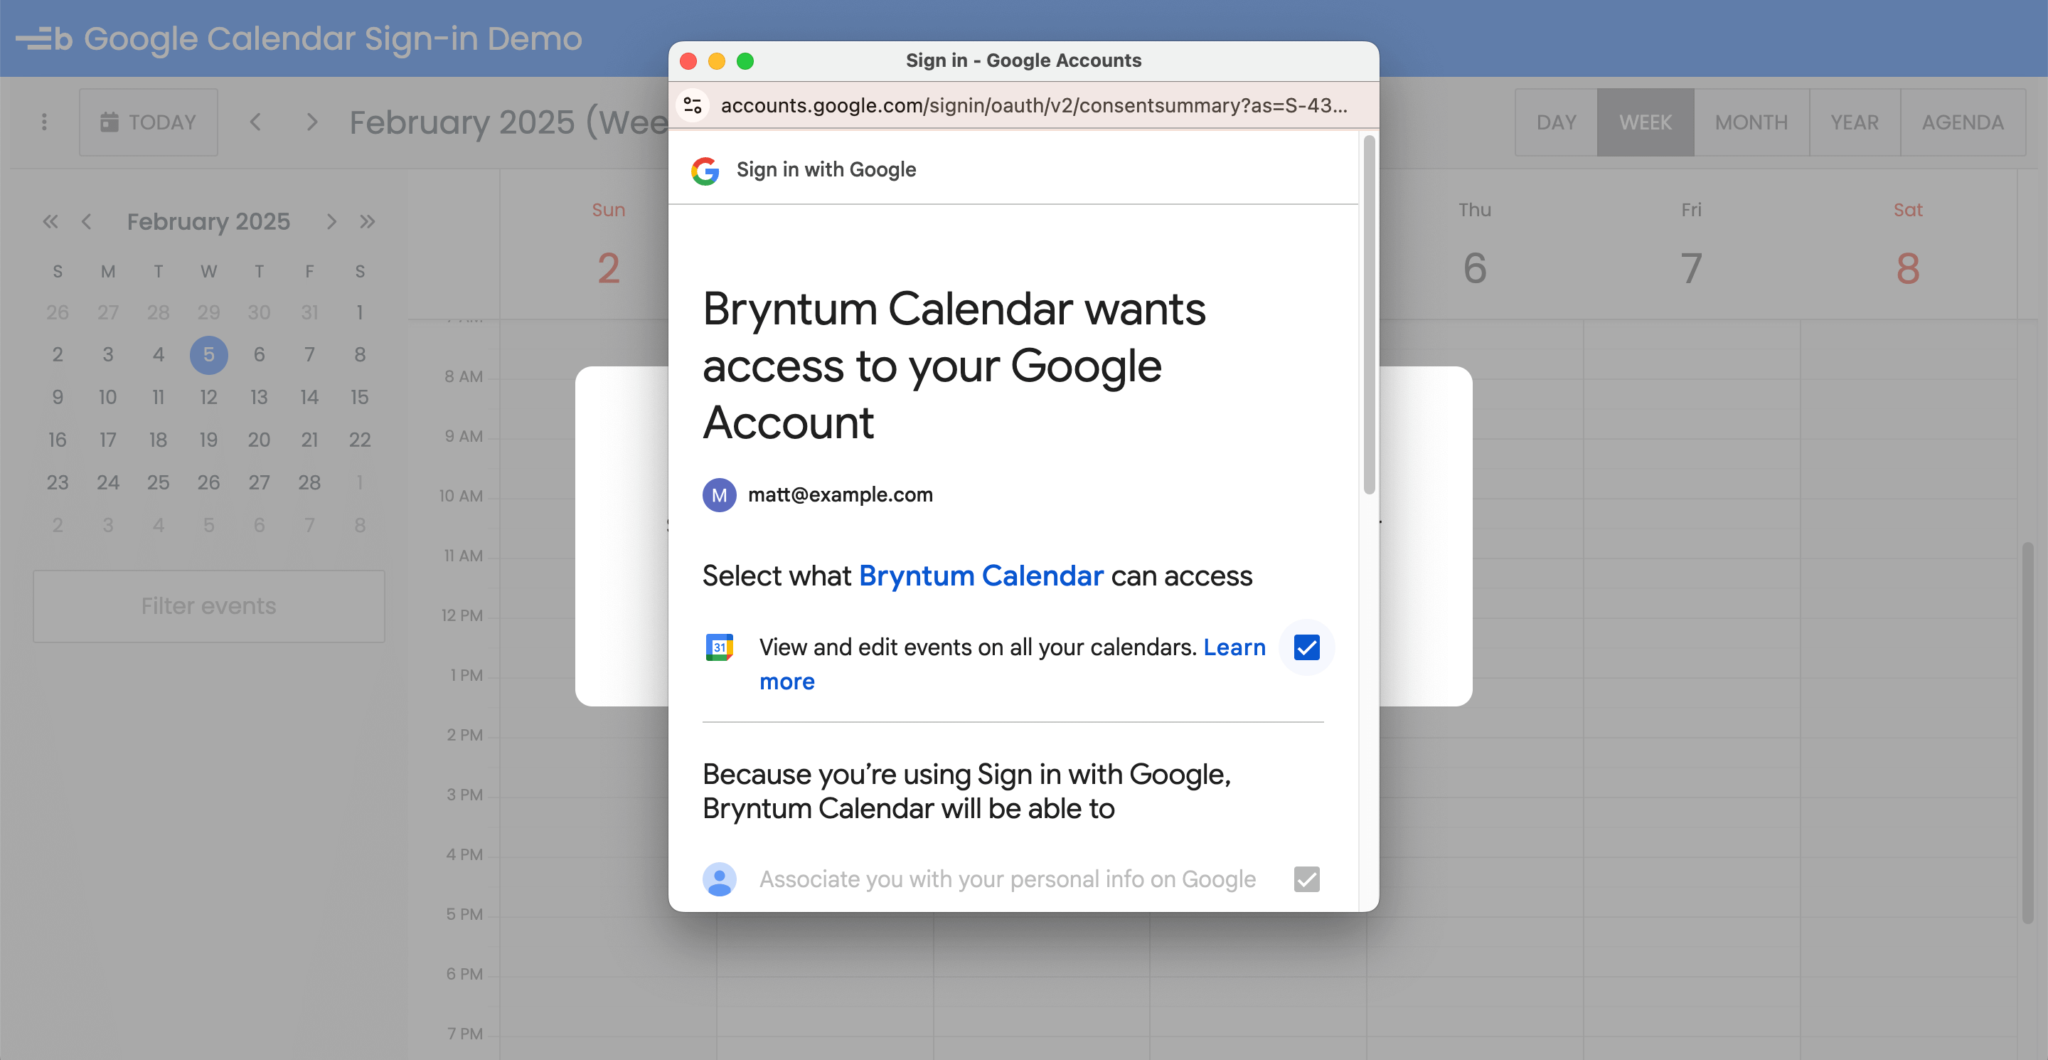
- Click the Continue button to log in to the app.
To prevent page scrolling when the modal is open, add the following Effect to the SignInModal component:
useEffect(() => {
    if (isModalVisible) {
        const scrollY = window.scrollY;
        document.body.style.overflowY = 'hidden';
        window.scrollTo(0, 0);
        return () => {
            document.body.style.overflowY = 'auto';
            window.scrollTo(0, scrollY);
        };
    }
}, [isModalVisible]);
Creating a sign-out button
Create a SignOutButton.jsx file in the src/components folder and add the following lines of code to it:
import { googleLogout } from '@react-oauth/google';
import { BryntumButton } from '@bryntum/calendar-react';
import Cookies from 'js-cookie';
function SignOutButton({
    accessToken,
    setAccessToken,
    setModalVisible
}) {
    const handleSignOut = () => {
        Cookies.remove('google_access_token', { path : '/' });
        googleLogout();
        setAccessToken(null);
        setModalVisible(true);
    };
    if (!accessToken) return null;
    return (
        <BryntumButton
            text="Sign Out"
            icon="b-fa-sign-out"
            cls="b-raised"
            color="b-blue"
            onClick={handleSignOut}
        />
    );
}
export default SignOutButton;
When the Bryntum sign-out button is clicked, we log the user out using the googleLogout method, remove the google_access_token cookie, and reset the state variables.
Import the Bryntum sign-out button in the src/components/App.jsx file:
import SignOutButton from './SignOutButton';Add the following code block below the <div> with a className of title-container in the <header> element:
{ accessToken ? (
    <SignOutButton
        accessToken={accessToken}
        setAccessToken={setAccessToken}
        setModalVisible={setModalVisible}
    />
) : null }
You’ll now see the Sign Out button in the Bryntum Calendar header:
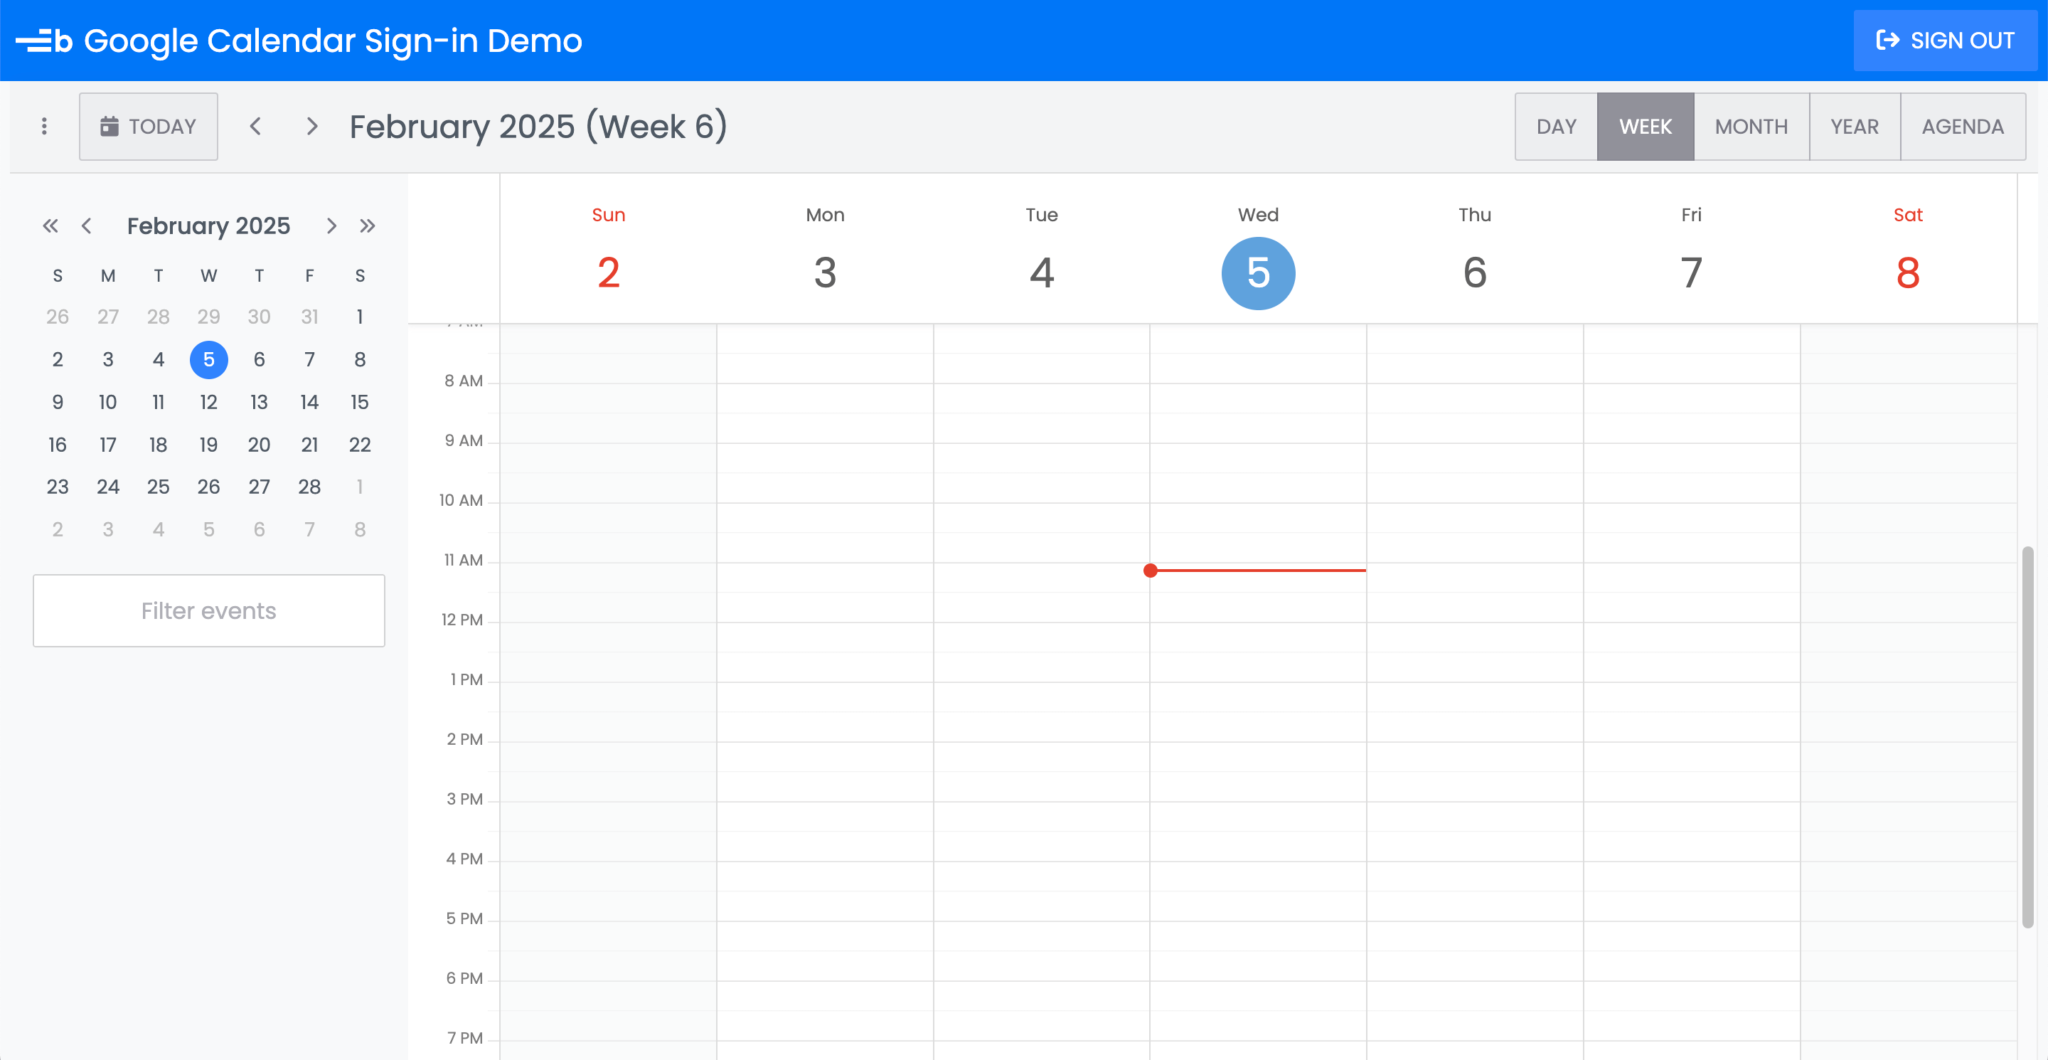
Next, we’ll use the access token to get events from the user’s Google Calendar.
Getting events data from Google Calendar
Create a crudFunctions.js file in the src folder and add the following function to it:
export async function listCalendarEvents(accessToken, setEvents) {
    if (!accessToken) return;
    const now = new Date();
    const twoWeeksBack = new Date(now);
    twoWeeksBack.setDate(now.getDate() - 14);
    const twoWeeksForward = new Date(now);
    twoWeeksForward.setDate(now.getDate() + 14);
    const query = new URLSearchParams({
        timeMin      : twoWeeksBack.toISOString(),
        timeMax      : twoWeeksForward.toISOString(),
        singleEvents : 'true',
        maxResults   : '100',
        orderBy      : 'startTime'
    });
    const res = await fetch(`https://www.googleapis.com/calendar/v3/calendars/primary/events?${query}`, {
        headers : {
            Authorization : `Bearer ${accessToken}`
        }
    });
    if (!res.ok) {
        throw new Error('Error fetching events:', res.statusText);
    }
    const data = await res.json();
    if (!data.items) return;
    const formattedEvents = data.items.map(ev => ({
        id        : ev.id,
        name      : ev.summary,
        startDate : ev.start.dateTime || ev.start.date,
        endDate   : ev.end.dateTime   || ev.end.date,
        allDay    : !ev.start.dateTime
    }));
    setEvents(formattedEvents);
}
This function uses the Fetch API to get the signed-in user’s Google Calendar events using their access token. We use the timeMin and timeMax query parameters to fetch events scheduled for the two weeks before and after the current date. We format the returned events to match the format expected by the Bryntum Calendar and save the events in the events state variable (which we’ll soon create).
Import the following function in the src/components/App.jsx file:
import { listCalendarEvents } from '../crudFunctions';Create the events state variable:
const [events, setEvents] = useState();In the rendered BryntumCalendar component, pass the events state variable to the eventStore prop:
eventStore={{
    data : events
}}
Replace the React Effect with the following:
useEffect(() => {
    async function fetchData() {
        const savedToken = Cookies.get('google_access_token');
        if (savedToken) {
            setAccessToken(savedToken);
            try {
                await listCalendarEvents(savedToken, setEvents);
            }
            catch (error) {
                console.error('Error fetching events:', error);
            }
        }
    }
    fetchData();
    setIsLoading(false);
}, []);
If a user is logged in, this Effect calls the listCalendarEvents function using their access token.
Add the following prop to the SignInModal and SignOutButton:
setEvents={setEvents}In the src/components/SignInModal.jsx file, import the listCalendarEvents function:
import { listCalendarEvents } from '../crudFunctions';Pass in setEvents as a prop in the SignInModal component:
setEvents,In the login function, call the listCalendarEvents function in the onSuccess callback function:
listCalendarEvents(tokenResponse.access_token, setEvents);In the src/components/SignOutButton.jsx file, pass in setEvents as a prop in the SignOutButton component:
setEvents,In the handleSignOut function, reset the events state:
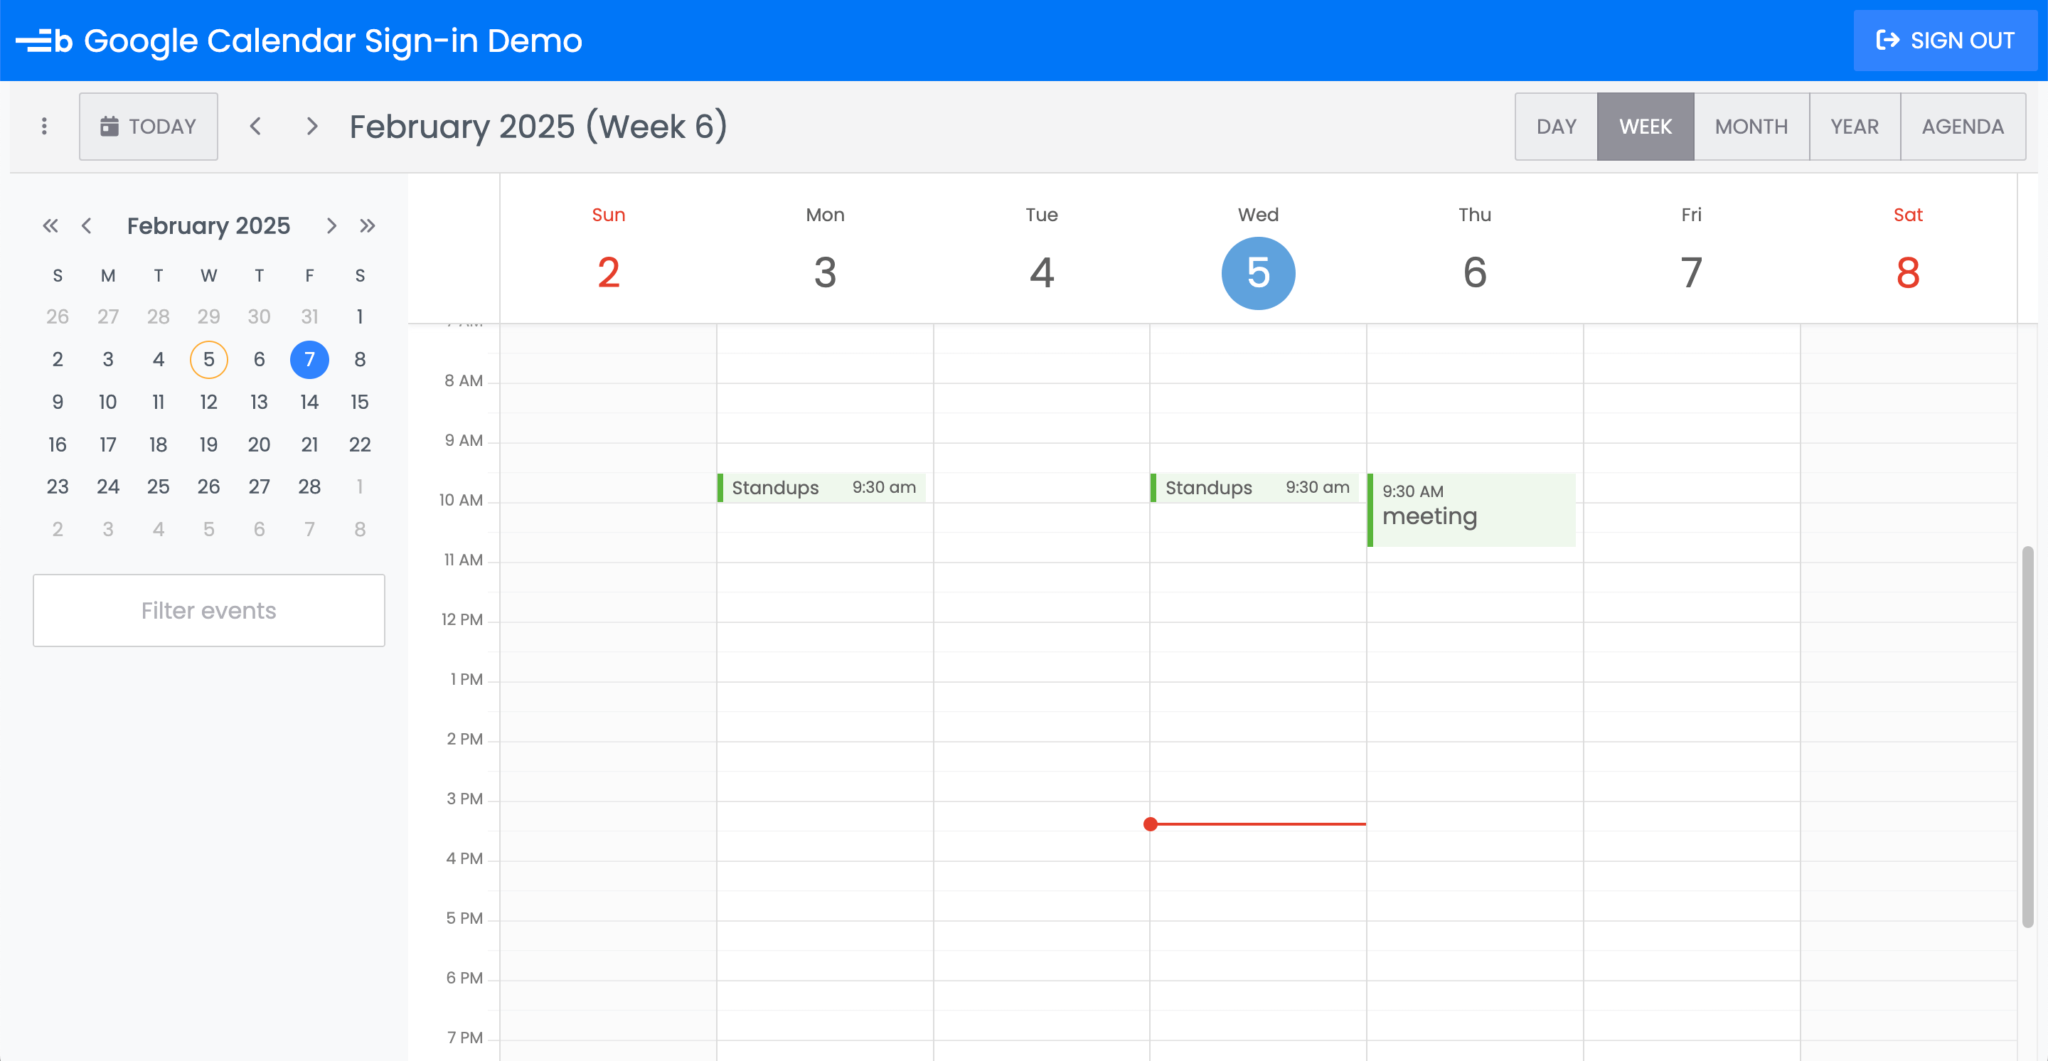
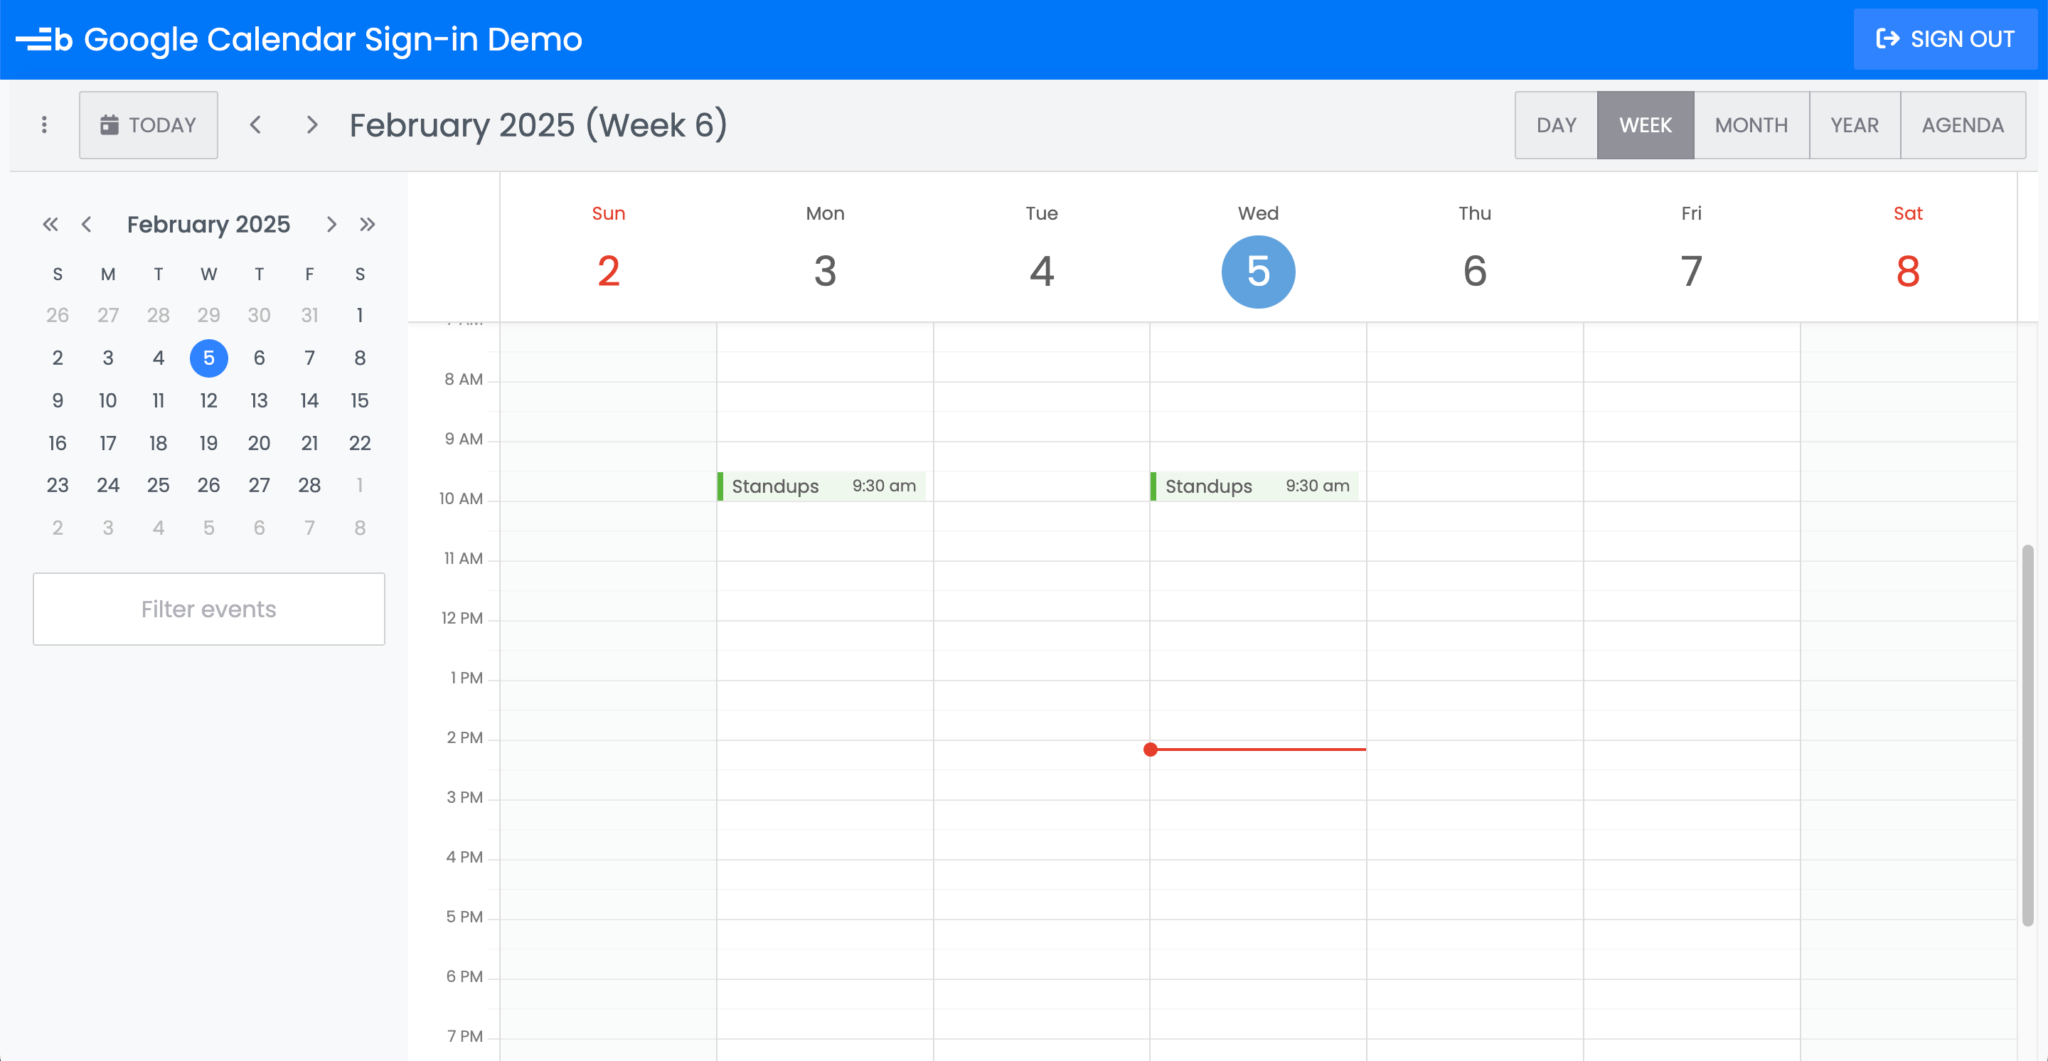
setEvents();Now when you log in, you should see the Bryntum Calendar populated with your Google Calendar events:
Syncing event data changes to Google Calendar
Add the following function to the src/crudFunctions.js file:
export function BryntumSync(
    id,
    name,
    startDate,
    endDate,
    allDay,
    action,
    setEvents,
    accessToken
) {
    if (!accessToken) return;
    const baseUrl = 'https://www.googleapis.com/calendar/v3/calendars/primary/events';
    const formatAllDayDate = (date) => {
        const d = new Date(date);
        return `${d.getFullYear()}-${String(d.getMonth() + 1).padStart(2, '0')}-${String(d.getDate()).padStart(2, '0')}`;
    };
    const eventData = {
        summary : name,
        start   : allDay ? { date : formatAllDayDate(startDate) } : { dateTime : new Date(startDate).toISOString() },
        end     : allDay ? { date : formatAllDayDate(endDate) }   : { dateTime : new Date(endDate).toISOString() }
    };
    if (action === 'add') {
        fetch(baseUrl, {
            method  : 'POST',
            headers : {
                Authorization  : `Bearer ${accessToken}`,
                'Content-Type' : 'application/json'
            },
            body : JSON.stringify(eventData)
        })
            .then(res => res.json())
            .then(data => {
                if (!data.id) throw new Error('Calendar API error');
                const newEvent = {
                    id        : data.id,
                    name      : data.summary,
                    startDate : data.start.dateTime || data.start.date,
                    endDate   : data.end.dateTime   || data.end.date,
                    allDay    : !data.start.dateTime
                };
                setEvents(prev => [...prev, newEvent]);
            })
            .catch(err => console.error('Error creating event:', err));
    }
    else if (action === 'update') {
        if (!id || id.startsWith('_generated')) return;
        fetch(`${baseUrl}/${id}`, {
            method  : 'PUT',
            headers : {
                Authorization  : `Bearer ${accessToken}`,
                'Content-Type' : 'application/json'
            },
            body : JSON.stringify(eventData)
        })
            .then(res => res.json())
            .then(data => {
                if (!data.id) throw new Error('Calendar API error');
                const updatedEvent = {
                    id        : data.id,
                    name      : data.summary,
                    startDate : data.start.dateTime || data.start.date,
                    endDate   : data.end.dateTime   || data.end.date,
                    allDay    : !data.start.dateTime
                };
                setEvents(prevEvents =>
                    prevEvents.map(evt => (evt.id === id ? updatedEvent : evt))
                );
            })
            .catch(err => console.error('Error updating event:', err));
    }
    else if (action === 'remove') {
        if (id.startsWith('_generated')) return;
        fetch(`${baseUrl}/${id}`, {
            method  : 'DELETE',
            headers : {
                Authorization : `Bearer ${accessToken}`
            }
        })
            .then(() => {
                setEvents(prevEvents => prevEvents.filter(evt => evt.id !== id));
            })
            .catch(err => console.error('Error deleting event:', err));
    }
}
In the BryntumSync function, we take in the event record data from the Bryntum Calendar when a data change event occurs and use the Fetch API to update the logged-in user’s Google Calendar. We also pass in the CRUD action type and the user’s access token as arguments.
We don’t update or delete events with id values that start with '_generated', because these events do not exist in Google Calendar. Each new record in the Bryntum Calendar client-side data store is assigned a UUID, prefixed by _generated, as its temporary event id. This temporary id should be replaced by a permanent id created on the server.
Import the BryntumSync function in the src/components/App.jsx file:
import { BryntumSync } from '../crudFunctions';Add the following memoized syncData function to the App component above the calendarConfig variable:
const syncData = useCallback(({ action, records }) => {
    if (action === 'add') {
        return;
    }
    records.forEach((record) => {
        BryntumSync(
            record.data.id,
            record.data.name,
            record.data.startDate,
            record.data.endDate,
            record.data.allDay,
            action,
            setEvents,
            accessToken
        );
    });
}, [accessToken]);
Import the useCallback hook:
import { useCallback } from 'react';This function calls the BryntumSync function for updates and deletions, passing in the Bryntum Calendar event record data.
Add the following memoized addRecord function below the syncData function:
const addRecord = useCallback(({ eventRecord }) => {
    if (
        eventRecord.id.startsWith('_generated')
    ) {
        BryntumSync(
            eventRecord.data.id,
            eventRecord.data.name,
            eventRecord.data.startDate,
            eventRecord.data.endDate,
            eventRecord.data.allDay,
            'add',
            setEvents,
            accessToken
        );
    }
    else {
        BryntumSync(
            eventRecord.data.id,
            eventRecord.data.name,
            eventRecord.data.startDate,
            eventRecord.data.endDate,
            eventRecord.data.allDay,
            'update',
            setEvents,
            accessToken
        );
    }
}, [accessToken]);
Here, we create a new Google Calendar event if the event record has an id that starts with _generated, and if it does not, we update the existing event.
Add the following properties to the memoized calendarConfig:
onDataChange     : syncData,
onAfterEventSave : addRecord
Add the syncData and addRecord functions to the memoized calendarConfig dependency array:
[syncData, addRecord]The Bryntum Calendar onDataChange event handler is called when data in the Bryntum Calendar changes. We use it to call the syncData function, which handles the synchronization of updates and deletions to Google Calendar.
The onAfterEventSave event handler is called after the Save button in the event editor form is clicked. It calls the addRecord function, which handles the synchronization of created and updated events to Google Calendar.
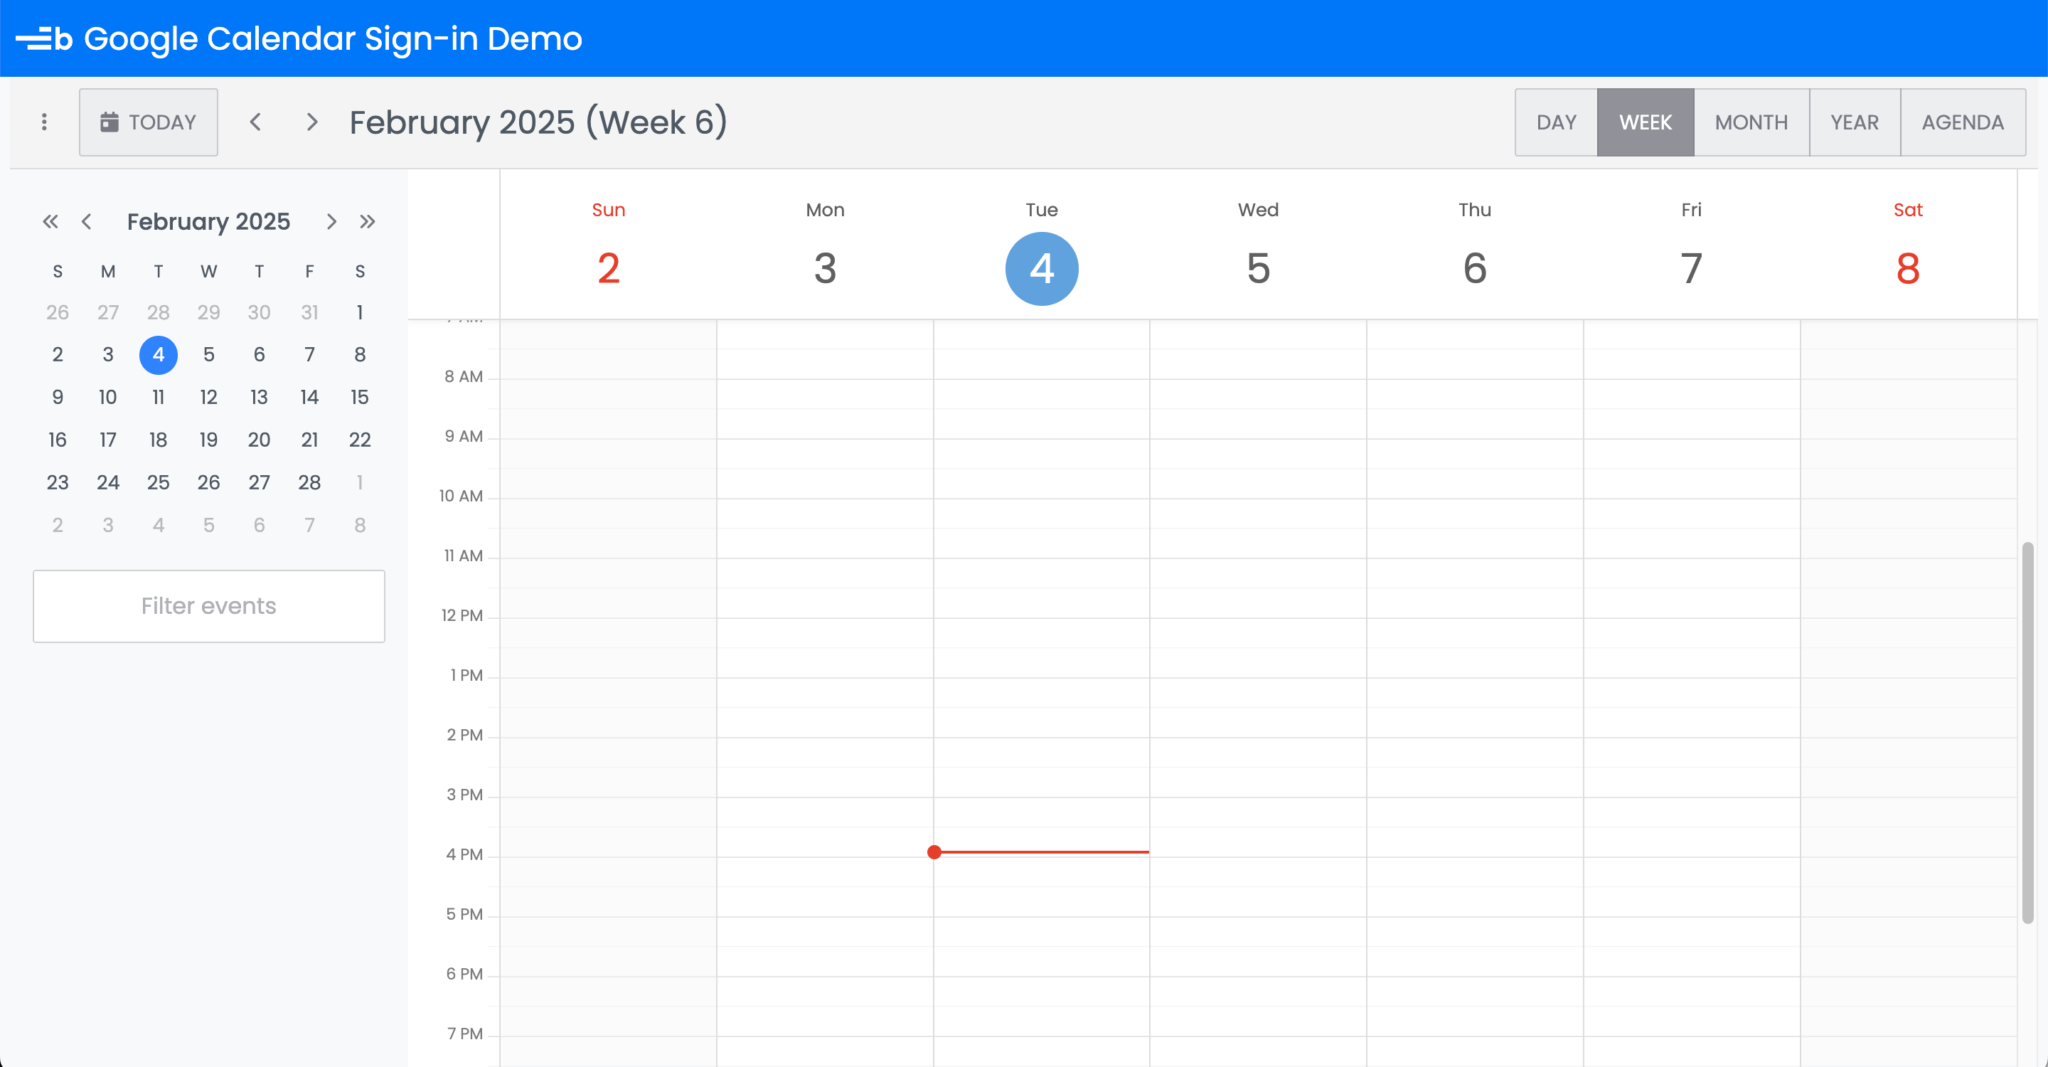
Now, run the local dev server. Data changes in your Bryntum Calendar will be synced with your Google Calendar:
Next steps
This tutorial gives you a starting point for syncing a React Bryntum Calendar with Google Calendar.
If you want to deploy your app, you’ll need to submit your Google app to Google’s OAuth review team for verification.
You can learn how to add recurring events to your Bryntum Calendar by referring to the Google Calendar API and Bryntum Calendar recurring events documentation.
Finally, you can look at our Bryntum Calendar demo page to get an idea of the additional features you can add to your calendar.