Exporting Bryntum Gantt To PDF
We strive to keep posts updated, but code samples may sometimes be outdated. Humans, see the Bryntum documentation; agents, https://mcp.bryntum.com for the latest info.
Recently we introduced support for exporting to PDF / PNG in our Grid, Scheduler and Gantt products. This feature has been one of our most popular ones over the years. In this post we will show you how to get started exporting your project schedule.
Export to PDF
Printing is a crucial feature of any Gantt chart. The native HTML browser print functionality is extremely limiting however and cannot be controlled from JavaScript. Instead, our components can be exported to PDF which can then be printed in high quality. With the recent addition of our `PdfExport` feature, you can now easily export schedules to PDF or PNG. The PDF format is widely supported on computers, smartphones and tablets. It supports multi page view and it is easy to read and print. Other times it’s preferable to have a PNG image, when you want to add your project schedule to a presentation or a report.
Export options
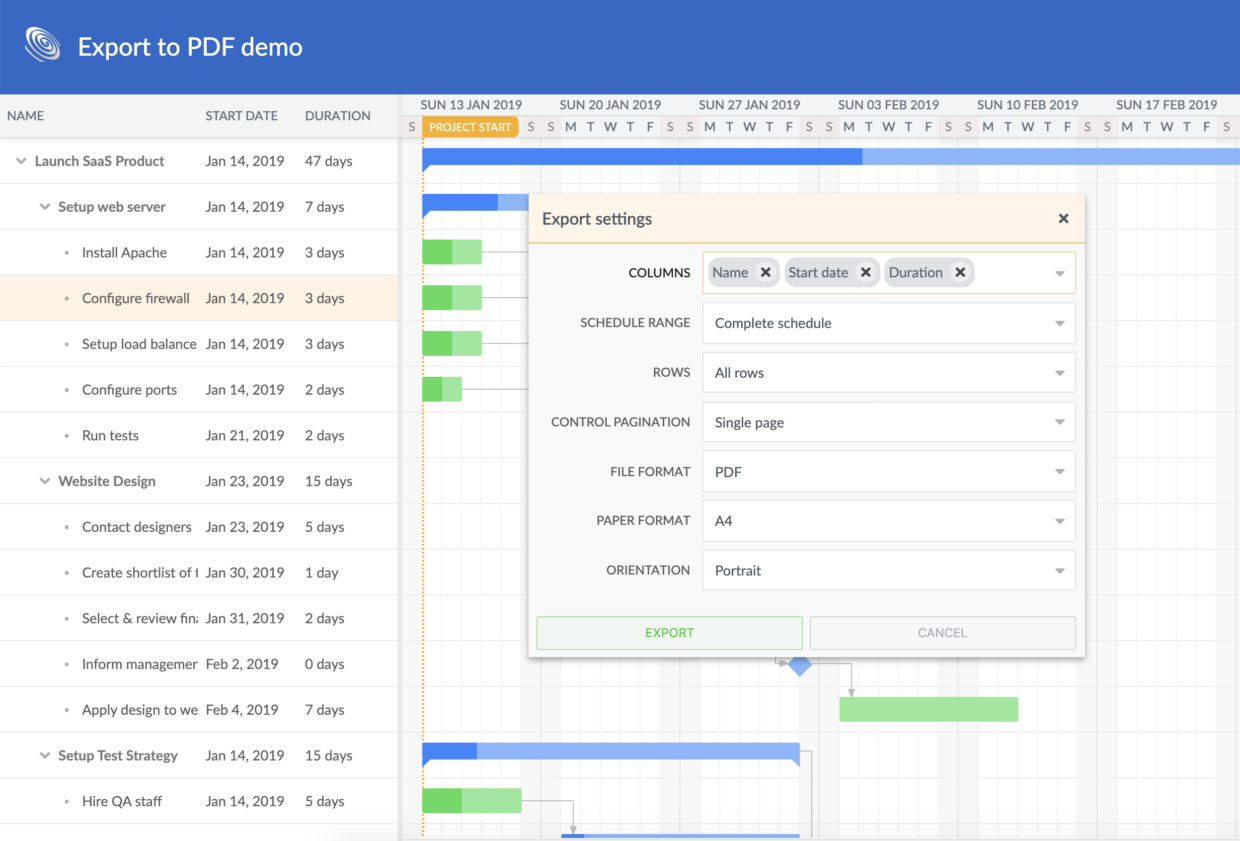
The ‘Export‘ feature is very configurable and allows you to customize the date range and the look of the output file. To make things even easier, these settings can be changed during runtime in the export dialog right before exporting.
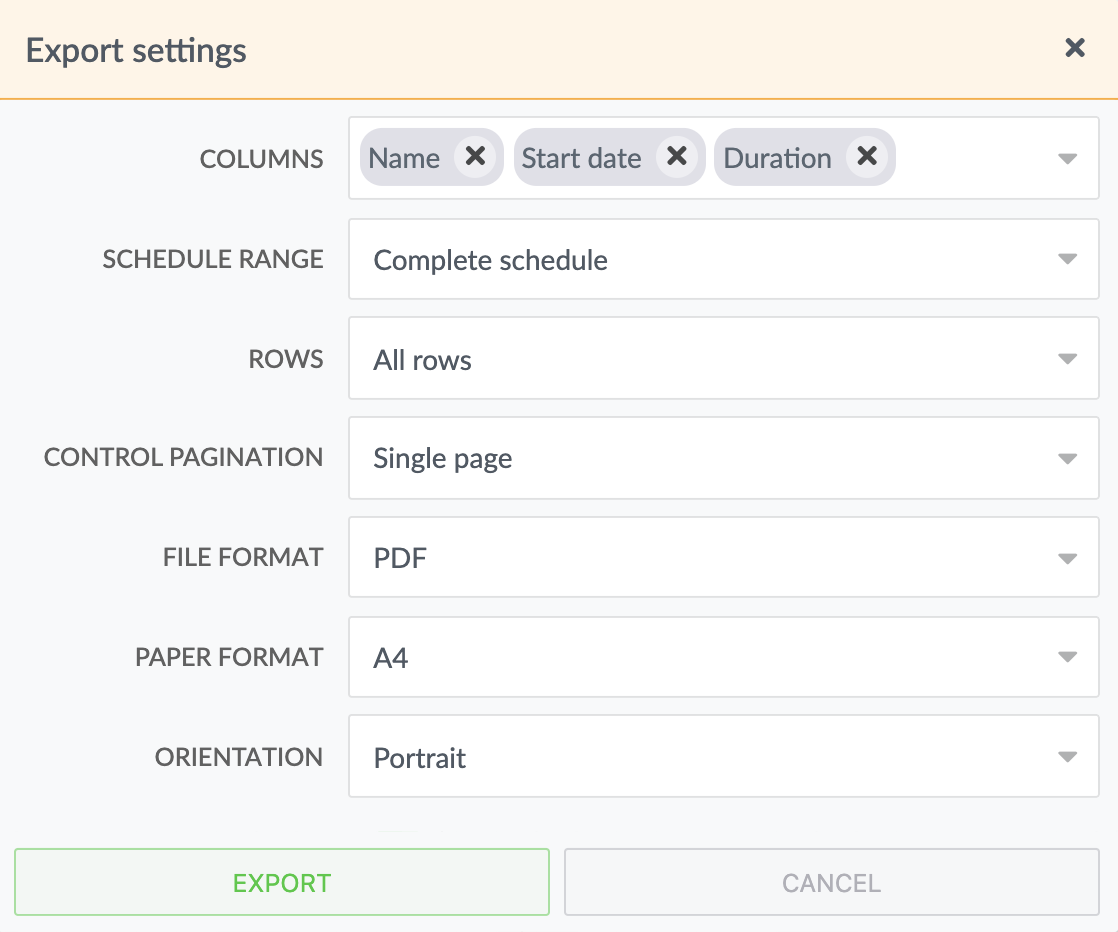
The options in the UI can be divided into three categories: Date range, paper size and orientation.
The date range setting defines the time span to include in the exported Gantt chart. The dialog gives you three options :
- Complete schedule – the total time span of the time axis.
- Visible schedule – the time span currently visible.
- Date range – displays date pickers to choose a custom time span.
The paper format option controls the size of the exported document by selecting one of the ISO paper formats from the combo box.
The orientation sets the orientation of the output file. It can be either `landscape` or `portrait`. These values can also be set in code as defaults for the fields in the dialog.
const gantt = new Gantt({
    features : {
        pdfExport : {
            exportServer            : 'https://localhost:8080/',
            translateURLsToAbsolute : 'https://localhost:8080/resources/',
            fileFormat  : 'png',
            orientation : 'landscape'
        }
    },
    ...
});
Adding a page header and footer
It is also easy to add a nice header and footer to your exported pages. See the code below for a simple example:
const headerTpl = ({ currentPage, totalPages }) => `
    <div class="demo-export-header">
        <img src="resources/logo.png"/>
        <dl>
            <dt>Date: ${DateHelper.format(new Date(), 'll LT')}</dt>
            <dd>${totalPages ? `Page: ${currentPage + 1}/${totalPages}` : ''}</dd>
        </dl>
    </div>`;

const footerTpl = () => '<div class="demo-export-footer"><h3>© 2020 Bryntum AB</h3></div>';

const gantt = new Gantt({
    features : {
        pdfExport : {
            exportServer            : 'https://localhost:8080/',
            translateURLsToAbsolute : 'https://localhost:8080/resources/',
            headerTpl,
            footerTpl
        }
    },
    ...
});
This produces the following output:

Setting up a backend for the export feature
To use the new Export feature, you need to setup a simple node server. This is explained in the README file of the `export` demo inside the examples folder:
1. Setup the server
Server is located in `examples/_shared/server`
Navigate to `examples/_shared/server/README.md` for instructions. Normally it is enough to run
cd examples/_shared/server/ && npm i && node ./src/server.js -h 8080 -r /path/to/resources
Where `/path/to/resources` is the path to the resources folder which is required to correctly load FontAwesome (used for icons).
An example:
# url              : https://localhost/gantt-x.y.z-trial/examples/export
# path             : /home/www/gantt-x.y.z-trial/examples/export
# resource path    : /home/www/gantt-x.y.z-trial/

node ./src/server.js -h 8080 -r /home/www/
2. Configure example to use your server
By default example is setup to use `localhost:8080`
3. Open the example
Open the in any browser and press `Export` to see the various export options.
Summing up…
We hope that you will be able to make good use of the new Export feature and as always we rely on your feedback in case it can be improved. Additional information about the configuration and setup of the environment can be found in the docs and the README file included in the export example folder.
Learn more
To try the export feature, please click here here. Additional resources below: