Creating a Bryntum Grid with Cursor, Claude Sonnet 4, and Context7
We strive to keep posts updated, but code samples may sometimes be outdated. Humans, see the Bryntum documentation; agents, https://mcp.bryntum.com for the latest info.
Bryntum Grid is a high-performance JavaScript table component for the web. It has an extensive API for customization and integrates easily with React, Angular, and Vue. Cursor is one of the most popular AI code editors. It can be used with various LLMs including Claude Sonnet 4, which is Anthropic’s latest LLM for daily use. A common problem with AI coding assistants is that LLMs often don’t work well with new versions of libraries. This is because their training data has a cutoff date. This is especially problematic for regularly updated libraries, such as the Bryntum Grid.
Context7 solves this problem by providing LLMs with up-to-date, version-specific documentation and code examples that have been indexed and processed for search efficiency. Documentation for thousands of libraries has already been added, including for Bryntum components. The Context7 MCP server lets you easily access documentation using an MCP client, such as Cursor.
In this guide, we’ll use Cursor, Claude Sonnet 4, and Context7 to create and customize a Bryntum Grid CRUD app by:
- Installing the Context7 MCP server in Cursor
- Creating Cursor rules files for persistent, reusable LLM context
- Creating a basic Bryntum Grid with an Express.js backend and Vite.js frontend
- Creating Express.js API endpoints to make the data persistent
- Adding features to the Grid
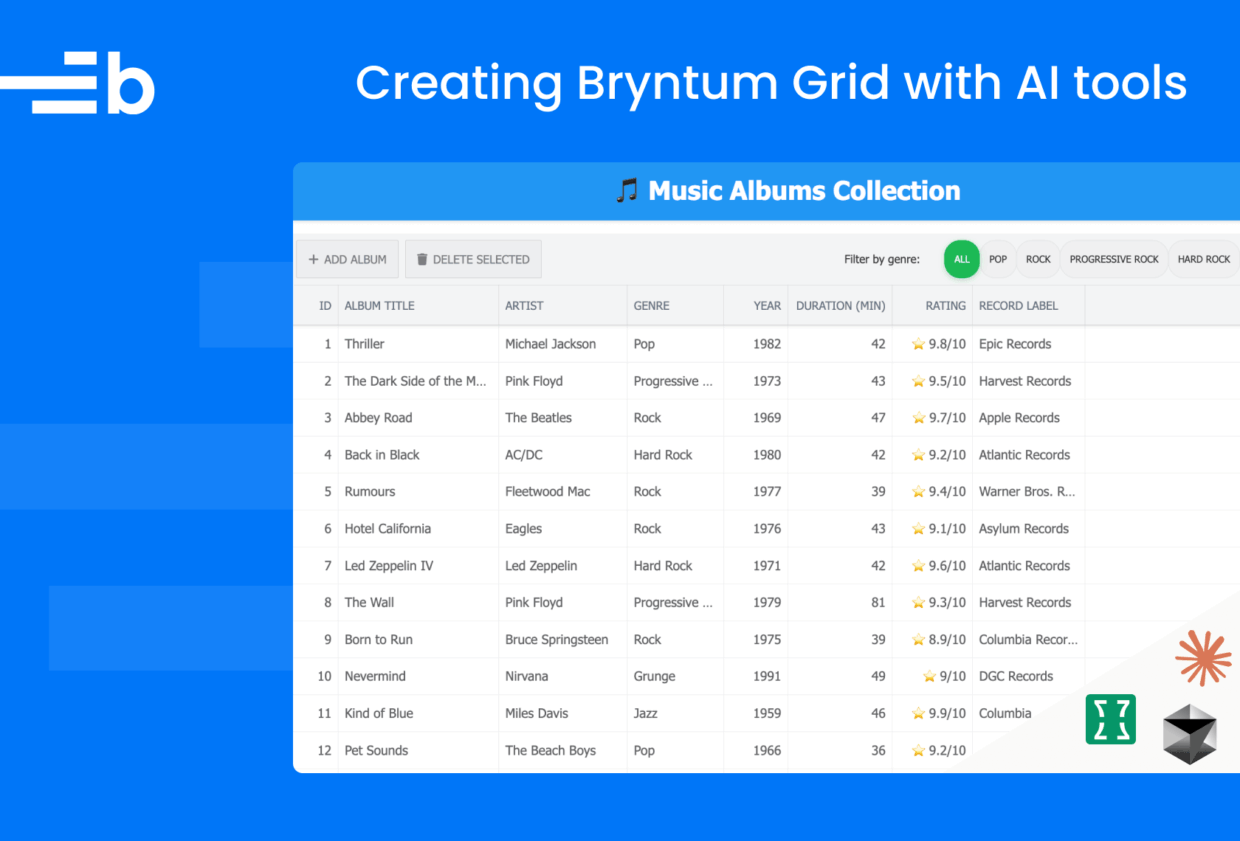
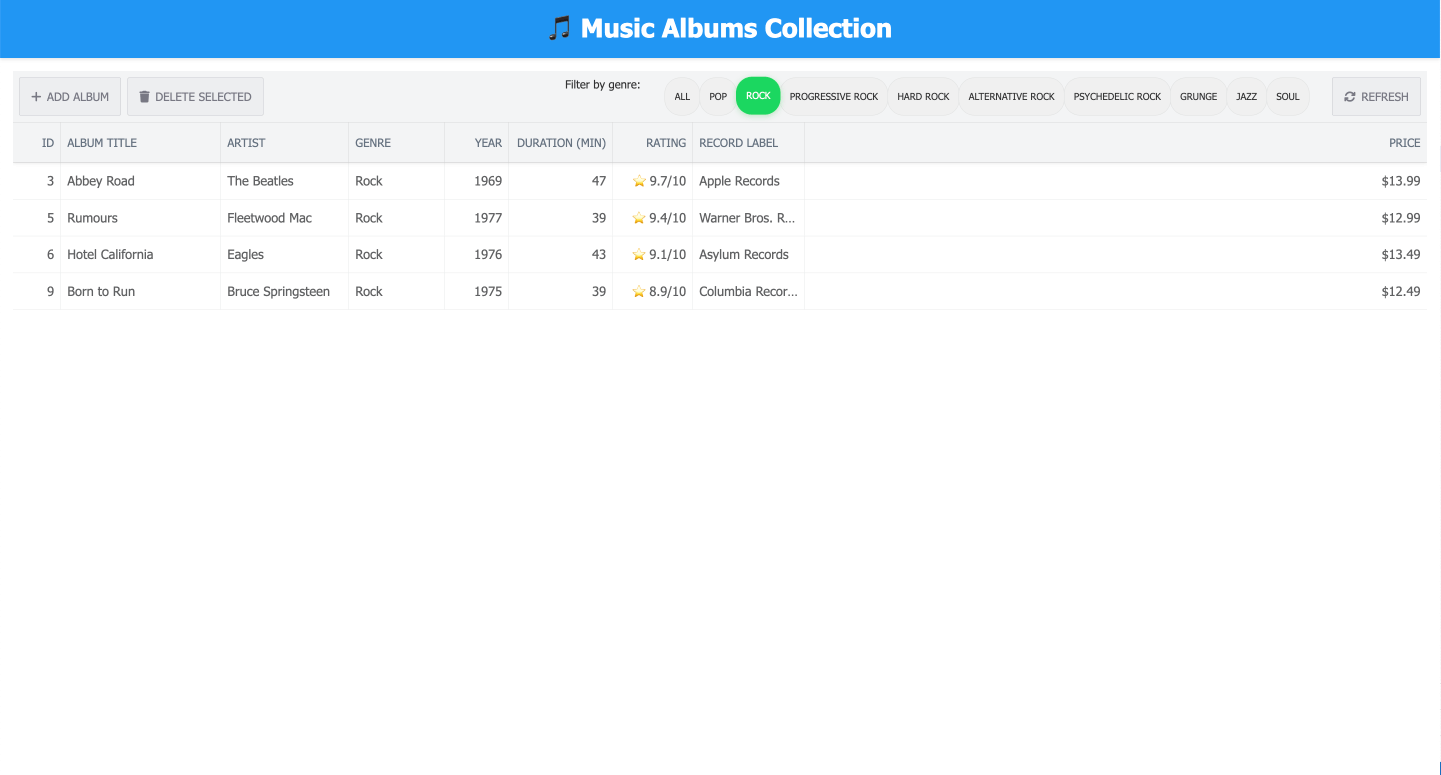
Here’s what we’ll build:
⚠️ LLMs can be unpredictable, so it’s likely that your generated Bryntum Grid will be a bit different to the grid in the image above. For example, if the “Add album” button is not added to your Bryntum Grid toolbar, you can add it using a prompt. Take a look at the commits in the Bryntum Grid Express.js app GitHub repo to see the code changes that were made by each prompt when creating this tutorial.
How Context7 gets up-to-date documentation
Context7 gets up-to-date documentation using retrieval augmented generation (RAG), a process in which external data is retrieved and added to an LLM prompt, augmenting the prompt to give the LLM the information it needs to generate an appropriate response.
RAG often uses vector databases to store external data. Before data is added to the vector database, it’s chunked into smaller pieces and enriched with metadata. Embeddings, which are mathematical representations of objects (such as library documentation text), are then generated for the chunks and metadata, and the embeddings and metadata are added to the database. The vector database stores the embeddings in a high-dimensional space where embeddings with similar meanings are grouped together.
When you search the vector database, the search is embedded, and the most relevant content is found using a similarity search. The effectiveness of the search depends on various factors, such as how well the data was processed and which embedding model was used. Context7 does all of this for you. Documentation gets added to Context7 from GitHub, an LLMs.txt file, or a website. Context7 then creates documentation suitable for LLMs by:
- Extracting code snippets and examples from the provided documentation
- Adding short explanations and metadata using LLMs, which improves search results
- Embedding the content and saving it using the Context7 vector database to improve similarity search efficiency
Context7 uses a proprietary algorithm for ranking search results and caches requests for better performance.
Installing the Context7 MCP server in Cursor
The Cursor Free plan provides a two-week free trial and extra features, including extended limits on agent mode, unlimited tab completions, and access to maximum context windows. The Context7 MCP GitHub repo has installation steps for multiple MCP clients, including Cursor.
We’ll install the Context7 MCP server globally, in the ~/.cursor/mcp.json file, but you can also install it for a specific project in a .cursor/mcp.json file in your project folder.
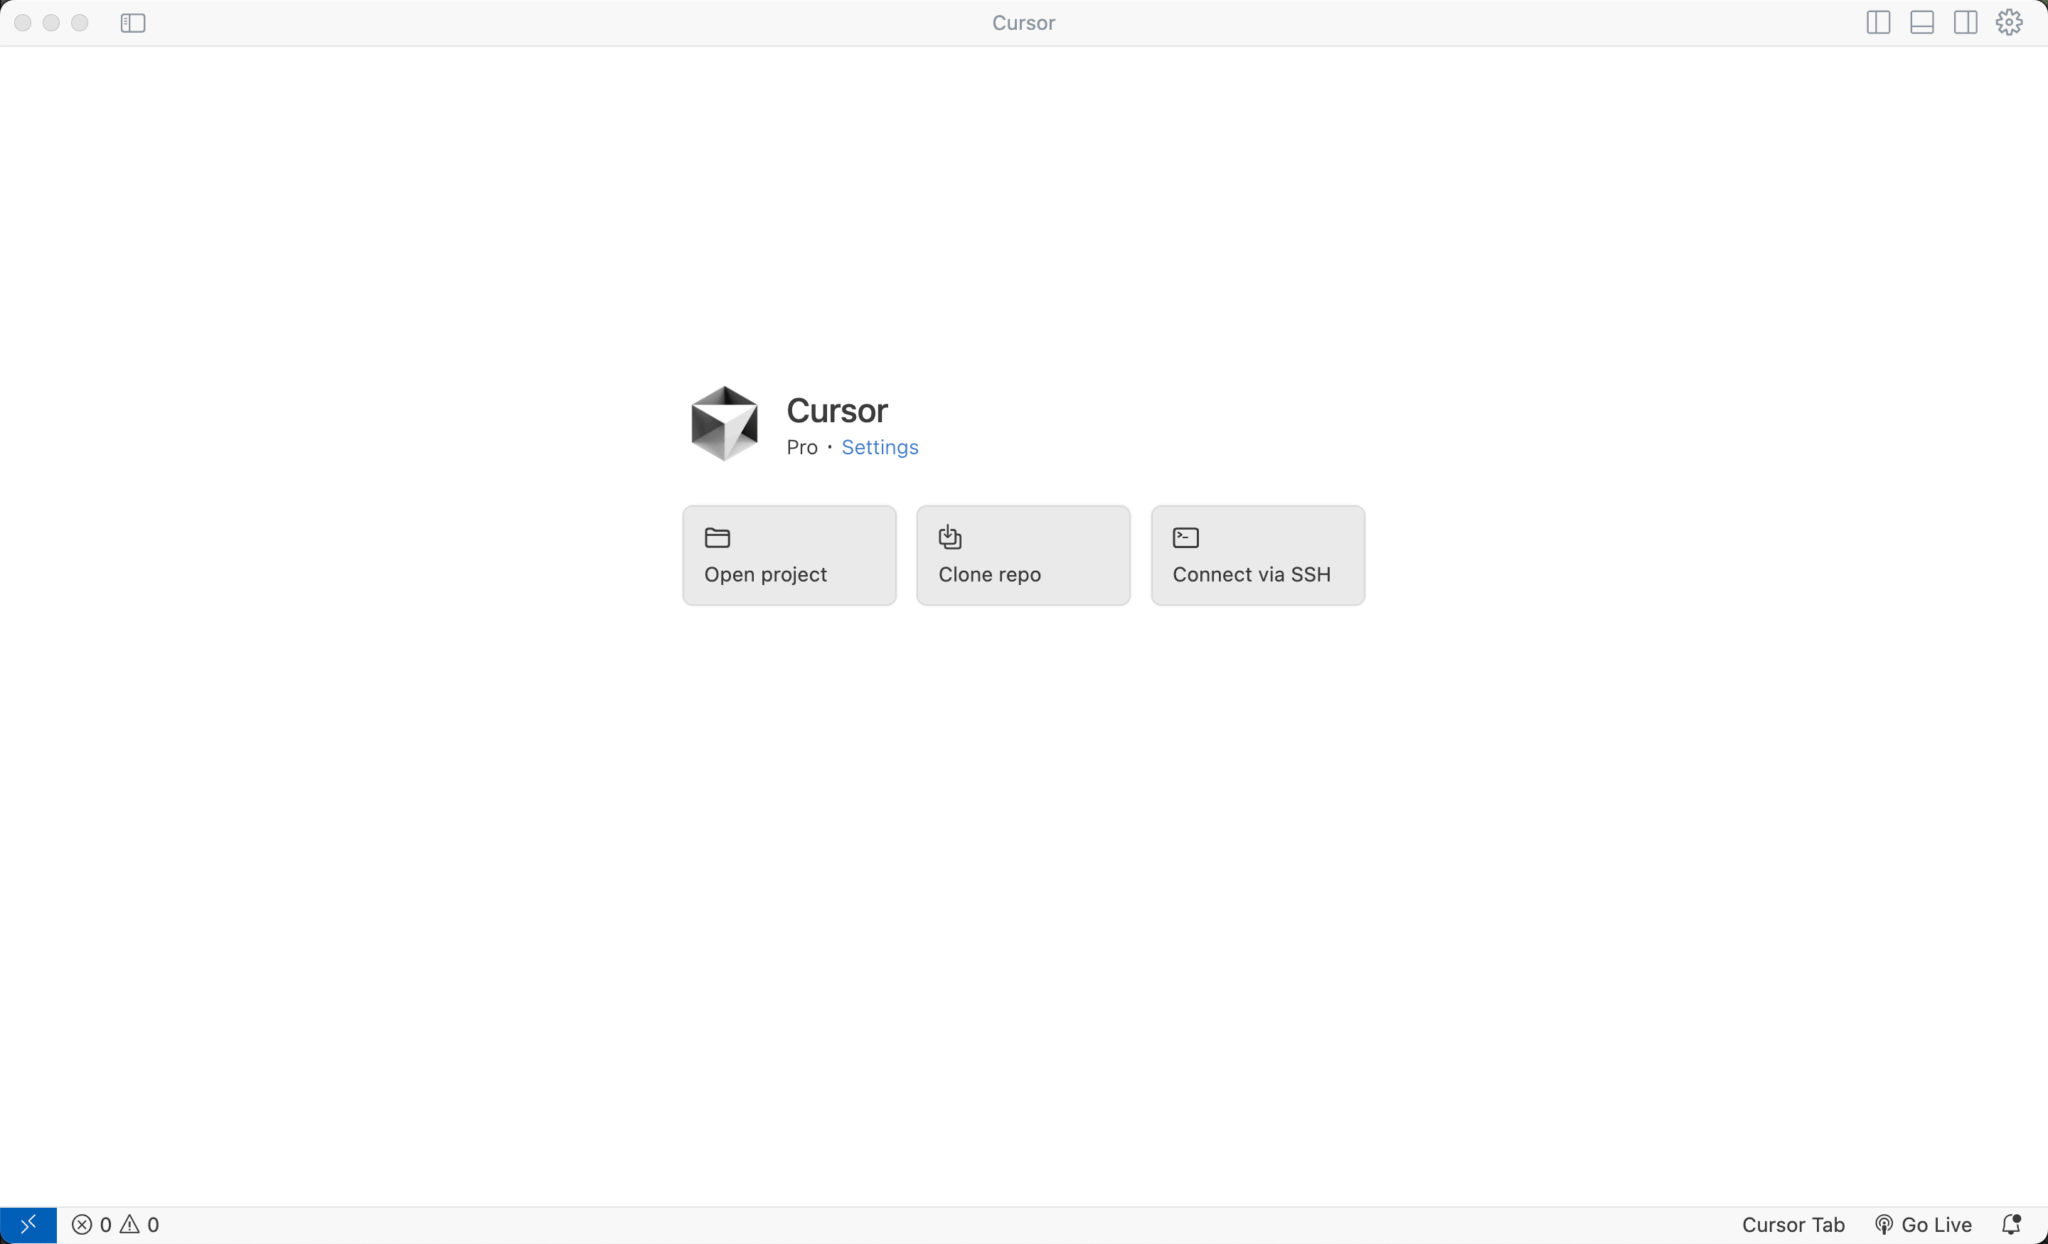
Open Cursor and then click on the Settings link:
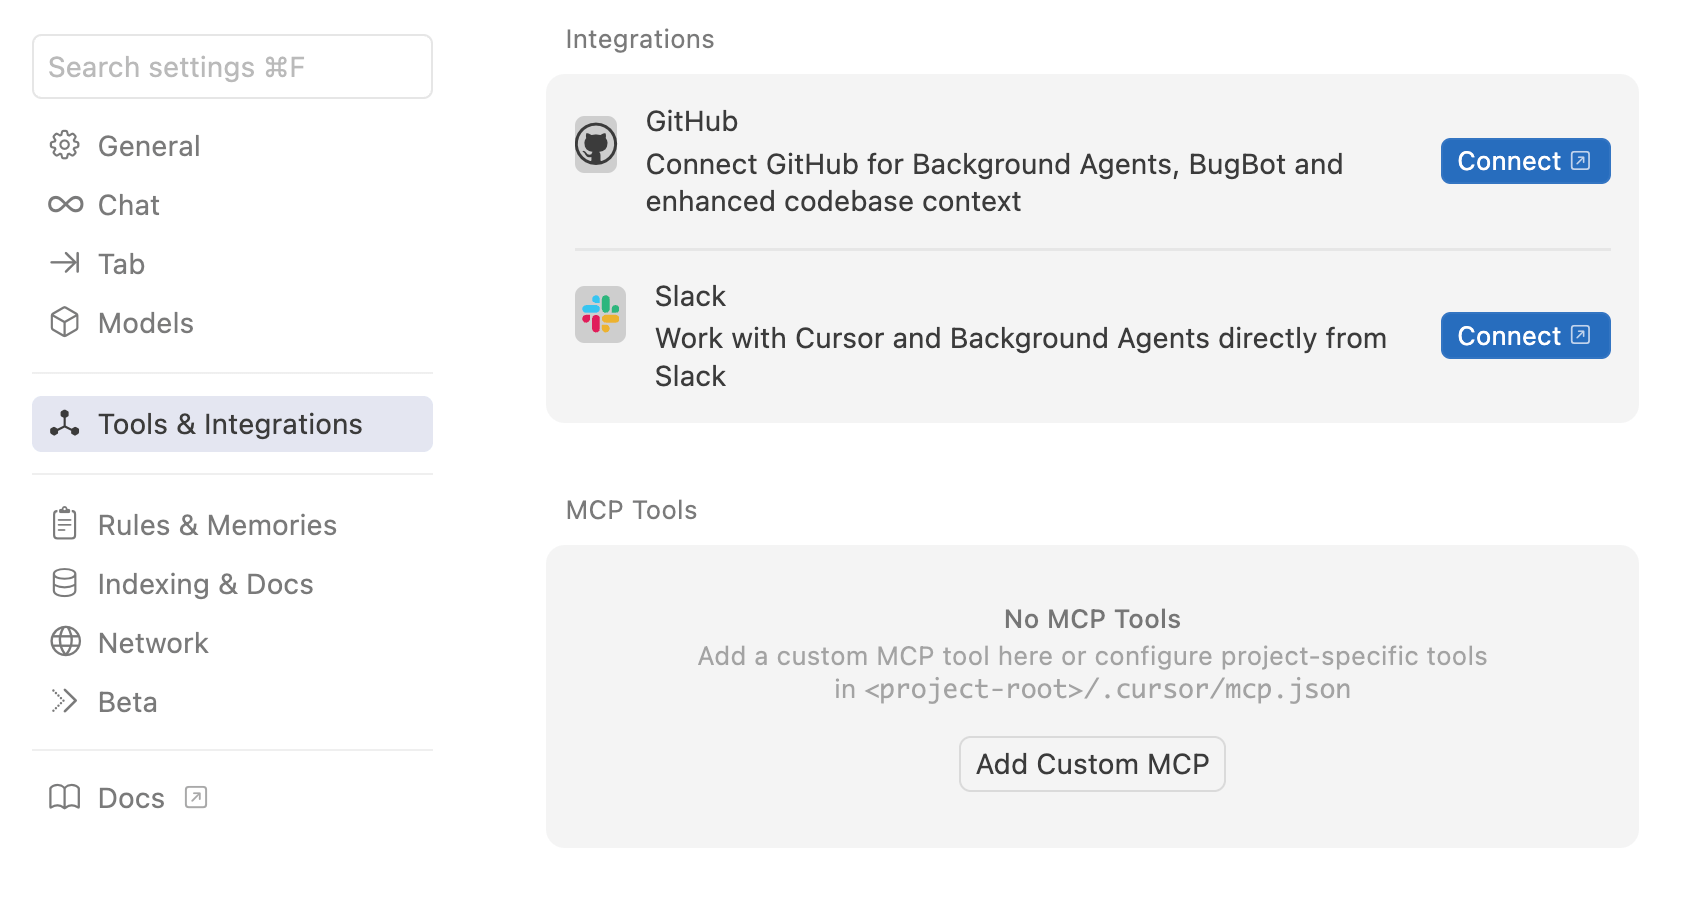
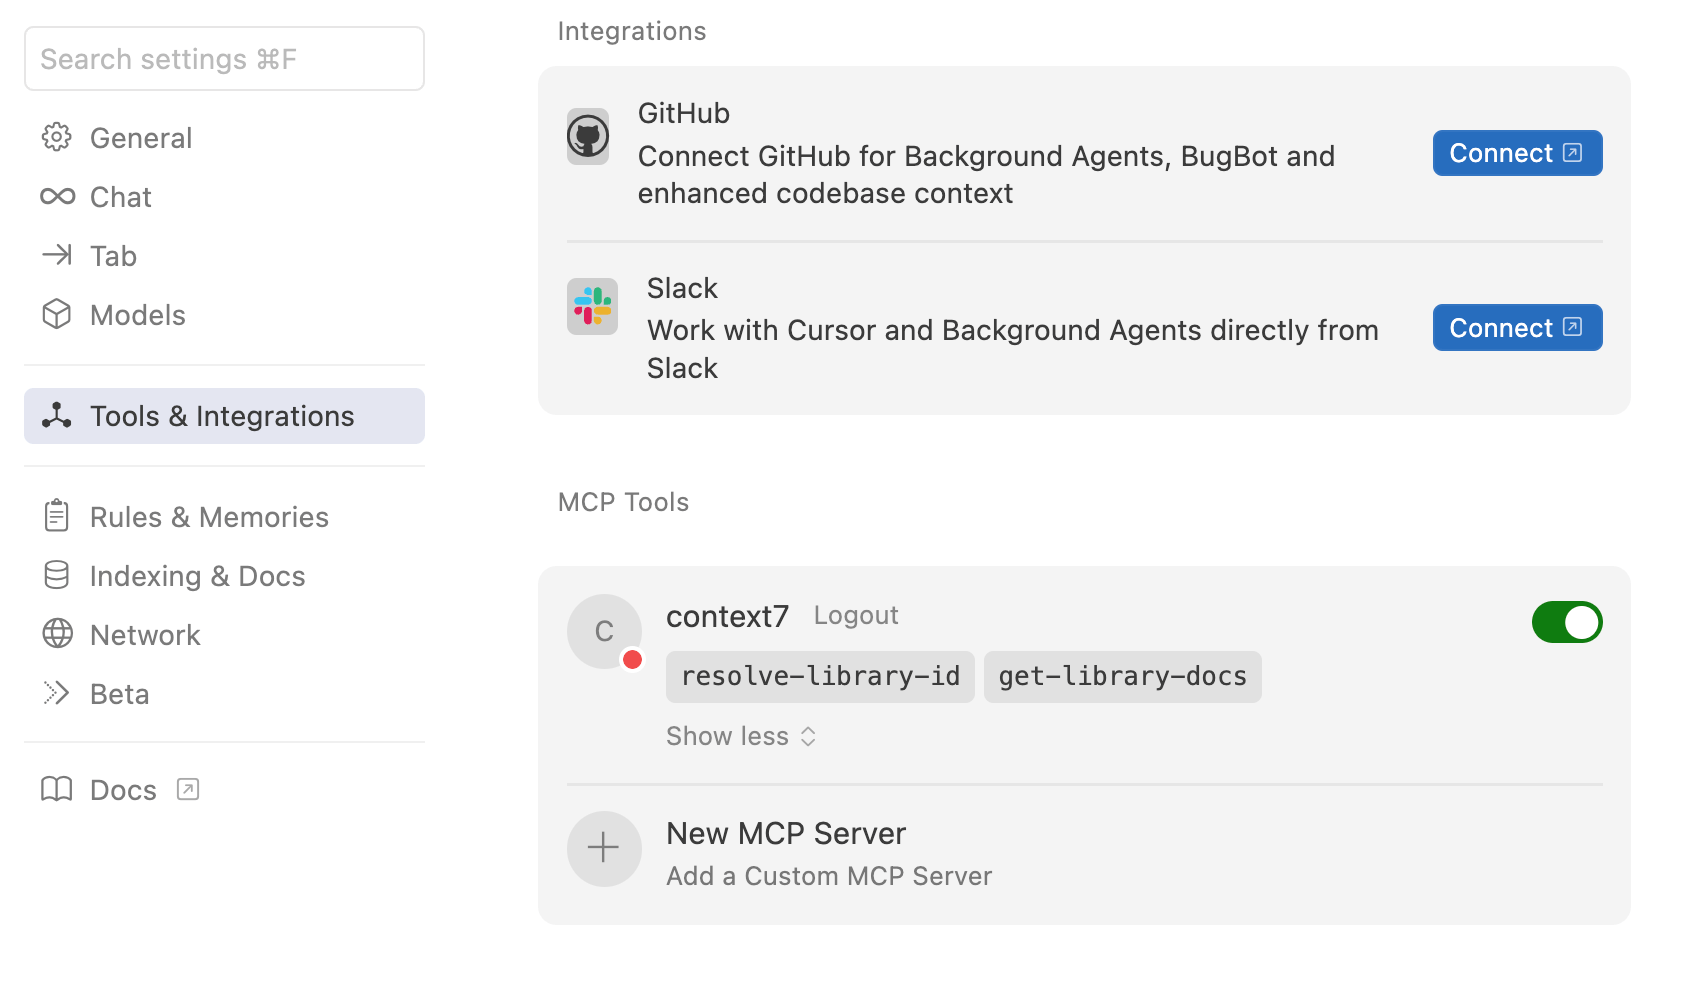
In the Tools & Integrations tab, click the Add Custom MCP button.
Add a remote server connection to the Context7 MCP server by adding the following Context7 configuration to the mcp.json file:
{
  "mcpServers": {
    "context7": {
      "url": "https://mcp.context7.com/mcp"
    }
  }
}
This adds the Context7 MCP server, which provides two tools that LLMs can use to get the latest documentation for a library:
resolve-library-idgets the library ID using the library name.get-library-docsfetches the Context7 documentation for a library using the library ID.
Creating Cursor rules files
Create a folder for the Bryntum Grid project in Cursor and then open it in Cursor by clicking on the File menu at the top left of the Cursor window and selecting Open….
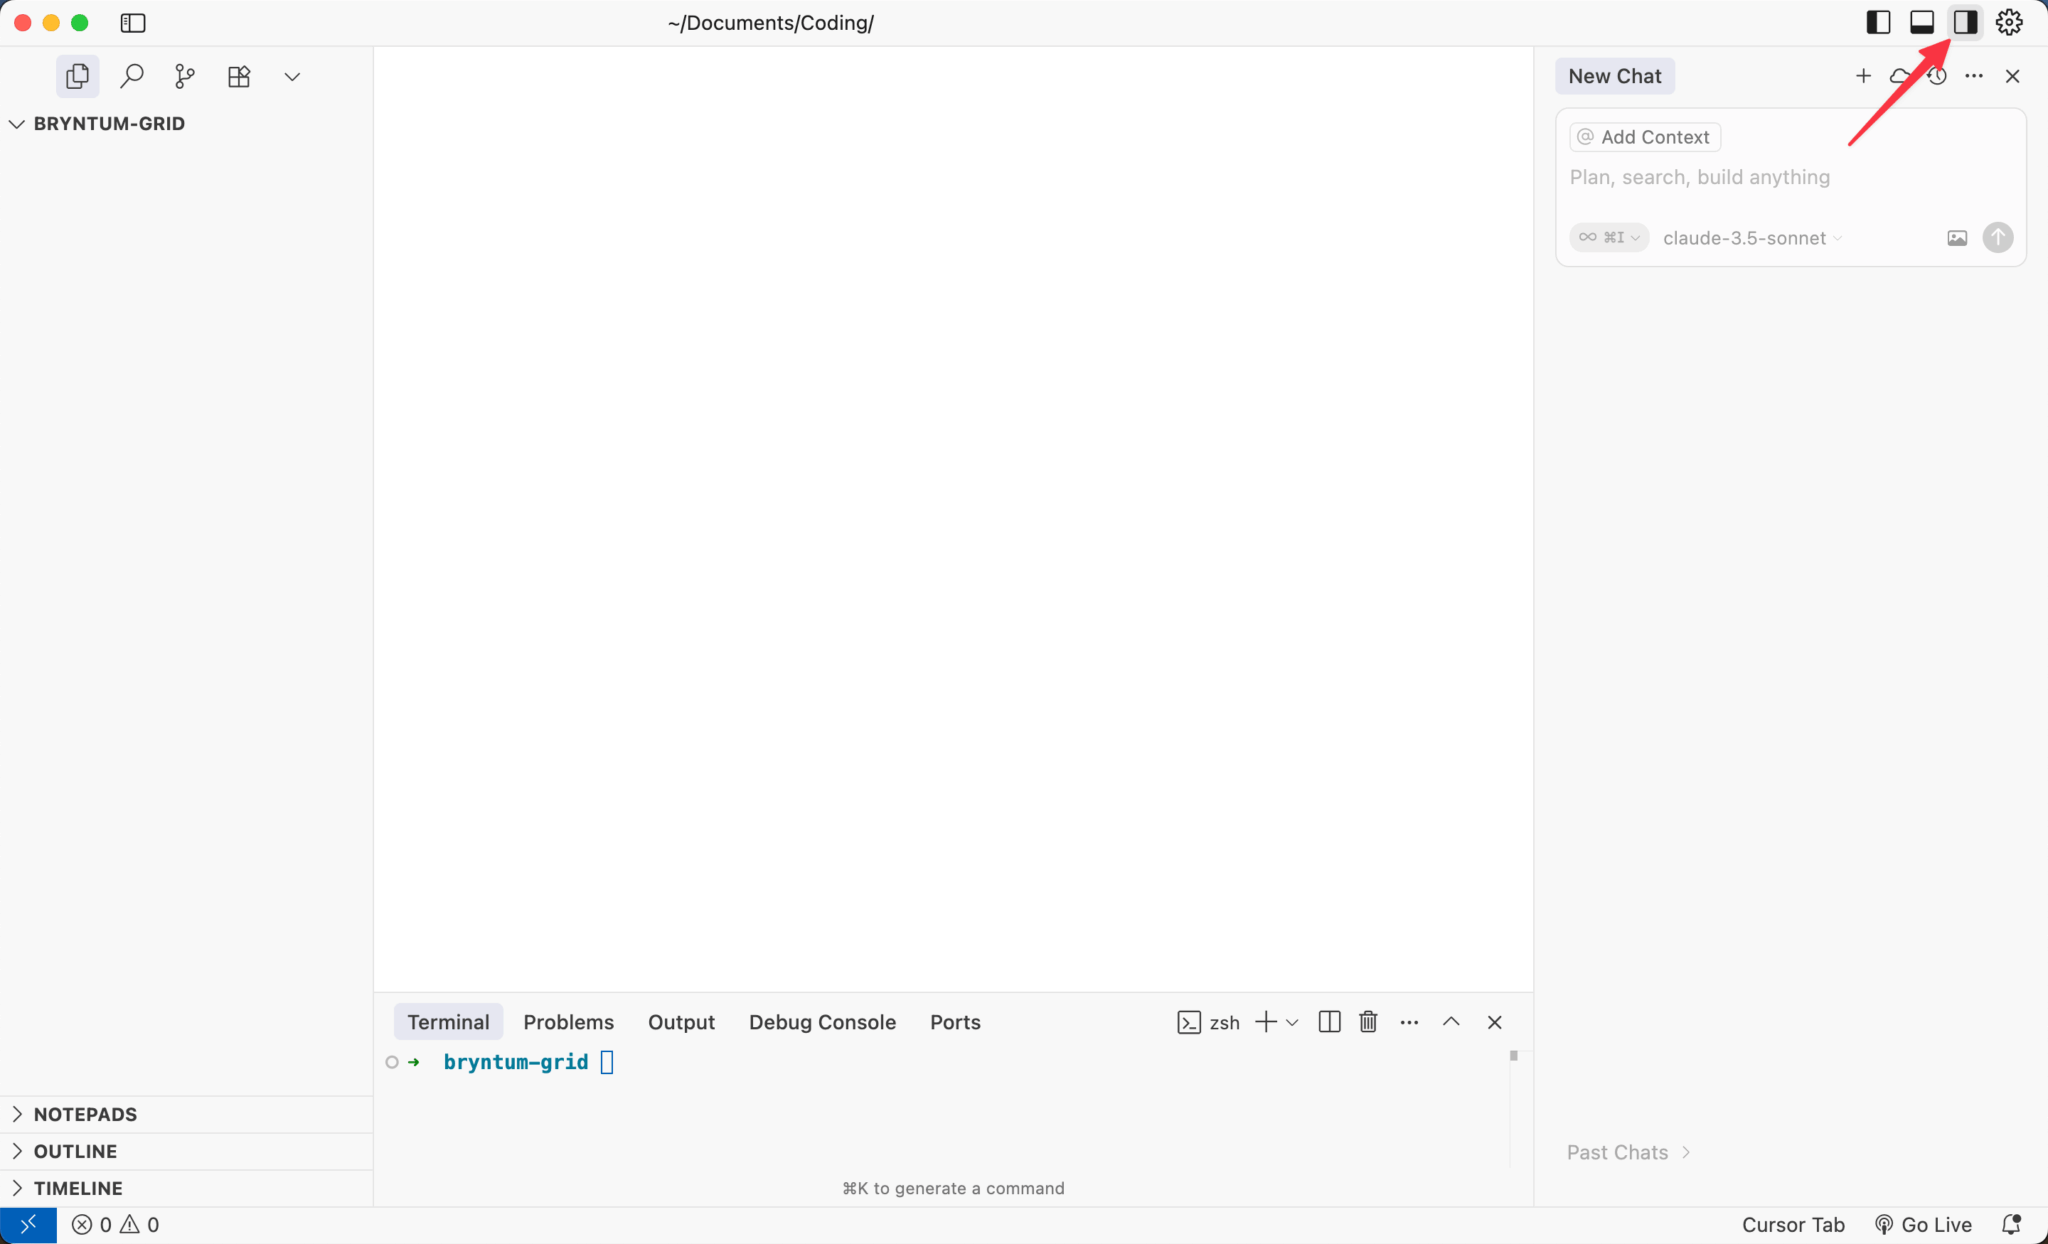
Open the chat sidebar by clicking on the Toggle AI Pane button at the top right of the Cursor window:
We’re first going to create Cursor rules files for the project, which provide context that will be reused for each prompt. Rules are useful because LLMs don’t retain memory between completions.
We’ll use the rules to provide project guidelines for folder and file structure, code structure, and bash commands, so that the LLM output better matches the desired output.
There are global and project rules. We’ll use project rules. Rules are written in MDC, a format that supports metadata and content. The project rules files must be added to .cursor/rules directories. You can use a directory in the project root and also add further directories to specific folders to create rules for those folders.
You can generate rules directly in conversations using the /Generate Cursor Rules command.
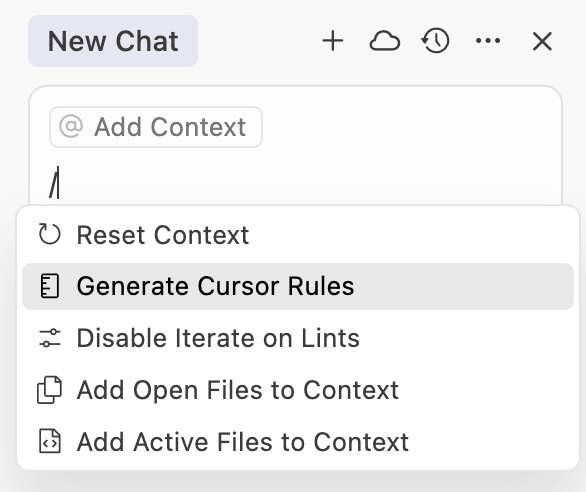
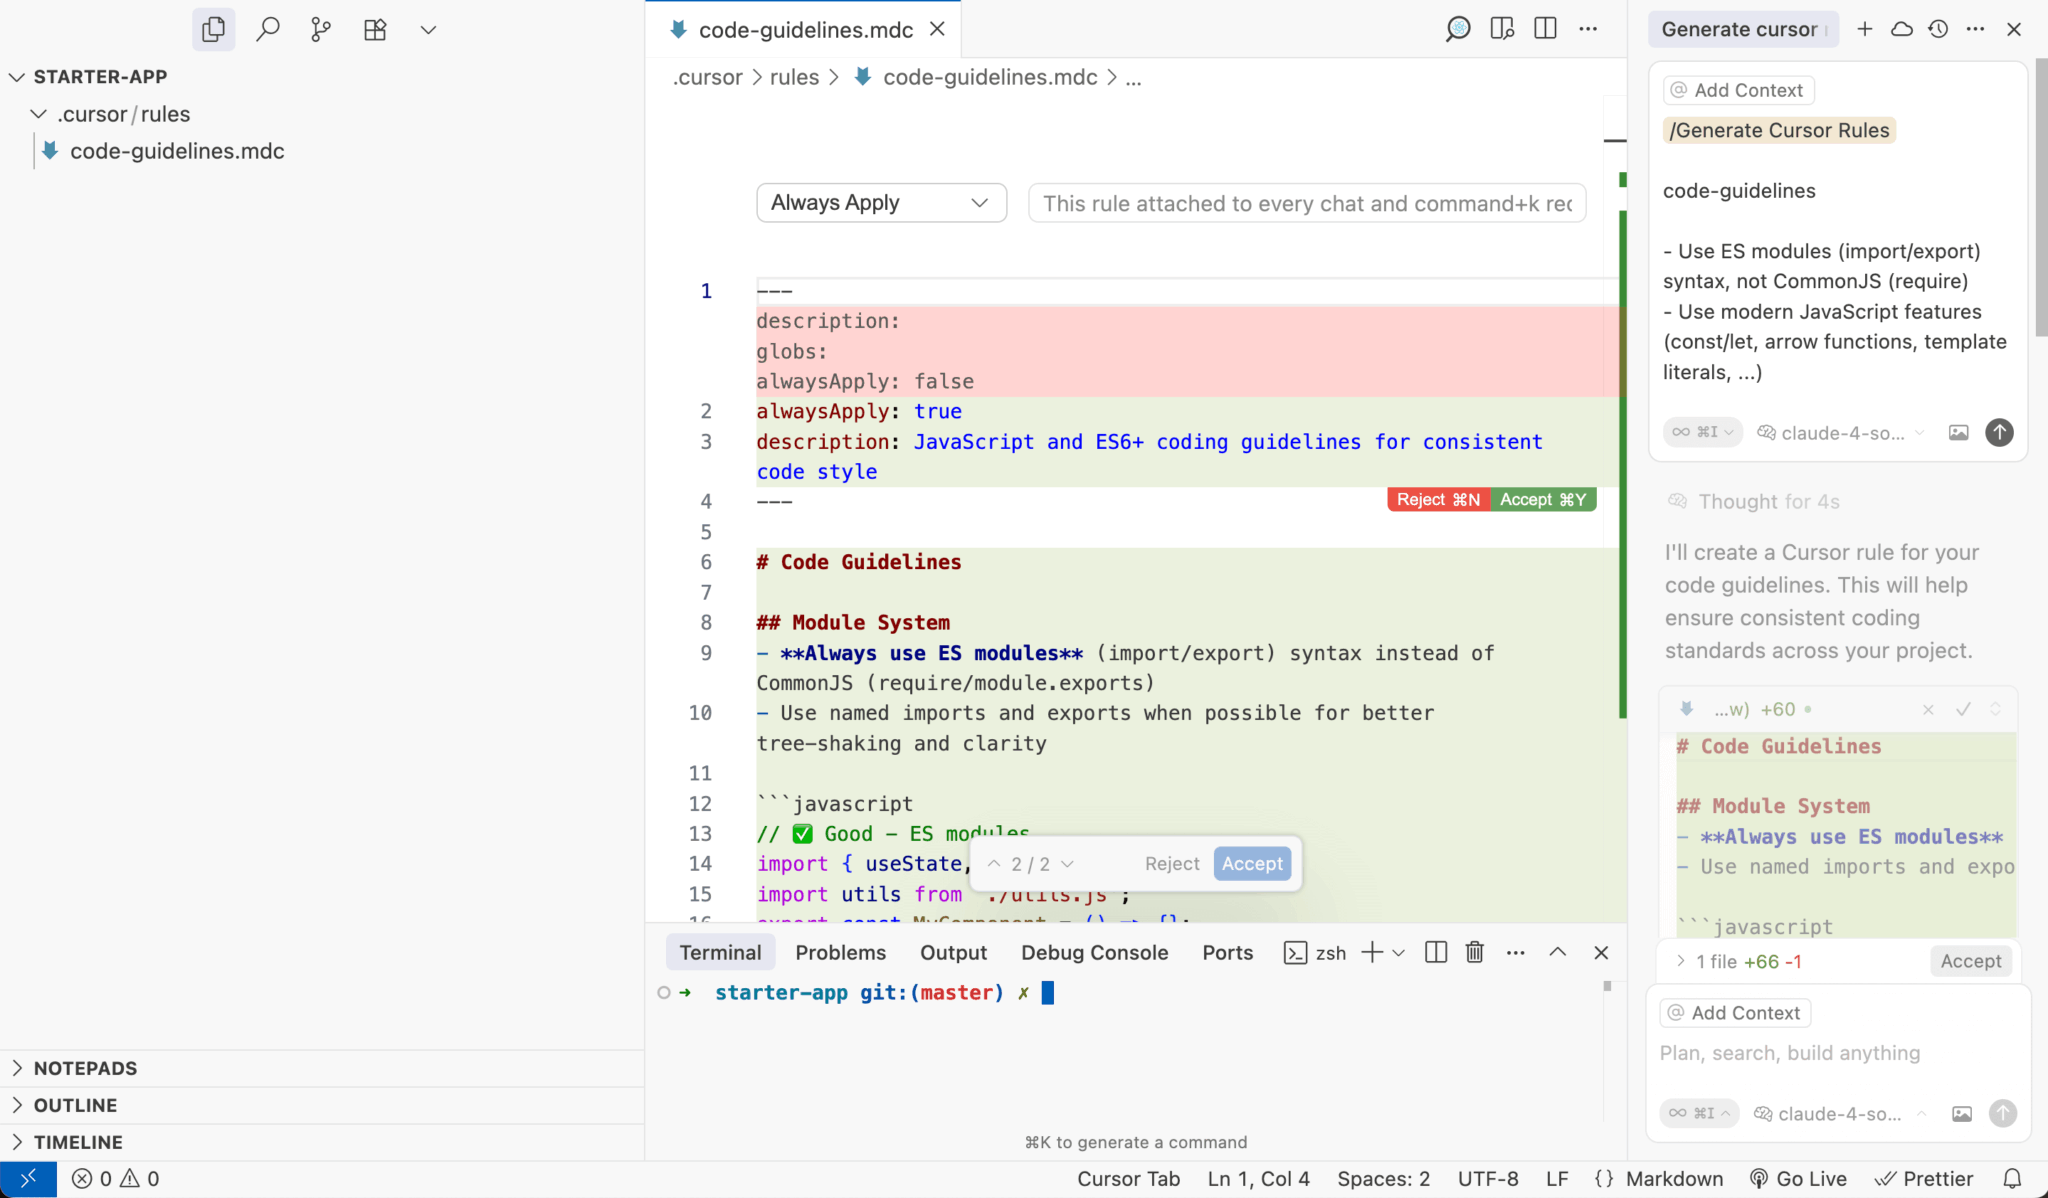
In the conversations panel, select Agent mode and the claude-4-sonnet model. Use the /Generate Cursor Rules command and add the following prompt:
code-guidelines

- Use ES modules (import/export) syntax, not CommonJS (require)
- Use modern JavaScript features (const/let, arrow functions, template literals, ...)
- Don't ignore errors or warnings
This creates a Cursor rules file and will probably expand the rules:
Good rules are focused, actionable, and scoped. Use the following best practices for writing rules:
- Keep rules under 500 lines.
- Split large rules into multiple, composable rules.
- Provide examples or referenced files.
- Write specific rules, like clear internal docs.
Accept the added rules and check them. Note that project rules only work in agent mode.
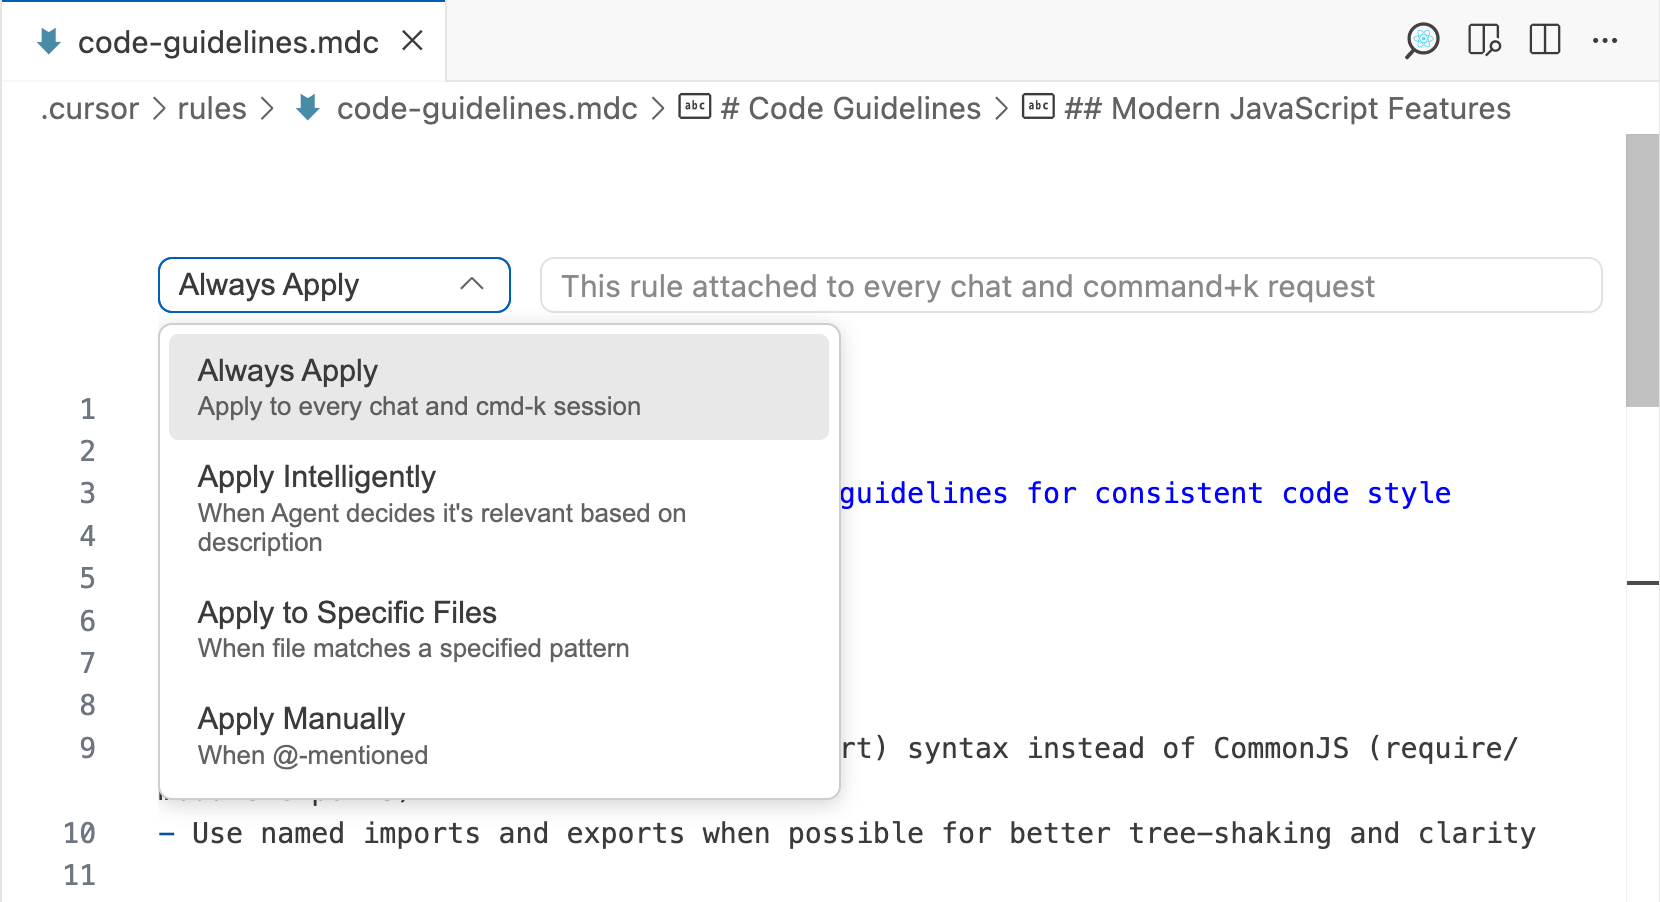
At the top of the MDC file, there is a dropdown menu that lets you control how rules are applied. Make sure it’s set to Always Apply for these added rules. The other options are Apply Intelligently, Apply to Specific Files, and Apply Manually.
Generate another rule for documentation:
documentation

- Use the context7 MCP to get the external documentation for the latest Bryntum version.

- Always check the documentation for the correct API usage and to check if there's any relevant example code. For example, if the user wants to make a CRUD app with Express.js, check if there are code examples that use Express.js.

- In the docs, there may be different ways to do the same thing. Use the recommended way, for example install the Bryntum component using npm.
Check the added rules and ensure the dropdown is set to Always Apply.
Now, generate a rule for creating a project:
create-project

---
alwaysApply: false
---

## Project organization

- Use npm workspaces to manage the frontend and backend dependencies from the root folder (https://docs.npmjs.com/cli/v11/using-npm/workspaces)

- Define the workspaces in the root folder's package.json file

`javascript
{
"name": "bryntum-grid-express-app",
"workspaces": ["backend", "frontend"]
}
`

The root folder should have the following structure:

`
package.json
node_modules
├── backend
│ ├── package.json
│ ├── node_modules
│ └── ...
├── frontend
│ ├── package.json
│ ├── node_modules
│ └── ...
...
`

- Add a `.gitignore` file to the root of the project to ignore node_modules, .env, database files, and other files that should not be committed to a GitHub repository.

- Use the npm package `concurrently` in the root folder's package.json file to run the backend and frontend servers at the same time.
- npm run dev: Run the project in development mode: start the backend dev server and frontend dev server concurrently.
- npm run seed: Seed the database with example data


## Frontend

- Use Vite and JavaScript. Use the standard Vite project structure.
- Add a basic Bryntum Grid connected to the backend. Take a look at the quick start guides to see how to do this.
- Save the Bryntum Grid config in a separate file:

`javascript
export const gridConfig = {
    appendTo : 'app',
    ...
};
`

- Configure the Grid to use an AjaxStore, set the `autoLoad` and `autoCommit` properties to `true`, and set URLs for the create, read, update, and delete operations.
- Create helper functions instead of class methods when needed.

`javascript
// ❌ Avoid - Class methods
class AlbumsGrid extends Grid {
    async addAlbum() {
        // Implementation
    }
}

// ✅ Good - Helper functions
function addAlbum() {
    // Implementation
};
`
- Add the Grid to the page in the `main.js` file.

`javascript
import { Grid } from '@bryntum/grid';
import { gridConfig } from './gridConfig';
import './style.css';

const grid = new Grid(gridConfig);
`

- Use the Bryntum Grid Stockholm CSS theme.
- Make the Bryntum component take up the full height and width of the page
- When widgets such as buttons are needed, use Bryntum widgets for the UI if possible.
- If column cell content needs HTML rendering, Use `htmlEncode: false` and sanitize data using Bryntum's `StringHelper.xss` method.

## Backend

- Use Nodemon, Express.js, and JavaScript.
- Use a local SQLite database to store the data and use an ORM (Sequelize) to query the database.
- Create an example `albums.json` file for a Bryntum Grid. Use this data to seed the database.
- Seed the database with example data using a `seed.js` file in the backend folder.
- For data updates, allow null values and partial updates.
- Create a REST API for the Bryntum Grid.
- For new records, IDs should be generated by the database.
This detailed rule guides the creation of a full-stack Bryntum Grid Express.js app that uses SQLite and Sequelize. It adds specific details for how the app should be created, including the folder structure, the type of Bryntum Grid theme, and the tech stack that should be used.
Many of the above instructions were determined through trial and error, based on errors the Cursor Agent made when initially creating the project. During development, add to the Cursor rules as needed. A good set of rules should lead to better, more consistent agent output.
Creating a basic Bryntum Grid using Express, SQLite, Sequelize, and Vite
Let’s create a full-stack Bryntum Grid app from scratch using the create-project rule. This rule is applied manually, which means you need to mention the rule name explicitly in the prompt. Add the following prompt to the conversation panel:
Create a plan to create a project @create-project.mdc and then create it - check the project Cursor rules⚠️ We appended “check the project Cursor rules” to the prompt to ensure the Cursor rules were always checked. There was an issue with project rules not being automatically detected by the agent at the time of writing. Read this Cursor forum post for more details.
The Cursor Agent uses to-dos for planning complex tasks. While the agent is working on the current task, you can add follow-up prompts that are added to a queue of to-dos that will be executed once the earlier tasks have been completed. Note that it will probably take a few minutes for the agent to complete the tasks.
The prompt should ask you to run the resolve-library-id and get-library-docs Context7 MCP tools. Click the Run button in the conversation panel to allow these tool calls.
The prompt should also use Context7 to search the Vite docs, because the create-project rule includes the following text:
Use the standard Vite project structure.Cursor asks permission to run terminal commands by default. You can set it to run terminal commands automatically by clicking the Ask every time dropdown menu at the bottom left of the terminal command prompt and selecting Auto Run:
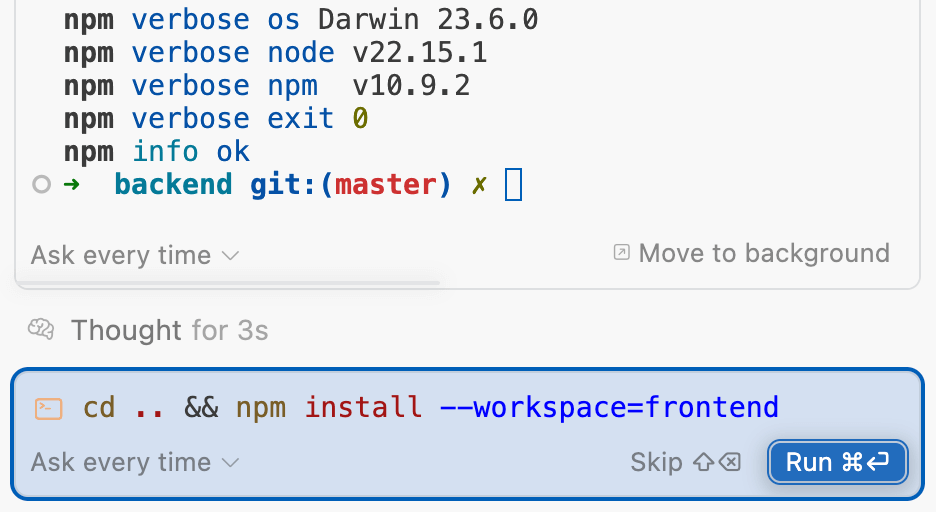
However, this is risky. It’s known as YOLO mode for a reason. It’s best to review terminal commands before letting them run.
Installing Bryntum Grid
If you’re using the free trial, install the public Bryntum trial package:
npm install @bryntum/grid@npm:@bryntum/grid-trial --workspace=frontendIf you have a Bryntum license, refer to our npm Repository Guide and install the licensed package:
npm install @bryntum/grid --workspace=frontendInstall the rest of the dependencies if you haven’t already:
npm installSeeding the database and running the application
Now, check whether the Cursor Agent successfully created a full-stack Bryntum Grid CRUD app.
Seed the database using the Sequelize ORM script:
npm run seedRun the backend and frontend servers:
npm run devIt’s likely that you’ll have to do some debugging to get the Bryntum Grid app running. Debug using Cursor’s agent mode and take a look at the following Bryntum Grid resources if needed:
For example, if you get an error such as the following:
[plugin:vite:css] [postcss] ENOENT: no such file or directory, open '@bryntum/grid/build/grid.stockholm.css'Make sure the Bryntum Grid Stockholm theme import path is correct:
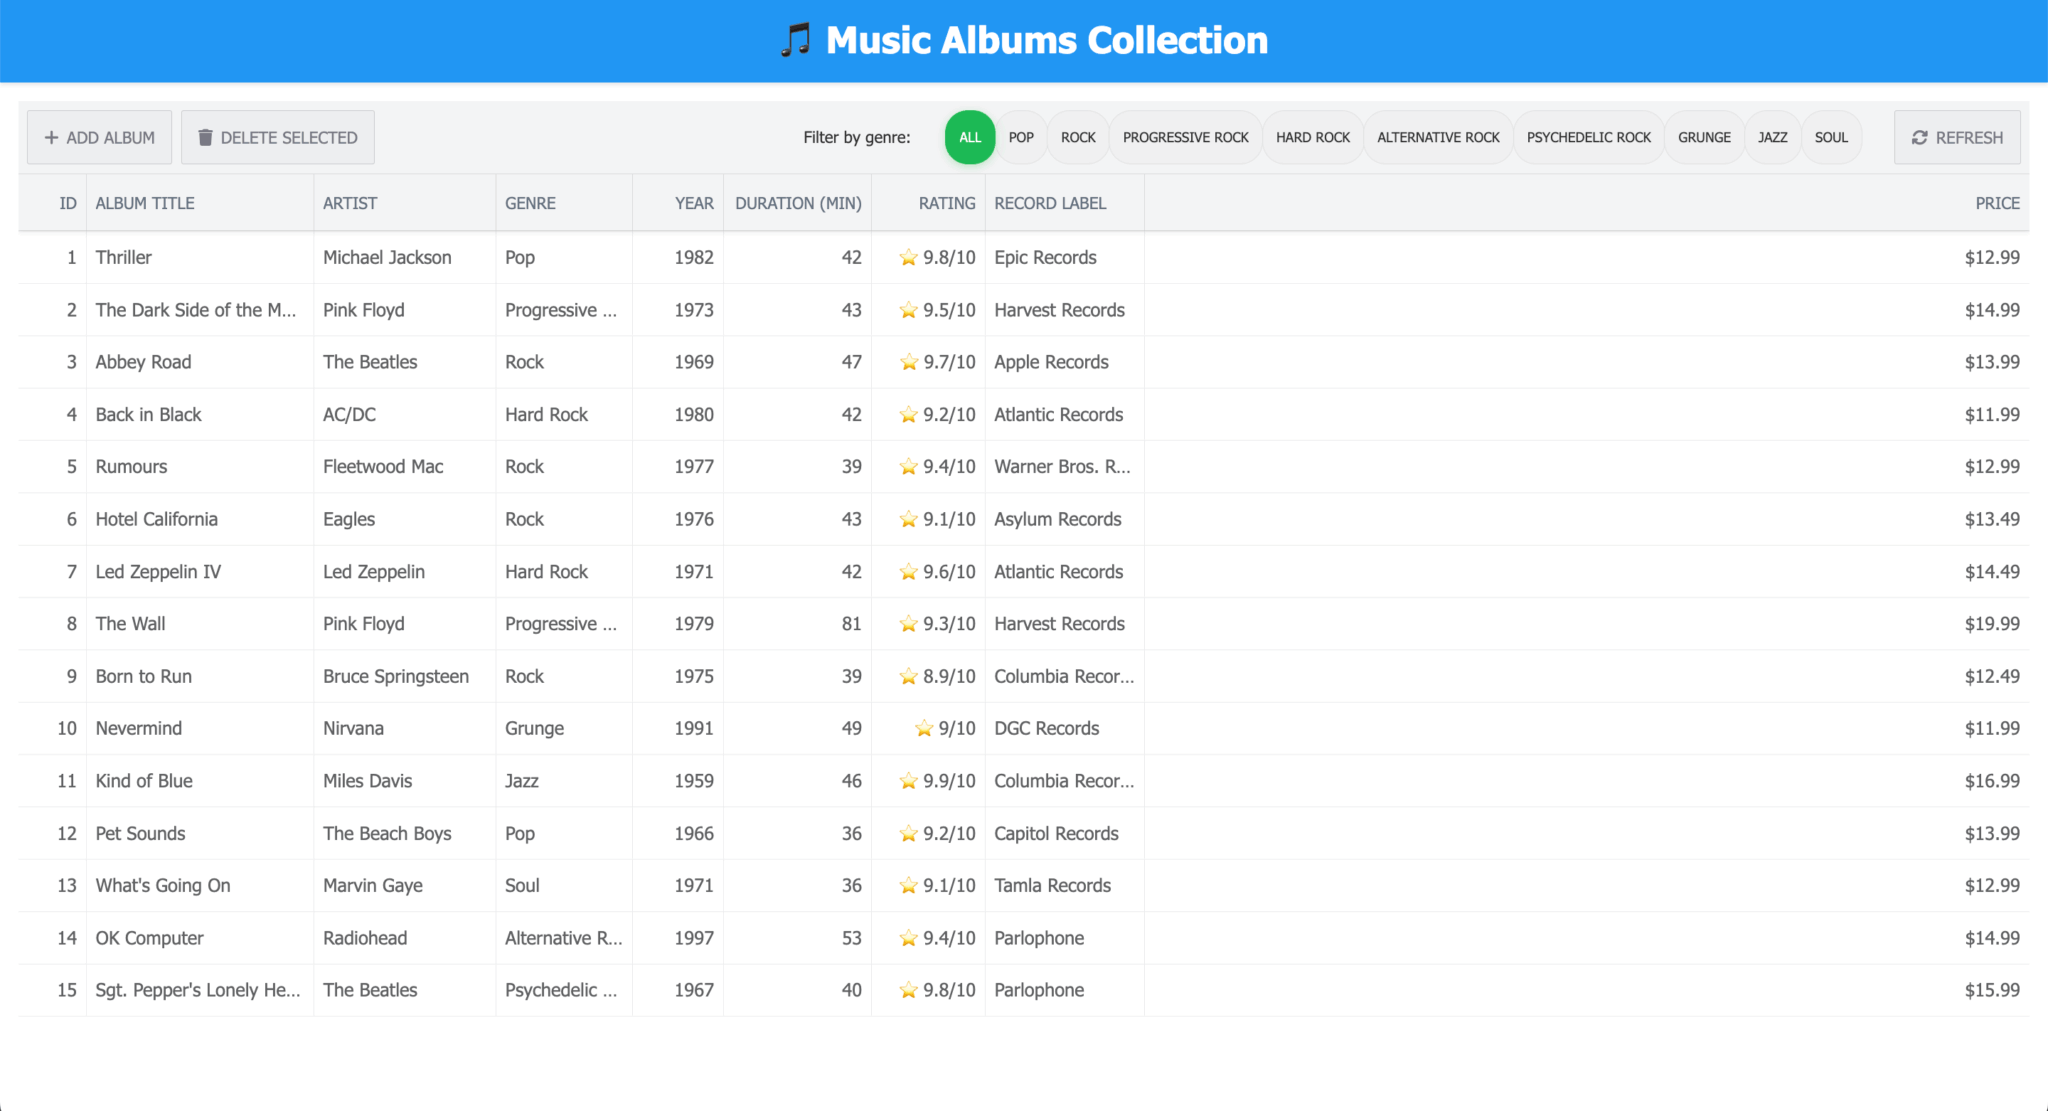
@import '@bryntum/grid/grid.stockholm.css';The Cursor Agent will likely create a Bryntum Grid like this:
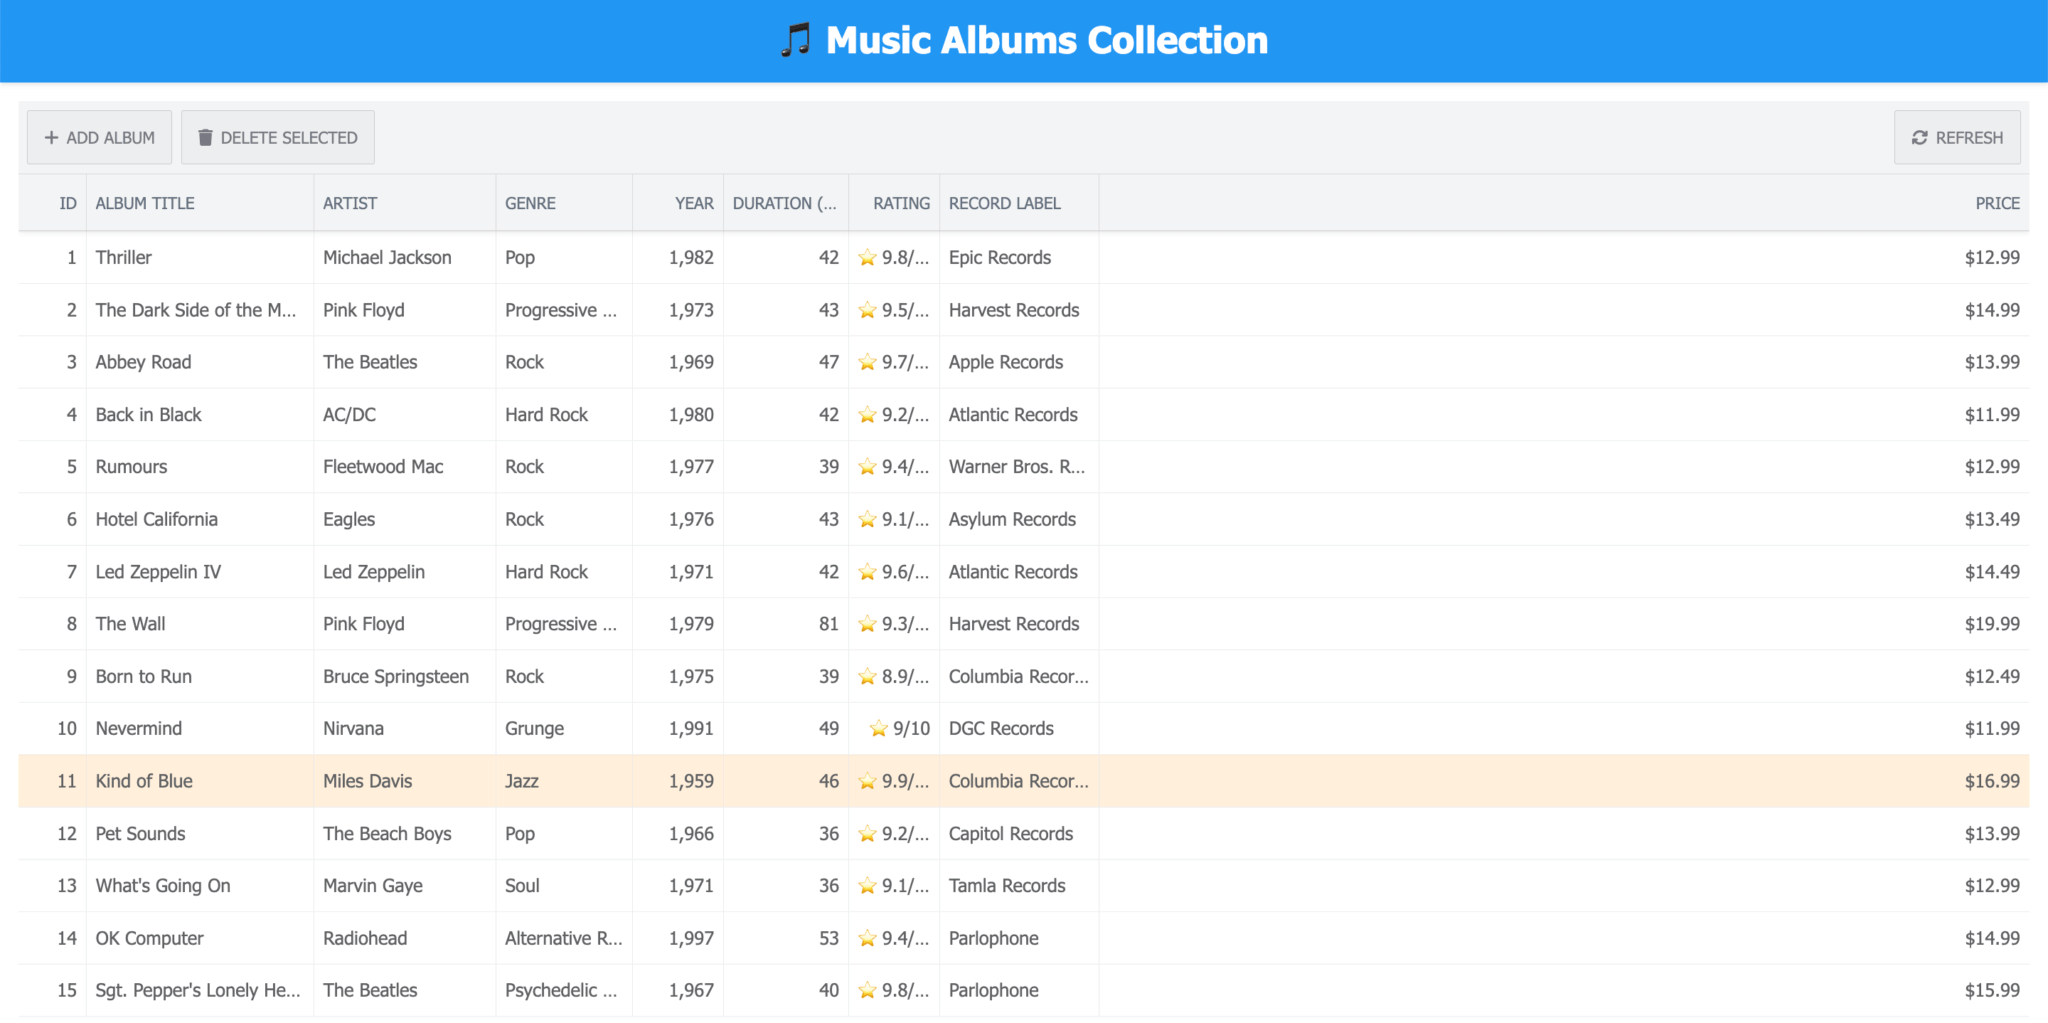
The UI looks good. However, the CRUD operations don’t work correctly. Let’s see how we can fix these issues.
Debugging CRUD operations and UI issues
Debug issues by adding the issue details to the prompt.
For example, if the CRUD operations are not working, you can ask the agent to check the documentation to see whether the CRUD operations have been implemented correctly:
Reading the data from the backend and adding it to the Bryntum Grid works. However, create, update, and delete operations fail.

update: response returns empty array
create: "_generated" id sent in payload. The id should be assigned on the backend. Error response: 'Album.title cannot be null' and 'Album.artist cannot be null'
delete: error: Data synchronization failed! Failed to parse server response

Use Context7 to check how to use Bryntum Grid with Express, Sequelize, and SQLite. Make sure the API requests and responses have the correct structure and make sure errors are handled appropriately.
This should fix the CRUD operations:
However, there are still some small issues with the Grid:
- The Duration column is not wide enough to show the full column title.
- The Rating column is not wide enough to show the full ratings values.
- The values in the Year column should not include a thousands separator.
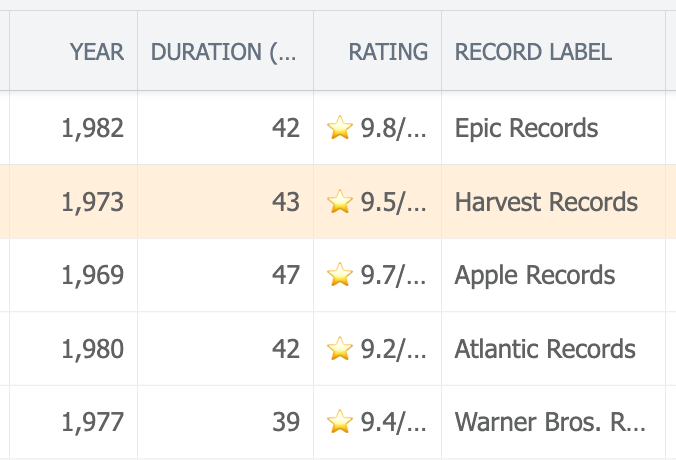
Explain these problems in the Cursor Agent chat and attach a screenshot of the issues, as this will help the agent understand the problems.
The Duration column is not wide enough to show the full column title and the Rating column is not wide enough to show the full ratings values. The year values should not have a thousands separator as well.If Cursor doesn’t call the Context7 tools, send a follow up prompt to the agent:
Always check the docs using Context7This should fix the column title issue by increasing the width of the columns, but the solution for removing the thousands comma separators in the Year column likely won’t work:
format: {
  groupSeparator: "";
}
Sometimes a manual fix is needed. Use a quick search in the Bryntum Grid docs to find the issue:

The number template docs show that the following format will remove the commas, so that only numbers are displayed:
format: {
	template: '0',
}
Adding features
A great way to add features is to attach an image to your prompt for extra context. For example, you can add a genre filter like Spotify’s one by attaching a screenshot of it:

Explain the details of the feature and where to add it in your prompt:
Add a genre filter, like this Spotify one, to the top of the grid. Add filters for all the genres in the example data - check the project Cursor rulesThis should successfully create the genre filter:
However, the genre filter label probably isn’t aligned correctly. Add another prompt to the chat to fix it:
Fix the vertical alignment of the "Filter by genre" labelIf this still doesn’t fix the alignment, it may prove easier to fix the issue manually by setting the height of the label to 100%:
height: 100%;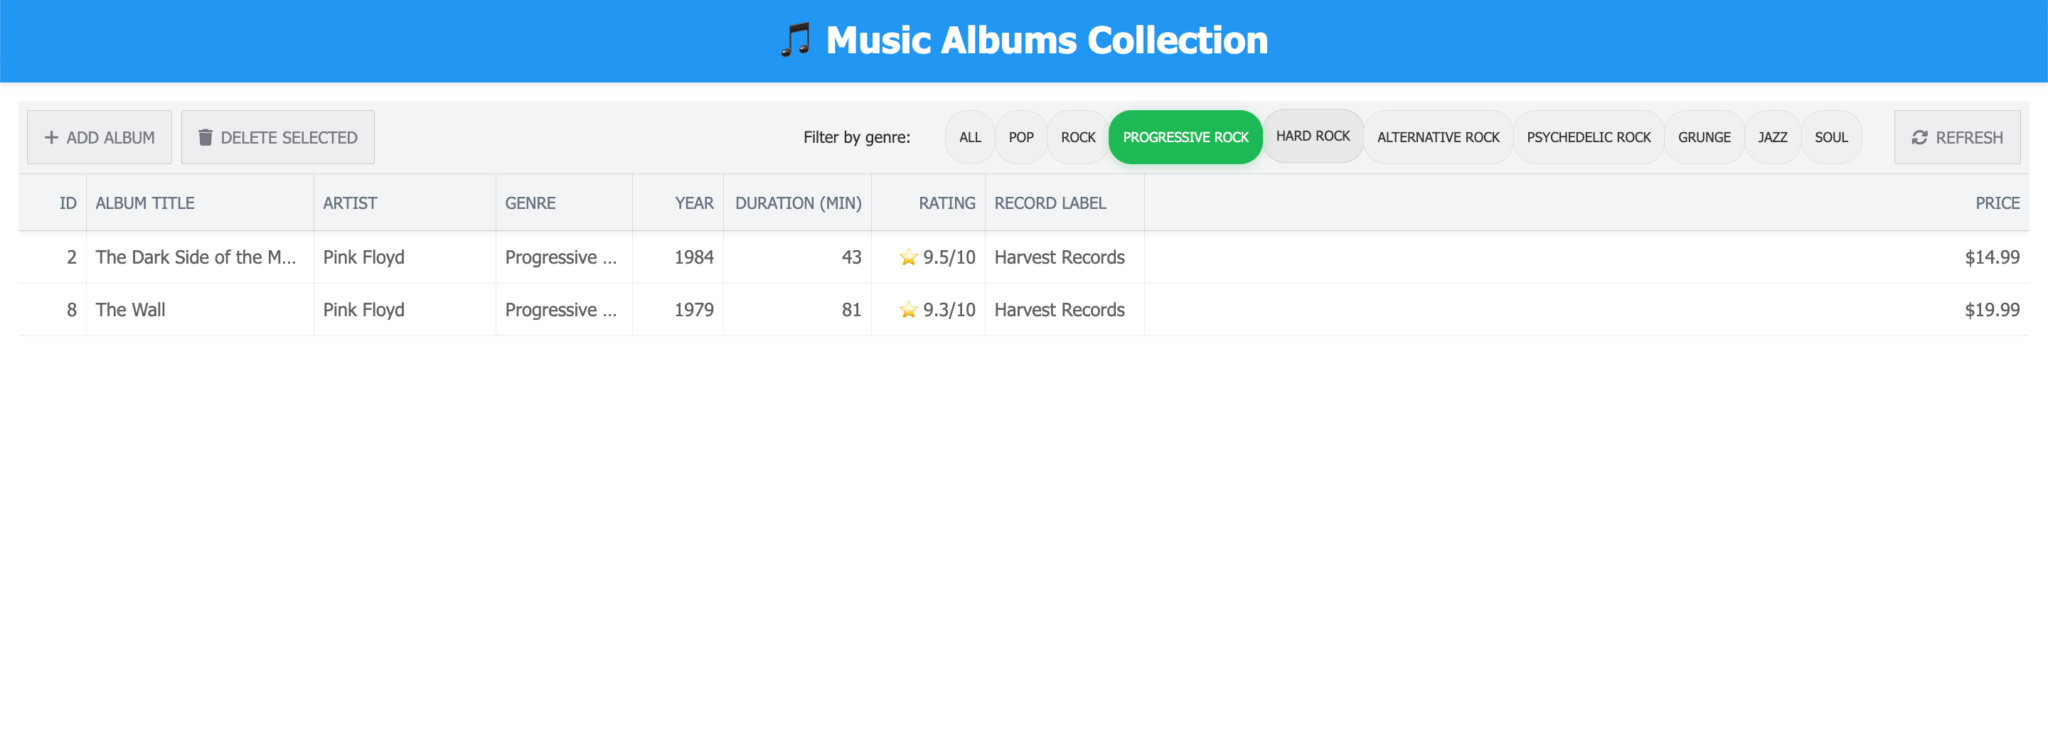
It’s best to add features one at a time and to add as much context as possible to help the agent generate a good response. It’s also easier to debug small changes. You can try adding many features in one go, but we’ve found that it does not work well, and you’ll likely end up with many issues. Add one feature at a time and commit often, so that it’s easy to roll back to a previous state if needed.
Next steps
Using Cursor’s agent mode with Context7 is a great way to get up-to-date documentation for libraries. It can help you rapidly prototype a Bryntum Grid with CRUD functionality. In this tutorial, Cursor rules helped guide the AI agent to use standardized code guidelines, which improved the agent’s output.
As with all AI-generated code, it’s important to review the generated code and to check it against code in the documentation. Building apps with AI-assisted development tools is great for prototyping and debugging. However, you will likely need to manually edit code, especially when polishing an app. This has been described as the 70% problem: Using AI for coding can help you rapidly create a prototype, but there are diminishing returns when polishing an app to make it production-ready, maintainable, and reliable.
The explore, plan, code, commit workflow we followed in this guide is just one of the workflows that have shown success when working with agents. Other workflows include:
- Write tests, commit; code, iterate, commit
- Write code, screenshot result, iterate
You can learn more about these workflows and others in the blog post, Claude Code: Best practices for agentic coding.
A great way to improve your agent workflow is to add testing. If you do, try out the Playwright MCP server, which simplifies creating and running browser automation tests. It works well for testing the Bryntum Grid UI functionality and checking whether CRUD operations work correctly.