Create a scheduler using Bryntum, Next.js, Prisma, SQLite, and GraphQL
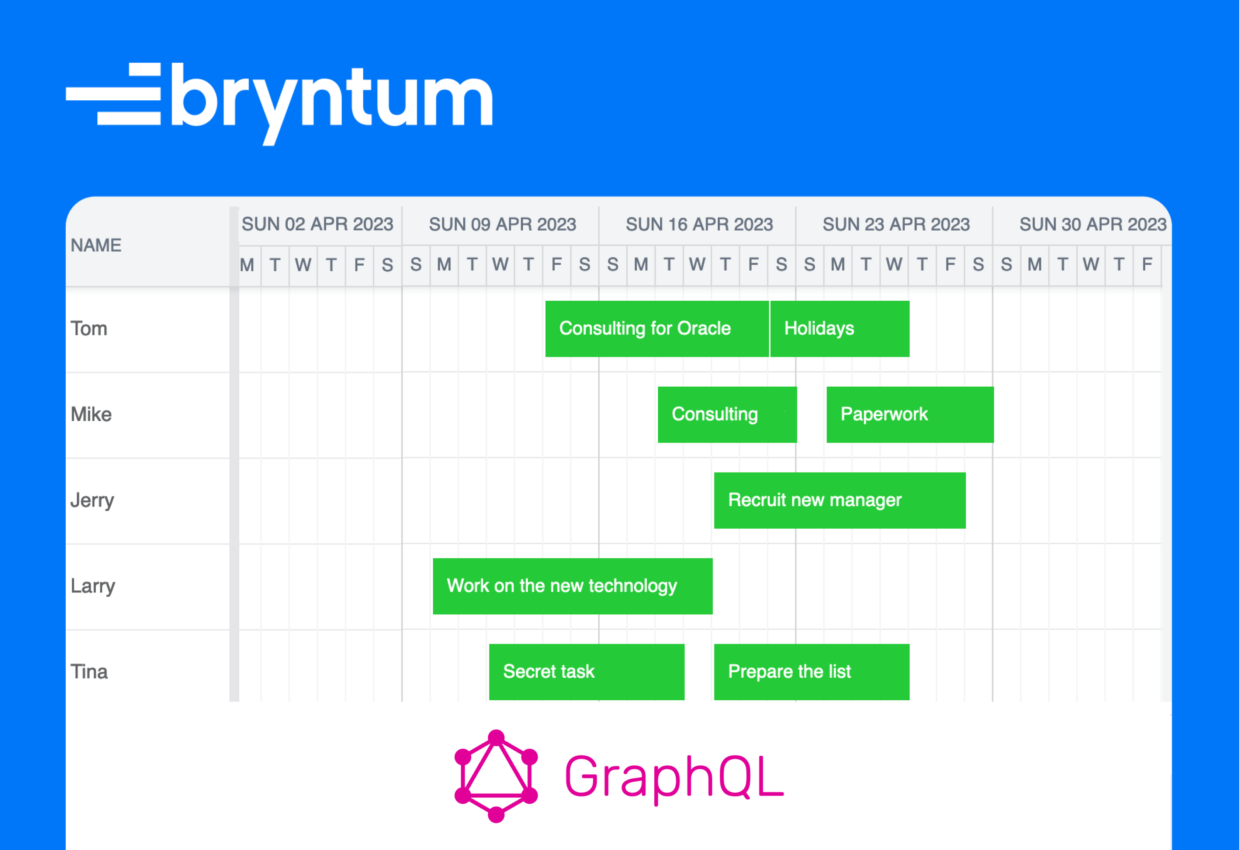
Bryntum Scheduler is a feature-rich, performant, and fully customizable scheduling UI component. It’s built with JavaScript and has wrappers to simplify its use with popular frameworks such as React, Vue, and Angular. In this tutorial, we’ll create a full-stack Bryntum scheduler app using Next.js. We’ll do the following:
- Set up Prisma, which is a Node.js and TypeScript ORM, and connect it to a local SQLite database.
- Create a GraphQL endpoint using GraphQL Yoga.
- Create a GraphQL schema using Pothos. GraphQL types will be created using the Prisma data models.
- Create a client-only Scheduler component for the Bryntum Scheduler.
- Use the Apollo Client state management library to keep the scheduler data on the frontend in sync with the scheduler data on the backend. GraphQL queries will fetch data and GraphQL mutations will persist the changes to the SQLite database.
Getting started
We’ll start by cloning the following Bryntum Scheduler GraphQL starter GitHub repository. Install the dependencies by running the following command: npm install. The starter repository also contains a branch called “completed-scheduler” that contains the completed code for this tutorial.
There’s a single page, index.tsx, that renders the text “index page”. Run the local development server using npm run dev. You’ll see a page with the rendered text.
There are global CSS styles in the styles/App.css file. These styles are for making the Bryntum Scheduler take up the full height of the screen. You can learn more about sizing Bryntum components in our docs.
The utils folder contains a debounce function we’ll be using.
Now let’s set up Prisma in our app, connect it to a local SQLite database, and seed the database with some data.
Setting up Prisma and connecting it to a local SQLite database
First we’ll set up Prisma so that we can make SQLite database queries using JavaScript.
Install the Prisma CLI as a development dependency:
npm install prisma --save-devNow use the Prisma CLI to set up Prisma by running the following command:
npx prisma initThis command creates a prisma folder in the root of your app. The prisma folder contains a Prisma schema file named schema.prisma, which is the main configuration file for setting up Prisma. It consists of three parts:
- Data sources: Determines how Prisma connects to your database. In our case, it will connect to a local SQLite database.
- Generators: Determines which assets are created when you run the
prisma generatecommand. We’ll use the generator to autogenerate a Prisma JavaScript Client, which we’ll use to make type-safe queries to our database. We’ll also create GraphQL schema types from our Prisma data models using Pothos. - Data model definition: Defines the application models and their relations. We’ll define models for the Bryntum scheduler data resources and events.
Change the data source provider in the schema.prisma file to SQLite:
datasource db {
  provider = "sqlite"
  url = env("DATABASE_URL")
}
The url is the connection URL for the database.
In the .env file that was created in the Prisma set up, change the DATABASE_URL environmental variable to the following:
DATABASE_URL="file:./data.db?connection_limit=1"
Now add the following models for our Bryntum Scheduler data at the bottom of the schema.prisma file:
model Resources {
  id   String @id
  name String?
  parentIndex Int? @default(0)
  events Events[]
}
model Events {
  id         String @id
  name       String?
  startDate  DateTime?
  endDate    DateTime?
  resourceId String?
  resizable  Boolean?  @default(true)
  draggable  Boolean?  @default(true)
  cls        String?
  duration   Float?
  durationUnit String?
  parentIndex Int?
  orderedParentIndex Int?
  exceptionDates String?
  readOnly  Boolean?  @default(false)
  allDay  Boolean?  @default(false)
  recurrenceCombo String? @default("none")

  resource Resources? @relation(fields: [resourceId], references: [id], onDelete: SetNull)
}
The Resources and Events models represent the shape of the Bryntum Gantt resources data and events data, respectively.
The exceptionDates field can be of type String or String[]. In this example, exceptionDates is of type String because SQLite does not support string arrays. This is not an issue with other databases such as PostgresSQL.
Now install the Prisma Client npm package by running the following command:
npm install @prisma/clientThe Prisma Client will allow us to send SQLite queries to our database using JavaScript. This command also runs the npx prisma generate command, which generates the Prisma Client and saves it to the node_modules/.prisma/client directory by default.
Note that you need to re-run the npx prisma generate command after every change that you make to your Prisma schema to update the generated Prisma Client code.
To generate a migration file, run the following command:
npx prisma migrate devThe Prisma migrate database migration tool is used to keep the database schema in sync with the Prisma schema. Run this command each time you change the Prisma schema.
Running this command creates a migrations folder in the prisma folder. Each migration contains the SQLite schema, created using the Prisma schema, for the SQLite database. The command also creates data.db and data.db-journal files in the prisma folder. The data.db file is our local SQLite database that Prisma is connected to. The data.db-journal file is a temporary file, called a rollback journal, which is used by SQLite for atomic commits and rollbacks.
Note that for testing and production environments, you should use the following migration command:
npx prisma migrate deployYou can read more about using Prisma migrate commands in the following article: Prisma Migrate in development and production.
Viewing the database in Prisma studio
Prisma has a built-in GUI to view and edit data in your database. Let’s open it to view our database by running the following command:
npx prisma studioWhen you open Prisma studio your browser, which will use the URL http://localhost:5555, you’ll see the following GUI:
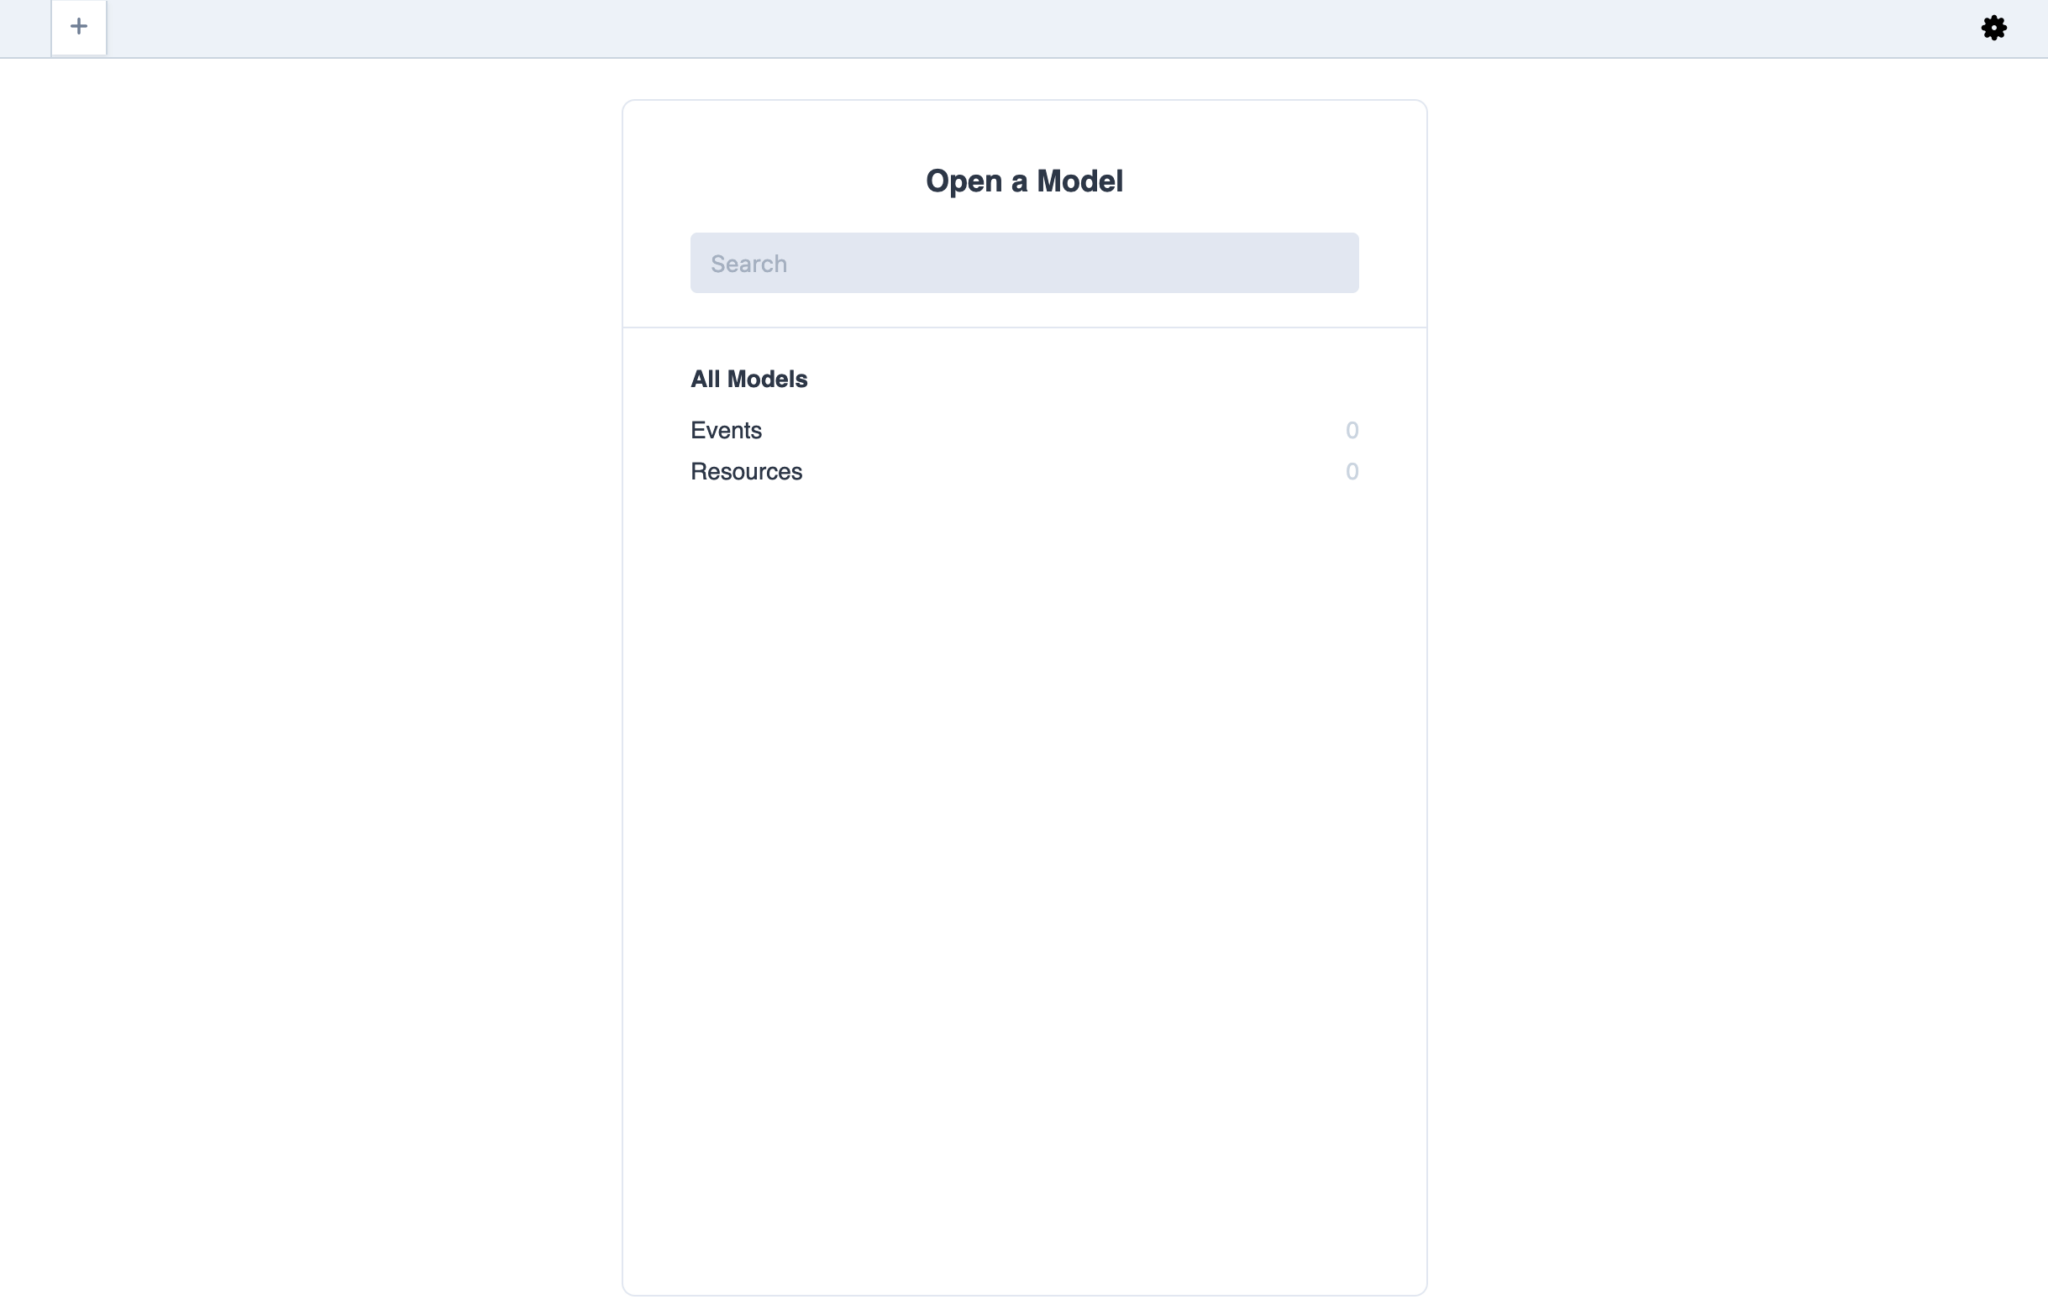
You can click on the Events and Resources SQLite tables to view, add, delete, edit, or filter records. The tables don’t have any records, so only the table columns will show. We can manually add some initial data for our Bryntum Scheduler using the Prisma Studio GUI, but that would be quite tedious. Let’s rather write a script to seed our database with some events and resources data.
Seeding the database
Create a seed.ts file in the prisma folder and add the following code:
import { PrismaClient } from "@prisma/client";
import { resources, events } from "../data/scheduler-initial-data";
const prisma = new PrismaClient();
async function main() {
  // clear database first
  await prisma.resources.deleteMany({});
  await prisma.events.deleteMany({});
  for (const resource of resources) {
    await prisma.resources.create({
      data: resource,
    });
  }
  for (const event of events) {
    await prisma.events.create({
      data: event,
    });
  }
}
main()
  .catch((e) => {
    console.error(e);
    process.exit(1);
  })
  .finally(async () => {
    await prisma.$disconnect();
  });
Here, we import and instantiate the Prisma Client so that we can send queries to our SQLite database.
We then run the seed() function. The seed() function first clears the database of any existing records in the resources and events tables using the Prisma deleteMany() function, which deletes multiple database records in a SQL transaction.
The scheduler-initial-data.ts file contains example Bryntum Scheduler data. We loop through each of the data arrays and use the Prisma create() function to create a database record for each resource or event.
Finally, we disconnect from the database. Generally, apps should only create one instance of PrismaClient.
Let’s create an npx script to run the seed() function. Add the following lines to your package.json file, below the “devDependencies” key:
  "prisma": {
    "seed": "ts-node --compiler-options {\"module\":\"CommonJS\"} prisma/seed.ts"
  }
We’ll need to install ts-node to run this script. Install it using the following command:
npm install ts-node --save-devNow run the following command to seed our database:
npx prisma db seedTo view the data in the database, open the Prisma Studio GUI again by running the following command:
npx prisma studioYou’ll now see the database populated with six resources and eight events.
In the utils folder, create a file called prisma.ts and add the following lines of code:
import { PrismaClient } from "@prisma/client";
let prisma: PrismaClient;
declare global {
  var prisma: PrismaClient;
}
if (process.env.NODE_ENV === "production") {
  prisma = new PrismaClient();
} else {
  if (!global.prisma) {
    global.prisma = new PrismaClient();
  }
  prisma = global.prisma;
}
export default prisma;
We’ll use this file to connect to our Prisma client in our app to make sure that we only have a single connection to the SQLite database during development.
Now let’s create a GraphQL endpoint to connect our frontend and backend.
Creating a GraphQL API endpoint using GraphQL Yoga
We’ll use the GraphQL Yoga library to create a GraphQL server in a Next.js API route. GraphQL Yoga makes setting up a GraphQL server easier, has good performance, and it has an in-browser IDE called GraphiQL for writing, validating, and testing GraphQL queries and mutations. We need a GraphQL server to create a GraphQL API endpoint.
Install the GraphQL Yoga library and its peer-dependency graphql:
npm install graphql graphql-yogaThe graphql package is the JavaScript reference implementation for GraphQL. It will be used as the execution engine for the GraphQL server.
Let’s create a GraphQL server and API route in a Next.js API route. Create a file called graphql.ts in the pages/api folder and add the following lines of code:
import { createYoga } from "graphql-yoga";
import type { NextApiRequest, NextApiResponse } from "next";
export default createYoga<{
  req: NextApiRequest;
  res: NextApiResponse;
}>({
  graphqlEndpoint: "/api/graphql",
});
export const config = {
  api: {
    bodyParser: false,
  },
};
We create a GraphQL Yoga server instance as a Next.js API route request handler and set the URL path for the GraphQL endpoint. We’ll create the GraphQL schema that will be added to this endpoint in the next section. The automatic request body parsing that’s done by Next.js is disabled because GraphQL Yoga handles request body parsing.
Creating a GraphQL schema using Pothos
To simplify creating a GraphQL schema, we’ll use the Pothos GraphQL schema builder for TypeScript. You can create the GraphQL schema and resolvers manually, but the schema and resolvers need to have the same structure. This schema-first approach can cause complications. For example, if you change the name of a query in the schema, you need to update the name of the query in the resolvers.
Pothos will solve this problem for us by creating GraphQL types based on the Prisma data model and allowing us to define resolvers inside the GraphQL queries and mutations. Pothos uses a code-first approach to creating a GraphQL schema. We’ll write our GraphQL queries and mutations using TypeScript and use the Prisma Plugin for Pothos to simplify defining our GraphQL types based on our Prisma data models. Other libraries that use this code-first approach for creating a GraphQL schema are TypeGraphQL and GraphQL Nexus.
The choice between code-first and schema-first approaches will depend on your project or team’s needs. For more information, you can see this article: Schema-First vs Code-Only GraphQL.
Let’s install Pothos and the Pothos Prisma plugin:
npm install @pothos/plugin-prisma @pothos/coreAdding the Pothos generator to your Prisma schema
Add the Pothos generator to your Prisma schema in the schema.prisma file, below the client generator:
generator pothos {
  provider = "prisma-pothos-types"
}
This will generate the types Pothos uses from your Prisma types. Now run the following command to generate the Pothos types:
npx prisma generateThe Pothos types will be regenerated each time you regenerate your Prisma client.
Setting up the Pothos GraphQL schema builder
In the graphql folder, create a file called builder.ts and add the following lines of code to it:
import SchemaBuilder from "@pothos/core";
import PrismaPlugin from "@pothos/plugin-prisma";
import type PrismaTypes from "@pothos/plugin-prisma/generated";
import prisma from "../utils/prisma";

export const builder = new SchemaBuilder<{
  PrismaTypes: PrismaTypes;
}>({
  plugins: [PrismaPlugin],
  prisma: {
    client: prisma,
  },
});

builder.queryType({});
The SchemaBuilder class instance is used to create a GraphQL schema. We pass in the generated Prisma types as a type param and pass in schema builder options: Pothos Prisma plugin and the Prisma Client instance. We then define a queryType that will allow us to define GraphQL queries using queryFields.
Creating a GraphQL type with builder.prismaObject
Let’s create our GraphQL object type for the Bryntum Scheduler resource data using our Prisma “Resources” data model.
In the graphql folder, create a folder called types. This folder will contain the GraphQL types, queries, and mutations for our events and resources.
Create a file called Resources.ts in the types folder and add the following lines of code:
import { builder } from "../builder";
builder.prismaObject("Resources", {
  fields: (t) => ({
    id: t.exposeID("id"),
    name: t.exposeString("name"),
    parentIndex: t.exposeInt("parentIndex"),
  }),
});
Here we add a prismaObject to our Pothos schema builder instance to create a GraphQL “Resource” object type for our schema. The first argument is the name of the Prisma model that we used to create this object type. If you have TypeScript setup in your programming IDE, you’ll notice that there is TypeScript autocomplete for this argument. The second argument is an options object for the created type. We use the field method and expose helper methods to make fields from our Prisma schema available for the Pothos builder. Pothos requires that you explicitly expose the fields that you want from your Prisma schema.
Creating a GraphQL query with builder.queryField
Now let’s define a GraphQL query using the schema builder queryField. Add the following lines of code to your Resources.ts file:
builder.queryField("resources", (t) =>
  t.prismaField({
    type: ["Resources"],
    resolve: (query, _parent, _args, _ctx, _info) =>
      prisma.resources.findMany({ ...query }),
  })
);
Here we add a queryField called "resources" to the existing builder queryType. We use the prismaField method to define a field that resolves to an array of the Prisma "Resources" type. The resolve property defines the resolver function. We use the prisma findMany() method to get all the resources for our Bryntum Scheduler.
Adding types, queries, and mutations to the Pothos GraphQL schema builder
Now let’s create a GraphQL schema using the Pothos schema builder. Create a file called schema.ts in the graphql folder and add the following lines of code.
import { builder } from "./builder";
import "./types/Resources";
export const schema = builder.toSchema();
We import the schema builder instance and the Resources object type and query that we created previously. We then call the builder toSchema() method that returns a GraphQL schema.
Now add this GraphQL schema to the GraphQL API endpoint in the pages/api/graphql.ts file:
import { schema } from "../../graphql/schema";Next, add the schema as a property in the object argument of the createYoga API route request handler function, above the line graphqlEndpoint: "/api/graphql":
schema,Using GraphiQL to write and validate the GraphQL query
Let’s use the GraphiQL in-browser IDE that’s part of GraphQL Yoga to check that our GraphQL resources query works.
Run the local development server and go to the GraphQL endpoint URL: http://localhost:3000/api/graphql. You’ll see the GraphiQL IDE:
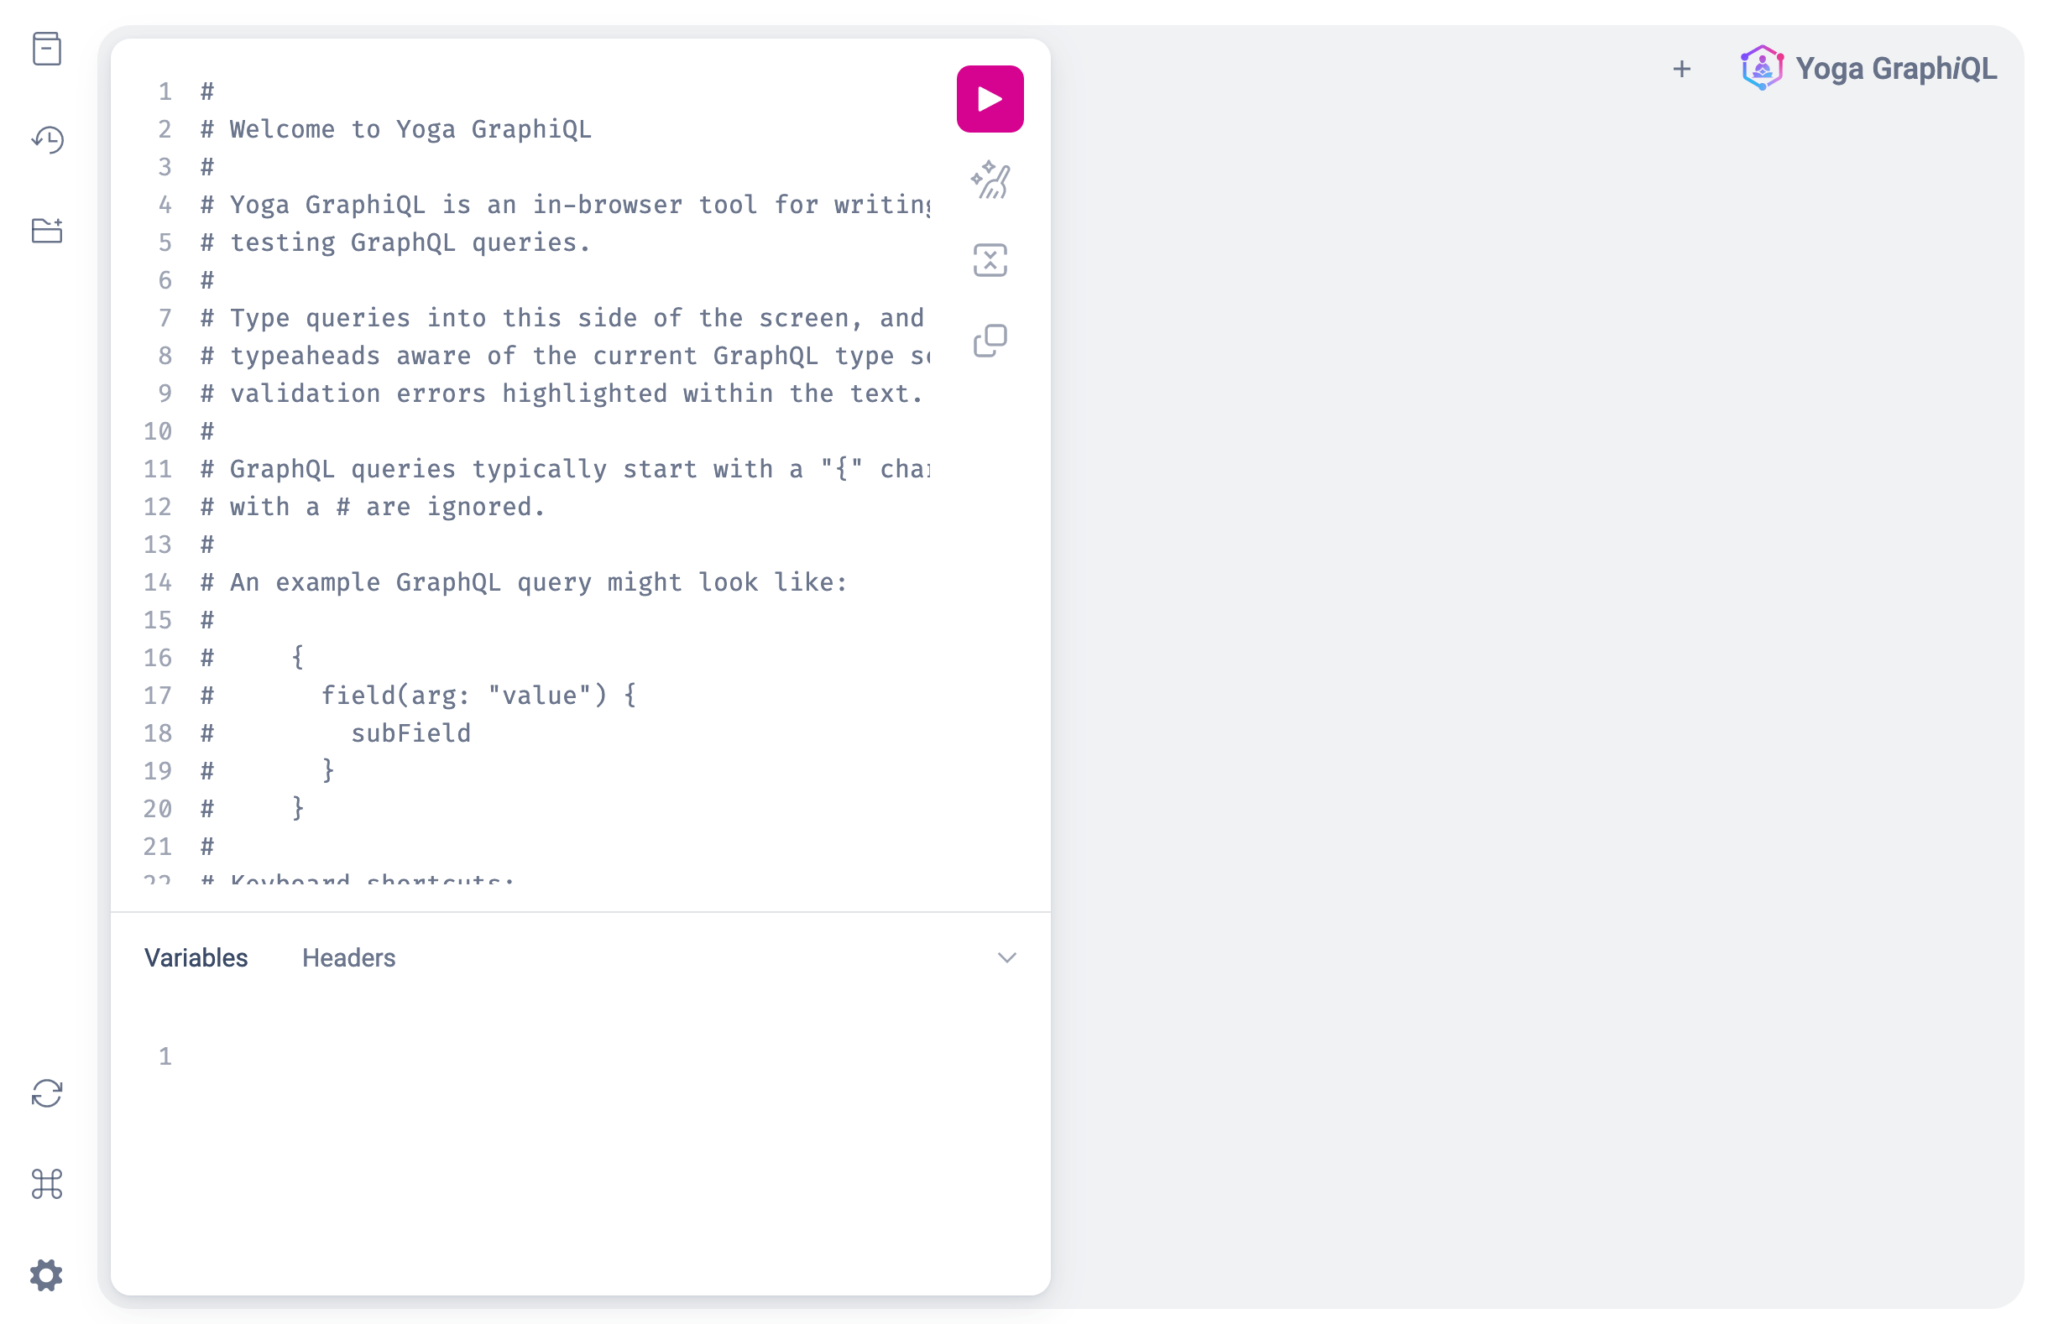
Notice the three navigation icons on the upper left: The top icon is the Documentation Explorer, which you can use to see your GraphQL object types, their fields, and the expected type for each field. The bottom icon is the GraphiQL Explorer, which you can use to create queries or mutations that you’ve defined.
Add the following query to the IDE and then click the pink “Execute Query” button:
query MyQuery {
  resources {
    id
    name
    parentIndex
  }
}
This should return a JSON object with data for the six resources we added to the SQLite database.
Now we’ll create mutations that can change our resources data.
Creating GraphQL mutations with builder.mutationField
First, add a mutationType to the end of the graphql/builder.ts file. This will allow us to define GraphQL mutations using mutationFields:
builder.mutationType({});Now add the following mutation fields to the graphql/types/Resources.ts file:
builder.mutationField("createResource", (t) =>
  t.prismaField({
    type: "Resources",
    args: {
      name: t.arg.string({ required: true }),
      parentIndex: t.arg.int({ required: true }),
    },
    resolve: async (query, _parent, args, ctx) => {
      const { name, parentIndex } = args;
      return prisma.resources.create({
        // the `query` argument will add in `include`s or `select`s to
        // resolve as much of the request in a single query as possible
        ...query,
        data: {
          id: crypto.randomUUID(),
          name,
          parentIndex,
        },
      });
    },
  })
);
builder.mutationField("deleteResource", (t) =>
  t.prismaField({
    type: "Resources",
    args: {
      id: t.arg.string({ required: true }),
    },
    resolve: async (query, _parent, args, ctx) => {
      const { id } = args;
      const deleteResource = await prisma.resources.delete({
        ...query,
        where: { id: id },
      });
      return deleteResource;
    },
  })
);
builder.mutationField("updateResource", (t) =>
  t.prismaField({
    type: "Resources",
    args: {
      id: t.arg.string({ required: true }),
      name: t.arg.string({ required: false }),
      parentIndex: t.arg.int({ required: false }),
    },
    resolve: async (query, _parent, args, ctx) => {
      const { id, ...modifiedVariables } = args;
      return prisma.resources.update({
        ...query,
        where: { id },
        data: { ...modifiedVariables },
      });
    },
  })
);
Here we created three mutations: "createResource", "deleteResource", and "updateResource". The structure of the mutationField method is similar to the structure of the queryField but there is an args property for arguments passed into the mutation request. We use the Prisma create(), delete(), and update() methods in the resolvers to update our SQLite database.
For created events and mutations, we generate a unique id using the randomUUID() method of the Node crypto module. We need to import this module at the top of the graphql/types/Resources.ts file:
import crypto from "crypto";You can use the GraphiQL IDE to test that these mutations work. Use the GraphiQL Explorer to create and execute a mutation.
Creating GraphQL type, query, and mutations for the events data
Now let’s create the GraphQL schema for our events data. Create a file called Events.ts in the graphql/types folder:
import { builder } from "../builder";
builder.prismaObject("Events", {
  fields: (t) => ({
    id: t.exposeID("id"),
    name: t.exposeString("name"),
    startDate: t.string({
      resolve: (event) => new Date(event.startDate).toISOString(),
    }),
    endDate: t.string({
      resolve: (event) => new Date(event.endDate).toISOString(),
    }),
    resourceId: t.exposeString("resourceId", { nullable: true }),
    resizable: t.exposeBoolean("resizable"),
    draggable: t.exposeBoolean("draggable"),
    cls: t.exposeString("cls"),
    duration: t.exposeFloat("duration"),
    durationUnit: t.exposeString("durationUnit"),
    parentIndex: t.exposeInt("parentIndex"),
    orderedParentIndex: t.exposeInt("orderedParentIndex", { nullable: true }),
    exceptionDates: t.exposeString("exceptionDates", { nullable: true }),
    readOnly: t.exposeBoolean("readOnly"),
    allDay: t.exposeBoolean("allDay"),
    recurrenceCombo: t.exposeString("recurrenceCombo"),
  }),
});
builder.queryField("events", (t) =>
  t.prismaField({
    type: ["Events"],
    resolve: (query, _parent, _args, _ctx, _info) =>
      prisma.events.findMany({ ...query }),
  })
);
builder.mutationField("createEvent", (t) =>
  t.prismaField({
    type: "Events",
    args: {
      name: t.arg.string({ required: true }),
      startDate: t.arg.string({ required: true }),
      endDate: t.arg.string({ required: true }),
      resourceId: t.arg.string({ required: true }),
      resizable: t.arg.boolean({ required: true }),
      draggable: t.arg.boolean({ required: true }),
      cls: t.arg.string({ required: true }),
      duration: t.arg.float({ required: true }),
      durationUnit: t.arg.string({ required: true }),
      parentIndex: t.arg.int({ required: true }),
      orderedParentIndex: t.arg.int({ required: false }),
      exceptionDates: t.arg.string({ required: false }),
      readOnly: t.arg.boolean({ required: false }),
      allDay: t.arg.boolean({ required: true }),
      recurrenceCombo: t.arg.string({ required: false }),
    },
    resolve: async (query, _parent, args, ctx) => {
      return prisma.events.create({
        ...query,
        data: {
          id: crypto.randomUUID(),
          ...args,
        },
      });
    },
  })
);
builder.mutationField("deleteEvent", (t) =>
  t.prismaField({
    type: "Events",
    args: {
      id: t.arg.string({ required: true }),
    },
    resolve: async (query, _parent, args, ctx) => {
      const { id } = args;
      return prisma.events.delete({
        ...query,
        where: { id },
      });
    },
  })
);
builder.mutationField("updateEvent", (t) =>
  t.prismaField({
    type: "Events",
    args: {
      id: t.arg.string({ required: true }),
      name: t.arg.string({ required: false }),
      startDate: t.arg.string({ required: false }),
      endDate: t.arg.string({ required: false }),
      resourceId: t.arg.string({ required: false }),
      resizable: t.arg.boolean({ required: false }),
      draggable: t.arg.boolean({ required: false }),
      cls: t.arg.string({ required: false }),
      duration: t.arg.float({ required: false }),
      durationUnit: t.arg.string({ required: false }),
      parentIndex: t.arg.int({ required: false }),
      orderedParentIndex: t.arg.int({ required: false }),
      exceptionDates: t.arg.string({ required: false }),
      readOnly: t.arg.boolean({ required: false }),
      allDay: t.arg.boolean({ required: false }),
      recurrenceCombo: t.arg.string({ required: false }),
    },
    resolve: async (query, _parent, args, ctx) => {
      const { id, ...modifiedVariables } = args;
      return prisma.events.update({
        ...query,
        where: { id },
        data: { ...modifiedVariables },
      });
    },
  })
);
Import the crypto node module used to generate a unique id for the created events:
import crypto from "crypto";Add the object, query, and mutation to the schema by importing them in the graphql/schema.ts file:
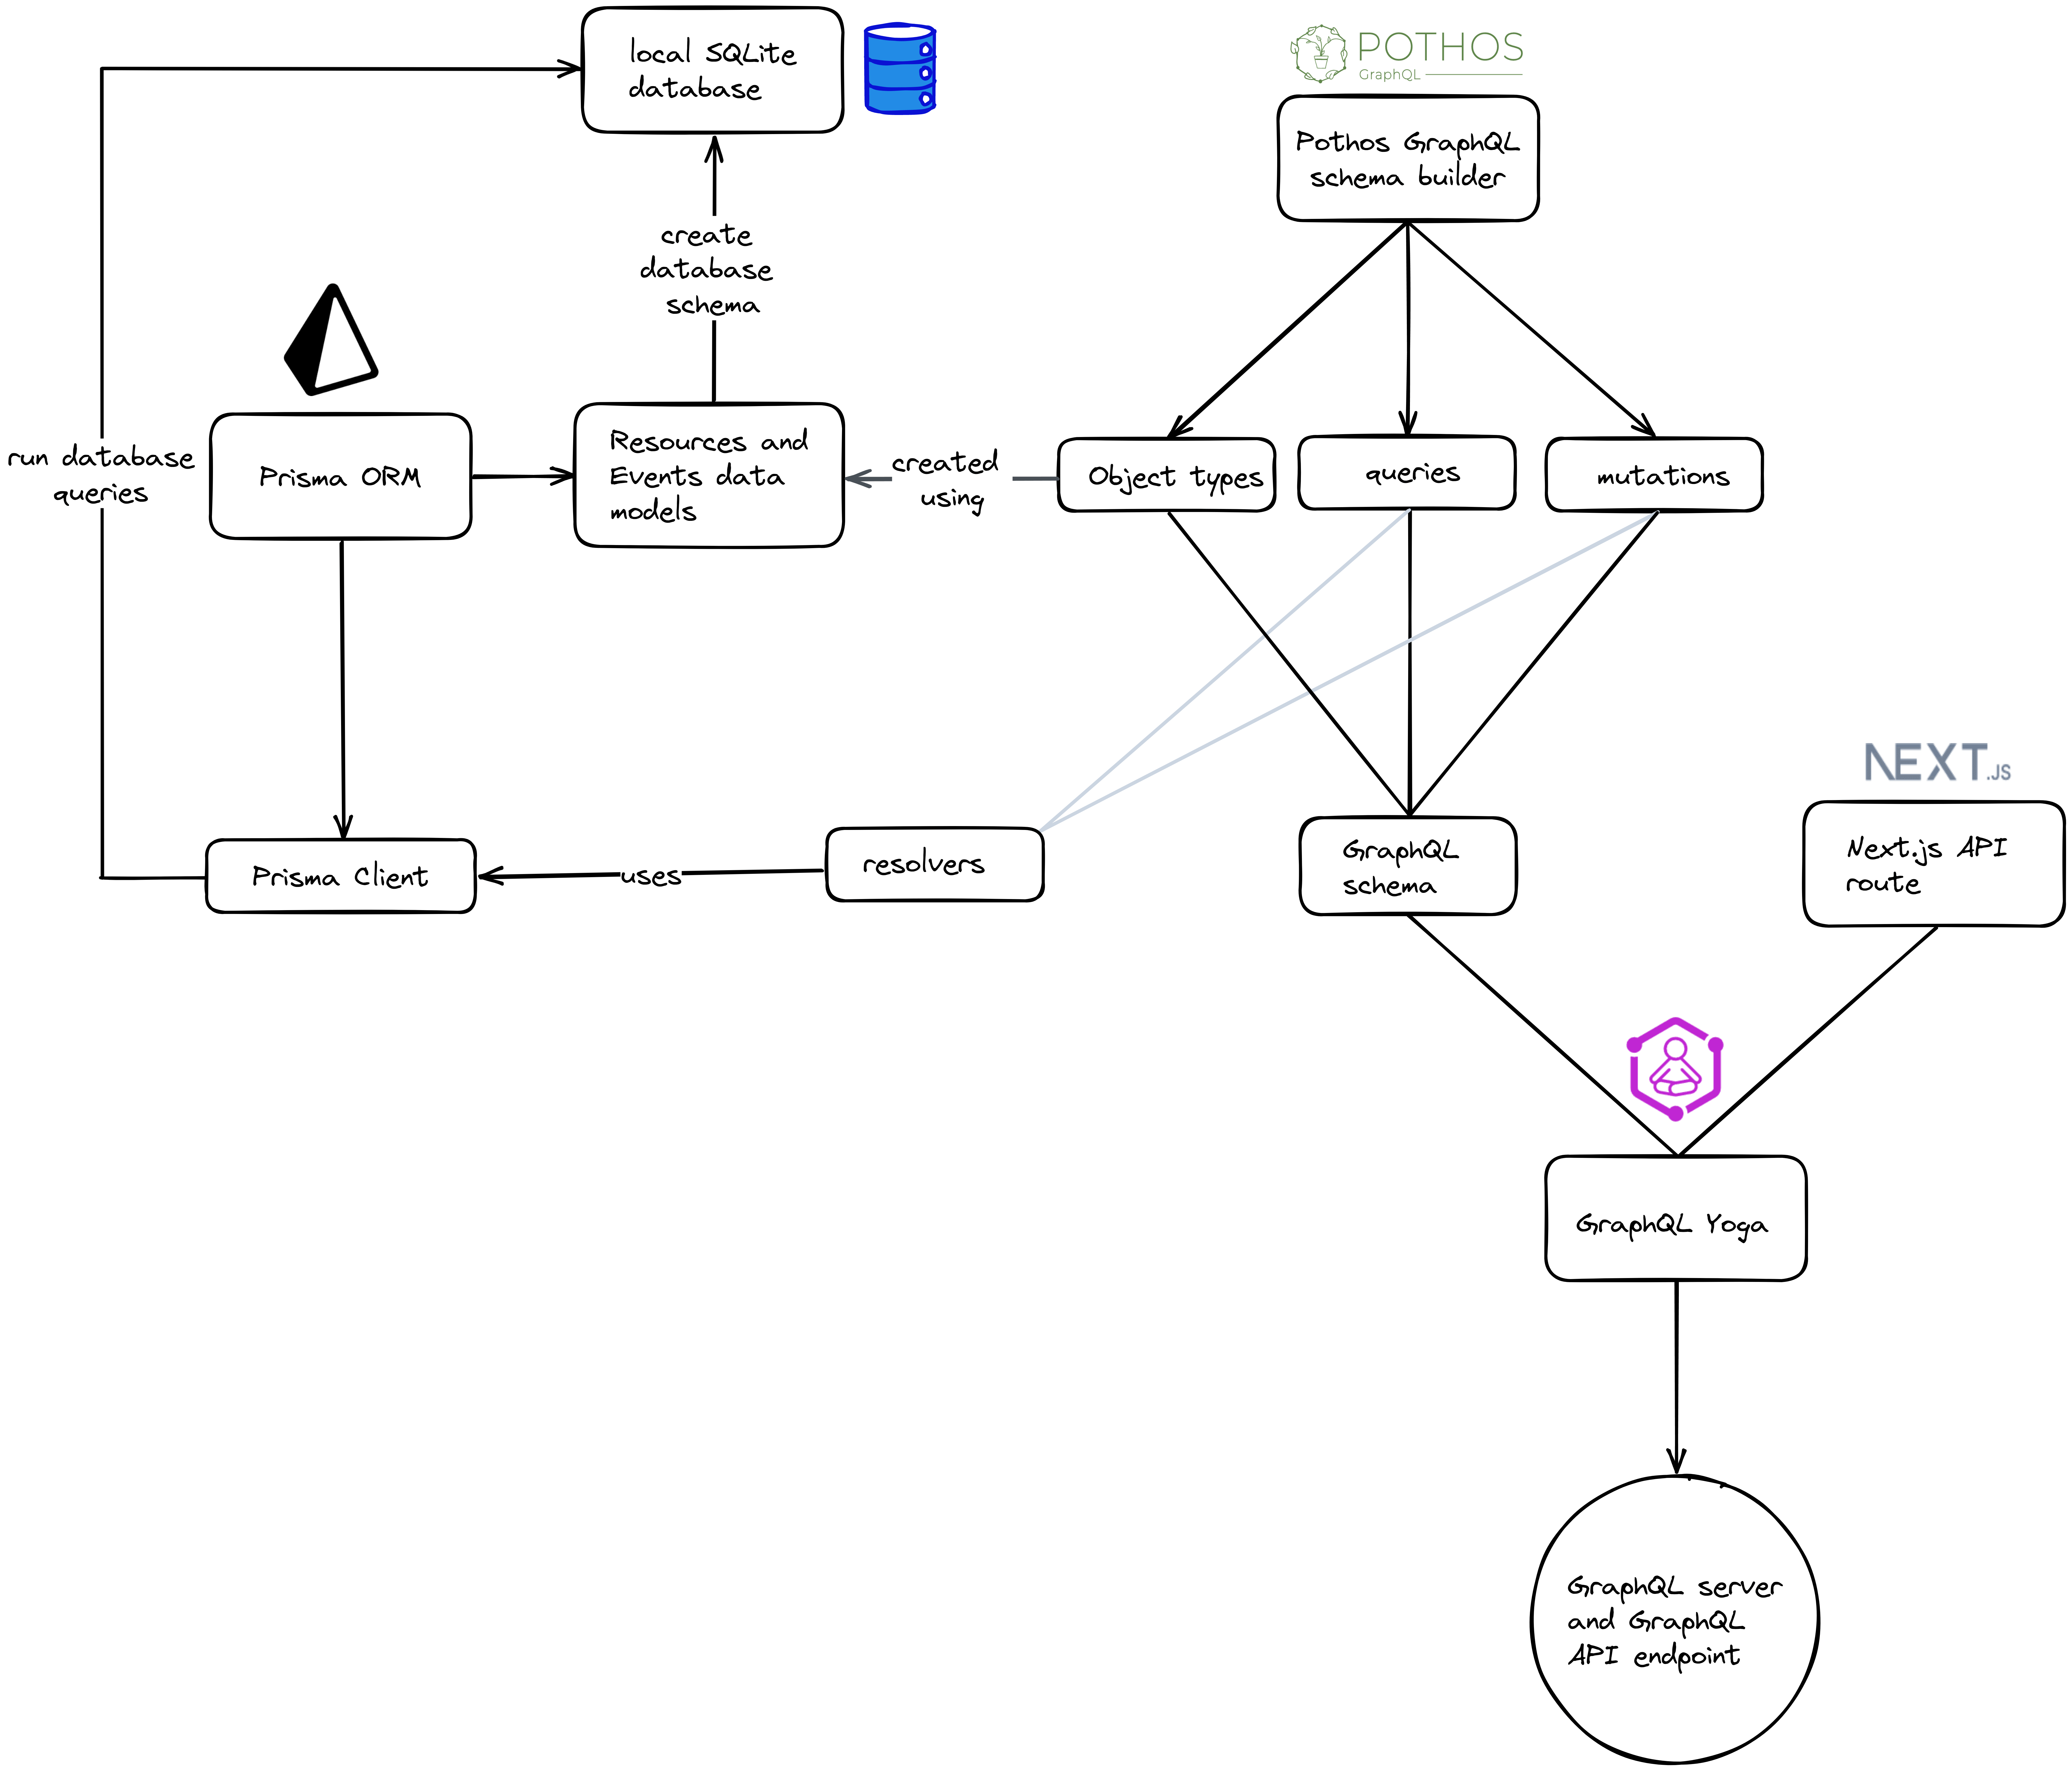
import "./types/Events";We’re done with our GraphQL API endpoint for now. Here’s a diagram showing an overview of how we created the GraphQL server and API endpoint:
Let’s create a Bryntum Scheduler component that will make queries and mutations using our GraphQL endpoint to sync its data with our SQLite database.
Creating a client-only Scheduler component
We’ll install the Bryntum Scheduler component using npm. First, you’ll need to get access to Bryntum’s private npm registry. You can do this by following the guide in our docs: Access to npm registry.
Once you’ve logged in to the registry, install the Scheduler component by following the guide here.
You’ll also need to install the Bryntum Scheduler React wrapper that encapsulates the Bryntum Scheduler in a React component. Install the Scheduler React wrapper using the following command:
npm i @bryntum/scheduler-reactWe’ll first create our Bryntum Scheduler configuration file. Create a file called schedulerConfig.ts in the root directory and add the following lines of code to it:
import type { BryntumSchedulerProps } from "@bryntum/scheduler-react";
const schedulerConfig: BryntumSchedulerProps = {
  columns: [{ text: "name", field: "name", width: 120 }],
  viewPreset: "weekAndDayLetter",
  barMargin: 10,
};
export { schedulerConfig };
Our scheduler will have a single column called “NAME” and will display the letter representing the week and the letter representing the day in the scheduler’s timeline header.
In the components folder, create a file called Scheduler.tsx and add the following lines to it:
import { LegacyRef } from "react";
import { schedulerConfig } from "@/schedulerConfig";
import { BryntumScheduler } from "@bryntum/scheduler-react";
type SchedulerProps = {
  schedulerRef: LegacyRef<BryntumScheduler> | undefined;
};
export default function Scheduler({ schedulerRef }: SchedulerProps) {
  return <BryntumScheduler ref={schedulerRef} {...schedulerConfig} />;
}
The rendered Bryntum Scheduler React wrapper component has a ref to access the Bryntum Scheduler instance. We don’t use this in this tutorial, but it’s useful if you need to access the Bryntum Scheduler instance. We also pass in the schedulerConfig.
Bryntum components are client-side only and Next.js uses SSR. To make the component client-side only, we’ll import the BryntumScheduler component dynamically to ensure that the Bryntum Scheduler is rendered on the client only. Now let’s add the Scheduler component to our index page. Replace the code in the pages/index.tsx file with the following lines of code:
import { useRef, LegacyRef } from "react";
import Head from "next/head";
import dynamic from "next/dynamic";
import { BryntumScheduler } from "@bryntum/scheduler-react";
const SchedulerDynamic = dynamic(() => import("@/components/Scheduler"), {
  ssr: false,
  loading: () => {
    return (
      <div
        style={{
          display: "flex",
          alignItems: "center",
          justifyContent: "center",
          height: "100vh",
        }}
      >
        <p>Loading...</p>
      </div>
    );
  },
});
export default function Home() {
  const schedulerRef = useRef() as LegacyRef<BryntumScheduler> | undefined;
  return (
    <>
      <Head>
        <title>
          Create a scheduler using Bryntum, Next.js, Prisma, SQLite, and GraphQL
        </title>
        <meta
          name="description"
          content="Create a scheduler using Bryntum, Next.js, Prisma, SQLite, and GraphQL"
        />
        <meta name="viewport" content="width=device-width, initial-scale=1" />
        <link rel="icon" type="image/png" href="/bryntum.png" />{" "}
      </Head>
      <div id="scheduler-container">
        <SchedulerDynamic schedulerRef={schedulerRef} />
      </div>
    </>
  );
}
We dynamically import our Scheduler component with ssr set to false. We display a loading component that returns a <p> tag with the message “Loading…” while the component is loading.
We’ll use the Bryntum Stockholm theme to style our scheduler. Import it at the top of the styles/App.css file:
@import "@bryntum/scheduler/scheduler.stockholm.css";Now run the local development server and you’ll see an empty Bryntum Scheduler:
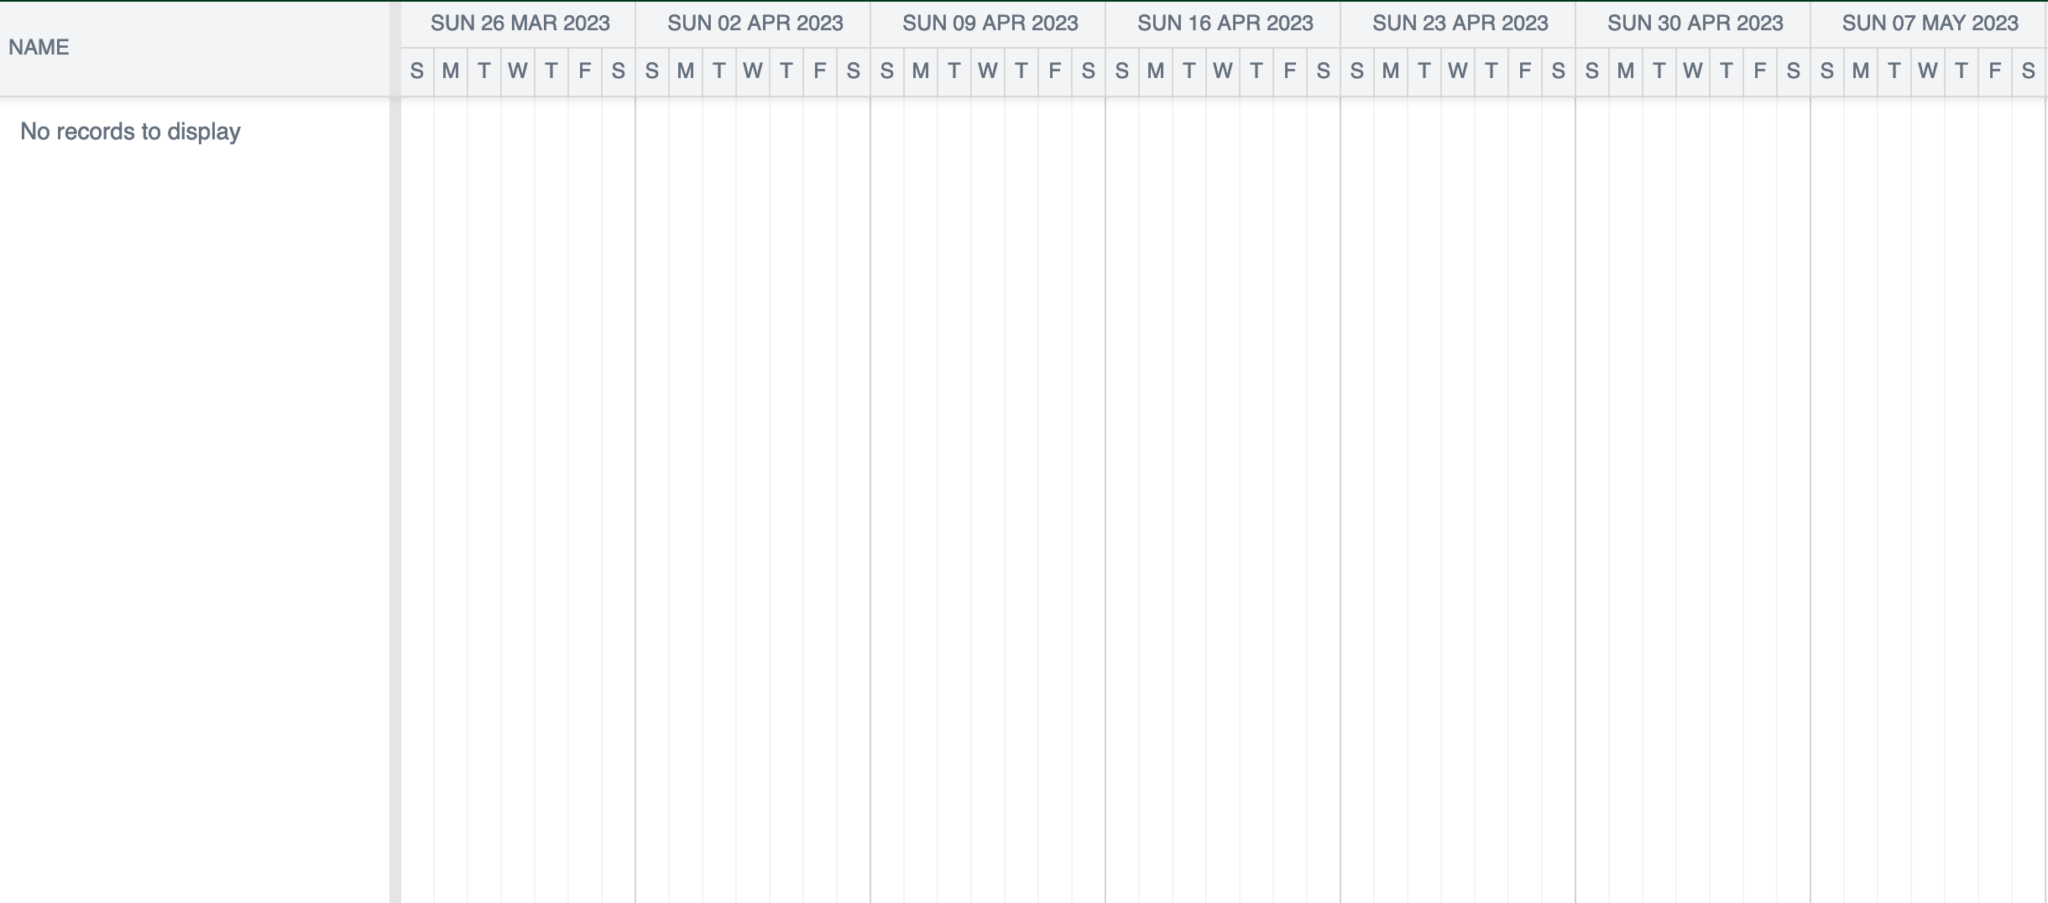
Note that Next.js 13, which this app uses, introduced the App Router app. All components inside the app directory are React Server Components by default. You can make a component client-side only by adding the "use client" directive at the top of the file, before any imports.
Making client-side GraphQL queries with Apollo Client
We’ll use the Apollo Client JavaScript state management library to keep our client-side and server-side scheduler data in sync using GraphQL. The Appollo Client will fetch, cache, and modify our scheduler data. Here’s an overview diagram of the data flow of our full-stack Bryntum Scheduler app once we’ve added Apollo Client:
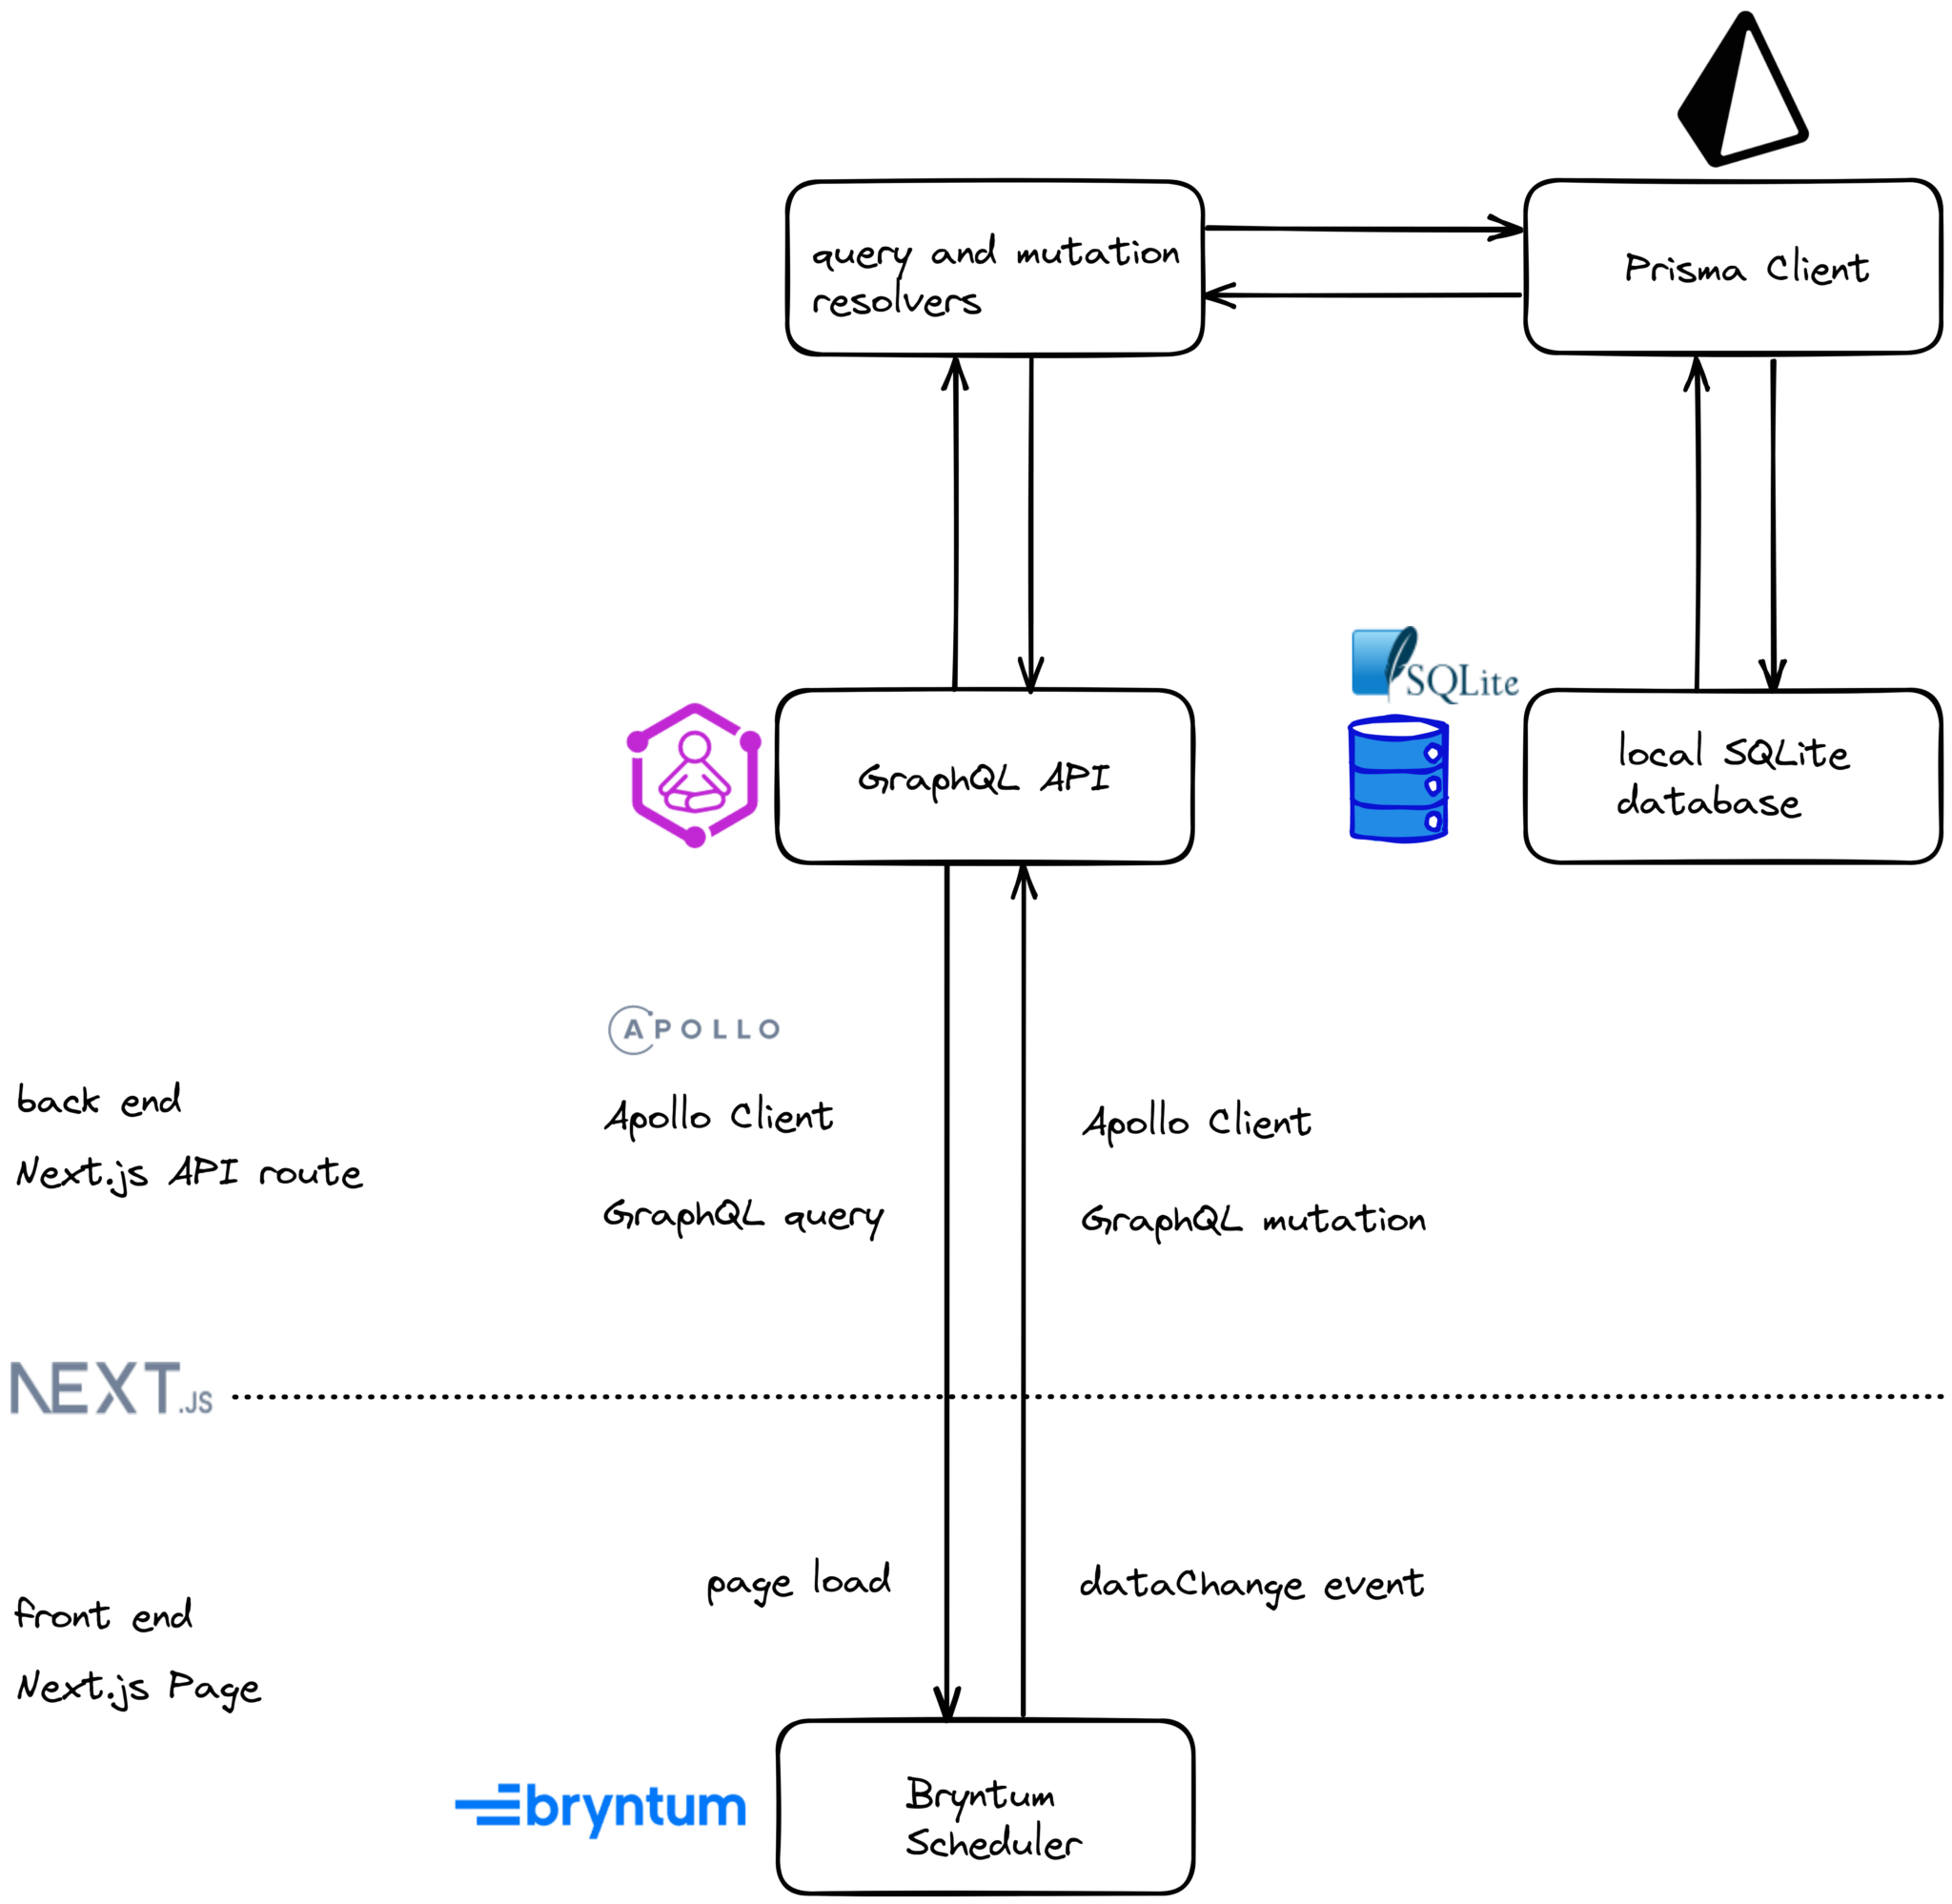
We’ll use Apollo Client GraphQL queries to fetch data, and Apollo Client GraphQL mutations to update data on the server.
Setting up Apollo Client in Next.js
Install the library by running the following command:
npm install @apollo/clientNow we’ll initialize an ApolloClient instance. Create a file called apollo.ts in the utils folder and add the following lines of code to it:
import { ApolloClient, InMemoryCache } from "@apollo/client";
const apolloClient = new ApolloClient({
  uri: "/api/graphql",
  cache: new InMemoryCache(),
});
export default apolloClient;
We pass the ApolloClient constructor a config object with the uri and cache fields. The uri is the URL of our GraphQL server and the cache is an instance of InMemoryCache that Apollo Client uses to cache query results after they’re fetched.
To connect Apollo Client with our app, we’ll wrap our app Component with the ApolloProvider component. This Apollo Client context provider will enable us to access Apollo Client functions for sending queries and mutations anywhere in our app.
In the pages/_app.tsx file, import the ApolloClient instance and ApolloProvider component:
import apolloClient from "@/utils/apollo";
import { ApolloProvider } from "@apollo/client";
Wrap the app Component in the ApolloProvider and pass in the apolloClient as a prop:
  return (
    <ApolloProvider client={apolloClient}>
      <Component {...pageProps} />
    </ApolloProvider>
  );
Now let’s use Apollo Client to get our scheduler data from our GraphQL API endpoint.
Getting scheduler data from the GraphQL API using useQuery
We’ll fetch scheduler data from our GraphQL API using the Apollo Client useQuery hook. We need to pass it a GraphQL query string as an argument, like the queries we made in the GraphiQL IDE. The useQuery hook returns an object with three values:
data: The data from a GraphQL API endpoint.loading: A boolean value indicating whether thedatahas been returned.error: An object that contains an error message if an error occurred.
To organize our code, we’ll add the GraphQL query strings in a separate file. We’ll add the useQuery and later the useMutation hooks to a custom React hook. In the helpers folder, create a file called graphqlOperations.ts and add the following lines of code to it:
import { gql } from "@apollo/client";
export const AllDataQuery = gql`
  query {
    resources {
      id
      name
      parentIndex
    }
    events {
      id
      name
      startDate
      endDate
      resourceId
      resizable
      draggable
      cls
      duration
      durationUnit
      parentIndex
      orderedParentIndex
      exceptionDates
      readOnly
      recurrenceCombo
    }
  }
`;
We create a GraphQL query string to get all of our resources and events data. We use the gql function to parse the GraphQL query string into a query document that defines the GraphQL query operation.
Now we’ll create a custom hook for GraphQL queries and mutations. In the hooks folder, create a file called useQueryAndMutations.ts and add the following lines of code to it:
import { useMutation, useQuery } from "@apollo/client";
import {
  AllDataQuery,
} from "@/helpers/graphqlOperations";
import { ResourceModel, EventModel } from "@bryntum/scheduler";
type Data = {
  resources: ResourceModel[];
  events: EventModel[];
};
export function useQueryAndMutations() {
  const {
    data,
    loading: loadingQuery,
    error: errorQuery,
  } = useQuery(AllDataQuery);
  return {
    data: data as Data,
    loading: {
      loadingQuery: loadingQuery,
    },
    error: {
      errorQuery: errorQuery,
    },
  };
}
We import the AllDataQuery string and use it as an argument for the useQuery hook to get our scheduler data. We then return the data, error object, and loading boolean from the custom hook.
Let’s use our custom hook to get the scheduler data from the GraphQL endpoint into our Bryntum Scheduler. In the Scheduler.tsx component, import the custom hook:
import { useQueryAndMutations } from "@/hooks/useQueryAndMutations";Use object destructuring to get the data from the GraphQL query in the Scheduler:
const { data } = useQueryAndMutations();Change the return statement to the following:
  return data ? (
    <BryntumScheduler
      ref={schedulerRef}
      resources={data?.resources}
      events={data?.events}
      {...schedulerConfig}
    />
  ) : null;
We add the resources and events data as props of the BryntumScheduler component. The data is a React state variable, we bind data to the Bryntum Scheduler component by setting the resources and events as properties of the component.
Now when you run your development server, you’ll see the scheduled events for each person:
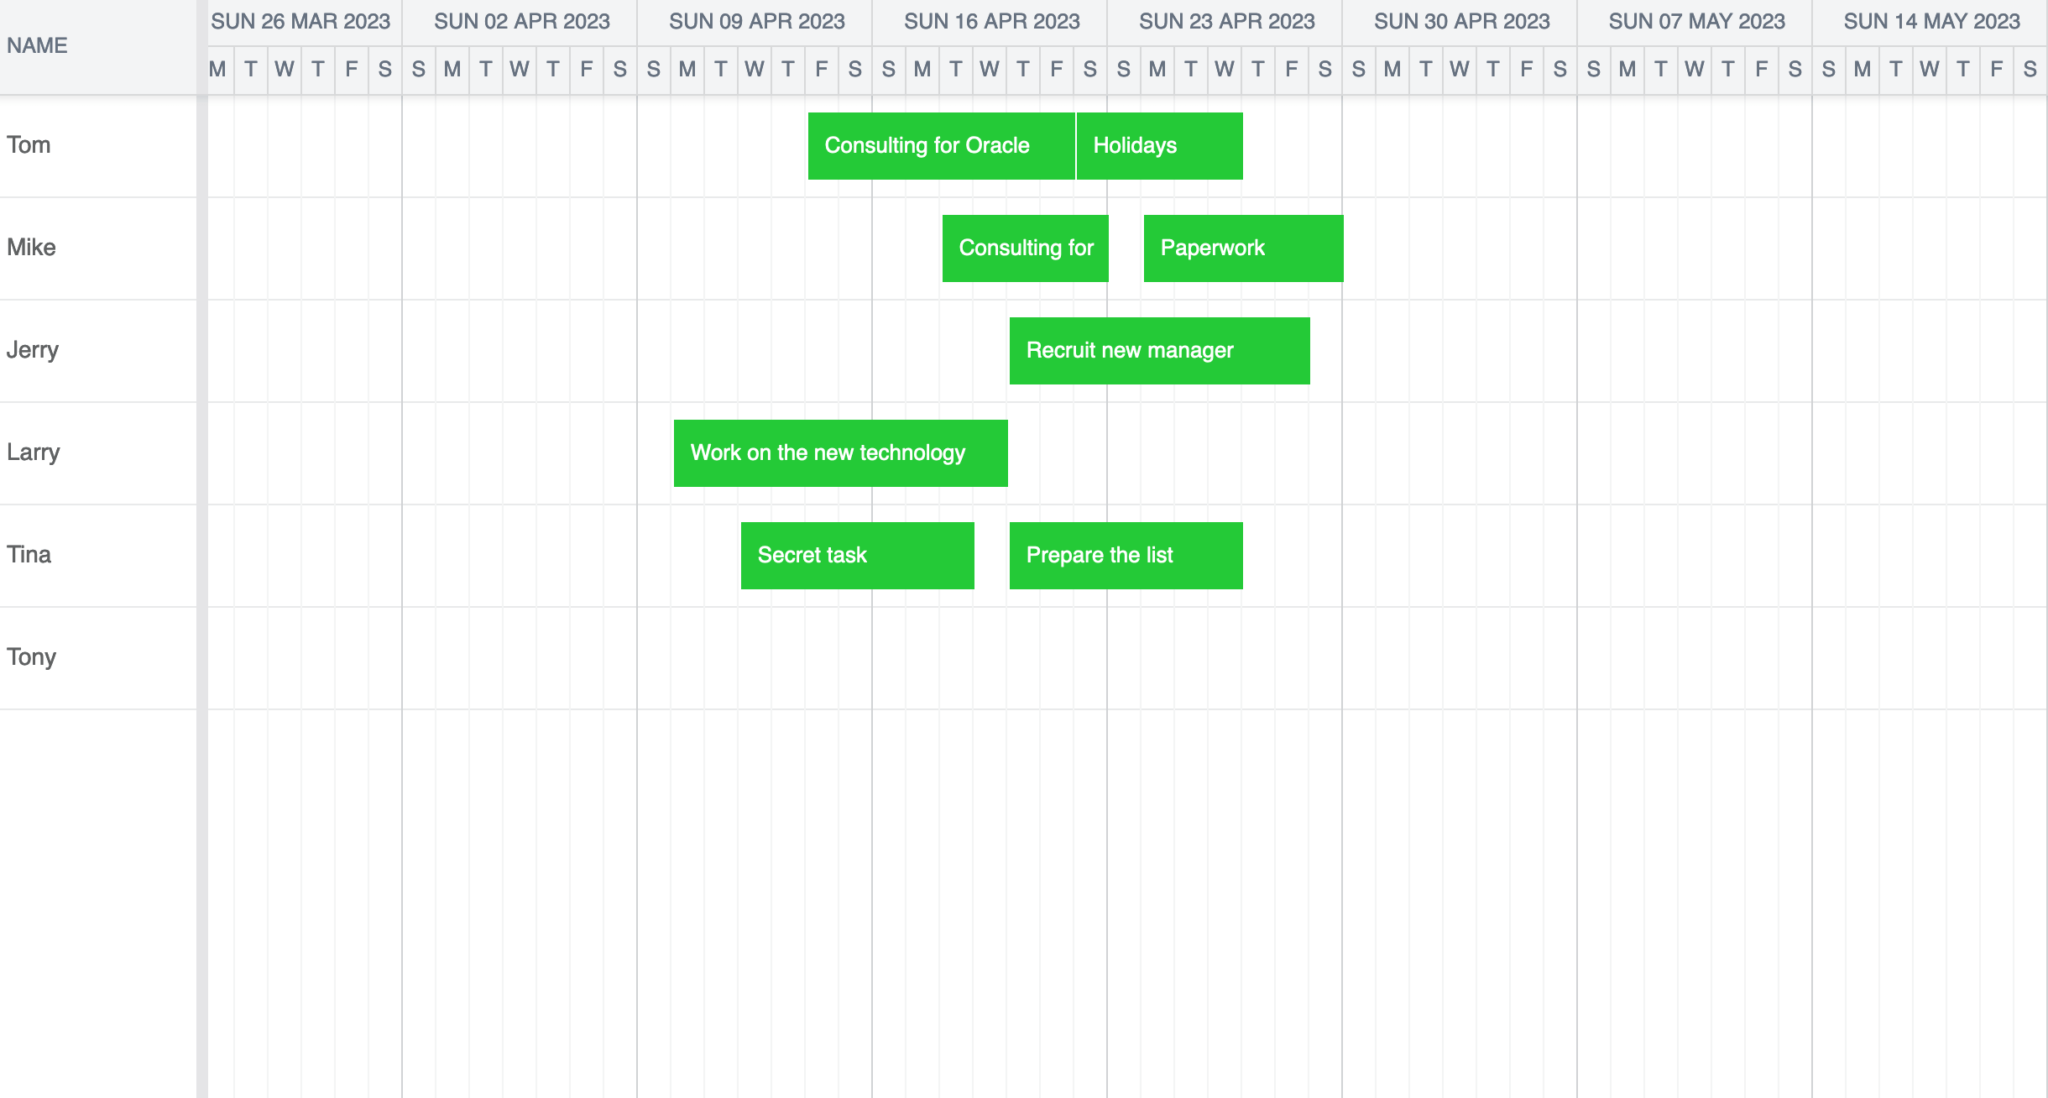
Next, we’ll sync data changes in our scheduler with our backend using the Apollo Client useMutation hook.
Making client-side GraphQL mutations with Apollo Client
We’ll use the Apollo Client useMutation hook to modify our SQLite data with GraphQL mutations.
For each mutation, we’ll pass in a mutation string to the useMutation hook, which will return a mutation function that we can call to execute the mutation. Let’s define the mutation strings that we need. In the helpers/graphqlOperations.ts file, add the following mutation strings:
export const CreateResourceMutation = gql`
  mutation createResource($name: String!, $parentIndex: Int!) {
    createResource(name: $name, parentIndex: $parentIndex) {
      id
      name
      parentIndex
    }
  }
`;
export const DeleteResourceMutation = gql`
  mutation deleteResource($id: String!) {
    deleteResource(id: $id) {
      id
    }
  }
`;
export const UpdateResourceMutation = gql`
  mutation updateResource($id: String!, $name: String, $parentIndex: Int) {
    updateResource(id: $id, name: $name, parentIndex: $parentIndex) {
      id
      name
      parentIndex
    }
  }
`;
export const CreateEventMutation = gql`
  mutation createEvent(
    $name: String!
    $startDate: String!
    $endDate: String!
    $resourceId: String!
    $resizable: Boolean!
    $draggable: Boolean!
    $cls: String!
    $duration: Float!
    $durationUnit: String!
    $parentIndex: Int!
    $orderedParentIndex: Int
    $exceptionDates: String
    $readOnly: Boolean
    $allDay: Boolean!
    $recurrenceCombo: String
  ) {
    createEvent(
      name: $name
      startDate: $startDate
      endDate: $endDate
      resourceId: $resourceId
      resizable: $resizable
      draggable: $draggable
      cls: $cls
      duration: $duration
      durationUnit: $durationUnit
      parentIndex: $parentIndex
      orderedParentIndex: $orderedParentIndex
      exceptionDates: $exceptionDates
      readOnly: $readOnly
      allDay: $allDay
      recurrenceCombo: $recurrenceCombo
    ) {
      id
      name
      startDate
      endDate
      resourceId
      resizable
      draggable
      cls
      duration
      durationUnit
      parentIndex
      orderedParentIndex
      exceptionDates
      readOnly
      allDay
      recurrenceCombo
    }
  }
`;
export const DeleteEventMutation = gql`
  mutation deleteEvent($id: String!) {
    deleteEvent(id: $id) {
      id
    }
  }
`;
export const UpdateEventMutation = gql`
  mutation updateEvent(
    $id: String!
    $name: String
    $startDate: String
    $endDate: String
    $resourceId: String
    $resizable: Boolean
    $draggable: Boolean
    $cls: String
    $duration: Float
    $durationUnit: String
    $parentIndex: Int
    $orderedParentIndex: Int
    $exceptionDates: String
    $readOnly: Boolean
    $allDay: Boolean
    $recurrenceCombo: String
  ) {
    updateEvent(
      id: $id
      name: $name
      startDate: $startDate
      endDate: $endDate
      resourceId: $resourceId
      resizable: $resizable
      draggable: $draggable
      cls: $cls
      duration: $duration
      durationUnit: $durationUnit
      parentIndex: $parentIndex
      orderedParentIndex: $orderedParentIndex
      exceptionDates: $exceptionDates
      readOnly: $readOnly
      allDay: $allDay
      recurrenceCombo: $recurrenceCombo
    ) {
      id
      name
      startDate
      endDate
      resourceId
      resizable
      draggable
      cls
      duration
      durationUnit
      parentIndex
      orderedParentIndex
      exceptionDates
      readOnly
      allDay
      recurrenceCombo
    }
  }
`;
Each mutation string has an operation type of mutation and a unique name. The mutations have dynamic variables passed in as arguments. The variable names start with a “$” sign and the type of the variable is indicated. Types that end with a ! sign mean that the variable is required, the value can’t be null. The createResource mutation field is defined in the mutation operation. This mutation field calls the resolver on the server. We pass in the variables to it. Within this mutation field, we define the data that we want to receive in the mutation response. We don’t use the returned data in this tutorial, but it can be used to update the Apollo Client cache directly. Apollo Client recommends refetching your queries to update your cached data after a mutation when you’re new to the platform. Later, you can improve your app’s responsiveness by updating the cache directly.
Let’s create the mutation functions we need to add, update, and delete resources or events in the useQueryAndMutations.ts custom hook. Import the useMutation hook:
import { useMutation } from "@apollo/client";Now import the GraphQL mutation strings:
import {
  CreateResourceMutation,
  DeleteResourceMutation,
  UpdateResourceMutation,
  CreateEventMutation,
  DeleteEventMutation,
  UpdateEventMutation,
} from "@/helpers/graphqlOperations";
Add the useMutation hooks that create our mutation functions to the useQueryAndMutations function below useQuery:
const [createResource, createResourceMeta] = useMutation(
    CreateResourceMutation,
    { refetchQueries }
  );
  const [deleteResource, deleteResourceMeta] = useMutation(
    DeleteResourceMutation,
    { refetchQueries }
  );
  const [updateResource, updateResourceMeta] = useMutation(
    UpdateResourceMutation,
    { refetchQueries }
  );
  const [createEvent, createEventMeta] = useMutation(CreateEventMutation, {
    refetchQueries,
  });
  const [deleteEvent, deleteEventMeta] = useMutation(DeleteEventMutation);
  const [updateEvent, updateEventMeta] = useMutation(UpdateEventMutation, {
    refetchQueries,
  });
The useMutation hooks return a mutation function and a results object containing the data, error object, and loading boolean in the same way the useQuery hook did previously. We name this results object with a “-Meta” suffix.
Add the following refetchQueries variable above the useMutation hooks:
const refetchQueries = [{ query: AllDataQuery }];We add a refetchQueries array as an option for the mutations to indicate that we want to refetch certain queries after a mutation. For simplicity, we refetch all of the data after each mutation.
Update the returned object from our custom hook to include the mutations:
    createResource,
    deleteResource,
    updateResource,
    createEvent,
    deleteEvent,
    updateEvent,
Add the mutation loading booleans to the returned loading object:
      createResource: createResourceMeta.loading,
      deleteResource: deleteResourceMeta.loading,
      updateResource: updateResourceMeta.loading,
      createEvent: createEventMeta.loading,
      deleteEvent: deleteEventMeta.loading,
      updateEvent: updateEventMeta.loading,
Add the mutation error objects to the returned error object:
      createResource: createResourceMeta.error,
      deleteResource: deleteResourceMeta.error,
      updateResource: updateResourceMeta.error,
      createEvent: createEventMeta.error,
      deleteEvent: deleteEventMeta.error,
      updateEvent: updateEventMeta.error,
Now we’ll use these mutation functions in our Bryntum Scheduler when there is a change in the data on the client.
Syncing data changes with the Bryntum Scheduler onDataChange event
We’ll use the Bryntum Scheduler onDataChange event to call mutations when the scheduler data changes.
Creating a syncData function to sync data changes
Add the onDataChange property to the BryntumScheduler component in the Scheduler.tsx file:
onDataChange={syncData}When a data change occurs in the Bryntum Scheduler, the dataChange event will be fired and the syncData function will be called. Let’s define this function within the Scheduler component:
  const syncData = ({ store, action, records }: SyncData) => {
    const storeId = store.id;
    if (storeId === "resources") {
      if (action === "add") {
        const { resources } = data;
      }
      if (action === "remove") {

      }
      if (action === "update") {

      }
    }

    if (storeId === "events") {
      if (action === "remove") {

      }
      if (action === "update") {

      }
    }
  };
We get information about the store, action, and records from the dataChange event. The store is used to determine which data store has been changed: "resources" or "events". The action determines the type of data change: "add", "remove", or "update". We won’t use the "add" event when an event is created, we’ll create the event when it is updated. This is because when an event is created in the Bryntum scheduler, an "add" event occurs and then the event editor menu is opened. An "update" event occurs when the new resource event is edited. We’ll create the event when this first "update" occurs.
Now add the following data type imports to the top of Scheduler.tsx file:
import { Events, Resources } from "@prisma/client";Add the SyncData type that we use for our syncData function below the imports in the Scheduler.tsx file:
type SyncData = {
  action: "dataset" | "add" | "remove" | "update";
  records: {
    data: Resources | Events;
    meta: {
      modified: Partial<Resources> | Partial<Events>;
    };
  }[];
  store: {
    id: "resources" | "events";
  };
};
Import the mutation functions from our custom hook:
  const {
    data,
    createResource,
    deleteResource,
    updateResource,
    createEvent,
    deleteEvent,
    updateEvent,
  } = useQueryAndMutations();
Calling the createResource mutation
Let’s update our syncData function so that the createResource mutation function is called when a resource is added to the Bryntum Scheduler. Add the following lines of code below the const { resources } = data; line:
        const resourcesIds = resources.map((obj: ResourceModel) => obj.id);
        for (let i = 0; i < records.length; i++) {
          const resourceExists = resourcesIds.includes(records[i].data.id);
          if (resourceExists) return;
          createResource({
            variables: {
              name: records[i].data.name,
              parentIndex: records[i].data.parentIndex,
            },
          });
        }
To get the data needed for the createResource mutation, we loop through the changed records objects, and for each of them we run the createResource mutation. If the resource already exists in the data from our useQuery query, we don’t create a new resource.
Make sure to import the Bryntum Scheduler ResourceModel type:
import { ResourceModel } from "@bryntum/scheduler";Now you can create a new resource in your scheduler by right-clicking on a resource in the “NAME” column, selecting “Copy” in the pop-up menu, and then right-clicking on a resource and selecting “Paste”. The copied resource will be persisted in the database. You can test this by refreshing the page.
Calling the deleteResource mutation
We’ll call the deleteResource mutation function when the storeId === "resources" and action === "remove". In the action === "remove" if statement, add the following code:
        if (records[0].data.id.startsWith("_generated")) return;
        records.forEach((record) => {
          deleteResource({
            variables: {
              id: record.data.id,
            },
          });
        });
For each changed record that is removed, we call the deleteResource function. If the id of the record starts with "_generated", we don’t run the mutation function. New records in a Bryntum Scheduler are assigned a temporary UUID that starts with "_generated". We create UUIDs on the backend in the mutation resolvers. We only want to run the deleteResource mutations for resources that exist on the backend.
Calling the updateResource mutation
We’ll call the updateResource mutation function in the action === "update" if statement. Add the following code to it:
        for (let i = 0; i < records.length; i++) {
          if (records[i].data.id.startsWith("_generated")) return;
          const modifiedVariables = records[i].meta
            .modified as Partial<Resources>;
          (Object.keys(modifiedVariables) as Array<keyof Resources>).forEach(
            (key) => {
              modifiedVariables[key] = (records[i].data as Resources)[
                key
              ] as any;
            }
          );
          updateResource({
            variables: { ...modifiedVariables, id: records[i].data.id },
          });
        }
For each updated record, we pass the modified variables to the updateResource mutation function.
Calling the deleteEvent mutation
When the storeId is "events" and the action is "remove", we call the deleteEvent mutation for each deleted event record:
        records.forEach((record) => {
          if (record.data.id.startsWith("_generated")) return;
          deleteEvent({
            variables: {
              id: record.data.id,
            },
          });
        });
Calling the updateEvent and createEvent mutations
We’ll run the createEvent mutation when a newly created event is first updated. To do this, we’ll create a disableCreate flag variable. We’ll determine if an event is a newly created one by checking if its id starts with "_generated".
We need to disable the createEvent mutation when an event is created using the Bryntum Scheduler EventDragCreate feature. This feature allows the user to create an event by clicking and dragging in the Bryntum Scheduler timeline. We disable creating the event in this case because an "add" event followed by an "update" event occurs. We’ll prevent this update from triggering a createEvent mutation so that an event is only created when a user clicks the “SAVE” button in the event editor pop-up menu.
Create a disableCreate variable below the useQueryAndMutations function call and set it to false:
let disableCreate = false;Add a onBeforeDragCreate and onAfterDragCreate event listener to the BryntumScheduler component:
      onBeforeDragCreate={onBeforeDragCreate}
    onAfterDragCreate={onAfterDragCreate}
Add the functions called when these events occur below the disableCreate variable:
  function onBeforeDragCreate() {
    disableCreate = true;
  }
  function onAfterDragCreate() {
    disableCreate = false;
  }
This sets the disableCreate variable to true during a drag-create event.
Now add the following for loop to the syncData function where the storeId is "events" and the action is "update":
        for (let i = 0; i < records.length; i++) {
          // update event occurring for newly created event
          if (records[i].data.id.startsWith("_generated")) {
            if (disableCreate) return;
            const { exceptionDates, ...newEventData } = records[i].data;
            createEventDebounced({
              ...newEventData,
              exceptionDates: JSON.stringify(exceptionDates),
            });
          } else {
            const modifiedVariables = records[i].meta
              .modified as Partial<Events>;
            (Object.keys(modifiedVariables) as Array<keyof Events>).forEach(
              (key) => {
                modifiedVariables[key] = (records[i].data as Events)[
                  key
                ] as any;
              }
            );
            const { id, exceptionDates, ...eventUpdateData } =
              modifiedVariables;
            updateEvent({
              variables: {
                ...eventUpdateData,
                exceptionDates: JSON.stringify(exceptionDates),
                id: records[i].data.id,
              },
            });
          }
        }
If an event is a newly created event record and the "update" is not caused by a drag-create event, we create a new event using the createEvent mutation. If the event already exists, we run the updateEvent mutation and pass in the modified variables.
We need to debounce the createEvent mutation. We’ll use the debounce utility function, so import it from the utils folder:
import { debounce } from "@/utils/debounce";Create a createEventDebounced function below the onAfterDragCreate function:
  const createEventDebounced = debounce((variables: Events) => {
    createEvent({ variables });
  }, 200);
Data changes to the Bryntum Scheduler will now be synced with the SQLite database through the GraphQL API.
Next steps
This tutorial gives you a starting point for connecting a Bryntum Scheduler with your backend using GraphQL. You can improve the GraphQL integration by adding error handling and by optimizing the refetching of data after each mutation. You can reduce the number of network requests made by updating the cache directly after each mutation. You can also batch queries using Apollo Client. If you do this, make sure that you set batching to true for GraphQL Yoga.
There are also many features that you can add to your Bryntum Scheduler. Take a look at our Bryntum Scheduler demo page to get an idea of what’s possible.