AI-powered Bryntum components
We strive to keep posts updated, but code samples may sometimes be outdated. Humans, see the Bryntum documentation; agents, https://mcp.bryntum.com for the latest info.
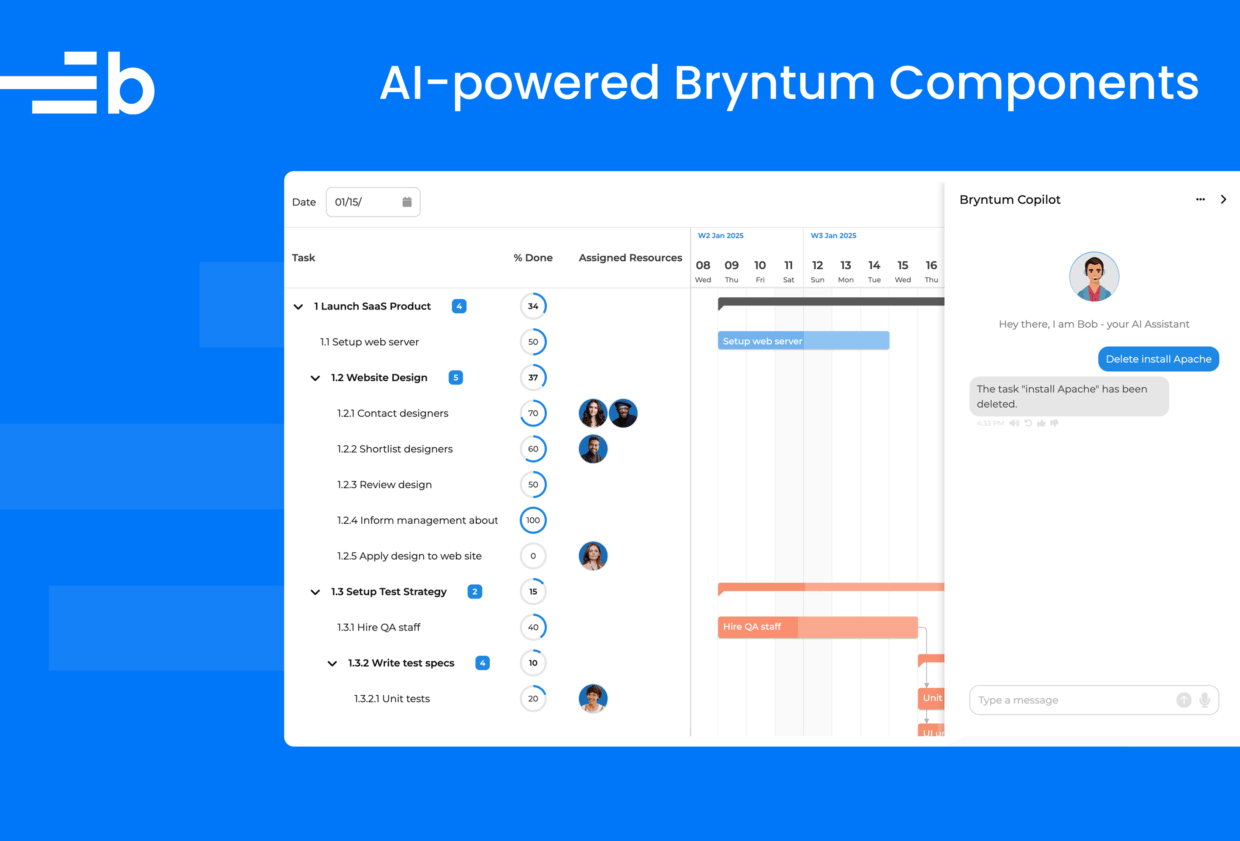
Bryntum’s new AI feature adds a Copilot-style assistant for your scheduling and project management needs. Users can interact with Bryntum products using natural language through text and voice, which you can see in action below or by filtering demos by “AI”:
- Grid AI Demo: Project summary management
- Gantt AI Demo: Intelligent project planning
- Scheduler AI Demo: Smart resource allocation
- Calendar AI Demo: AI-powered scheduling
The assistant can filter data, add and update tasks, reassign work, generate summaries, and more.
The Bryntum AI feature adds a chat panel to your app where users interact with an AI assistant. You can inspect the AI feature’s API requests in the demo to see how it works. You’ll see the payload includes:
- A system message describing the context (for example, “You are a scheduling assistant…”)
- The user’s prompt
- Model metadata, such as temperature
- A
toolsarray containing function definitions
The tools array defines the actions the LLM can request, such as updateTasks, deleteTasks, assignTasks, and filterTasks. Each tool includes a name, description, and a parameters schema.
For example, if a user asks the AI assistant to “Delete contact designers”, Bryntum sends a request that looks like this:
{
    "messages": [
        { "role": "system", "content": "You are an assistant for a Gantt application..." },
        { "role": "user", "content": "Delete contact designers." }
    ],
    "tools": [
        {
            "type": "function",
            "function": {
                "name": "deleteTasks",
                "description": "Delete Tasks based on a set of conditions",
                "parameters": { ... }
            }
        }
    ],
    "model": "gpt-4.1",
    "temperature": 0
}
The LLM responds with a tool_calls array specifying which function to run:
"tool_calls": [
    {
        "type": "function",
        "function": {
            "name": "deleteTasks",
            "arguments": "{\"taskConditions\":{\"type\":\"all\",\"conditions\":[{\"field\":\"name\",\"operator\":\"*\",\"value\":\"contact designers\"}]}}"
        }
    }
]
The LLM doesn’t execute code itself. Bryntum’s client-side JavaScript receives this response, parses the tool_calls, and runs the deleteTasks function with the specified conditions to update the Gantt data.
Let’s build an AI-powered Gantt to see how this works in practice.
In this guide, we’ll build a simplified version of the AI-powered Gantt demo with an Express.js backend that uses OpenAI for chat, text-to-speech (TTS), and transcription.
You can find the completed code in the AI-powered Gantt GitHub repo.
Requirements
- Node.js version 18 or later
- An OpenAI API key for text generation, TTS, and speech-to-text (STT) APIs
If you use a different AI provider or want to give users multiple AI provider options, you’ll need to adjust the Express APIs that we’ll create.
Create a TypeScript Express app
Create a new project folder and initialize npm:
mkdir bryntum-gantt-ai-express
cd bryntum-gantt-ai-express
npm init -y
This creates a package.json file.
Install the required dependencies
Install the libraries that we’ll use:
npm install dotenv express multer openaiWe’ll use Multer to handle uploaded audio files for STT. The OpenAI library simplifies using the OpenAI REST API.
Now install TypeScript, the library types, and tsx to easily run TypeScript in Node.js:
npm install --save-dev typescript tsx @types/express @types/multer @types/nodeUpdate package.json
In your package.json file, set the type to module:
"type": "module",Add the following script that we’ll use to start the Express dev server:
"scripts": {
    "dev": "tsx watch ./src/index.ts"
}
Set up the TypeScript config
Create a TypeScript config file using the following command:
npx tsc --initReplace the contents of the generated tsconfig.json file with the following:
{
  "compilerOptions": {
    "sourceMap": true,
    "outDir": "dist",
    "strict": true,
    "lib": ["esnext"],
    "esModuleInterop": true,
    "module": "es2022",
    "target": "es2022",
    "moduleResolution": "node",
    "skipLibCheck": true,
    "forceConsistentCasingInFileNames": true,
    "resolveJsonModule": true
  },
  "include": ["src/**/*"],
  "exclude": ["node_modules", "public/**/*"]
}
This config keeps the backend TypeScript compilation strict while ignoring the frontend code that we’ll serve from the public folder. The frontend uses vanilla JavaScript for simplicity.
Create the required app folders and files
Create the folders and starter files:
mkdir -p src public/lib public/data public/resources/usersThen create the files we’ll use for the app:
touch .env .gitignore src/index.ts public/index.html public/app.js public/style.css public/lib/Task.js public/data/data.jsonYou now have the following files and folders:
├── node_modules/
├── public/
│   ├── data/
│   │   └── data.json
│   ├── lib/
│   │   └── Task.js
│   ├── resources/
│   │   └── users/
│   ├── app.js
│   ├── index.html
│   └── style.css
├── src/
│   └── index.ts
├── .env
├── .gitignore
├── package-lock.json
├── package.json
└── tsconfig.json
Copy the example data and resource images
Copy the JSON data for the example Launch SaaS Product from the complete guide and add it to the /public/data/data.json file.
Copy the user images and add them to the /public/resources/users folder.
Add the AI assistant avatar image to the /public/resources/ folder.
Add environment variables and configure .gitignore
Add the following environment variables to the .env file:
PORT=3000
OPENAI_API_KEY=your_api_key_here
Add your OpenAI API key to the OPENAI_API_KEY variable.
Add the following text to the .gitignore file:
*.log
.env
node_modules/
database.sqlite3
.DS_Store
Install the Bryntum Gantt
If you’re using the free trial, install the public Bryntum trial package:
npm install @bryntum/gantt@npm:@bryntum/gantt-trialIf you have a Bryntum license, refer to our npm Repository Guide and install the licensed package:
npm install @bryntum/ganttCreate an Express backend
Add the following lines of code to the src/index.ts file:
import express from 'express';
import path from 'path';
import { fileURLToPath } from 'url';
import 'dotenv/config';

const __filename = fileURLToPath(import.meta.url);
const __dirname = path.dirname(__filename);

const port = process.env.PORT || 3000;

const app = express();

// Serve Bryntum Gantt files from node_modules
app.use(express.static(path.join(__dirname, '../node_modules/@bryntum/gantt')));

// Serve static files from public directory
app.use(express.static(path.join(__dirname, '../public')));

app.listen(port, () =>
    console.log(`Server running at http://localhost:${port}`)
);
This creates an Express server that serves static frontend HTML, CSS, and JavaScript files from the public folder. It also makes the Bryntum Gantt library available to the frontend code in the public folder.
Create the API endpoint for the AI chat
Next, we’ll create the API endpoints for the Bryntum Gantt AI Assistant.
First, import the OpenAI API Client for interfacing with the OpenAI API:
import { OpenAI } from 'openai';Create a client instance and store it in a variable called openai:
const openai = new OpenAI({
    apiKey : process.env.OPENAI_API_KEY
});
Add the following /api/prompt endpoint POST request route definition to the bottom of the src/index.ts file. It receives a list of messages, sends them to the OpenAI Chat Completions API, and sends back the response:
app.post('/api/prompt', async(req, res) => {
    try {
        const startTime = Date.now();
        const data = await openai.chat.completions.create(req.body);
        res.set('X-AI-Execution-Time', String(Date.now() - startTime));
        res.json(data);
    }
    catch (error) {
        console.error('Prompt error:', error);
        res.status(500).json({ error : 'Failed to process prompt' });
    }
});
Create an API endpoint for checking available models
Add the following /api/getapis endpoint GET request route definition to the bottom of the file. It returns available AI models:
// Return available AI models
app.get('/api/getapis', (_req, res) => {
    res.json({
        success : true,
        data    : [
            { id : 'gpt-4.1', name : 'OpenAI GPT-4.1' }
        ]
    });
});
We’re only using OpenAI GPT-4.1 in this guide but you can add others. These are the models that can be used for the /api/prompt endpoint. The Bryntum Gantt will use this endpoint to determine which AI models are available and send this information with requests to the /api/prompt endpoint.
Create the AI text-to-speech API endpoint
Add the following /api/texttospeech endpoint POST request route definition:
// Text-to-speech using OpenAI TTS API
app.post('/api/texttospeech', async(req, res) => {
    try {
        const { text } = req.body;

        const mp3 = await openai.audio.speech.create({
            model : 'gpt-4o-mini-tts',
            voice : 'coral',
            input : text
        });

        const buffer = Buffer.from(await mp3.arrayBuffer());
        res.set('Content-Type', 'audio/mpeg');
        res.send(buffer);
    }
    catch (error) {
        console.error('TTS error:', error);
        res.status(500).json({ error : 'Failed to generate speech' });
    }
});
This endpoint uses the OpenAI Audio API to convert text to speech. In this guide, the model and voice are hard-coded for simplicity. There are other TTS models that each have different voices. Eligible OpenAI customers can create a custom voice.
Create the AI speech-to-text API endpoint
The STT API endpoint requires Multer for easily uploading audio. Import it at the top of the file:
import multer from 'multer';Create a multer instance at the top of the file and save it in a variable called upload.
const upload = multer({ storage : multer.memoryStorage() });Multer stores uploaded files in memory as Node.js Buffer objects, which represent a fixed-length sequence of bytes.
Add the following line of code below the const app = express(); line:
app.use(express.json({ limit : '10mb' }));This limits file uploads to 10 MB. The limit for the STT OpenAI API is 25 MB.
Now add the following /api/transcribe endpoint POST request route definition to the bottom of the file:
// Speech-to-text using OpenAI Whisper API
app.post('/api/transcribe', upload.single('audio'), async(req, res) => {
    try {
        const audioFile = req.file;

        if (!audioFile) {
            res.status(400).json({ error : 'No audio file provided' });
            return;
        }

        // Set extension so the OpenAI API can parse the format.
        const file = await toFile(audioFile.buffer, 'audio.webm');

        const transcription = await openai.audio.transcriptions.create({
            file,
            model : 'whisper-1'
        });

        res.type('text/plain').send(transcription.text);
    }
    catch (error) {
        console.error('Transcription error:', error);
        res.status(500).json({ error : 'Failed to transcribe audio', details : String(error) });
    }
});
Import the toFile function:
import { OpenAI , toFile } from 'openai';This API endpoint uploads an audio file to memory and then sends it to the OpenAI Audio API for transcription. The ‘whisper-1’ model is used, but there are other models available.
Create an API endpoint for receiving user feedback on AI responses
Add the following /api/feedback endpoint POST request route definition to the bottom of the file:
app.post('/api/feedback', async(req, res) => {
    const { positive, messages, url } = req.body;
    console.log({ positive, messages, url });
    // save feedback, create tickets, ...etc.
});
The Bryntum Gantt AI assistant feature lets users provide thumbs-up or thumbs-down AI responses. This endpoint logs feedback. You can perform actions on this feedback, such as saving it to a database or sending alerts.
Create the frontend HTML
Now that we’ve added the API endpoints, let’s set up the frontend Bryntum Gantt by adding code to the HTML, CSS, and JavaScript files in the /public folder.
Add the following lines of code to the public/index.html file:
<!DOCTYPE html>
<html lang="en">
<head>
    <meta charset="UTF-8" />
    <meta name="viewport" content="width=device-width, initial-scale=1.0" />
    <title>AI-Powered Bryntum Gantt</title>
    <link rel="icon" type="image/png" href="/bryntum.png" />
    <link rel="stylesheet" href="style.css" />
</head>
<body>
    <div id="container" role="main"></div>
    <script type="module" src="app.js" defer></script>
</body>
</html>
The Bryntum Gantt will be appended to the <div> with an ID of "container".
Add the Gantt styling
Now we’ll add CSS to style the Gantt.
Add the following imports and root styles to the public/style.css file:
@import url('https://fonts.googleapis.com/css2?family=Poppins:wght@300;400;500;600;700&display=swap');

/* FontAwesome is used for icons */
@import "/fontawesome/css/fontawesome.css";
@import "/fontawesome/css/solid.css";
/* Structural CSS */
@import "/gantt.css";
/* Bryntum theme */
@import "/stockholm-light.css";

:root {
    font-family: Poppins, "Open Sans", Helvetica, Arial, sans-serif;
}
This imports the Gantt structural CSS and the Stockholm theme. Bryntum provides five themes with light and dark variants.
Now add the following base layout styles:
html, body {
    margin  : 0;
    padding : 0;
    height  : 100%;
}

#container {
    height : 100vh;
}
The container takes the full viewport height.
Configure the Bryntum Gantt and add an AI assistant
Now we’ll configure the Bryntum Gantt in public/app.js. The configuration includes the Gantt layout and the addition of an AI assistant and a settings panel.
Initialize the Bryntum Gantt
In the public/app.js file, add the following lines of code:
import { Gantt } from './gantt.module.js';

const gantt = new Gantt({
    appendTo           : 'container',
    dependencyIdField  : 'sequenceNumber',
    rowHeight          : 50,
    tickSize           : 40,
    barMargin          : 10,
    resourceImagePath  : '/resources/users/',
    columnLines        : false,
    rowLines           : false,
    eventColor         : 'blue',
    startDate          : new Date(2026, 0, 9),
    transitionDuration : 400,
    zoomOnMouseWheel   : false,

    viewPreset : {
        base           : 'weekAndDayLetter',
        columnLinesFor : 1,
        headers        : [
            {
                unit       : 'week',
                align      : 'start',
                dateFormat : '{W}W MMM YYYY'
            },
            {
                unit       : 'day',
                dateFormat : 'DD'
            },
            {
                unit       : 'day',
                dateFormat : 'ddd'
            }
        ]
    }
});
The Gantt configuration sets up the timeline display with week and day headers using the viewPreset property.
Add the project configuration
Add the following project property to the gantt configuration object:
project : {
    autoSetConstraints : true,
    autoLoad           : true,
    loadUrl            : 'data/data.json'
},
The Bryntum Gantt project has a Crud Manager that simplifies loading data from and syncing data changes to the server. The Crud Manager uses the Fetch API as a transport system and JSON as the encoding format.
We set loadUrl to the example JSON data that we copied from the completed app.
Start the dev server:
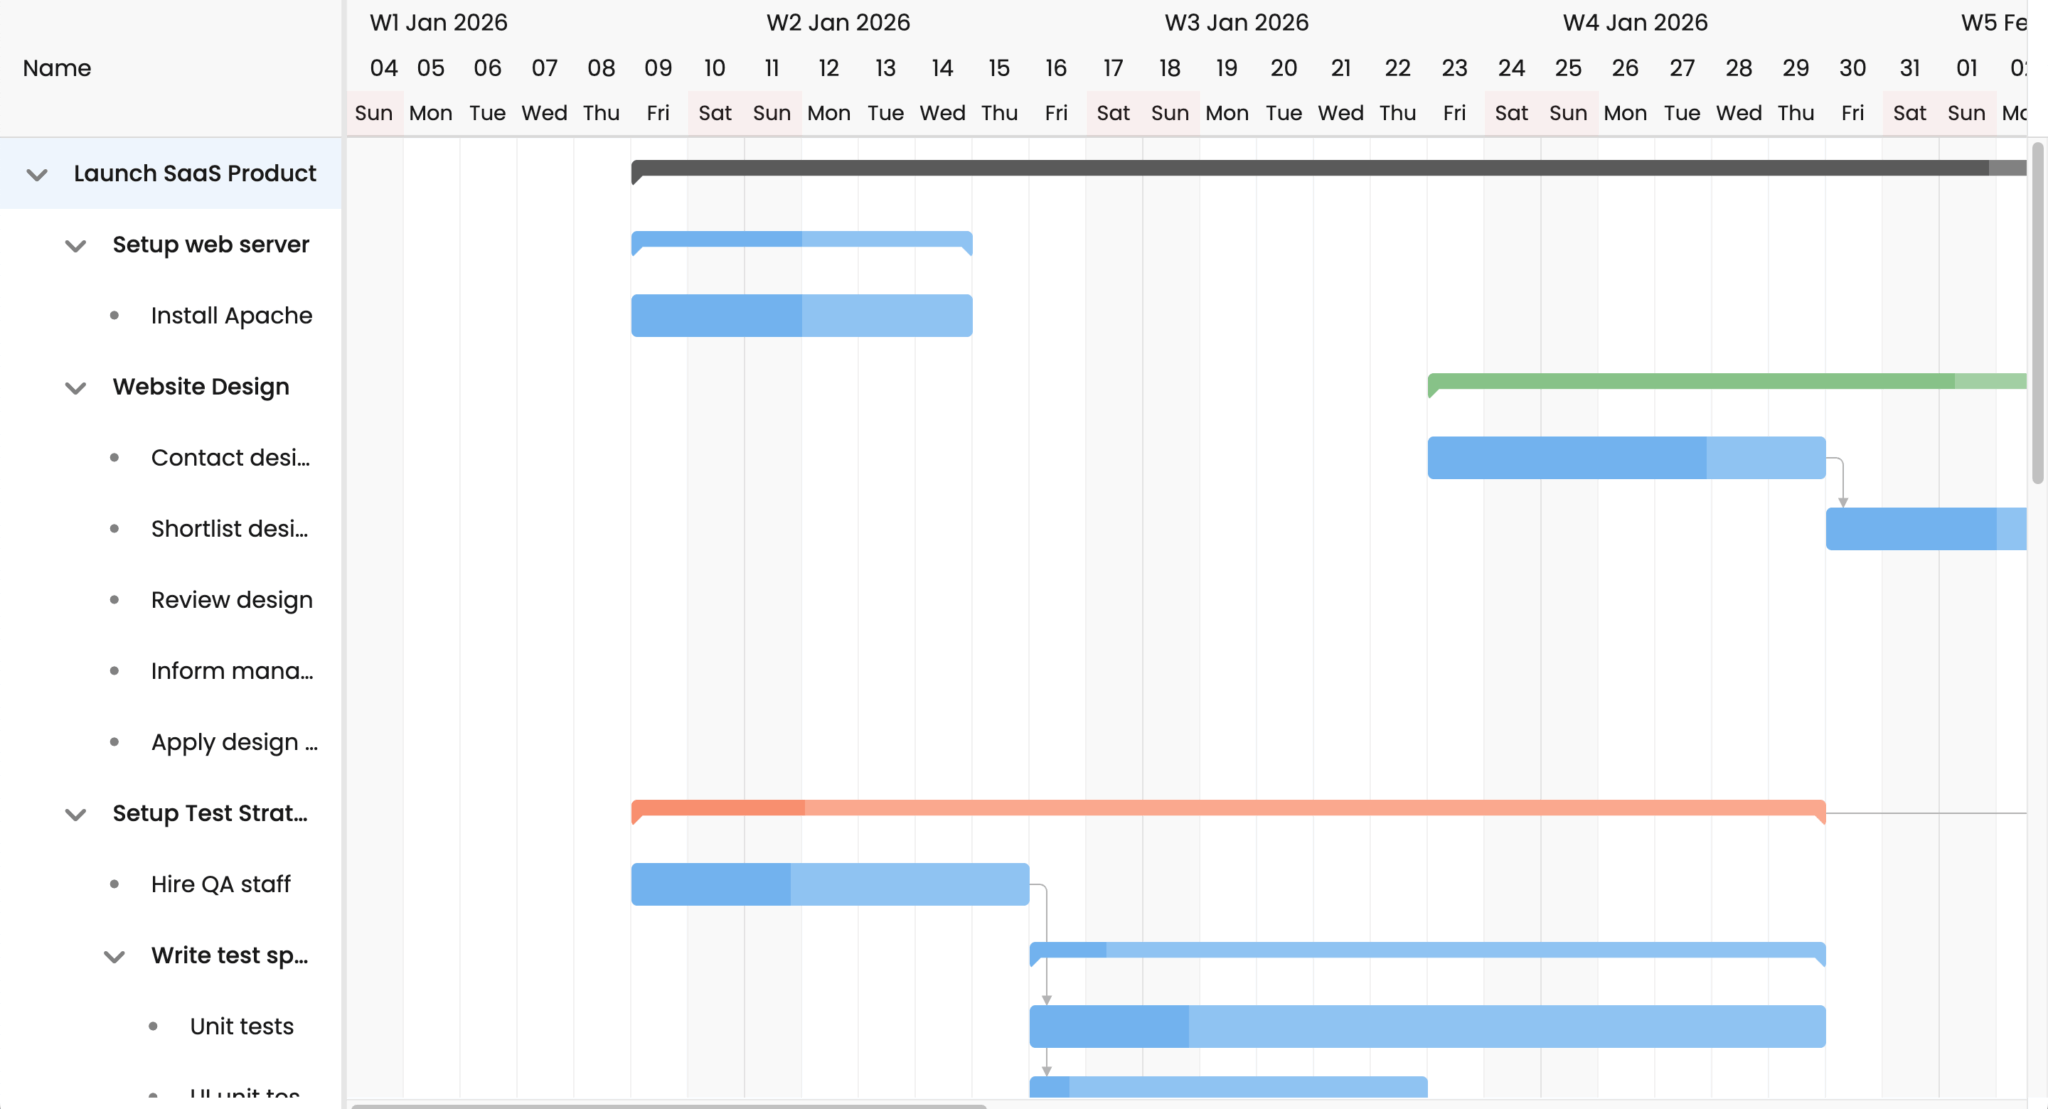
npm run devOpen http://localhost:3000. You’ll see the Bryntum Gantt populated with the example data:
Let’s add some more columns to the Gantt:
Define the Gantt columns
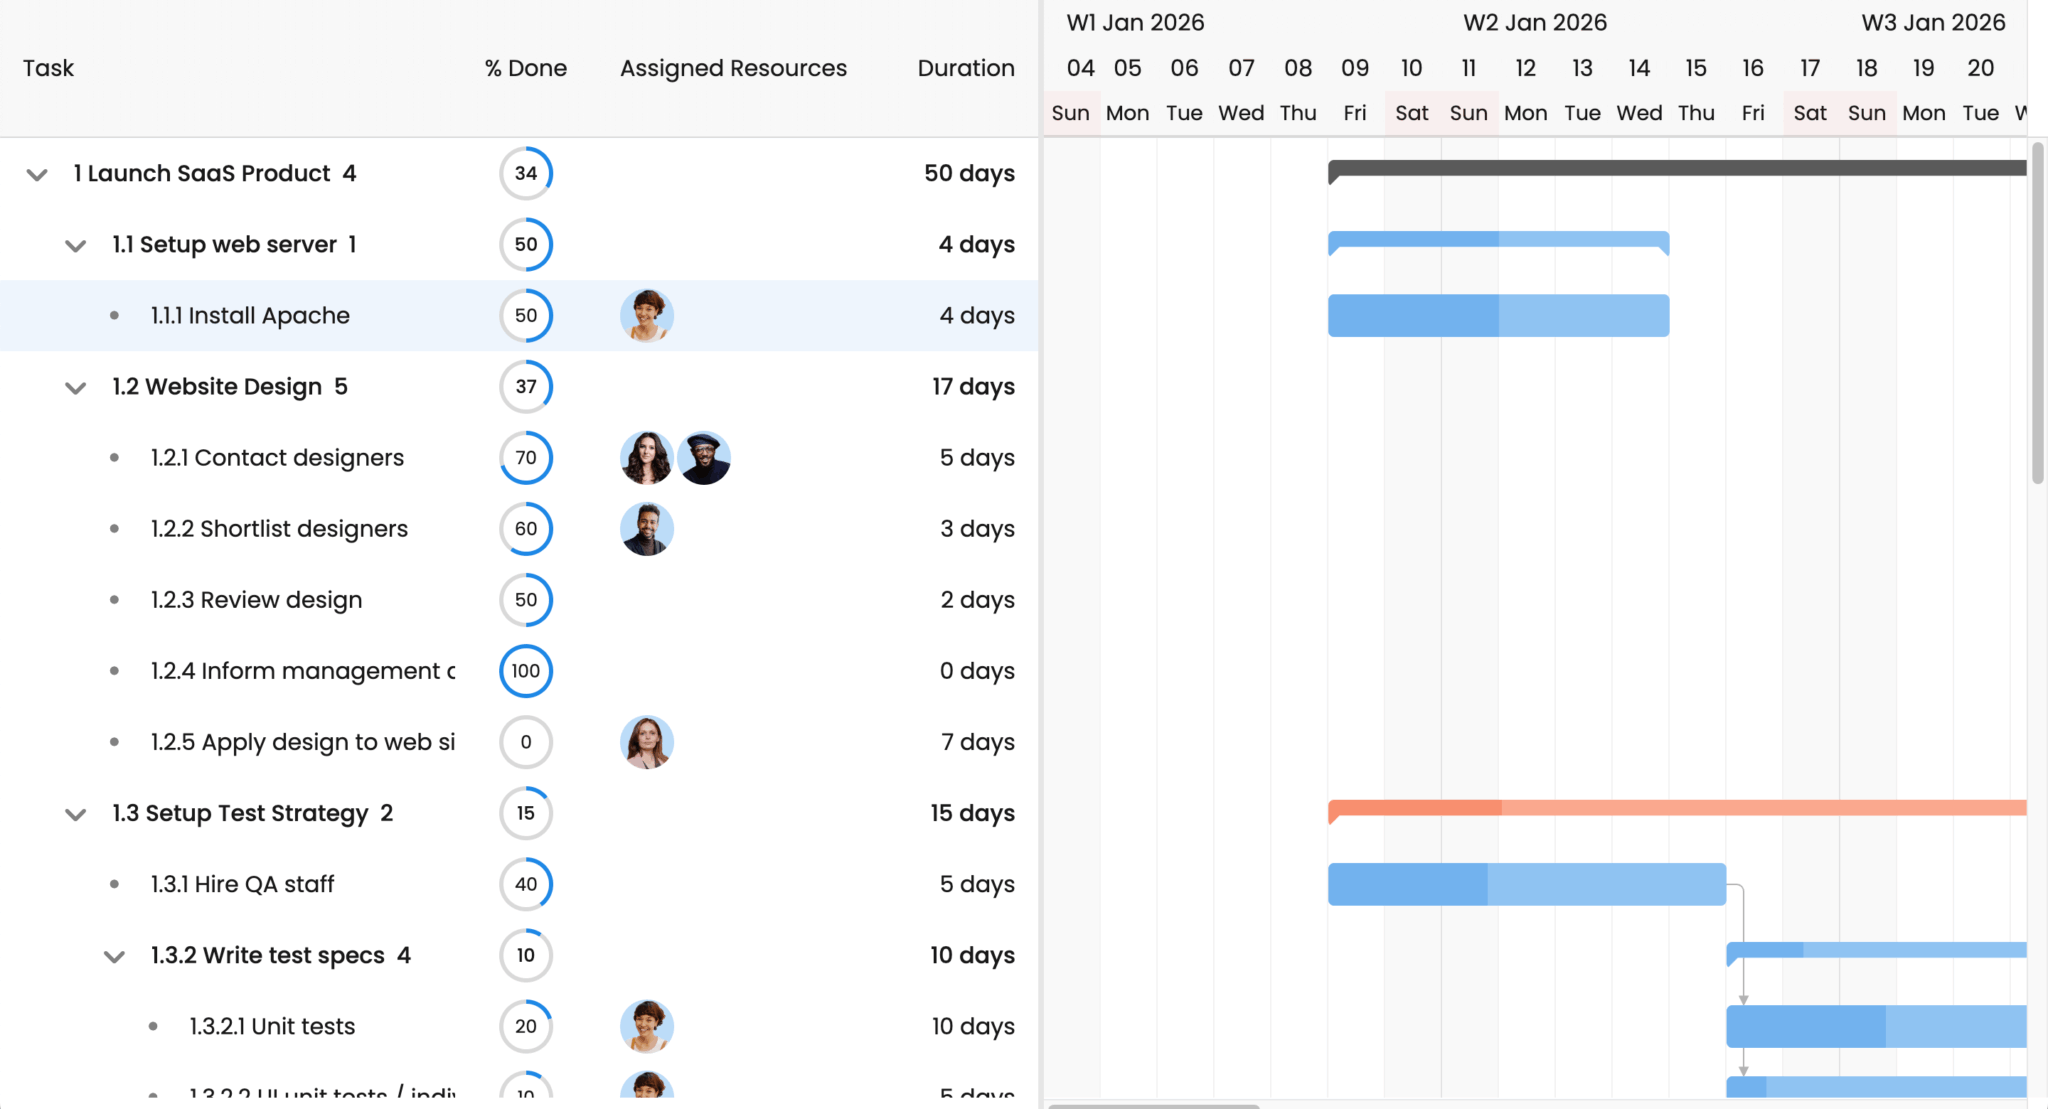
Add the following columns property to display task information in the grid on the left side of the Gantt:
columns : [
    {
        type     : 'name',
        text     : 'Task',
        width    : 320,
        renderer : ({ record }) => ({
            children : [
                {
                    tag  : 'span',
                    text : `${record.wbsCode} ${record.name}`
                },
                record.children?.length > 0 ? {
                    class : 'b-child-count',
                    text  : record.children.length
                } : null
            ]
        })
    },
    { type : 'percentdone', mode : 'circle', width : 100, align : 'center' },
    { type : 'resourceassignment', showAvatars : true, width : 200 },
    { type : 'duration', width : 110 },
],
The renderer functions customize how data appears in each column. The columns display the task name, percentage complete (as a circle), assigned resources (with avatars), and duration:
Add AI features
Now let’s add the AI features to the gantt config.
First import the OpenAIPlugin:
import { OpenAIPlugin } from './gantt.module.js';There’s also an AnthropicPlugin and a GooglePlugin, which make it easier to work with these providers.
Add the following variables to the top of the file:
const
    userSettingsKey = 'ai-user-settings',
    savedUserSettings = localStorage.getItem(userSettingsKey),
    userSettings = savedUserSettings ? JSON.parse(savedUserSettings) : {};
The userSettings object stores the user’s AI assistant preferences in localStorage, so they persist between sessions.
Add the following features property to the gantt config:
features: {
  ai : {
      promptUrl       : '/api/prompt',
      textToSpeechUrl : '/api/texttospeech',
      transcribeUrl   : '/api/transcribe',
      feedbackUrl     : '/api/feedback',
      model           : 'gpt-4.1',
      apiPlugin       : OpenAIPlugin,
      userSettings    : { ...userSettings },
      availableApis   : fetch('/api/getapis').then(r => r.json().then(response => {
          return response.data.map(({ id, name }) => ({
              id,
              name,
              apiPlugin : OpenAIPlugin
          }));
      })),
      chatButton : {
          toolTip   : 'Bryntum Copilot',
          appendTo  : 'container',
          chatPanel : {
              drawer           : { autoCloseDelay : -1 },
              title            : 'Bryntum Copilot',
              intro            : { html : 'Hey there, I am Alan - your AI Assistant' },
              avatar           : 'resources/avatar.webp',
              showTimestamp    : true,
              showReadAloud    : true,
              showRecordButton : true,
              showUndoButton   : true,
              showRedoButton   : true,
              autoReadAloud    : userSettings.autoReadAloud !== false,
              width            : '30em'
          }
      },
      listeners : {
          // Use this event to save the user's AI settings
          userSettingsUpdate({ changes }) {
              Object.assign(userSettings, changes);
              localStorage.setItem(userSettingsKey, JSON.stringify(userSettings));
          }
      }
  },
}
The ai property connects the AI assistant to our Express API endpoints. The promptUrl, textToSpeechUrl, transcribeUrl, and feedbackUrl map to the routes we created earlier. The availableApis method uses the /api/getapis endpoint to get the list of AI models.
The chatButton configuration adds a button, which opens the AI chat panel, to the bottom right of the screen:
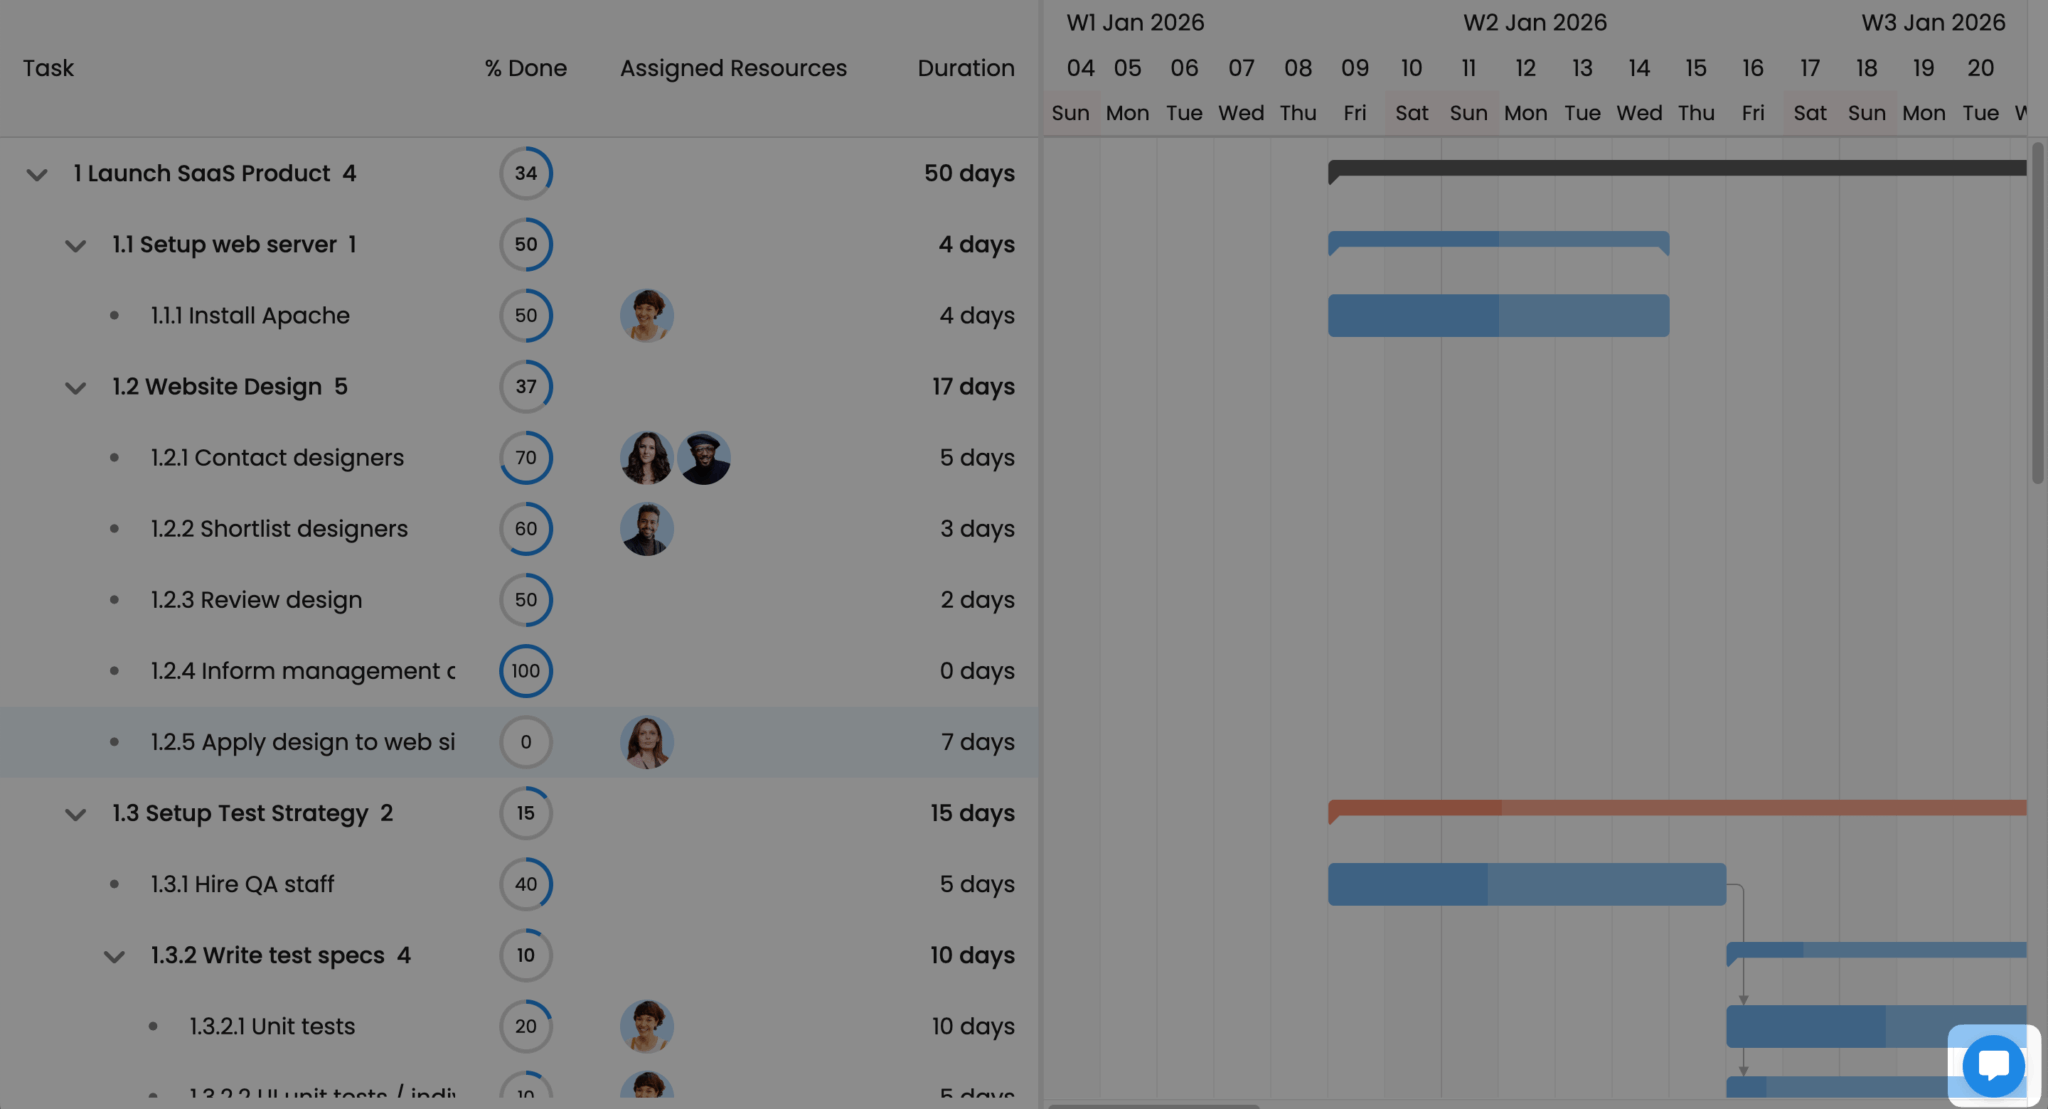
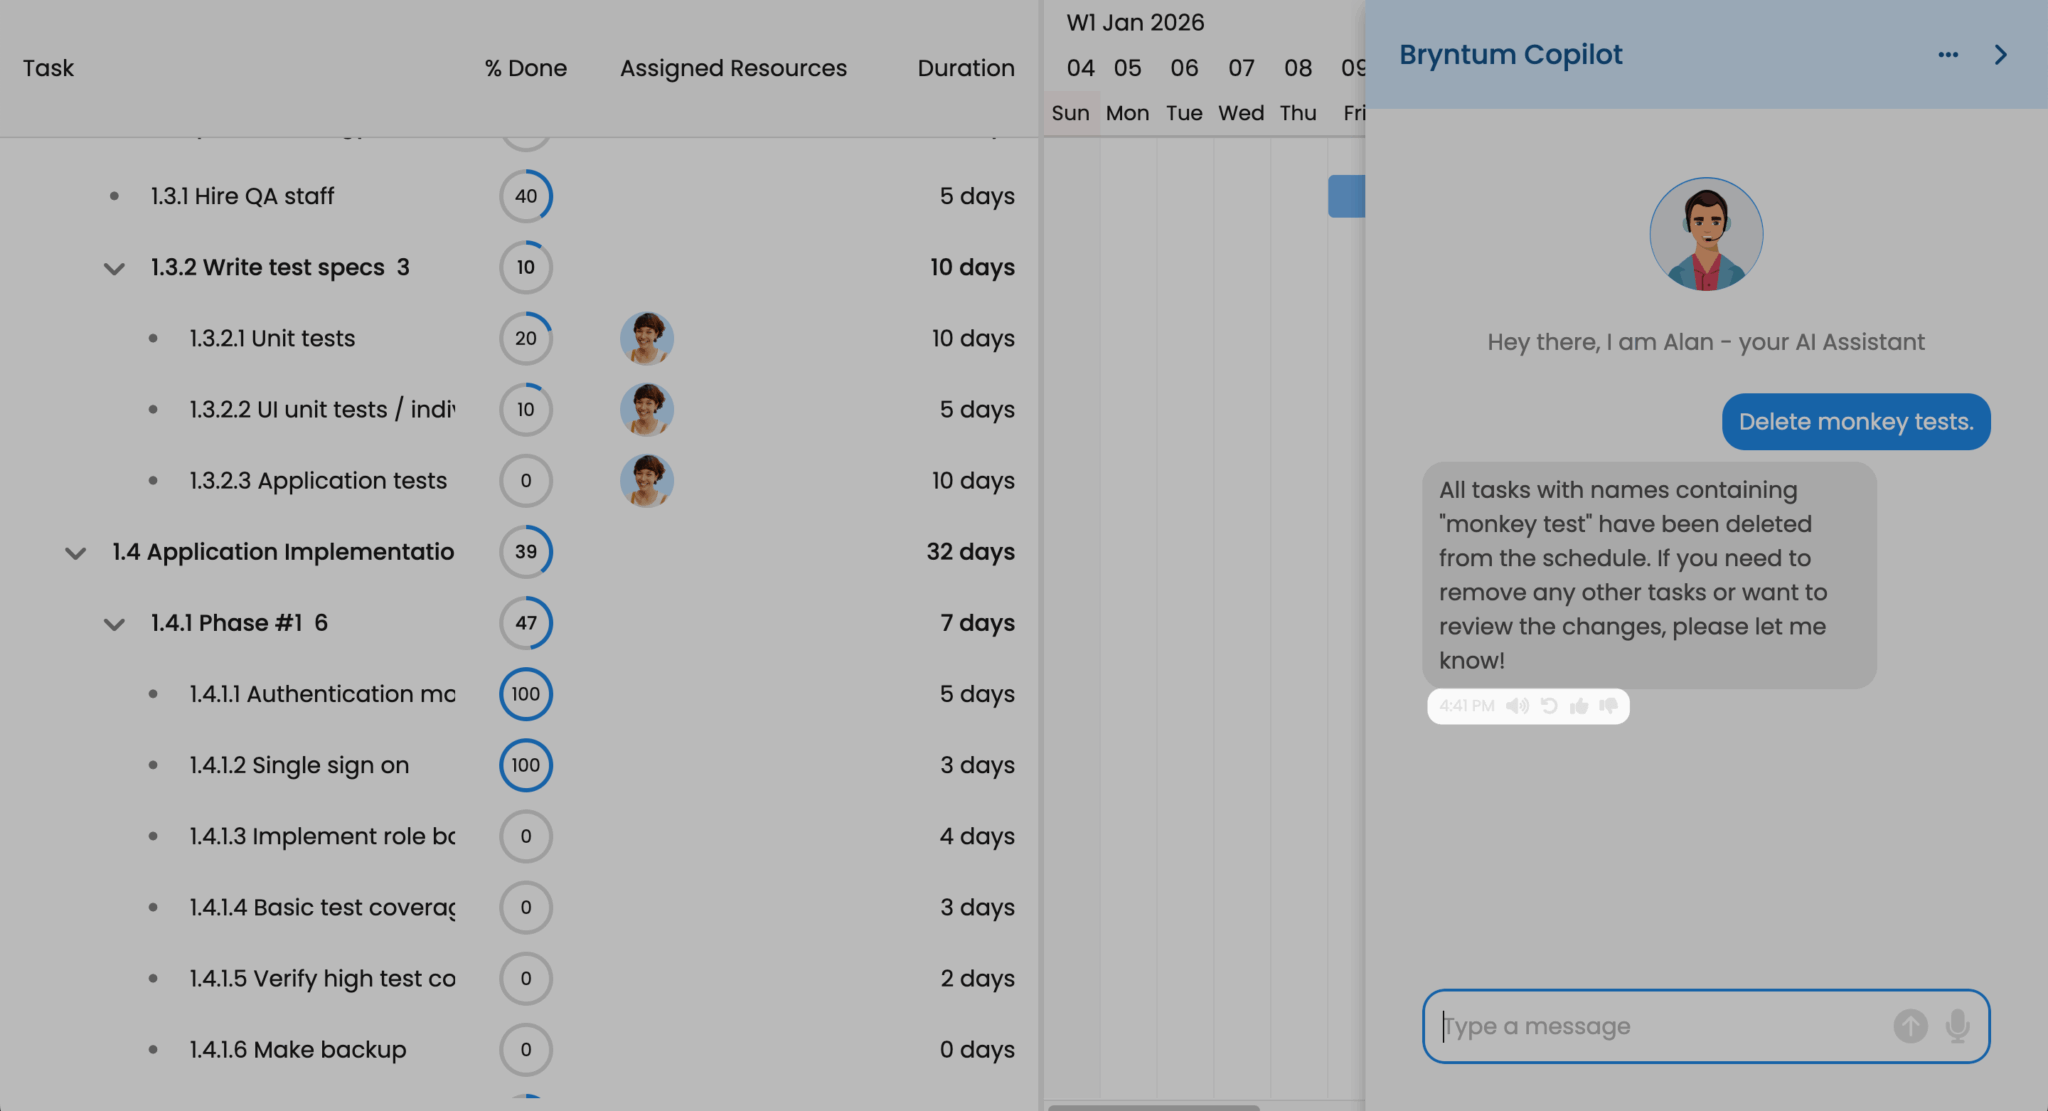
Click on the button to open the chat assistant. You can ask it to update your task, or ask for information about the data:
Take a look at your browser dev tools Network tab to see the requests made to the API endpoints that we created.
The showTimestamp, showReadAloud, showRecordButton, showUndoButton, and showRedoButton properties add widgets to the bottom of the AI assistant’s responses.
Add a toggle to disable auto-read responses
By default, the AI assistant reads responses aloud using the TTS API endpoint. This can make back-and-forth interactions slow, as you can probably read faster than the AI talks. We’ll add autoReadAloud to the user settings, so it can be turned off.
Add the following code before the gantt variable declaration to let users disable auto-read responses in the AI settings panel:
const _onSettingsPanelCreation = GanttAI.prototype.onSettingsPanelCreation;
GanttAI.prototype.onSettingsPanelCreation = function(config) {
    return {
        ...(_onSettingsPanelCreation?.call(this, config) ?? {}),
        readAloud : {
            type       : 'slidetoggle',
            label      : 'Auto read aloud responses',
            checked    : userSettings.autoReadAloud !== false,
            weight     : 450,
            toggleable : true,
            onAction   : ({ source }) => {
                this.chatPanel.autoReadAloud = source.checked;
                userSettings.autoReadAloud = source.checked;
                localStorage.setItem(userSettingsKey, JSON.stringify(userSettings));
            }
        }
    };
};
Import the GanttAI class:
import { GanttAI } from './gantt.module.js';This extends the GanttAI prototype to add an Auto read aloud responses toggle to the AI settings panel.
To find the AI settings, click the three-dot button at the top of the AI assistant panel and click the Settings option:
Next steps
You can further improve your Bryntum AI assistant by:
- Enhancing the styling: Take a look at the CSS of our AI-Powered Gantt demo to see how you can add some polish to your Gantt.
- Adding the option to choose different AI models: Take a look at our AI demos that allow you to select different AI models.
- AI-Powered Project Summary Grid
- Skill-Matching Scheduler
- Pest Control Calendar
- Persisting the data to a database: Take a look at How to use Bryntum Gantt with Express and SQLite to learn how to save your Gantt data to a database.