Bryntum Calendar with MongoDB
Bryntum Calendar is a high-performance JavaScript component built with an elegant user interface and user experience in mind. With an extensive API customization and numerous features, it integrates easily with React, Angular, and Vue.
One of the advantages of Bryntum Calendar is that it doesn’t bind you to a specific backend technology or database. You’re free to use any backend system and database and connect it with Bryntum Calendar using API endpoints.
MongoDB is a great NoSQL, document-oriented database platform that stores data in a flexible, JSON-like format rather than in rigid relational tables. It is built for horizontal scaling and handles large datasets and high-throughput applications well.
This guide demonstrates how to integrate Bryntum Calendar with MongoDB using Node.js. You’ll learn to do the following:
- Set up MongoDB.
- Use Express.js to create a basic Node.js server to interact with MongoDB.
- Create a basic Bryntum Calendar component with Vite.
- Improve the Express endpoints to sync data changes from Bryntum Calendar via CRUD (create, read, update, and delete) operations.
- Add features to the Bryntum Calendar.
Getting started
Before we can connect to MongoDB, we need to configure the frontend app with the Bryntum Calendar component and the backend server.
Setting up the frontend
To begin, we’ll set up the Bryntum Calendar frontend app and prepare the environment.
Clone the frontend app repository and install its dependencies:
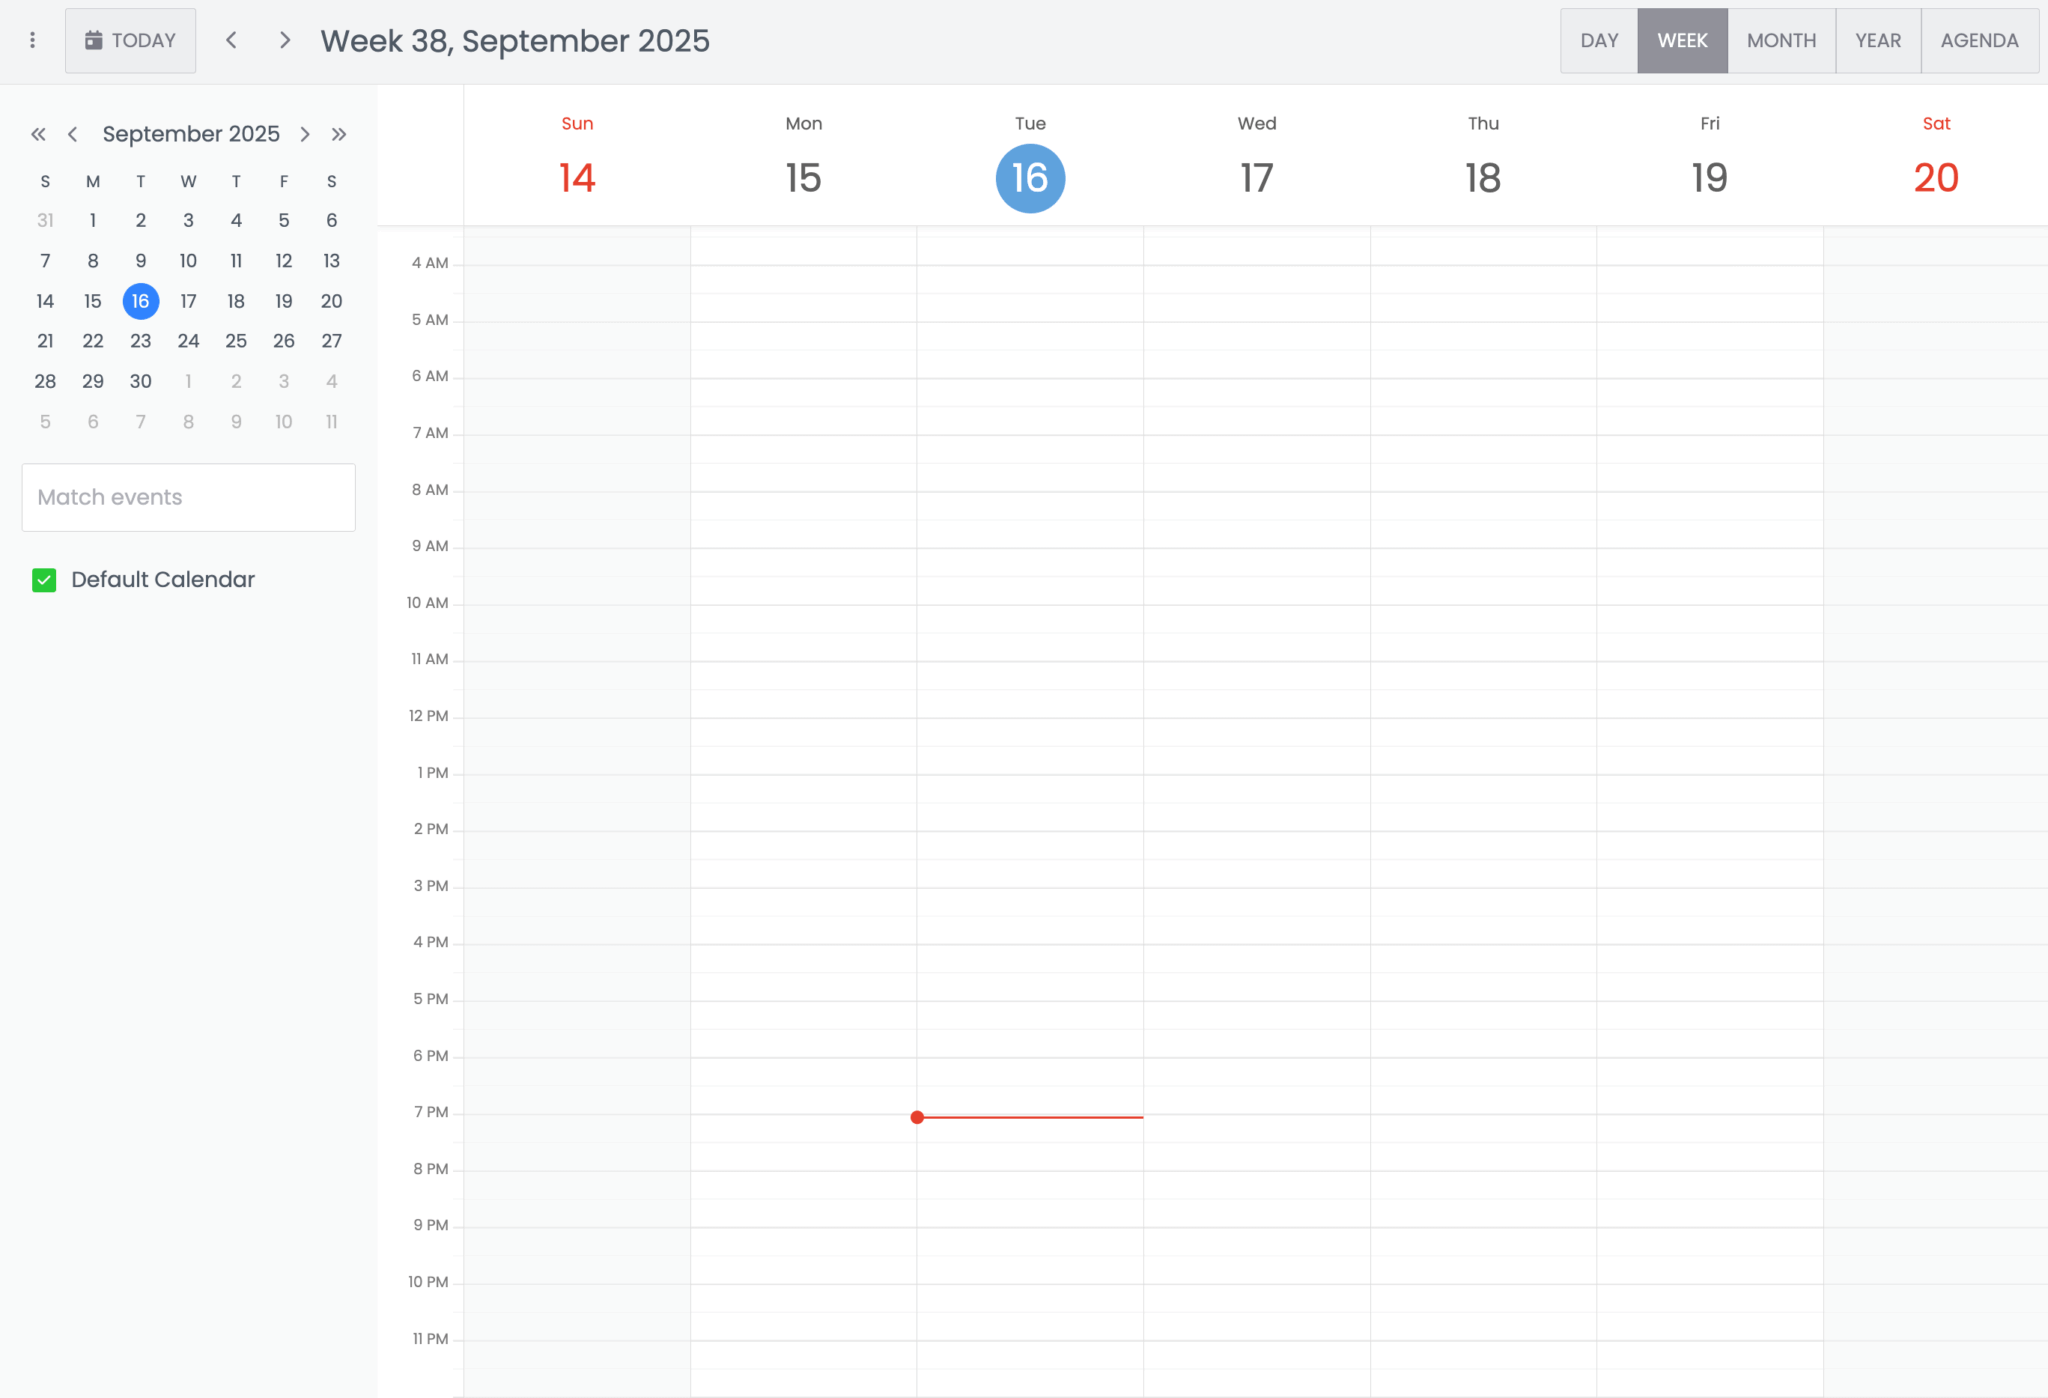
npm installStart the dev server:
npm run devYou should see the Bryntum Calendar app with MongoDB text on the localhost.
Since Bryntum components are commercial products hosted in a private npm registry, you need to install the Calendar package. To download the package, follow the guide to accessing the Bryntum npm repository. Then, install the package:
If you don’t have a Bryntum license, install the trial version by running the following command.
npm install @bryntum/calendar@npm:@bryntum/calendar-trialIf you have a license, install the full package instead.
npm install @bryntum/calendarIn the frontend app files, replace the contents of src/main.js with the following code to render a basic Bryntum Calendar:
import './style.css';
import { Calendar } from '@bryntum/calendar';

const calendar = new Calendar({

    appendTo : 'app',
    date     : '2026-07-01',

    resources : [
        {
            id         : 1,
            name       : 'Default Calendar',
            eventColor : 'green'
        }
    ],
    events : [
        {
            id         : 1,
            name       : 'Meeting',
            startDate  : '2026-07-01T10:00:00',
            endDate    : '2026-07-01T11:00:00',
            resourceId : 1
        }
    ]
});
Add the following import to src/style.css:
@import '../node_modules/@bryntum/calendar/calendar.stockholm.css';

#app {
    height: 100vh;
}
Run the dev server again, and you’ll see the Bryntum Calendar is now rendered in the browser.
Setting up the backend
Now that we’ve got a basic frontend app, let’s set up the backend and configure the API endpoints to sync and serve data.
First, clone the backend repository and install the dependencies:
git clone <https://github.com/bryntum/bryntum-calendar-mongodb-vanilla-backend.git>
cd bryntum-calendar-mongodb-vanilla-backend
npm install
The backend is a Node.js server built with Express.js. The main server.js file defines two API endpoints:
/loadis aGETendpoint that returns calendar data in JSON format./syncis aPOSTendpoint that receives CRUD updates from the frontend.
Start the server:
node server.jsVisit http://localhost:3000/api/load in your browser (adjust the port if necessary). You should see a JSON response that Bryntum Calendar will use to load events.
Setting up MongoDB
The two most common ways to set up MongoDB are to use MongoDB Atlas to create a cloud-hosted database or to use MongoDB Community Edition to create a local database.
The MongoDB Atlas cloud database is ideal for production applications and large distributed teams:
- It’s fully managed by MongoDB.
- You don’t need to install or maintain MongoDB locally.
- It’s easy to scale, secure, and accessible from anywhere.
The MongoDB Community Edition database is useful for learning, experimenting, or running quick local demos:
- You can install MongoDB for free on your local machine or server.
- It requires manual setup, updates, and maintenance.
- You have full control over the database configuration and data.
The MongoDB Compass GUI allows you to visualize, manage, and import JSON files directly into MongoDB databases.
Installing MongoDB
For this guide, we’ll use the MongoDB Community Edition to install MongoDB locally and use MongoDB Compass to visualize and manage the database.
Follow the official guide to install MongoDB:
Download and install MongoDB Compass.
Follow the instructions in the documentation to start the MongoDB server:
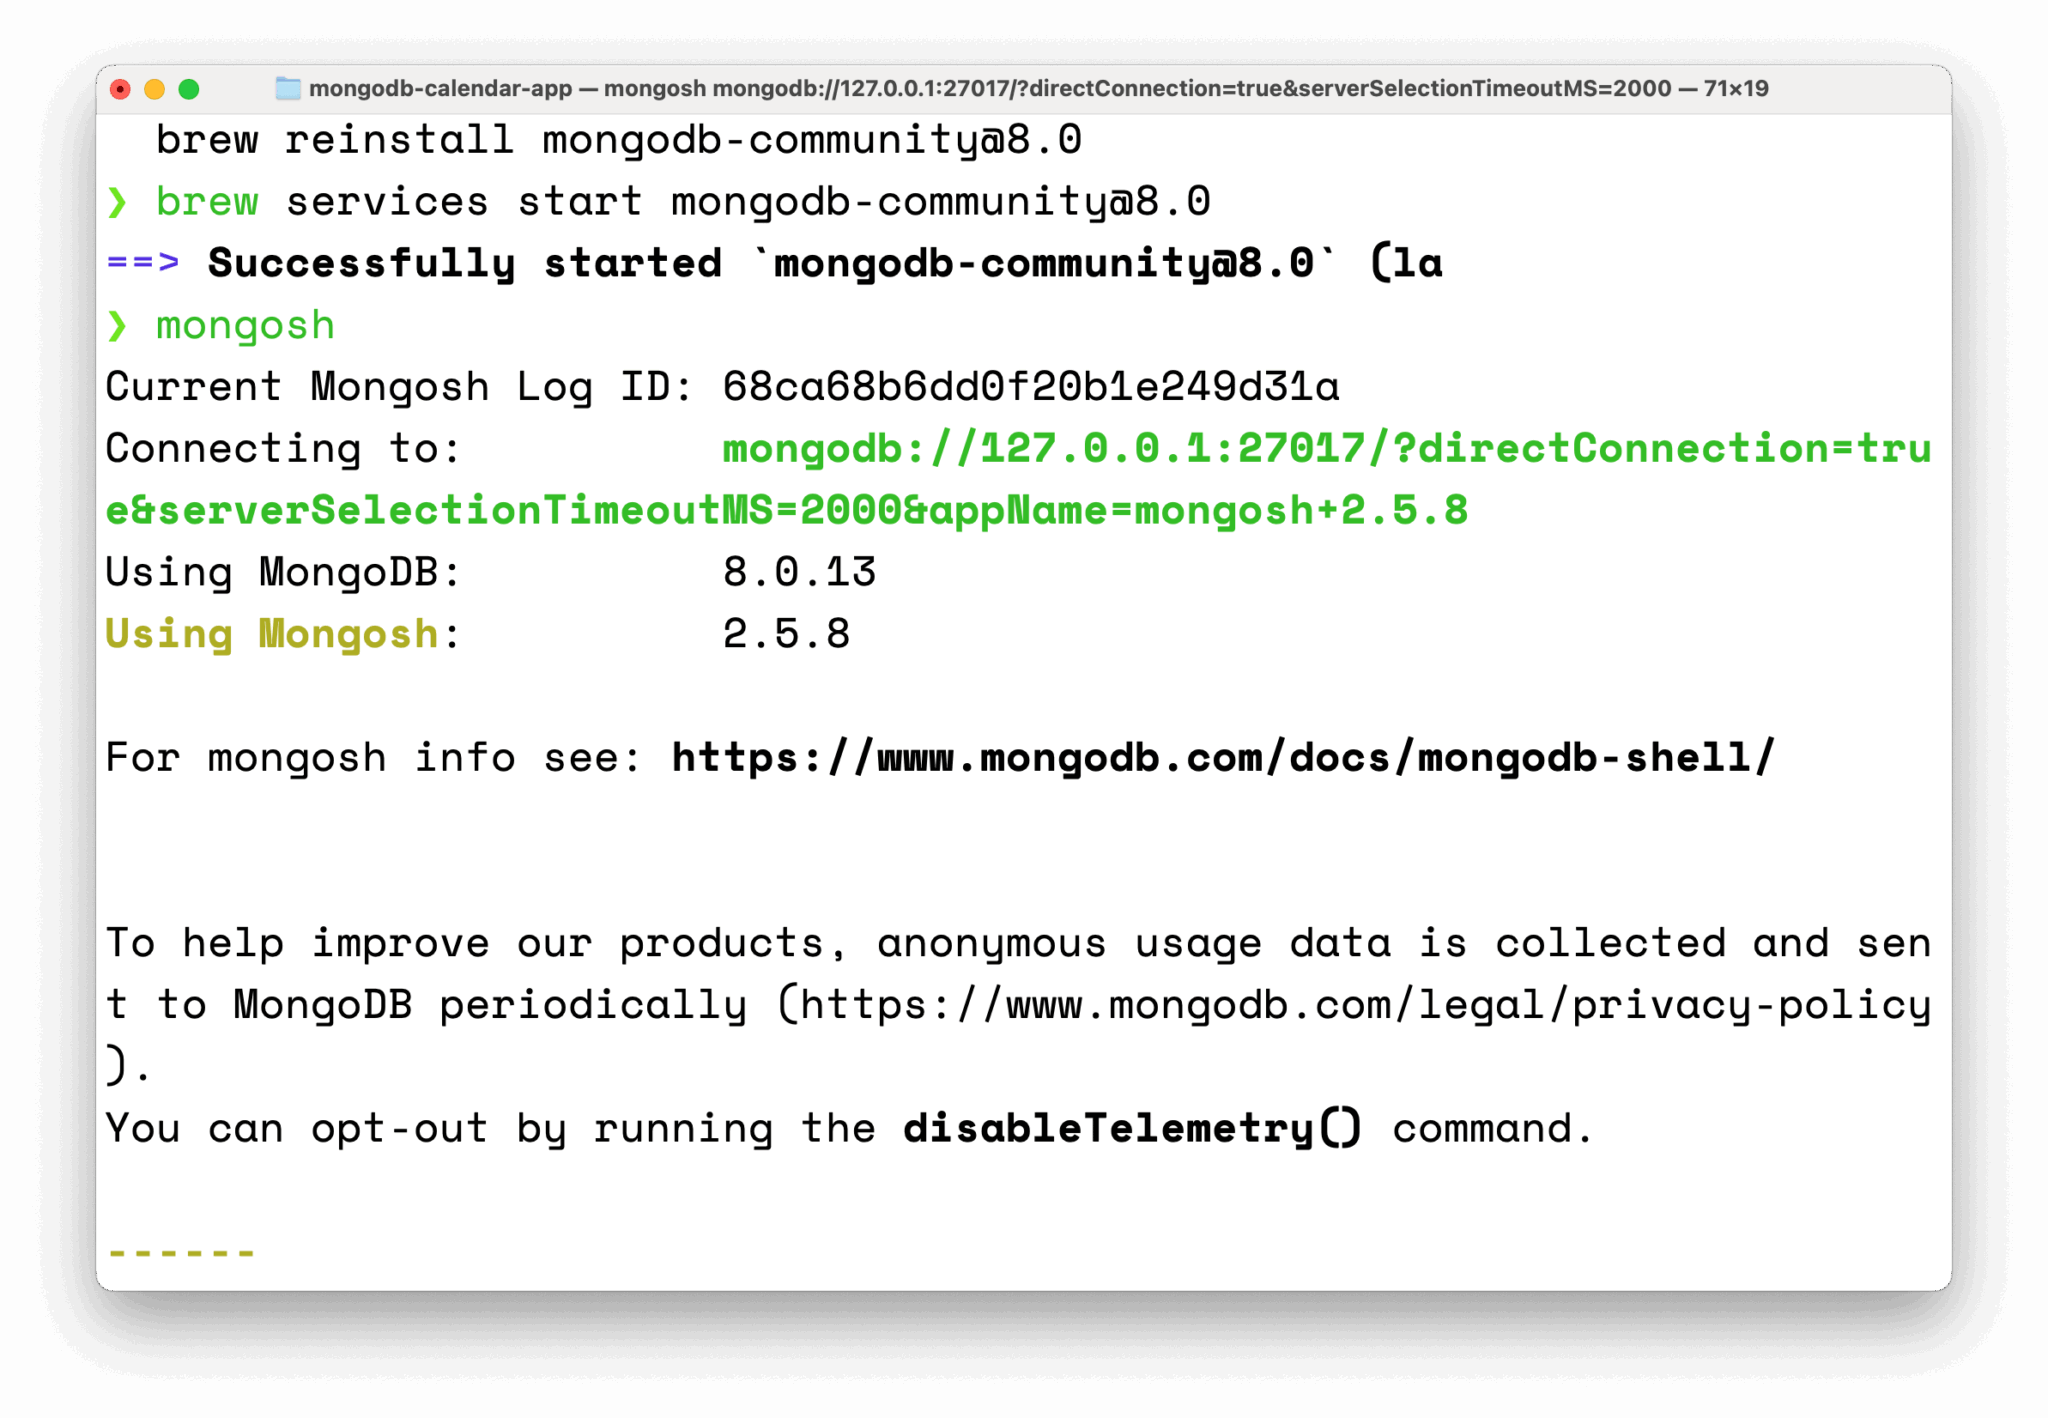
Verify that the server is running by opening a new terminal and running the following command:
mongosh
If the MongoDB shell starts and shows a prompt (>), your server is up and running.
Connecting to MongoDB on localhost
By default, when MongoDB is installed and running locally, it listens on port 27017.
The standard connection URI looks like this:
mongodb://localhost:27017Using MongoDB Compass to create a database
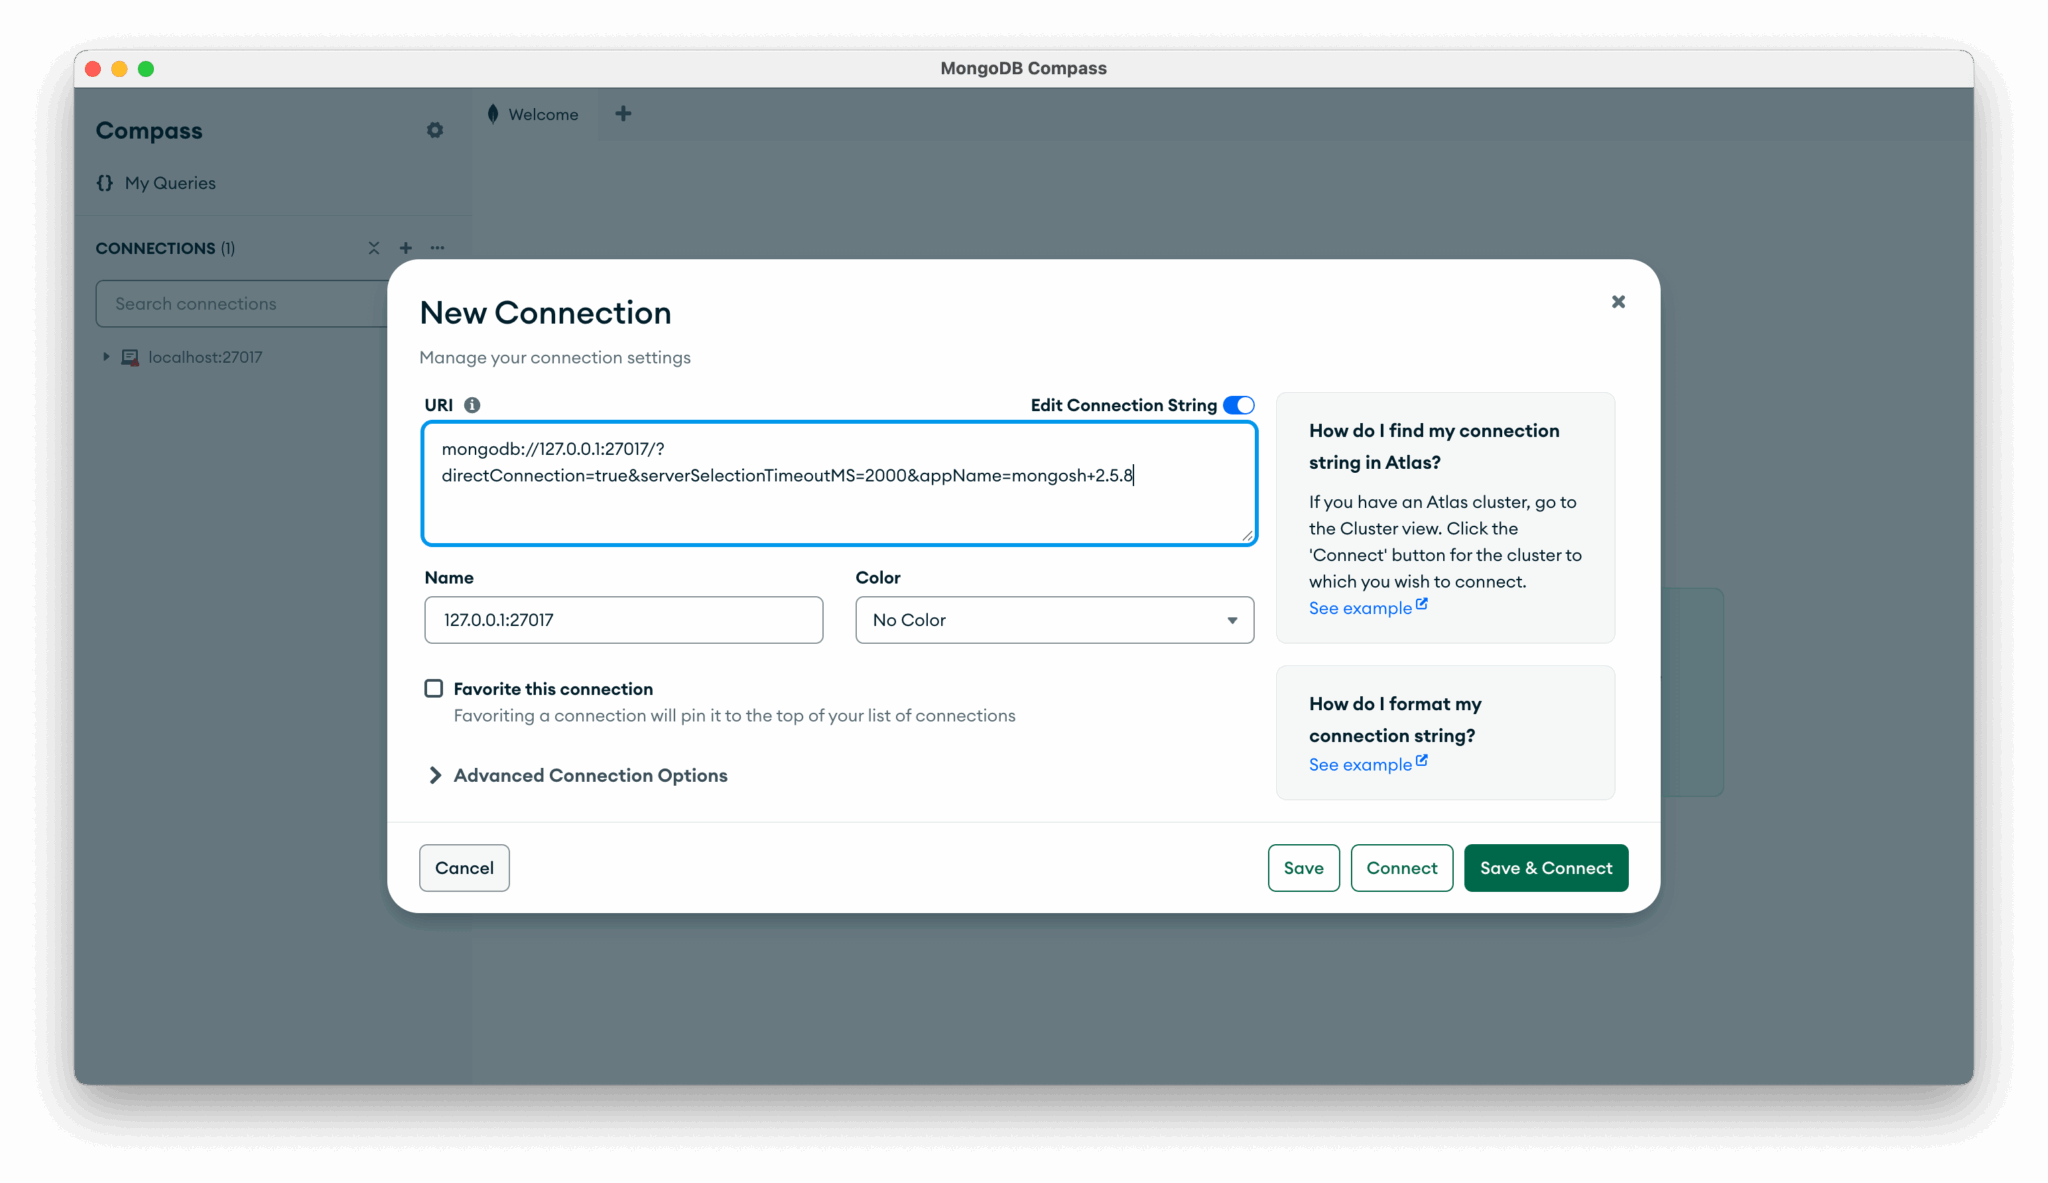
Open MongoDB Compass.
In the New Connection dialog, enter the URI and click Save & Connect.
You should now see your local MongoDB server and be able to create or explore databases visually.
Now, we need to create a database for the Bryntum Calendar and make collections for the Bryntum Calendar stores.
The Bryntum Calendar contains multiple stores:
ResourceStore | Holds a collection of resources |
|---|---|
EventStore | Holds a collection of events |
AssignmentStore | Holds a collection of assignments |
TimeRangeStore | Holds a collection of time ranges |
ResourceTimeRangeStore | Holds a collection of resource time ranges |
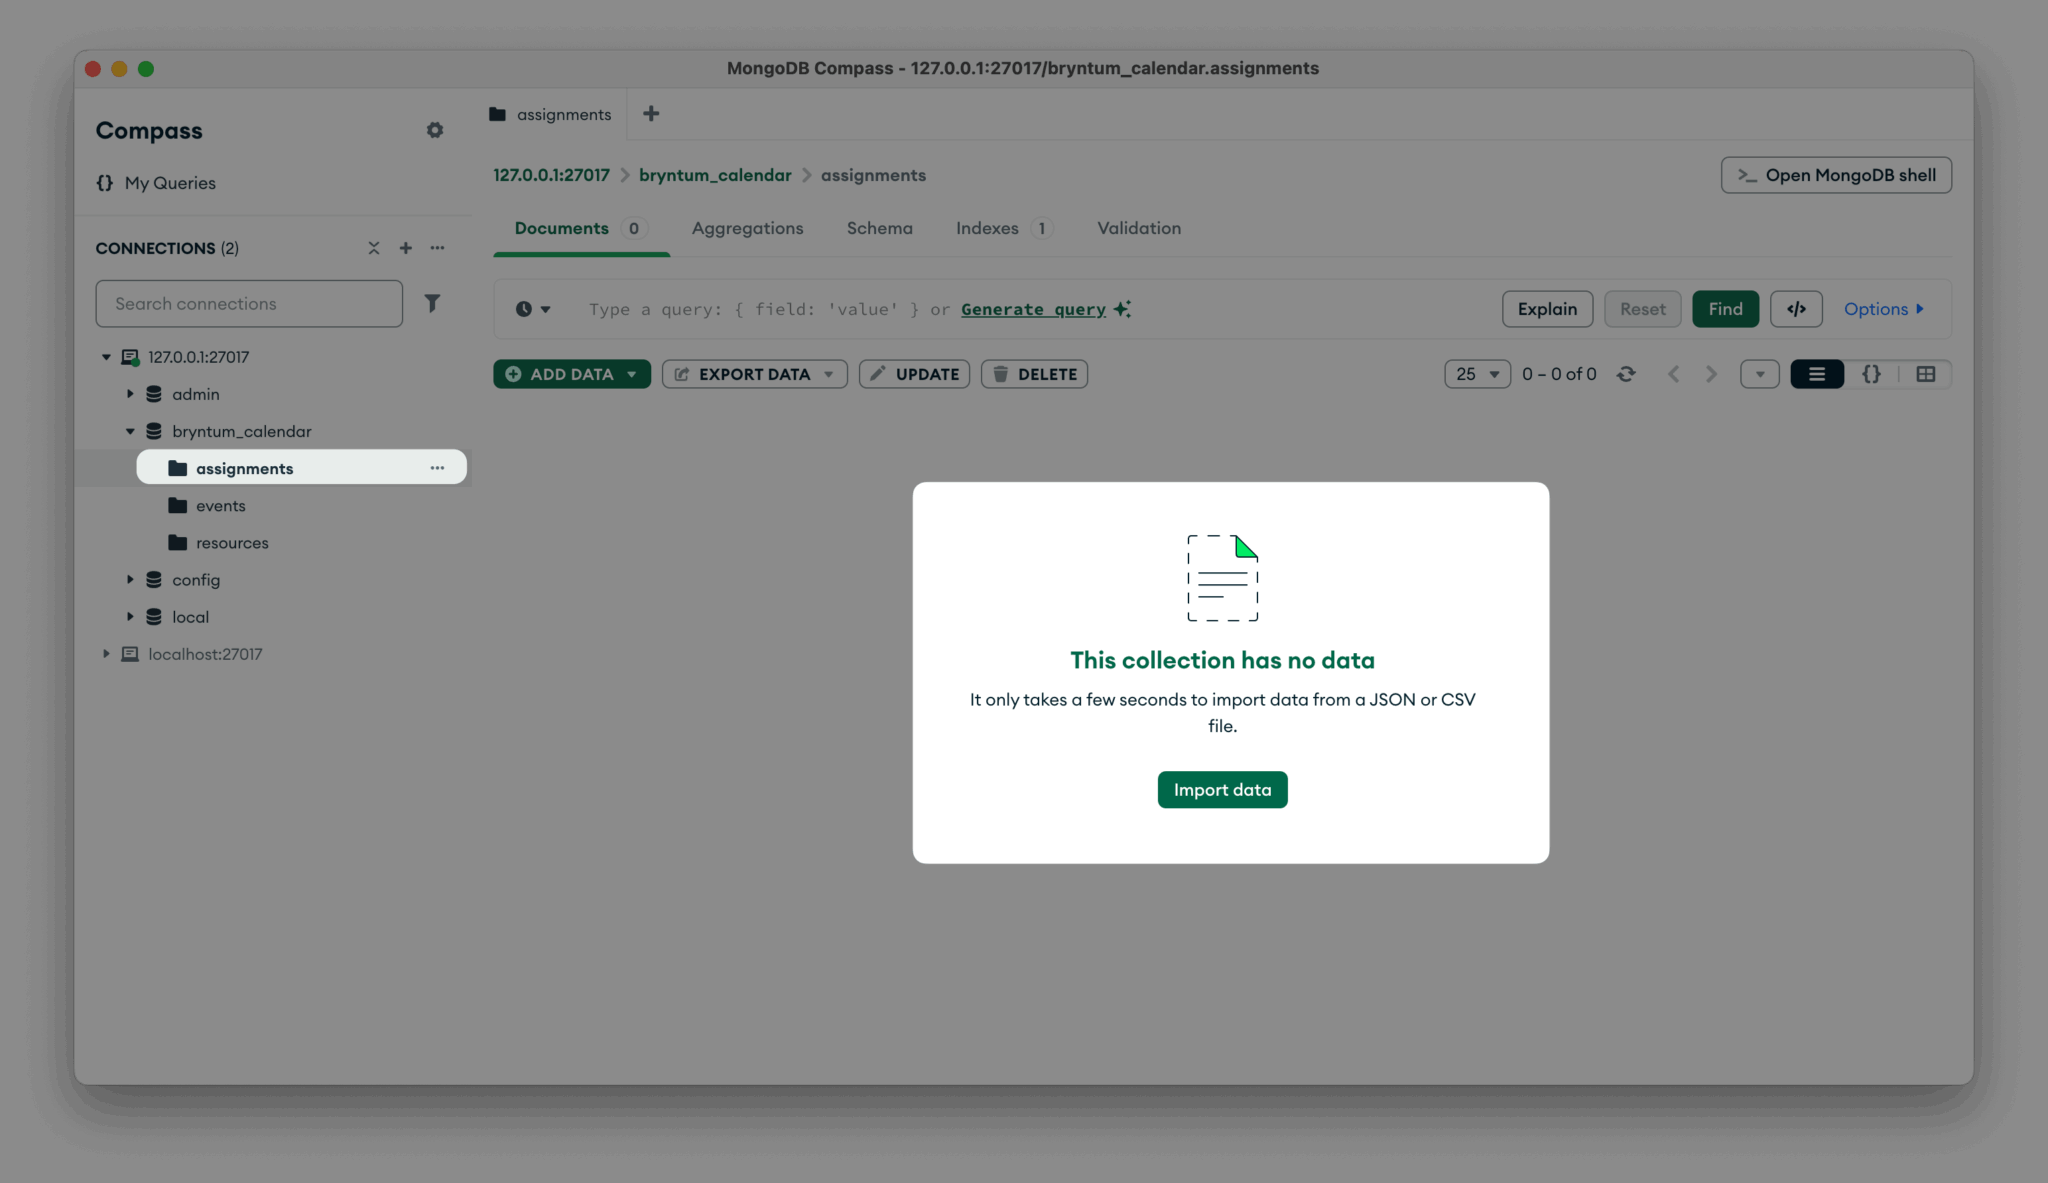
Ideally, you would create a collection for each of the stores. To keep it simple for this guide, just create collections for resources, events, and assignments.
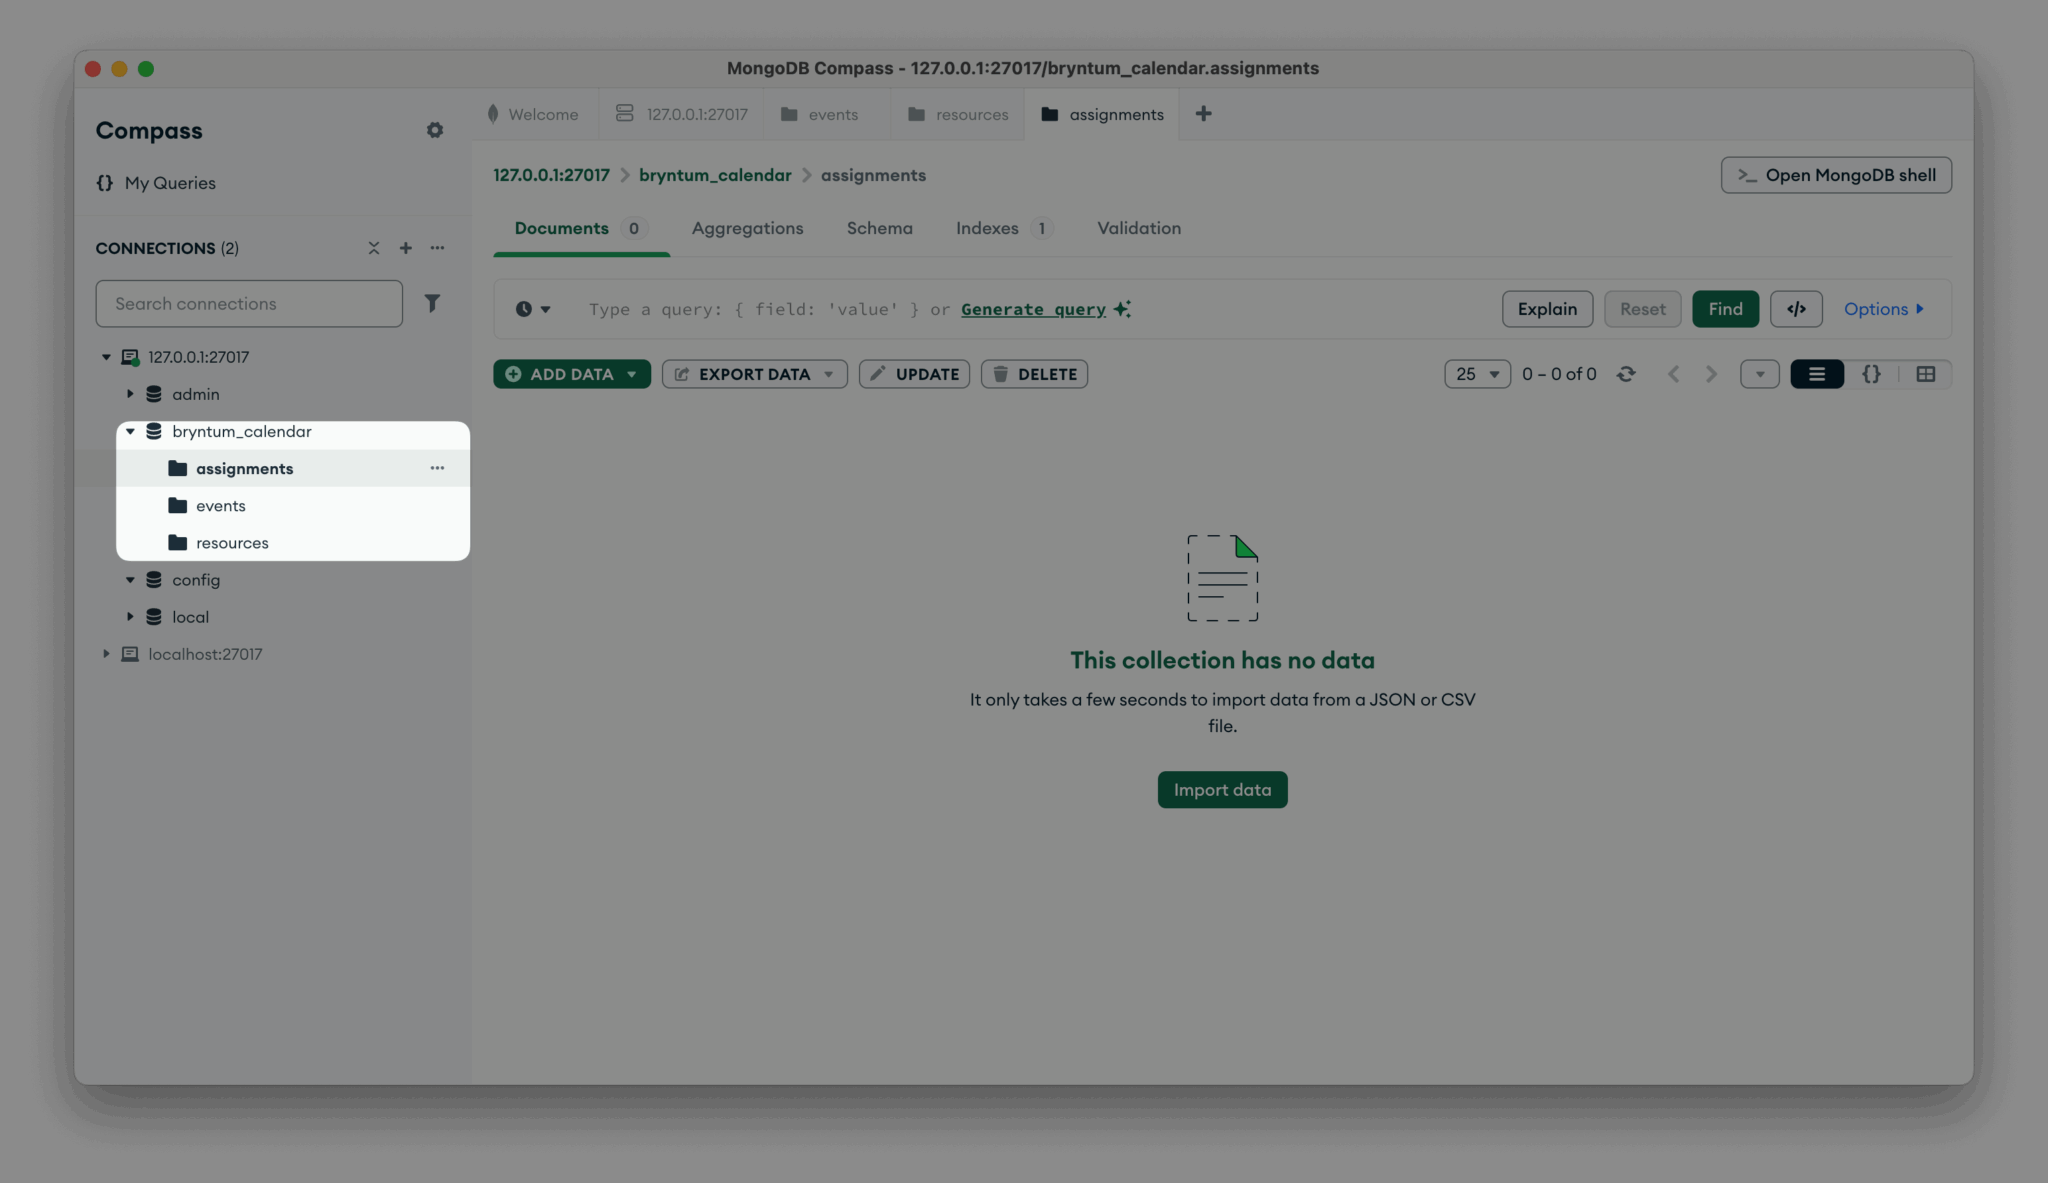
With that, your MongoDB database is set up.
Populating the MongoDB database
Now, let’s seed it with some initial data that will form a starting point when we connect the database to the frontend and fetch events in the Bryntum Calendar.
Create three JSON files: assignments.json, events.json, and resources.json.
Add the following data to assignments.json:
[
    { "id": 1, "eventId": 1, "resourceId": "arena-alpha" },

    { "id": 2, "eventId": 2, "resourceId": "team-phoenix" },
    { "id": 3, "eventId": 2, "resourceId": "team-shadow" },
    { "id": 4, "eventId": 2, "resourceId": "arena-alpha" },

    { "id": 5, "eventId": 3, "resourceId": "team-aurora" },
    { "id": 6, "eventId": 3, "resourceId": "team-titans" },
    { "id": 7, "eventId": 3, "resourceId": "arena-beta" },

    { "id": 8, "eventId": 4, "resourceId": "arena-alpha" },

    { "id": 9, "eventId": 5, "resourceId": "arena-alpha" },
    { "id": 10, "eventId": 6, "resourceId": "arena-beta" },

    { "id": 11, "eventId": 7, "resourceId": "arena-alpha" },
    { "id": 12, "eventId": 7, "resourceId": "team-phoenix" },
    { "id": 13, "eventId": 7, "resourceId": "team-aurora" },

    { "id": 14, "eventId": 8, "resourceId": "arena-alpha" }

]
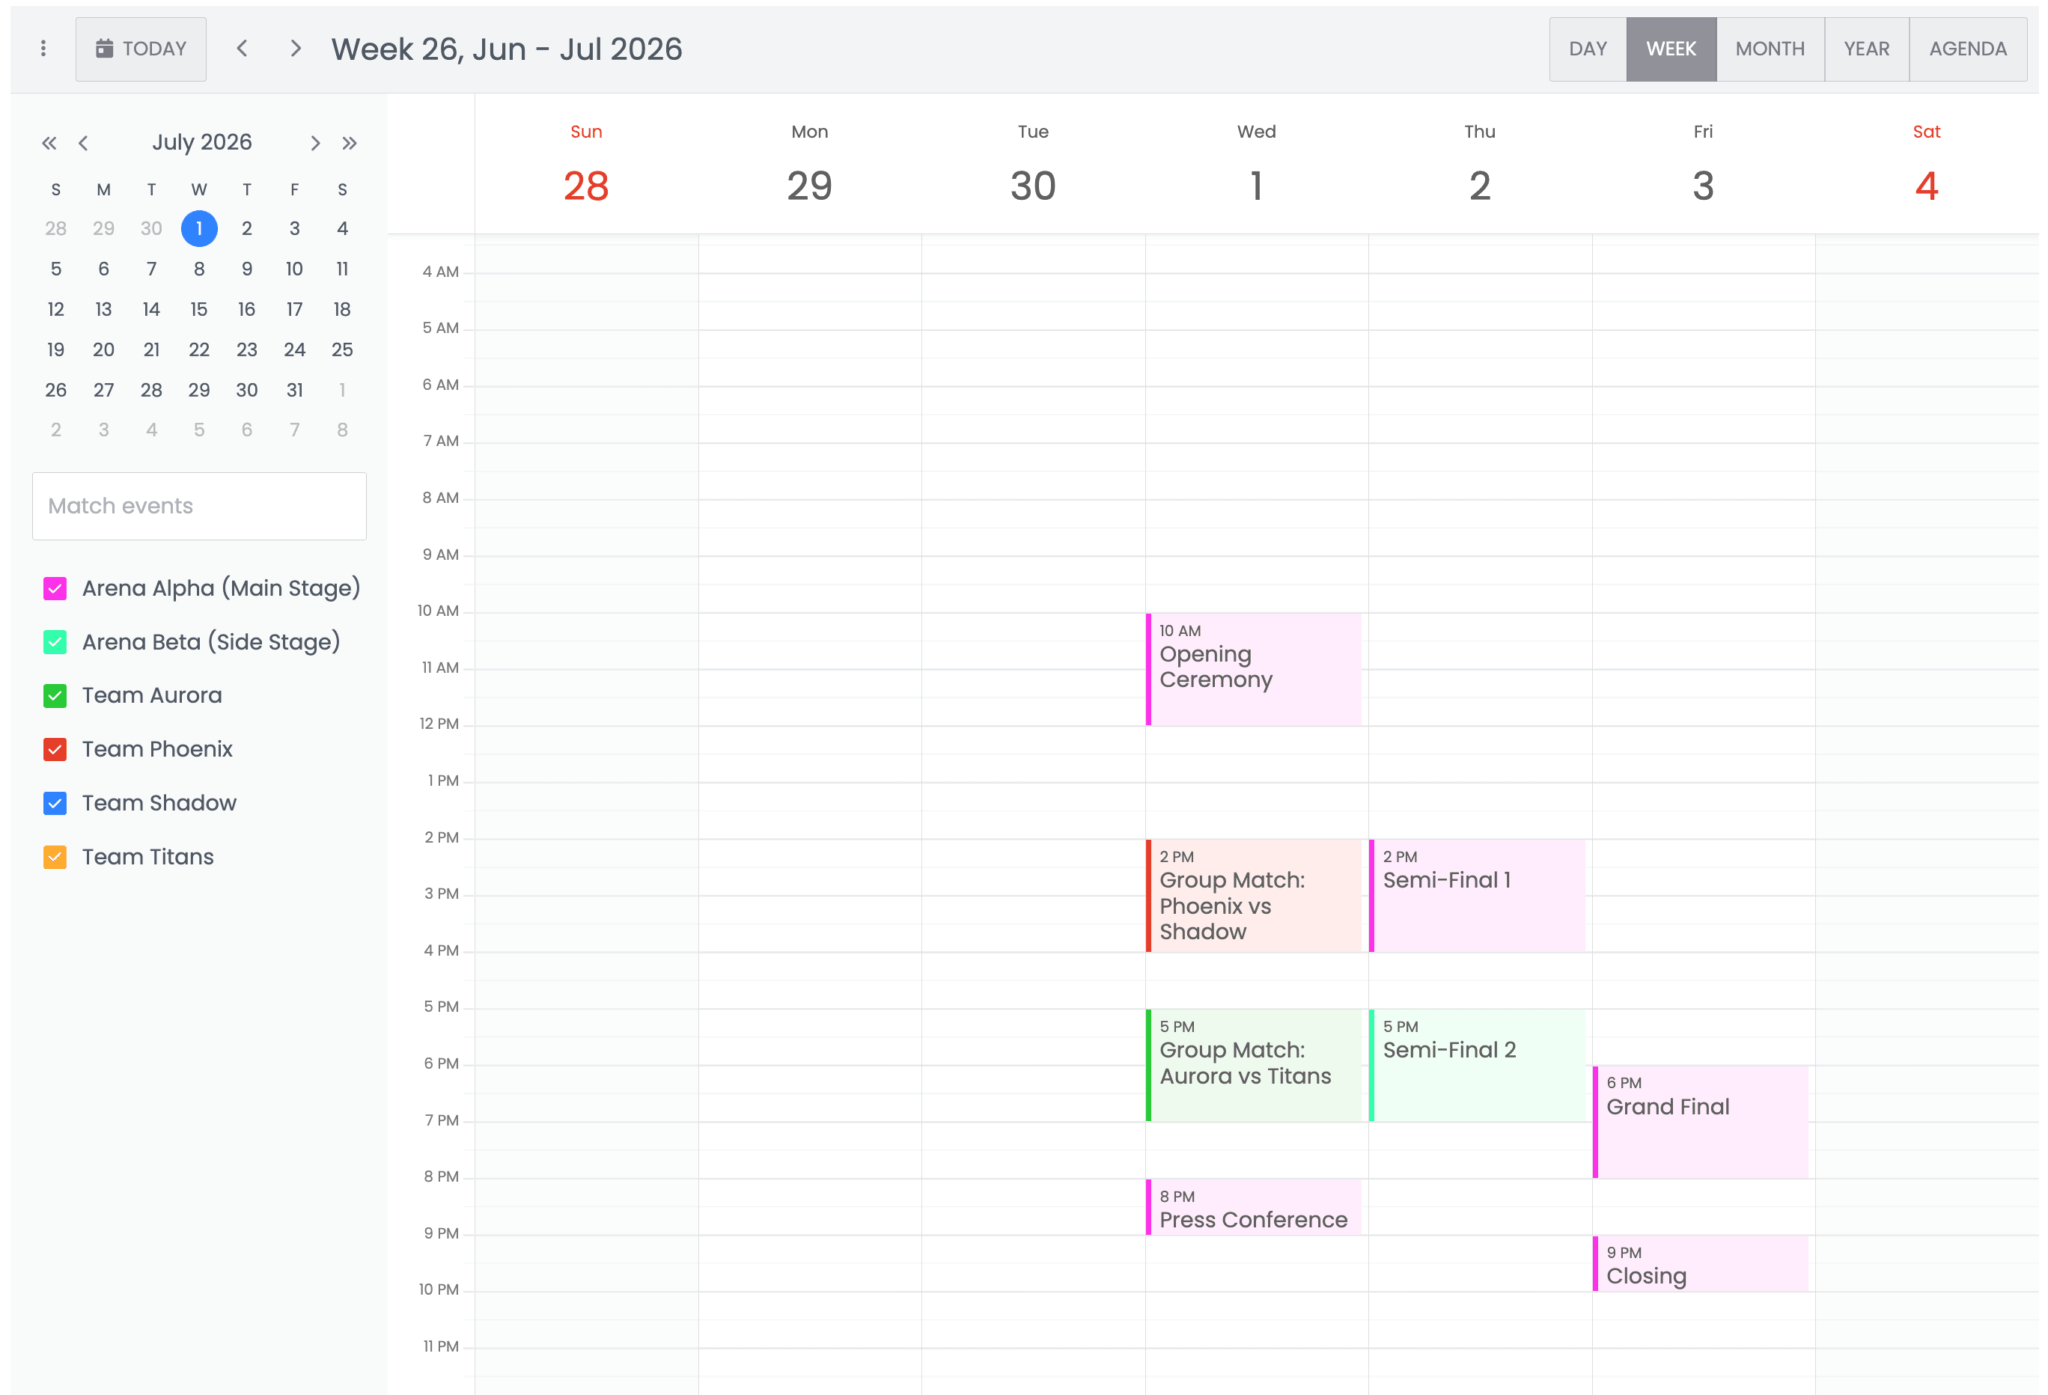
Add the following data to events.json:
[
    {
      "id": 1,
      "name": "Opening Ceremony",
      "startDate": "2026-07-01T10:00:00",
      "endDate": "2026-07-01T12:00:00"
    },
    {
      "id": 2,
      "name": "Group Match: Phoenix vs Shadow",
      "startDate": "2026-07-01T14:00:00",
      "endDate": "2026-07-01T16:00:00"
    },
    {
      "id": 3,
      "name": "Group Match: Aurora vs Titans",
      "startDate": "2026-07-01T17:00:00",
      "endDate": "2026-07-01T19:00:00"
    },
    {
      "id": 4,
      "name": "Press Conference - Day 1",
      "startDate": "2026-07-01T20:00:00",
      "endDate": "2026-07-01T21:00:00"
    },
    {
      "id": 5,
      "name": "Semi-Final 1",
      "startDate": "2026-07-02T14:00:00",
      "endDate": "2026-07-02T16:00:00"
    },
    {
      "id": 6,
      "name": "Semi-Final 2",
      "startDate": "2026-07-02T17:00:00",
      "endDate": "2026-07-02T19:00:00"
    },
    {
      "id": 7,
      "name": "Grand Final",
      "startDate": "2026-07-03T18:00:00",
      "endDate": "2026-07-03T20:00:00"
    },
    {
      "id": 8,
      "name": "Closing Ceremony",
      "startDate": "2026-07-03T21:00:00",
      "endDate": "2026-07-03T22:00:00"
    }
  ]
And add the following data to resources.json:
[
    { "id": "team-phoenix", "name": "Team Phoenix", "eventColor": "red" },
    { "id": "team-shadow", "name": "Team Shadow", "eventColor": "blue" },
    { "id": "team-aurora", "name": "Team Aurora", "eventColor": "green" },
    { "id": "team-titans", "name": "Team Titans", "eventColor": "orange" },
    { "id": "arena-alpha", "name": "Arena Alpha (Main Stage)", "eventColor": "purple" },
    { "id": "arena-beta", "name": "Arena Beta (Side Stage)", "eventColor": "teal" }
  ]
In the Bryntum Calendar database, import assignment.json into the assignments collection, events.json into the events collection, and resources.json into the resources collection.
Integrating MongoDB with the backend
Now that the database is ready, let’s connect it to the backend Node.js server, so that we can populate the Bryntum Calendar using the data and sync changes made in the frontend app to the database.
First, install the MongoDB npm package:
npm install mongodbCreate a .env file with your connection details:
MONGODB_URI=mongodb://localhost:27017
DB_NAME=bryntum_calendar
PORT=3000
Create a new connection.js file for a reusable connection function:
// connection.js
const { MongoClient } = require('mongodb');

const uri = process.env.MONGODB_URI;
const dbName = process.env.DB_NAME;

let db, eventsCollection, resourcesCollection, assignmentsCollection;

async function connectDB() {
  if (db) return { db, eventsCollection, resourcesCollection, assignmentsCollection };

  const client = new MongoClient(uri);
  await client.connect();

  db = client.db(dbName);
  eventsCollection = db.collection('events');
  resourcesCollection = db.collection('resources');
  assignmentsCollection = db.collection('assignments');

  console.log('Connected to MongoDB');
  return { db, eventsCollection, resourcesCollection, assignmentsCollection };
}

module.exports = connectDB;
Then, import it to server.js:
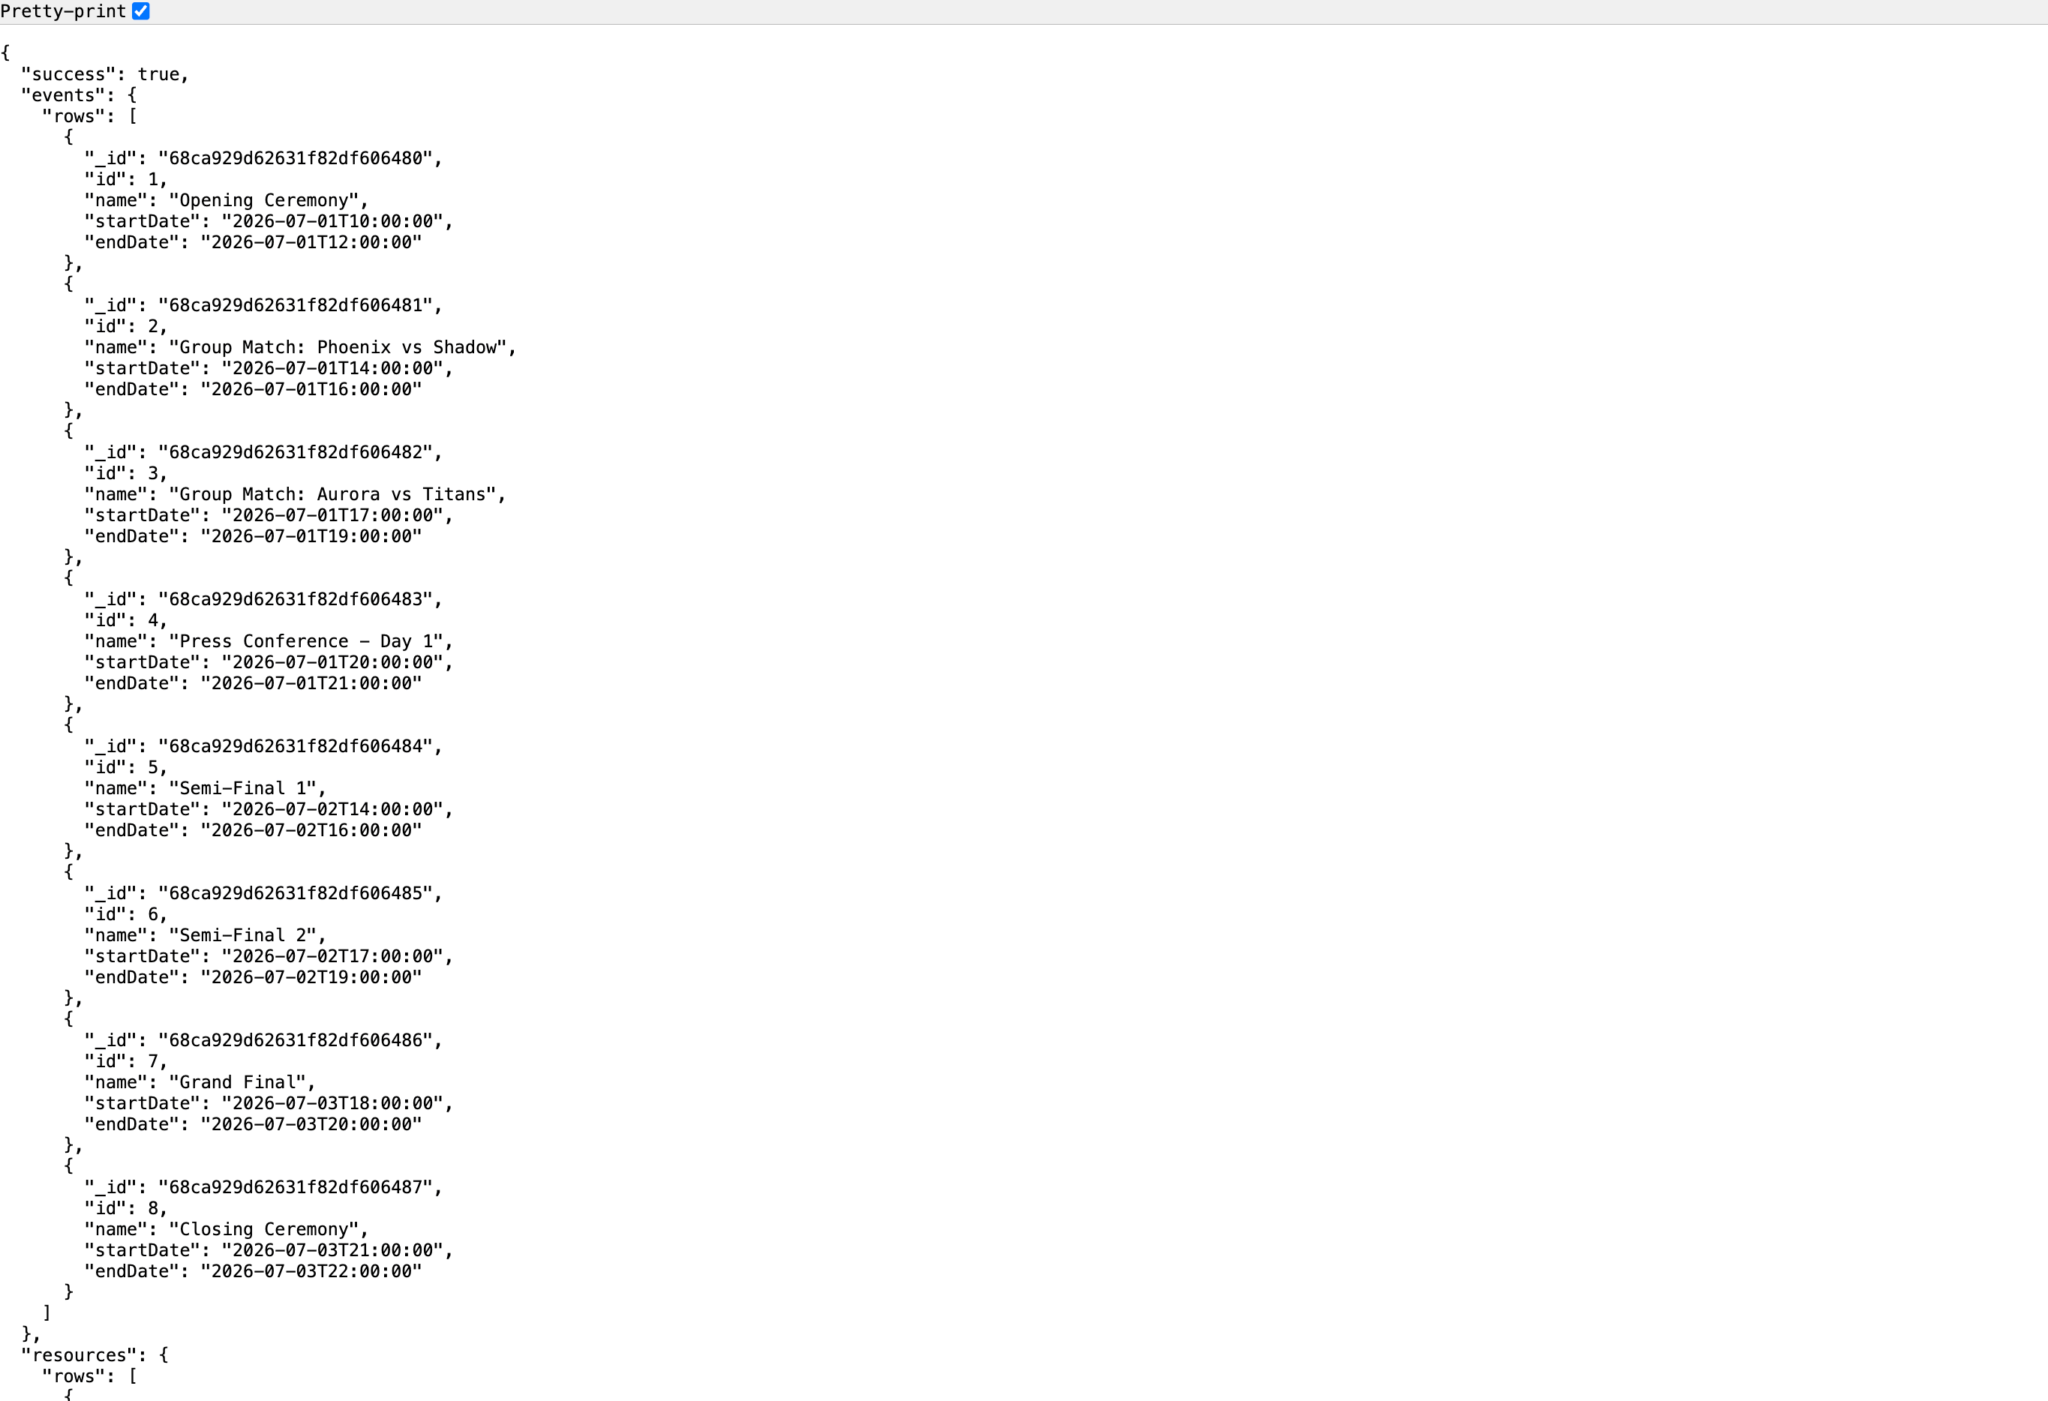
const connectDB = require('./connection');The /api/load endpoint fetches events, resources, and assignments from MongoDB, converts _id into a string id, and returns the data in the Bryntum format, replace the /api/load in the server.js:
app.get('/api/load', async (req, res) => {
  try {
    const { eventsCollection, resourcesCollection, assignmentsCollection } = await connectDB();

    const events = await eventsCollection.find({}).toArray();
    const resources = await resourcesCollection.find({}).toArray();
    const assignments = await assignmentsCollection.find({}).toArray();

    const mappedEvents = events.map(({ _id, ...rest }) => ({
      id: _id.toString(),
      ...rest
    }));
    const mappedResources = resources.map(({ _id, ...rest }) => ({
      id: _id.toString(),
      ...rest
    }));
    const mappedAssignments = assignments.map(({ _id, ...rest }) => ({
      id: _id.toString(),
      ...rest
    }));

    res.json({
      success: true,
      events: { rows: mappedEvents },
      resources: { rows: mappedResources },
      assignments: { rows: mappedAssignments }
    });
  } catch (err) {
    console.error(err);
    res.status(500).json({ success: false, message: 'Error loading data' });
  }
});
Similarly, the /api/sync endpoint handles CRUD operation requests. It inserts new records, maps phantom IDs to real MongoDB IDs, updates existing ones, and removes deleted ones, replace /api/sync in server.js with the following:
const { ObjectId } = require('mongodb');
app.post('/api/sync', async (req, res) => {
  try {
    const { eventsCollection, assignmentsCollection } = await connectDB();
    const { events, assignments, requestId, revision } = req.body;

    const responsePayload = {
      success: true,
      requestId: requestId || null,
      revision: (revision || 0) + 1
    };

    const phantomEventMap = {};

    async function processStore(storeData, collection) {
      const storeResponse = {};

      if (storeData.added) {
        const insertData = storeData.added.map(({ $PhantomId, eventId, ...rest }) => {
          // Special handling for assignments -> map eventId if it's a phantom
          const mappedEventId = phantomEventMap[eventId] || eventId;
          return eventId ? { ...rest, eventId: mappedEventId } : rest;
        });

        const result = await collection.insertMany(insertData);

        const mappings = Object.keys(result.insertedIds).map((key, idx) => {
          const phantomId = storeData.added[idx].$PhantomId;
          const realId = result.insertedIds[key].toString();

          if (collection === eventsCollection) {
            phantomEventMap[phantomId] = realId;
          }

          return { $PhantomId: phantomId, id: realId };
        });

        storeResponse.rows = mappings;
      }

      if (storeData.removed) {
        const objectIds = storeData.removed.map(id => new ObjectId(id));
        await collection.deleteMany({ _id: { $in: objectIds } });

        storeResponse.removed = storeData.removed;
      }

      if (storeData.updated) {
        const updatedRows = [];

        for (const record of storeData.updated) {
          const { id, $PhantomId, ...updateData } = record;
          if (!id) continue;

          await collection.updateOne(
            { _id: new ObjectId(id) },
            { $set: updateData }
          );

          updatedRows.push({ $PhantomId });
        }

        storeResponse.rows = [...(storeResponse.rows || []), ...updatedRows];
      }

      return Object.keys(storeResponse).length ? storeResponse : null;
    }

    if (events) {
      const result = await processStore(events, eventsCollection);
      if (result) responsePayload.events = result;
    }

    if (assignments) {
      const result = await processStore(assignments, assignmentsCollection);
      if (result) responsePayload.assignments = result;
    }

    res.json(responsePayload);

  } catch (err) {
    console.error(err);
    res.status(500).json({ success: false, message: 'Error syncing data' });
  }
});
Update package.json to load .env automatically:
"start": "nodemon --env-file=.env server.js"Run the server and open http://localhost:3000/api/load. You’ll see the JSON response from MongoDB.
Syncing the backend with the frontend
So far, the frontend uses hard-coded data. Let’s hook it up to the backend so it loads data from the /api/load endpoint and syncs changes through the /api/sync endpoint.
In the frontend’s src/main.js file, remove the events and resources objects and replace them with the following:
crudManager : {
        autoLoad : true,
        loadUrl  : '/api/load'
    }
Create a vite.config.js file with the following code to fix any CORS issues:
// vite.config.js
import { defineConfig } from 'vite';

export default defineConfig({
  server: {
    proxy: {
      '/api': {
        target: '<http://localhost:3000/>',
        changeOrigin: true
      }
    }
  }
});
This proxy redirects frontend requests (like /api/load) to the Node.js backend and resolves CORS issues without requiring changes to the backend code.
After this step, restart the app. The Bryntum Calendar should display the data from your MongoDB database.
Next, configure crudManager to send changes back to the server, In the src/main.js, add the following after loadUrl : '/api/load':
        autoSync : true,
        syncUrl  : '/api/sync',
Now, when you create, edit, or delete events, they are persisted in MongoDB. Try adding an event, then refresh the page and confirm that it’s still there.
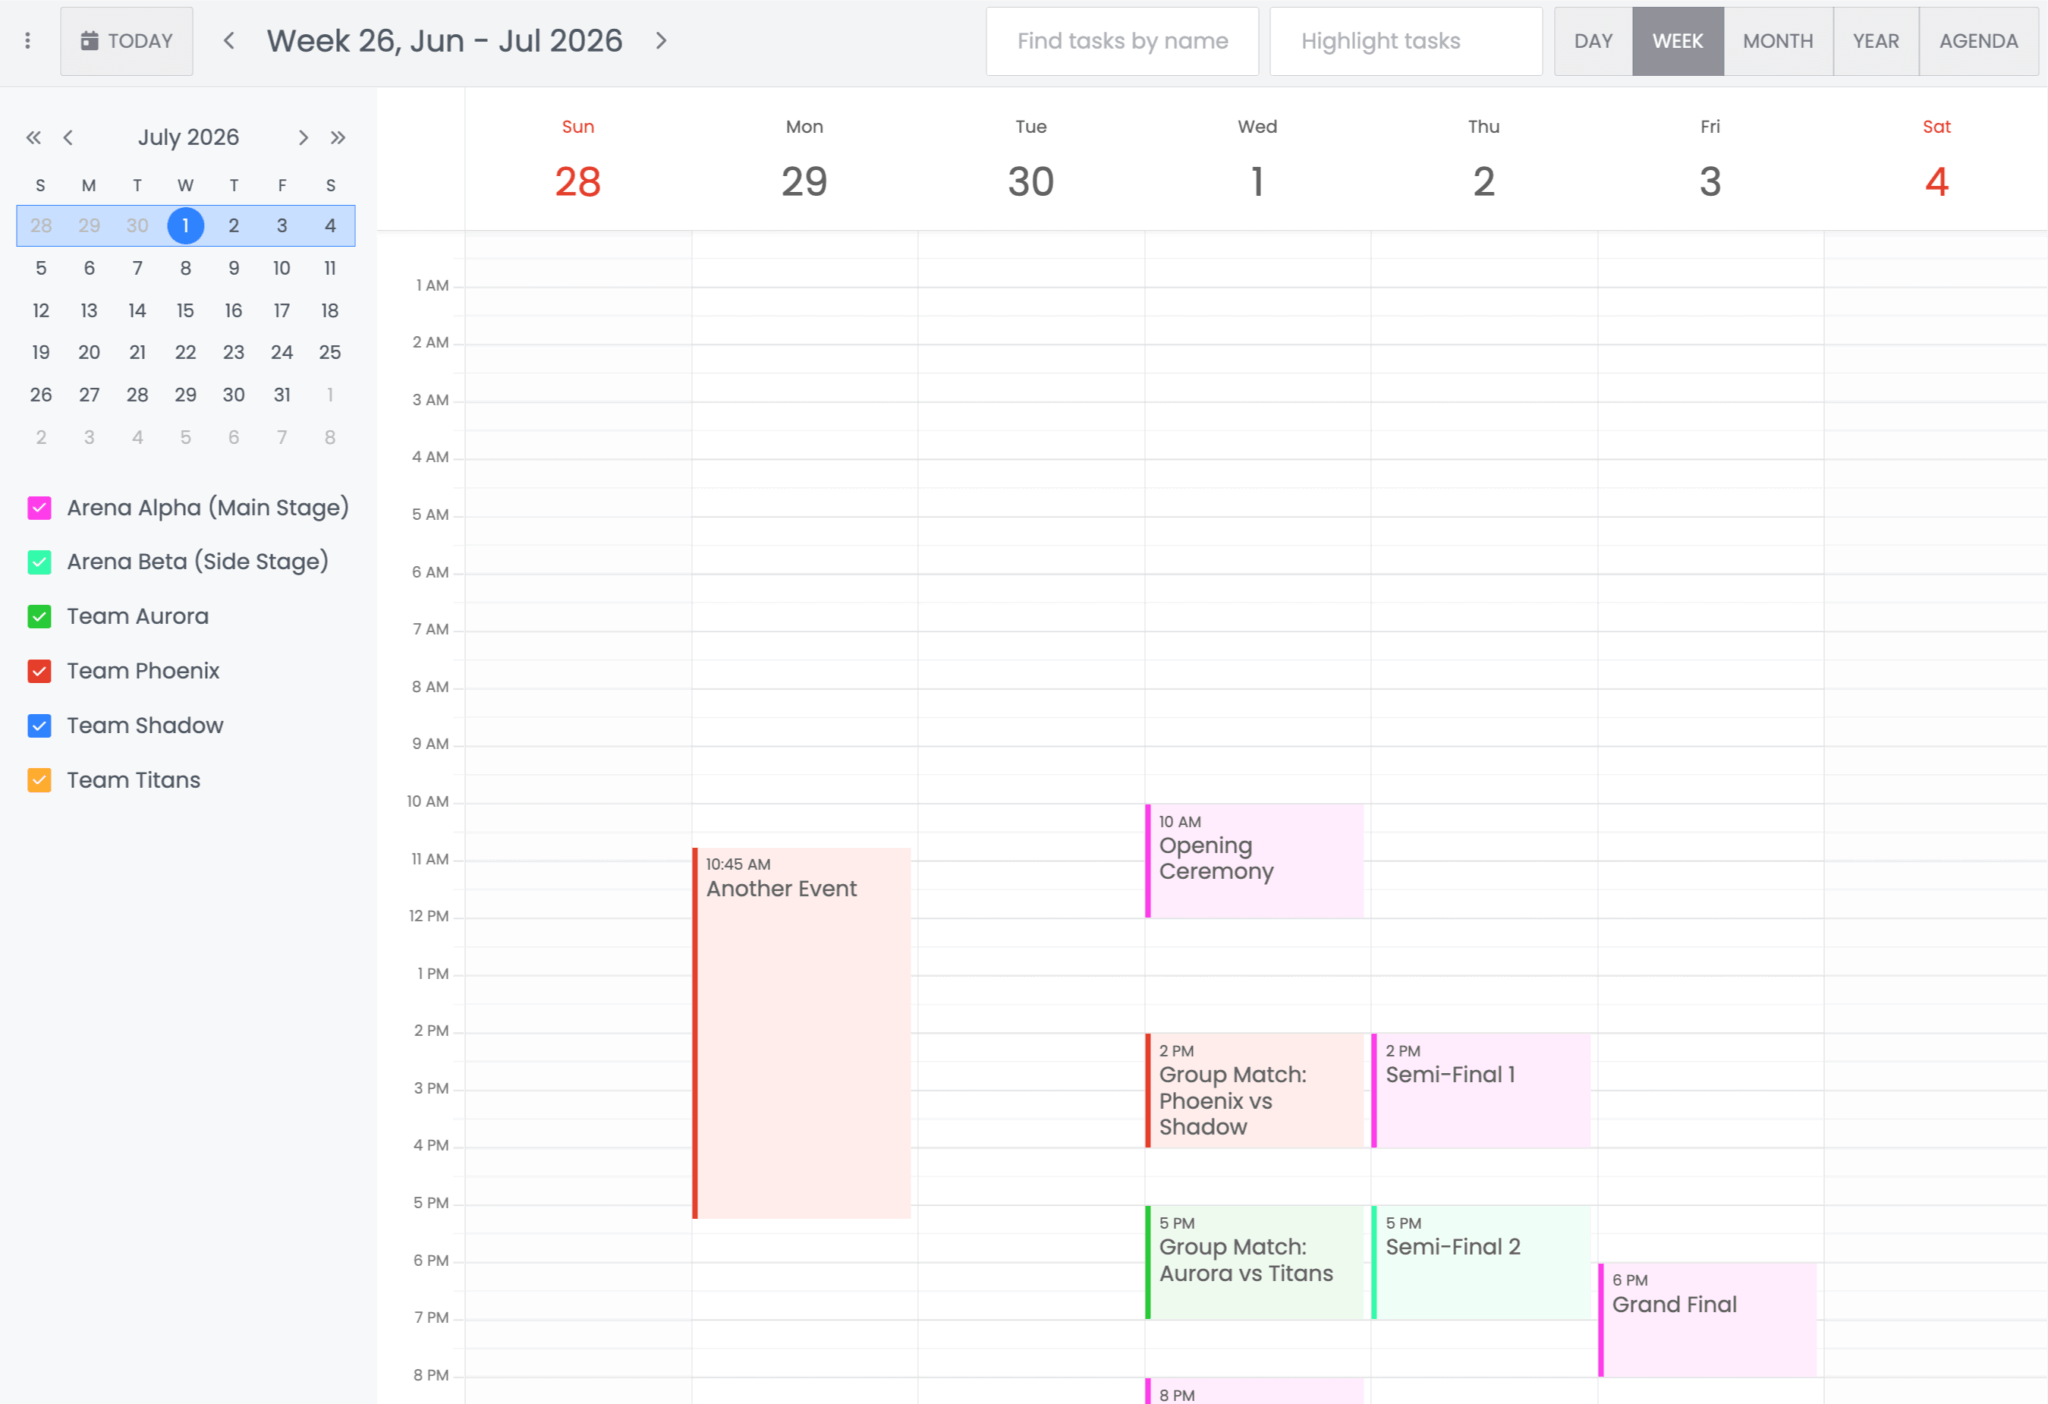
Adding features to the Bryntum Calendar
The base Bryntum Calendar is functional but plain. Let’s enhance it by enabling a few useful features in the main.js file.
Highlight the selected week in the sidebar:
sidebar : {
    items : {
        datePicker : {
            highlightSelectedWeek : true
        },
        eventFilter : false   // remove the default event filter
    }
}
Add toolbar filters and highlights:
    tbar : {
        items : {
            // Description between the prev and next buttons
            viewDescription : {
                weight : 350
            },
            filterByName : {
                type                 : 'textfield',
                weight               : 650,
                icon                 : 'fa fa-filter',
                placeholder          : 'Find tasks by name',
                clearable            : true,
                keyStrokeChangeDelay : 100,
                triggers             : {
                    filter : {
                        align : 'start',
                        cls   : 'fa fa-filter'
                    }
                },

                // "up." means look in ownership tree. Will be found on the Calendar
                onChange : 'up.onNameFilterChange'
            },
            highlight : {
                type                 : 'textfield',
                weight               : 660,
                placeholder          : 'Highlight tasks',
                clearable            : true,
                keyStrokeChangeDelay : 100,
                triggers             : {
                    filter : {
                        align : 'start',
                        cls   : 'fa fa-search'
                    }
                },

                // "up." means look in ownership tree. Will be found on the Calendar
                onChange : 'up.onNameSearchChange'
            }
        }
    },
Then, define the functions:
    onNameFilterChange({ value }) {
        // We filter using a RegExp, so quote significant characters
        value = value.replace(/[.*+?^${}()|[\\]\\\\]/g, '\\\\$&');

        // A filter with an id replaces any previous filter with that id.
        // Leave any other filters which may be in use in place.
        calendar.eventStore.filter({
            id       : 'eventNameFilter',
            filterBy : event => event.name.match(new RegExp(value, 'i'))
        });
    },

    onNameSearchChange({ value }) {
        value = value.toLowerCase();

        // Loop through all events in the store
        calendar.eventStore.forEach(task => {

            // The cls field is a DomClassList with add and remove methods
            if (value !== '' && task.name.toLowerCase().includes(value)) {
                task.cls.add('b-match');
            }
            else {
                task.cls.remove('b-match');
            }
        });

        // Schedule a refresh of the UI now that we have updated all event UI classes.
        calendar.refresh();

        calendar.element.classList[value.length > 0 ? 'add' : 'remove']('b-highlighting');
    }
Finally, add the following styling to style.css:
.b-highlighting {
    .b-cal-event-wrap {
        opacity : 0.2;

        &.b-match {
            opacity : 1;
            z-index : 10;
        }
    }
}
With that, your Bryntum Calendar now offers filtering and highlighting.
Next steps
The Bryntum Calendar component comes with a wide range of features, such as recurring events, different view modes (by day, week, month, or year), and advanced filtering. You can also integrate the Calendar component with other Bryntum tools. Check out the official Bryntum Calendar examples and API documentation to see how you can extend the app you built here.
This tutorial used MongoDB in its simplest form, but the database offers powerful features such as aggregation pipelines, indexing, and schema validation. Dive into the official MongoDB Docs to learn how you can use MongoDB’s advanced capabilities to improve performance and reliability as your database grows.
You may also want to integrate MongoDB with other Bryntum products, like the Grid, Scheduler, Gantt, and Task Board components. Sign up for a free 45-day trial to test component features and experiment with different use cases.