Building with AI agents using the Bryntum MCP server
Bryntum’s new MCP server grants AI coding tools access to version-specific Bryntum docs, helping developers integrate and configure Bryntum components and handle version updates.
In this article, we demonstrate how to install the Bryntum MCP server in your IDE or AI coding assistant of choice. We then use it with Lovable, the popular no-code AI-powered platform for building web apps, to create a full-stack Gantt app using only prompts.
Installing the Bryntum MCP server in Claude Code, Codex, Cursor, and VS Code
You can install the MCP server in your LLM client of choice.
For Claude Code, run the following command:
claude mcp add --transport http bryntum https://mcp.bryntum.comFor OpenAI’s Codex, run this command:
codex mcp add bryntum --url https://mcp.bryntum.comTo install it in Cursor:
- Open the Command Palette (
Cmd + Shift + Pon Mac,Ctrl + Shift + Pon Windows) and run View: Open MCP Settings. This opens the.cursor/mcp.jsonfile. - Add the following property to the
mcpServersJSON object:
"Bryntum": {
  "url": "https://mcp.bryntum.com",
  "type": "http"
}
To install it in VS Code:
- Open the Command Palette (
Cmd + Shift + Pon Mac,Ctrl + Shift + Pon Windows) and run MCP: Add Server…. - Select HTTP (HTTP or Server-Sent Events) Connect to a remote HTTP server that implements the MCP protocol.
- Enter
https://mcp.bryntum.comin the Server URL input.
This adds the following JSON object property to the .vscode/mcp.json file:
{
    "servers": {
        "Bryntum MCP": {
            "url": "https://mcp.bryntum.com",
            "type": "http"
        }
    },
    "inputs": []
}
Installing the Bryntum MCP server in Lovable
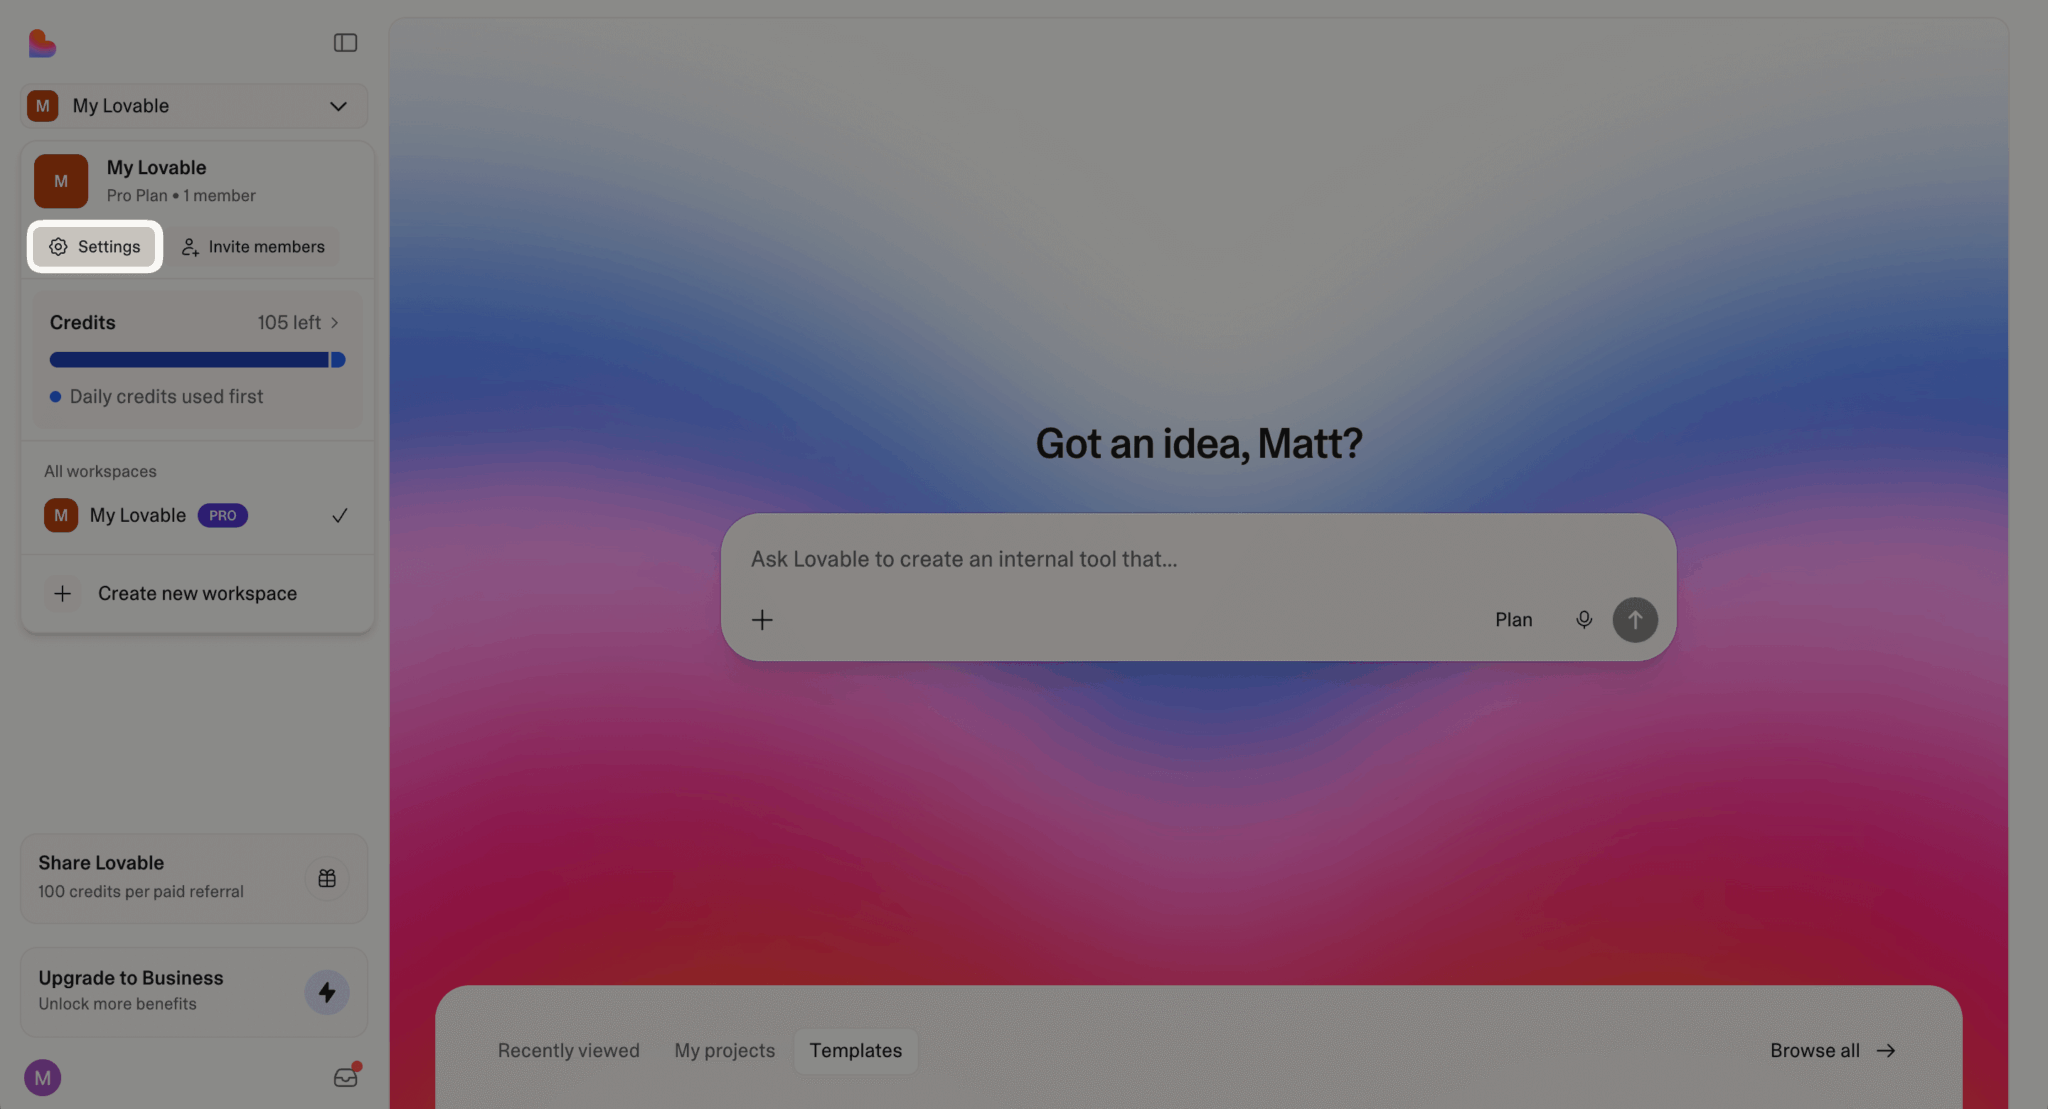
You first need to sign up for Lovable to create an account. Lovable has several personal connectors (MCP servers) that are available on all plans. The paid plans let you add custom MCP servers to extend the capabilities of Lovable’s agent.
To add the Bryntum MCP, first open Settings from the homepage:
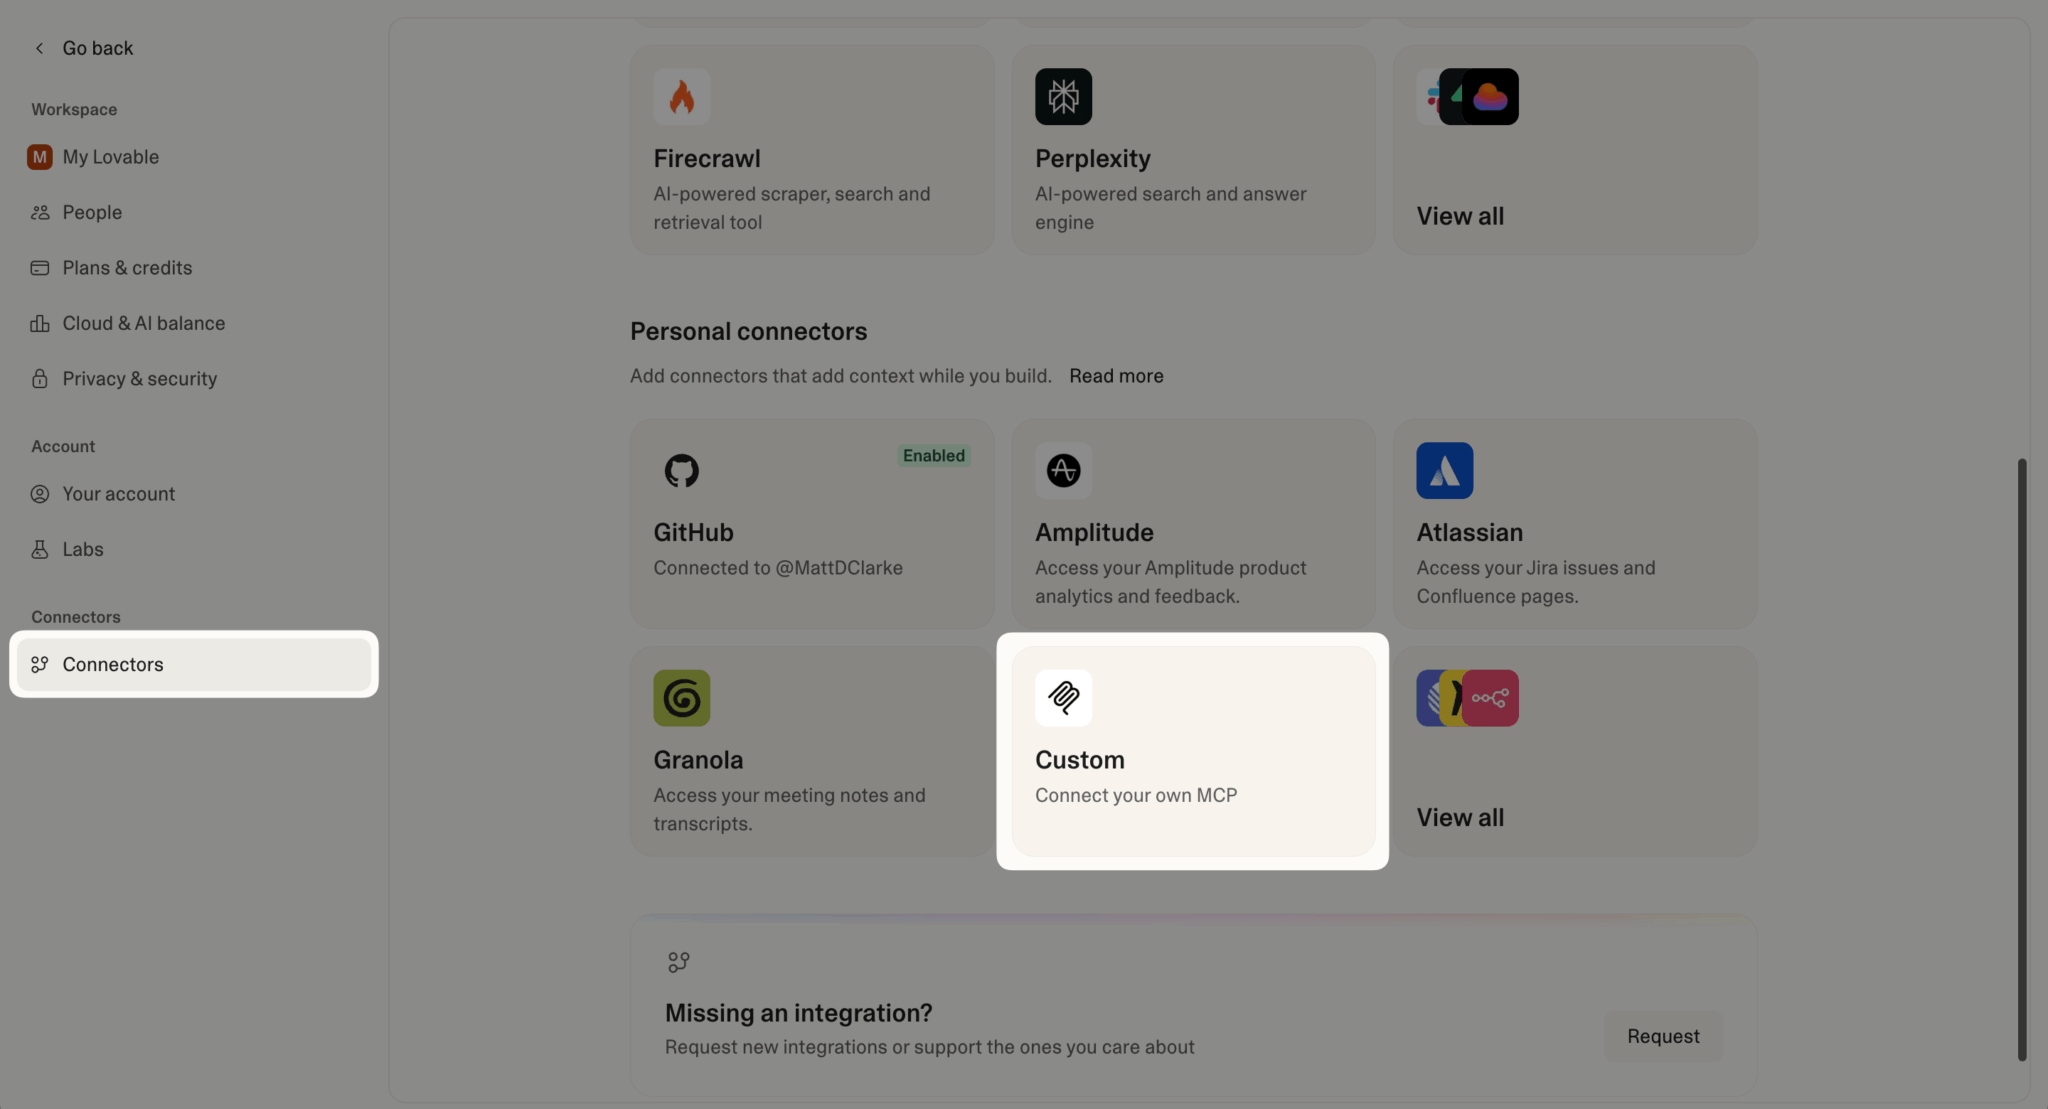
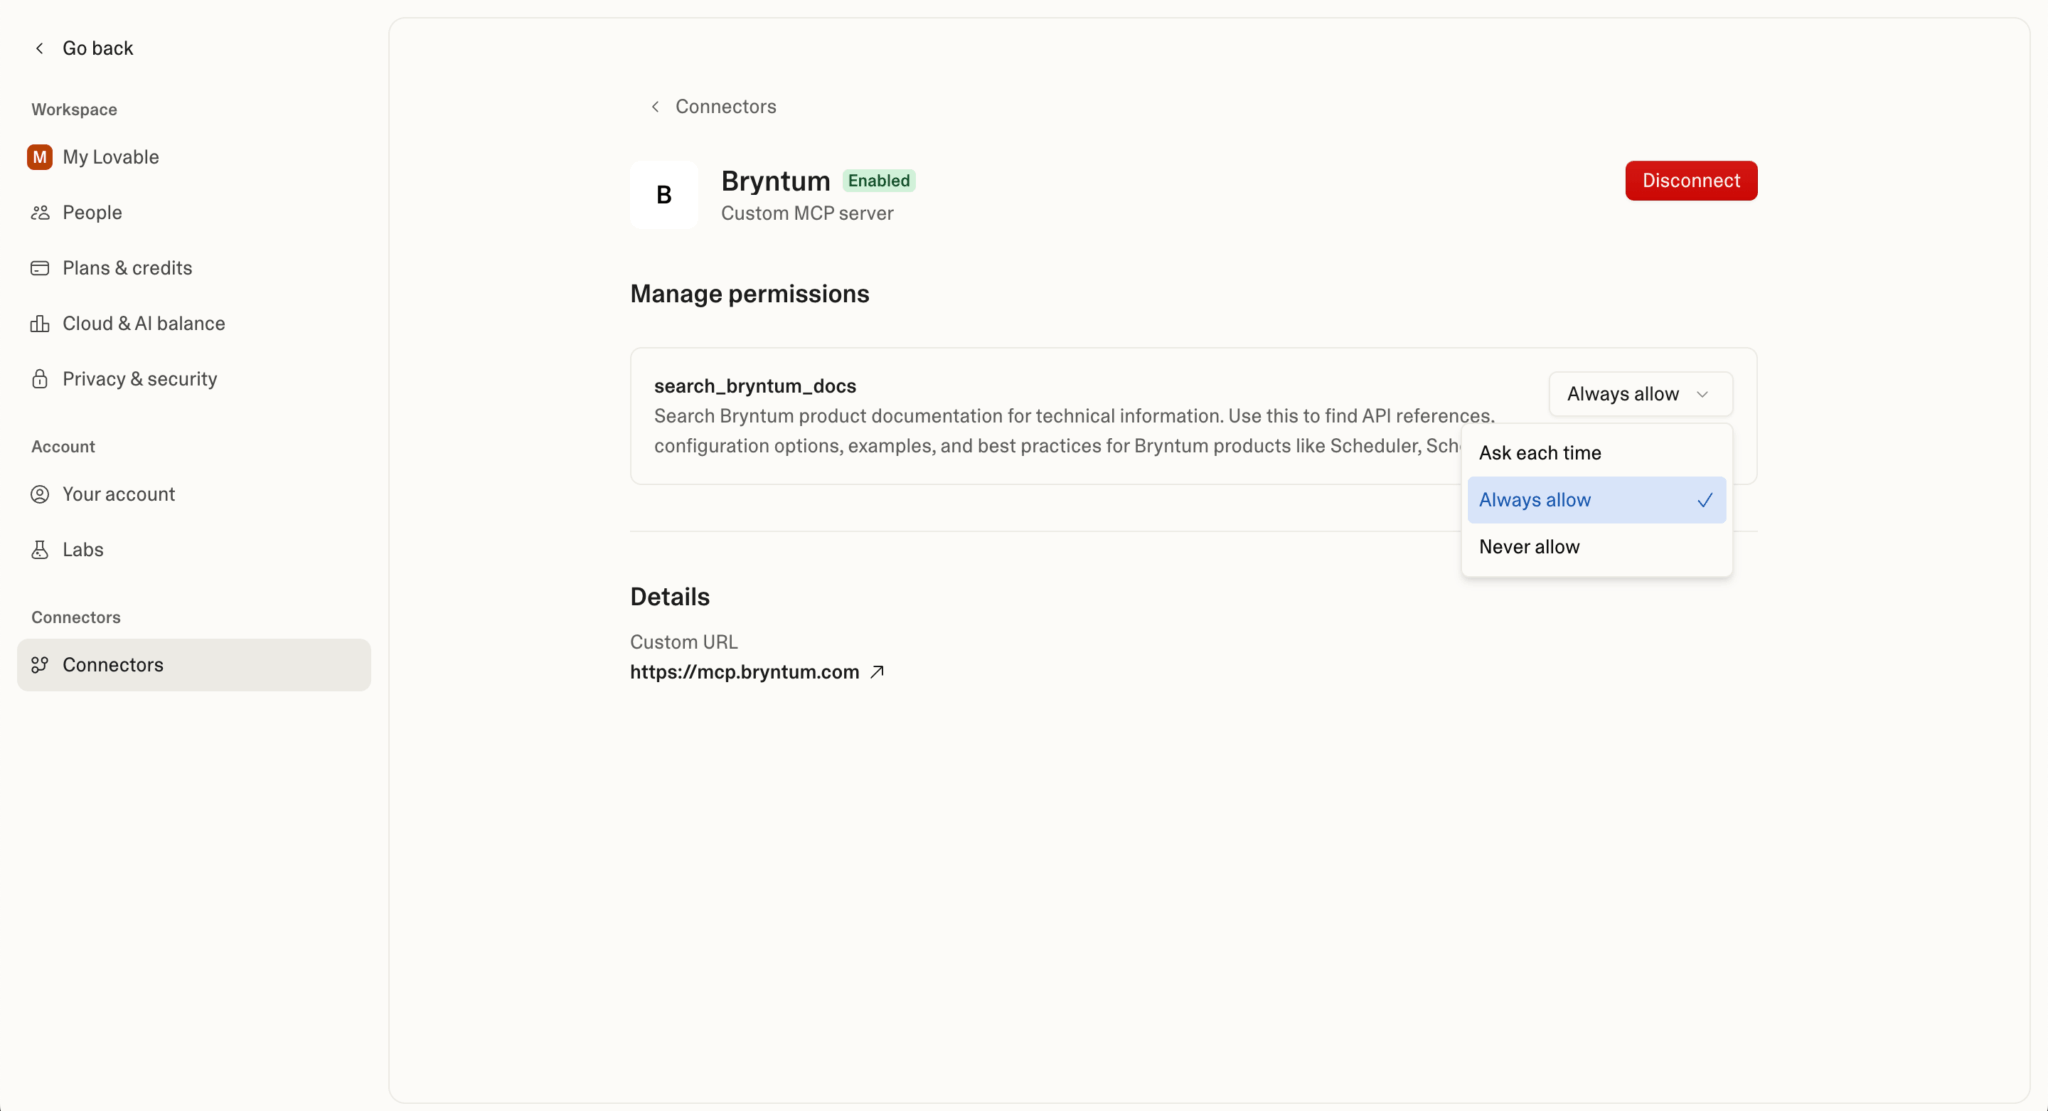
Next, open the Connectors page using the navigation menu. In the Personal connectors section, select Custom.
Set the Server URL to "https://mcp.bryntum.com". No authentication is required.
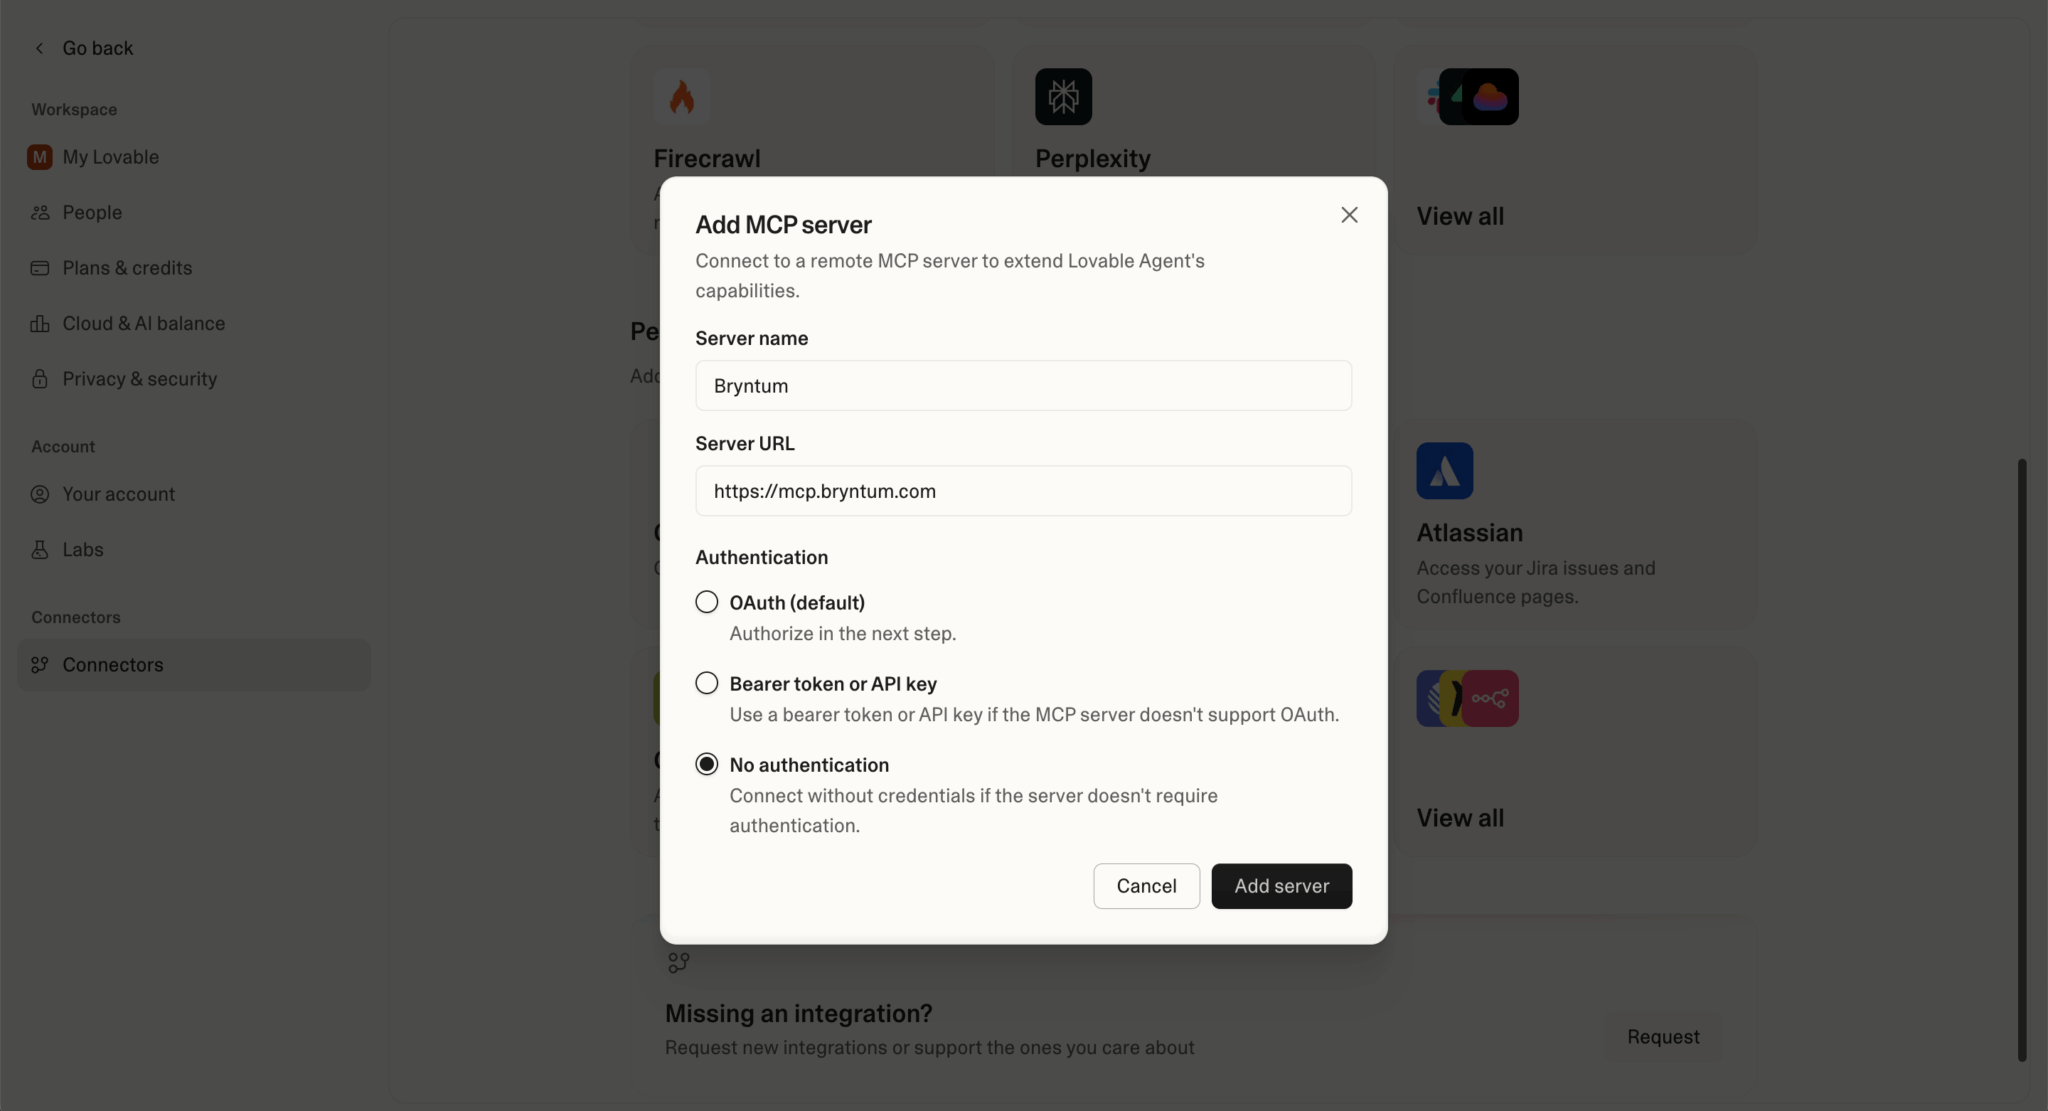
Under Manage permissions, select Always allow in the dropdown selector.
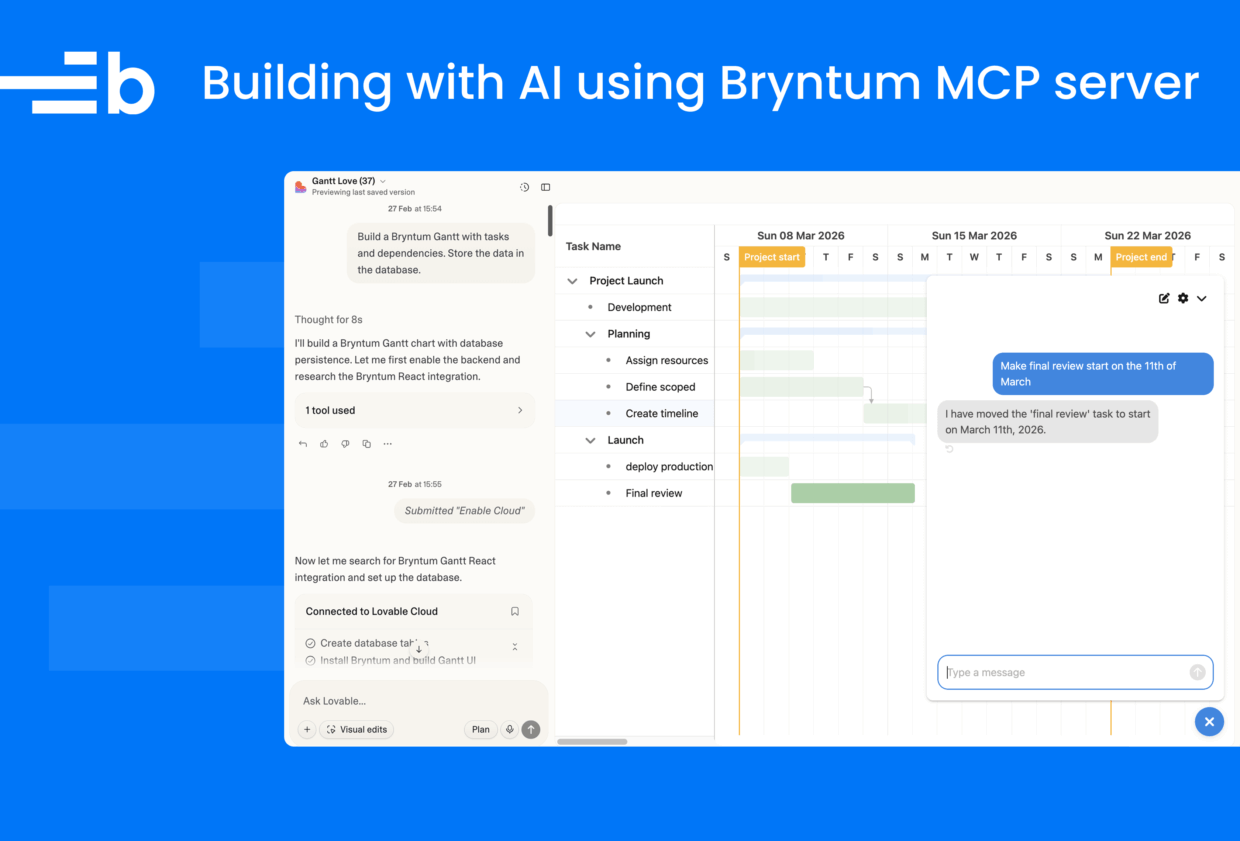
Creating a full-stack Bryntum Gantt in Lovable using the Bryntum MCP
We used the following prompt:
Build a Bryntum Gantt with tasks and dependencies. Store the data in the database.Lovable built a functional Bryntum Gantt CRUD app from our single prompt:
The Lovable agent then asked whether we wanted to enable Lovable Cloud, which adds a database, authentication, storage, and edge functions to your apps and provides full-stack hosting. We enabled it.
The Lovable agent then used the Bryntum MCP server tool to install and configure the Bryntum Gantt. It correctly installed the Bryntum Gantt trial package, which is public.
It created task and dependency tables in the Lovable Cloud database.
Adding the new Bryntum AI feature to the Gantt chart
To see how well the Bryntum MCP server handles the latest features, we prompted the Lovable agent to add the recently released experimental Bryntum AI feature to the Gantt chart. This feature adds a chat panel for interacting with Bryntum components using natural language.
Lovable added the Bryntum AI feature after we sent the following prompt:
Add the Bryntum AI feature.It used the Bryntum MCP to get the AI feature information. At first, the AI chat button was not visible in the Gantt chart, so we asked Lovable to add it:
Add the AI buttonIt used a screenshot to confirm that there was no AI chat button, checked the Bryntum feature configs using the Bryntum MCP, and then edited the Gantt config file. This added an AI chat button at the bottom-right corner of the Gantt chart. When clicked, the button opened a functional chat panel, enabling users to filter and modify the Gantt chart:
Lovable added a Lovable Cloud Edge function with AI functionality for the Bryntum AI feature.
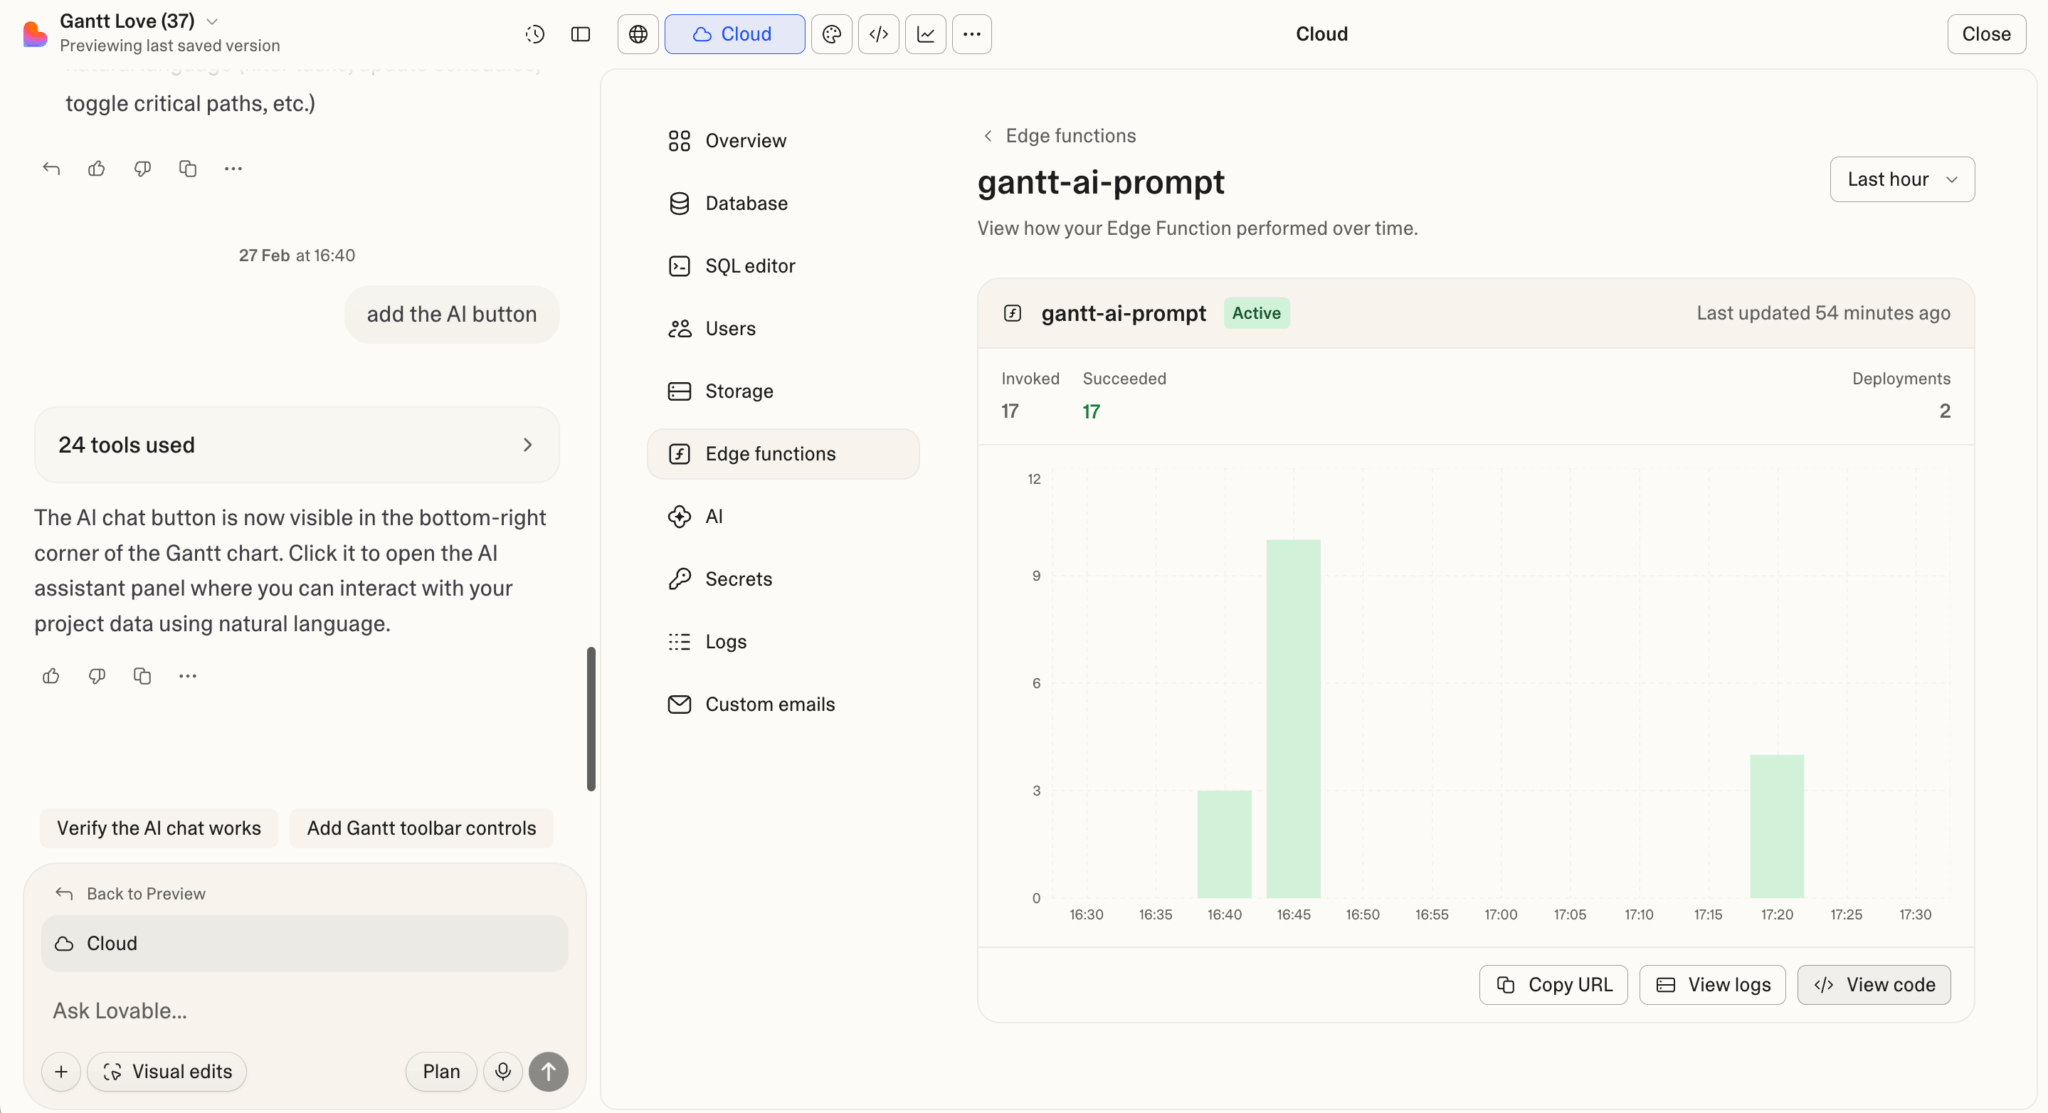
This Edge function used Gemini 2.5 Flash. It didn’t require an API key, and like the rest of the code, the Edge function was editable.
The Bryntum AI feature is LLM-agnostic, so we can swap in a different model if needed.
Using the Bryntum MCP server with Codex
The Bryntum MCP server helps your AI coding assistant get up-to-date context about Bryntum and get started with a framework. Here, we used Codex to get started with the Angular framework:
Create an Angular Bryntum Scheduler.OpenAI’s Codex used the Bryntum MCP search docs tool to configure and render a Bryntum Scheduler in an Angular app:
The MCP server has a search_bryntum_docs tool that accepts a natural language query and returns version-specific documentation results, including source code, configuration options, and links to live examples. You can filter results by product (for example, Scheduler, Gantt, Calendar, Grid, and others) and by version. Here’s a snippet of what the tool returned for one of the tool calls in the Codex prompt:
## Result 1
**Product:** scheduler
**Version:** 7.2.0
**File:**
**Relevance:** 0.658

# Basic setup demo (Angular)

**Product:** scheduler-vanilla
**Framework:** Angular
**URL:** https://bryntum.com/products/scheduler/examples/frameworks/angular/basic/dist/

## Description

This simple example shows how the Angular Scheduler component can be integrated into any Angular application

## Source Code

### src/app/app.component.ts

/**
 * App component script
 */
import { AfterViewInit, Component, ViewChild, ViewEncapsulation } from '@angular/core';
import { BryntumSchedulerComponent } from '@bryntum/scheduler-angular';
import { Scheduler } from '@bryntum/scheduler';
...
Advantages of the Bryntum MCP server
As we saw with the Lovable and Codex examples, the Bryntum MCP server gives your AI agent the context needed to get started with Bryntum, configure Bryntum components, and add features. We didn’t need to write a single line of code ourselves.
The MCP server returns API references, configuration options, working source code examples, and migration guides, all tied to the specific Bryntum version you use. This is quicker and more reliable than the alternative of searching the docs manually, where you risk using outdated information or missing relevant configuration details. The MCP server gives your AI agent the latest data directly, bypassing LLM training data cut-off issues.
Adding more complex features may require some back-and-forth with your agent and possibly some manual coding.
The Bryntum MCP is a new feature that we’re actively working on. If you have any feedback, send a message on our support forum.